nginx的日志管理
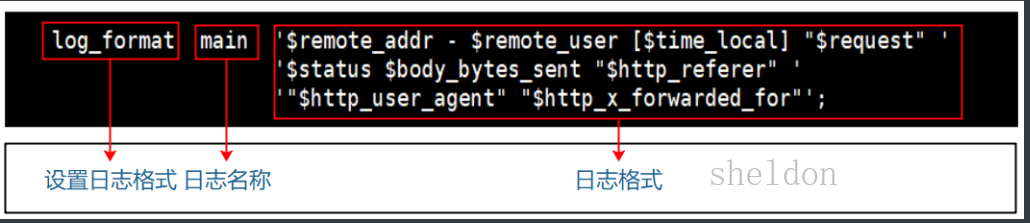
log_format  main  '$remote_addr - $remote_user [$time_local] "$request" '
                      '$status $body_bytes_sent "$http_referer" '
                      '"$http_user_agent" "$http_x_forwarded_for"';

main			# 日志格式的名字
$remote_addr		# 访问主机的ip
$remote_user		# 访问用户的凭证,网页没有设置就没有。
$time_local			# 服务器本地时间
$request			# 请求和http版本
$status				# 请求的状态码
$body_bytes_sent	# 服务器返回的大小
$http_referer		# 这个请求是从那个网站访问过来的
$http_user_agent	# 能看到客户端的浏览器和操作系统信息
$http_x_forwarded_for	 # 源客户端IP,经过代理访问,记录原来的IP地址
日志的调用
在写好日志格式和取好名称之后直接使用下面方式调用。

log_format  main  '$remote_addr - $remote_user [$time_local] "$request" '
                      '$status $body_bytes_sent "$http_referer" '
                      '"$http_user_agent" "$http_x_forwarded_for"';

    log_format  zidingyi  '访问的IP:$remote_addr - 认证的用户:$remote_user - 访问的时间:[$time_local] - 请求
的资源:$request - 状态码:$status - 发送数据量:$body_bytes_sent - http_refere:"$http_referer"';

    # access_log  /var/log/nginx/access.log  main;
    access_log  /var/log/nginx/zidingyi_access.log  zidingyi;
局部的调用方式。
[root@web01 /etc/nginx]# vi nginx.conf
............
log_format  main  '$remote_addr - $remote_user [$time_local] "$request" '
                      '$status $body_bytes_sent "$http_referer" '
                      '"$http_user_agent" "$http_x_forwarded_for"';

    log_format  zidingyi  '访问的IP:$remote_addr - 认证的用户:$remote_user - 访问的时间:[$time_local] - 请求
的资源:$request - 状态码:$status - 发送数据量:$body_bytes_sent - http_refere:"$http_referer"';
access_log  /var/log/nginx/access.log  main;

................
# =================================================================#
[root@web01 /etc/nginx/conf.d]# vi web01.conf
server {
        listen 80;
        server_name 10.0.0.7;

        location / {
                root /code/web01;
                index index.html;
}
        access_log  /var/log/nginx/web01_access.log  zidingyi;
}
日志的路径
用指定路径会在指定的目录下生成日志文件。
# 这种配置方法会在指定目录下生成日志。/code/
[root@web01 /etc/nginx]# vi conf.d/web01.conf
server {
        listen 80;
        server_name 10.0.0.7;

        location / {
                root /code/web01;
                index index.html;
}
        access_log  /code/web01_zi_access.log  main;
}

# 会找到/etc/nginx下的log目录再存储日志。如果没有需要新建目录。
[root@web01 /etc/nginx]# vi conf.d/web01.conf
server {
        listen 80;
        server_name 10.0.0.7;

        location / {
                root /code/web01;
                index index.html;
}
        access_log  log/web01_zi_access.log  main;
}
FBI WARNING
QQ:1402122292 认准原创sheldon 别人叫我晓东