前言:
曾经你有没有为allure测试报告而困惑?那么相必可以帮助到你。不知道如何在linux服务器上部署一个静态thml,把allure报告静态文件部署,有的使用tomcat部署,有的人打开jenkins查看。
而我,部署一个node.js的Anywhere,它是一个随启随用的静态服务器,它可以随时随地将你的当前目录变成一个静态文件服务器的根目录。由此我认为是非常方便。
本次学习的内容:
- linux环境下:jenkins + allure 插件生成测试报告
- linux环境下:node.js +Anywhere + html 生成任意IP都能查看到的allure报告
一、jenkins + allure
首先得安装好 jenkins、python、pytest,小龙使用的是docker jenkins,详细请看这篇:https://www.cnblogs.com/gsxl/p/12129333.html
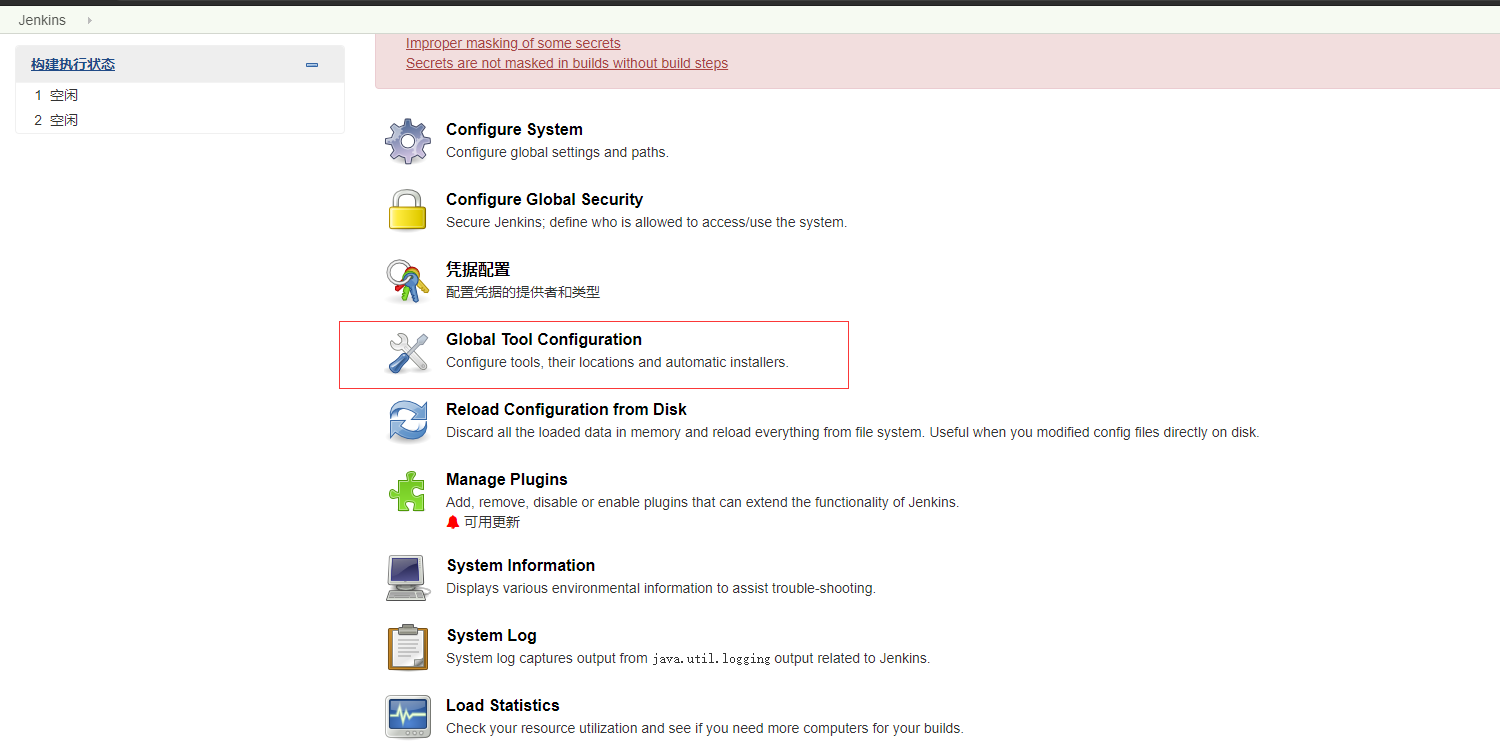
1、jenkins 安装插件:Allure Commandline
输入:allure 查找出插件,并安装重启(喝杯茶...)
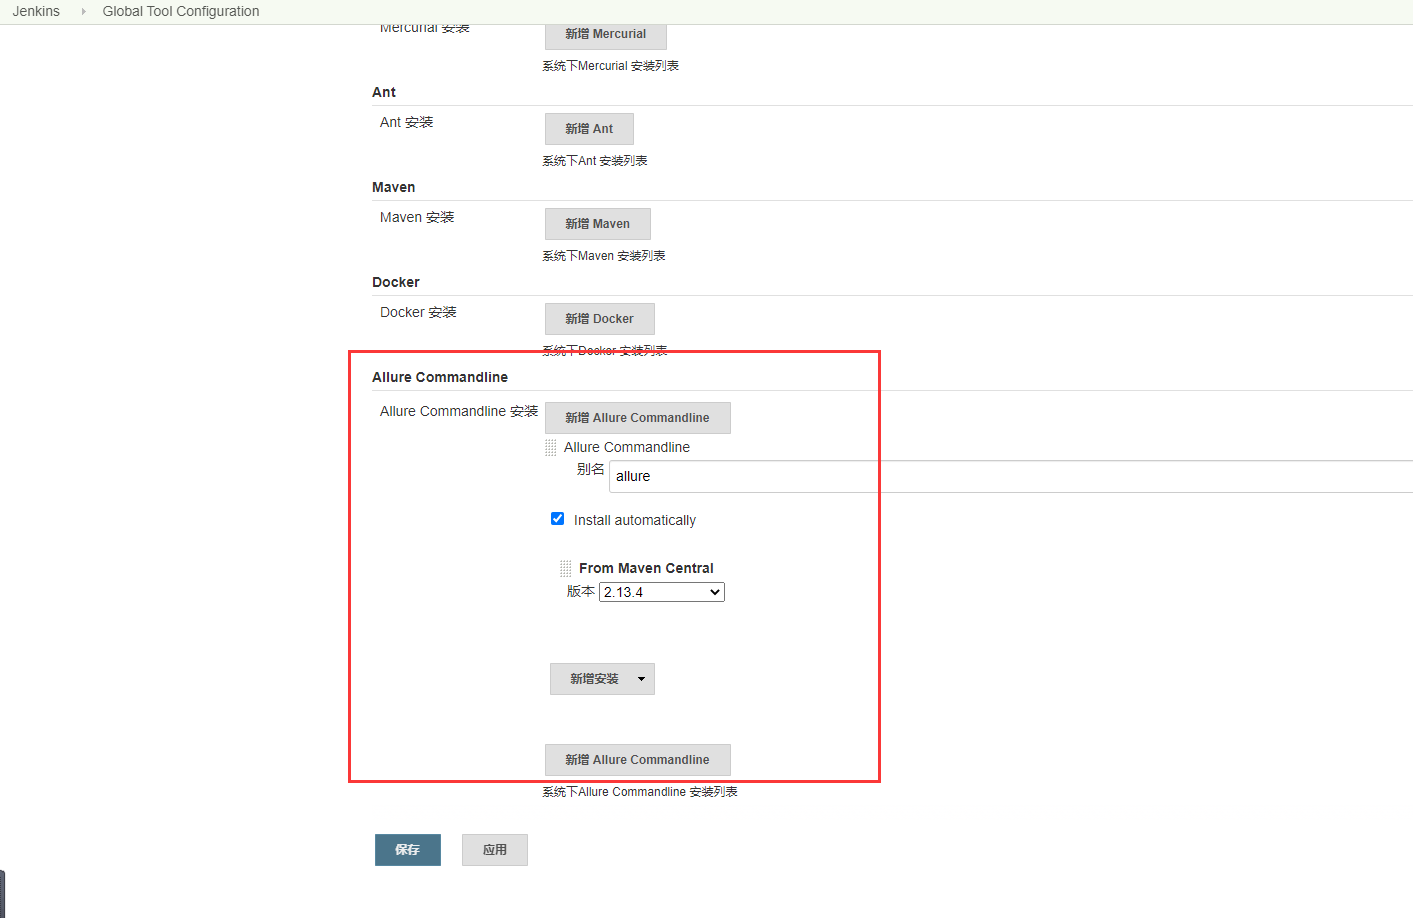
2、全局工具配置中 → Allure Commandline 新增随便起个名字,应用保存,如下图:
3、构建设置:Execute shell 、构建后操作设置
# /bin/bash
cd ${WORKSPACE}/xxx/testCase
pytest --alluredir ${WORKSPACE}/report
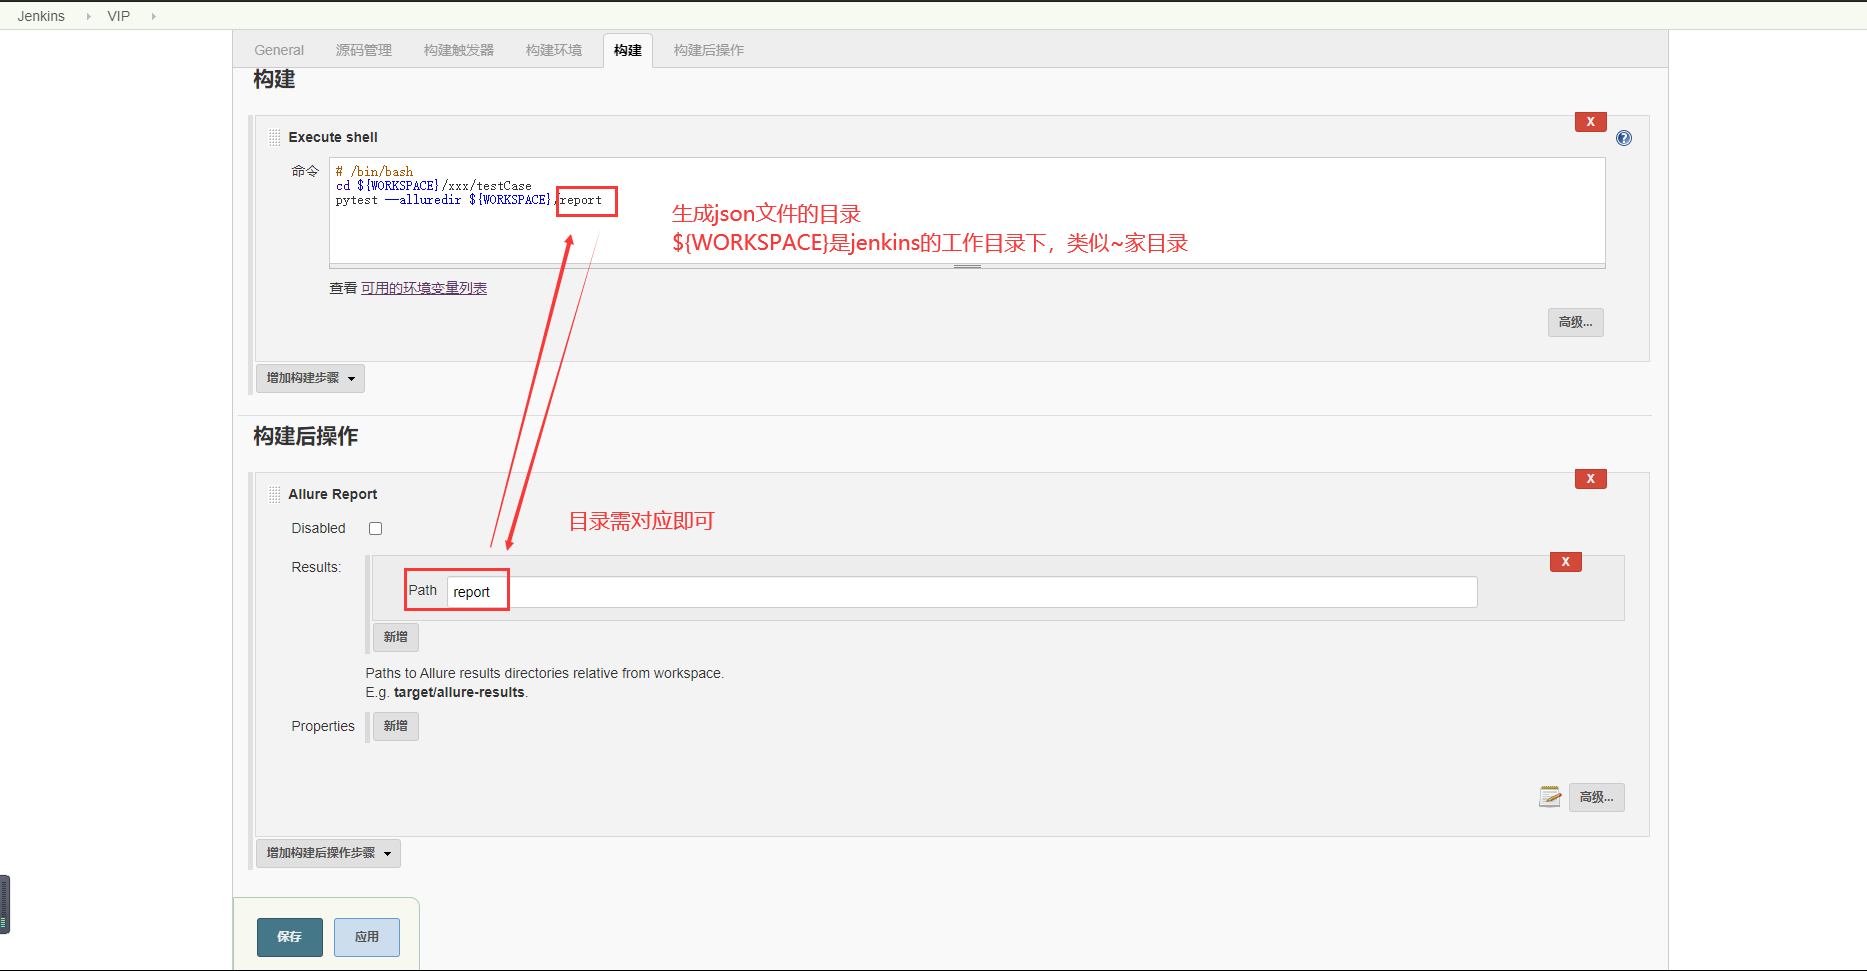
最后 应用保存。
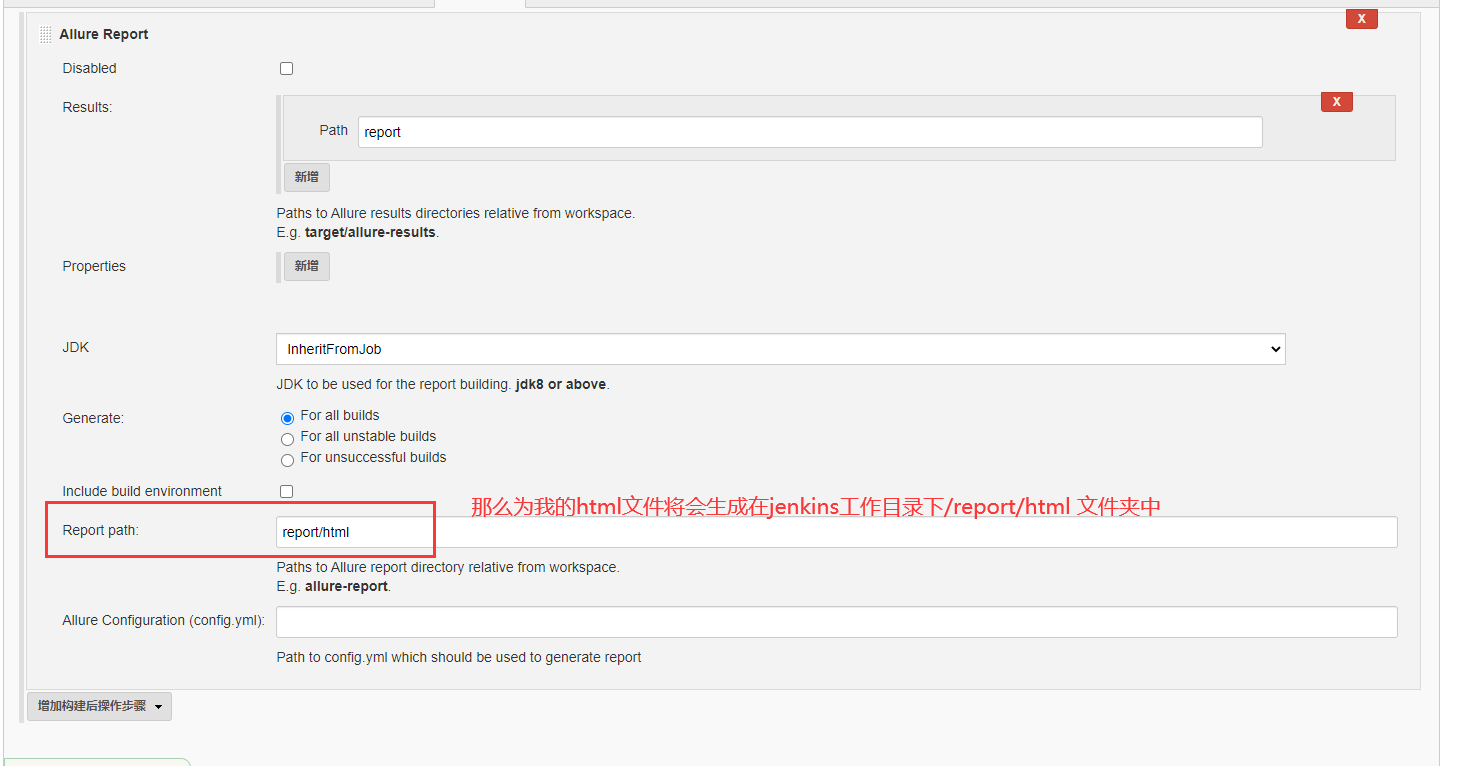
4、如果需要指定html文件目录需在高级设置中配置(用来起一个小服务,任何人都可以访问链接的allure报告),如下图:
最后构建,可以查看到allure报告:
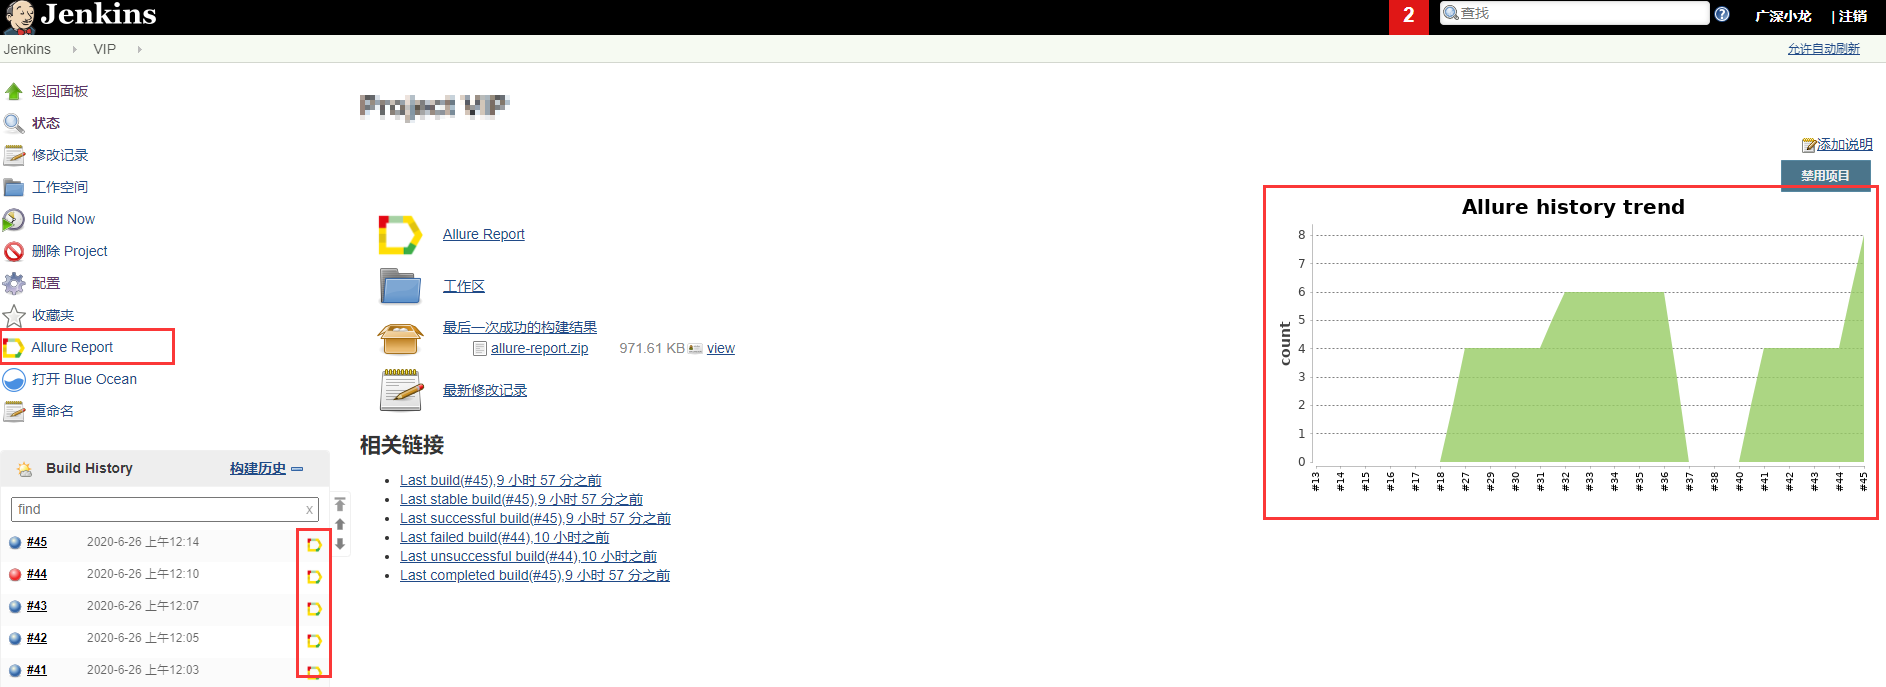
点击打开的allure报告: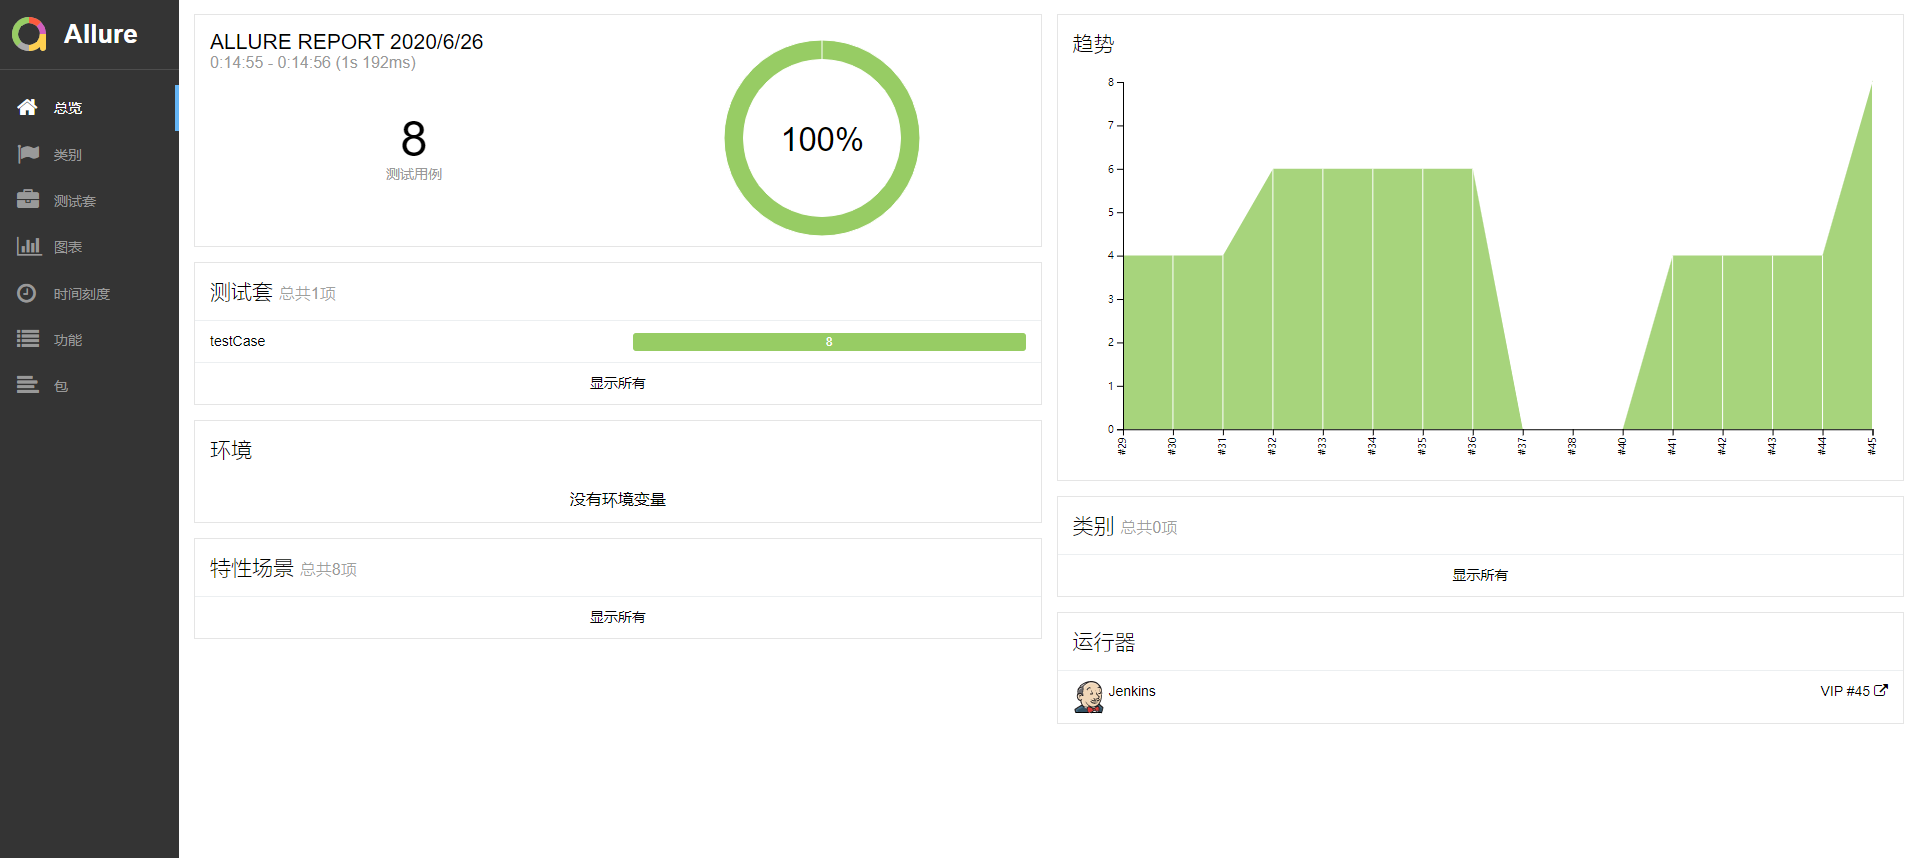
二、 node.js +Anywhere + html
基于jenkins中构建我们获得了一个html文件,那么我们可以使用node.js +Anywhere起一个服务,这样任何IP访问便可以看到啦。
而且只需要后台启动一次即可,有新的数据它也会获取数据展示出来,这样就不需要经常重启Anywhere服务了。
1、安装 node.js:
curl --silent --location https://rpm.nodesource.com/setup_8.x | sudo bash -0
sudo yum -y install nodejs
2、查看node版本:
[root@iZbp19lugf22zbsubsf1y6Z ~]# node -v
v8.17.0
3、安装 Anywhere
继续喝杯茶等一会就好了
npm install anywhere -g
4、查看帮助:
[root@iZbp19lugf22zbsubsf1y6Z ~]# anywhere --help
Usage:
  anywhere --help // print help information
  anywhere // 8000 as default port, current folder as root
  anywhere 8888 // 8888 as port
  anywhere -p 8989 // 8989 as port
  anywhere -s // don't open browser
  anywhere -h localhost // localhost as hostname
  anywhere -d /home // /home as root
  anywhere -l // print log
  anywhere -f // Enable history fallback
5、到html文件夹下启动服务:
先到文件夹下确认:
[root@iZbp19lugf22zbsubsf1y6Z html]# ll
total 2200
-rw-r--r--  1 1000 1000  682840 Jun 26 00:14 app.js
drwxr-xr-x  4 1000 1000    4096 Jun 26 00:15 data
drwxr-xr-x  2 1000 1000    4096 Jun 26 00:14 export
-rw-r--r--  1 1000 1000      57 Jun 26 00:14 favicon.ico
drwxr-xr-x  2 1000 1000    4096 Jun 26 00:14 history
-rw-r--r--  1 1000 1000     657 Jun 26 00:14 index.html
drwxr-xr-x 11 1000 1000    4096 Jun 26 00:14 plugins
-rw-r--r--  1 1000 1000 1539624 Jun 26 00:14 styles.css
drwxr-xr-x  2 1000 1000    4096 Jun 26 00:15 widgets
[root@iZbp19lugf22zbsubsf1y6Z html]# pwd
/root/jenkins/workspace/xxx/report/html
启动服务,指定8085端口:anywhere -p 8085
[root@iZbp19lugf22zbsubsf1y6Z html]# anywhere -p 8085
Running at http://172.16.128.251:8085/
Also running at https://172.16.128.251:8086/
6、打开浏览器输入ip+port 访问:

7、最后确定正常后,先 kill 掉,再用后台的方式来运行:
①杀掉相关的进程:ps -aux | grep anywhere|xargs kill -9
②后台启动服务:nohup anywhere -p 8085 >any.out 2>&1 &
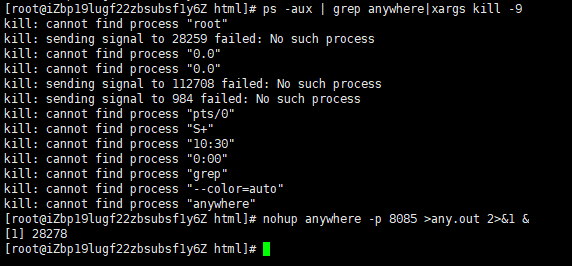
结果便是后台运行着,查看进程:
[root@iZbp19lugf22zbsubsf1y6Z html]# ps -ef | grep anywhere
root     28278 27577  0 10:30 pts/0    00:00:00 node /usr/bin/anywhere -p 8085
root     28456 27577  0 10:31 pts/0    00:00:00 grep --color=auto anywhere
[root@iZbp19lugf22zbsubsf1y6Z html]#
我们可以打开浏览器看一下有没有毛病。本次分享结束,谢谢谢大家!
如有疑问或更多交交流加QQ群:482713805