前言
如果还没有搭建好环境,最好先到上篇搭建好环境,以便我们下一步操作。本篇主要是扫描插件、jenkins持续集成...
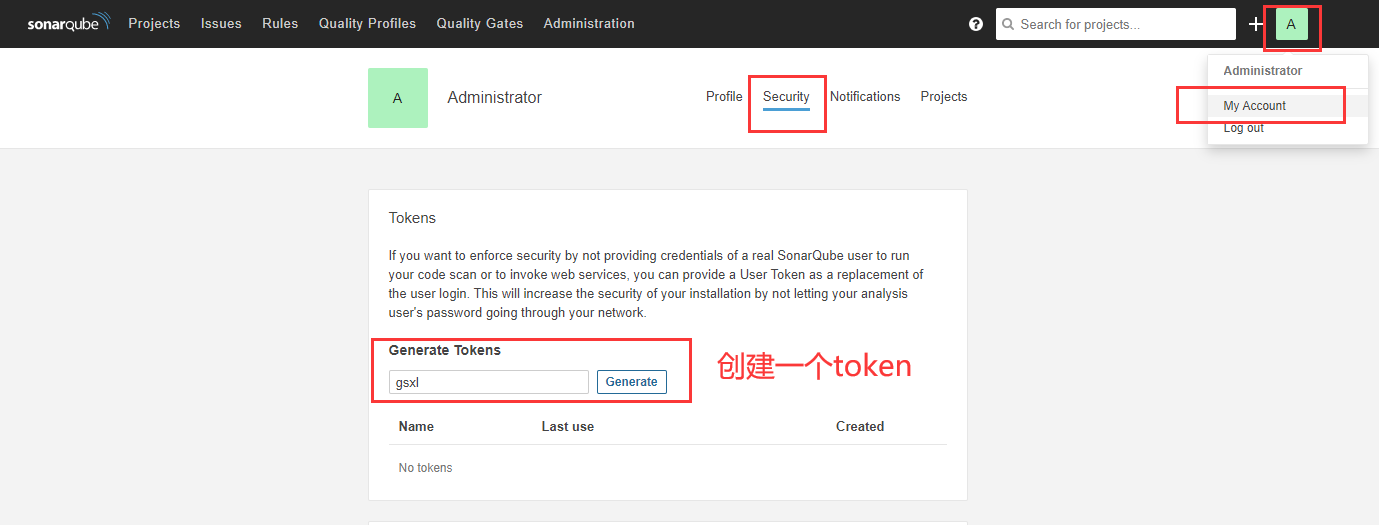
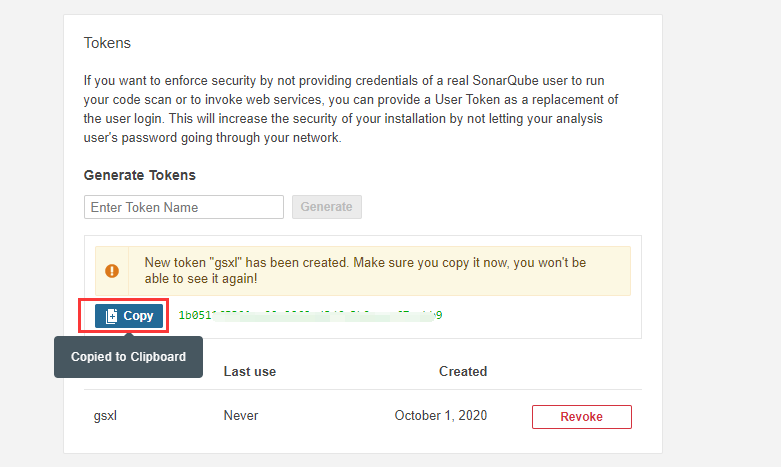
浏览器访问sonarqube并登录创建一个token,用户头像--My Account--Security 页面。把token复制下来。
一、jenkins 配置
为了方便,jenkins用到图片下面的三个地方入口。
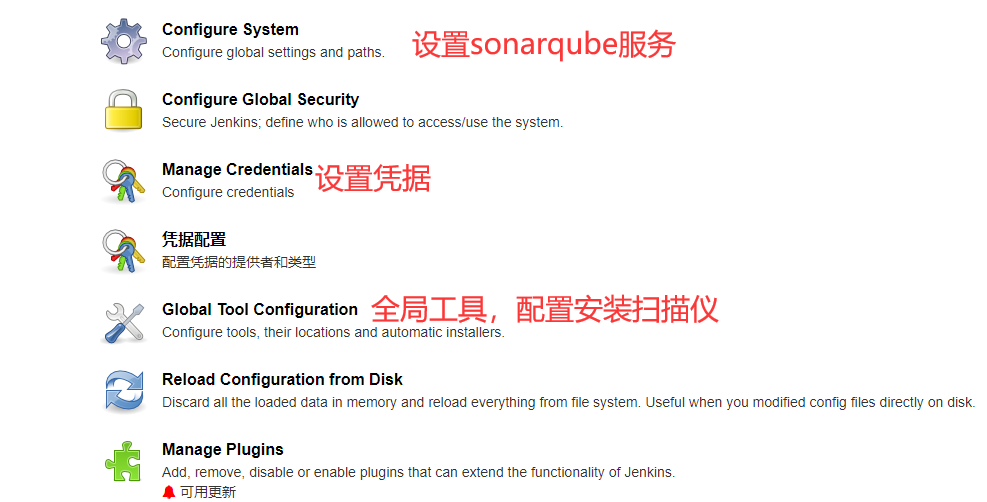
1、添加全局凭据
Secret 填写刚才复制sonarqube中生成的token。

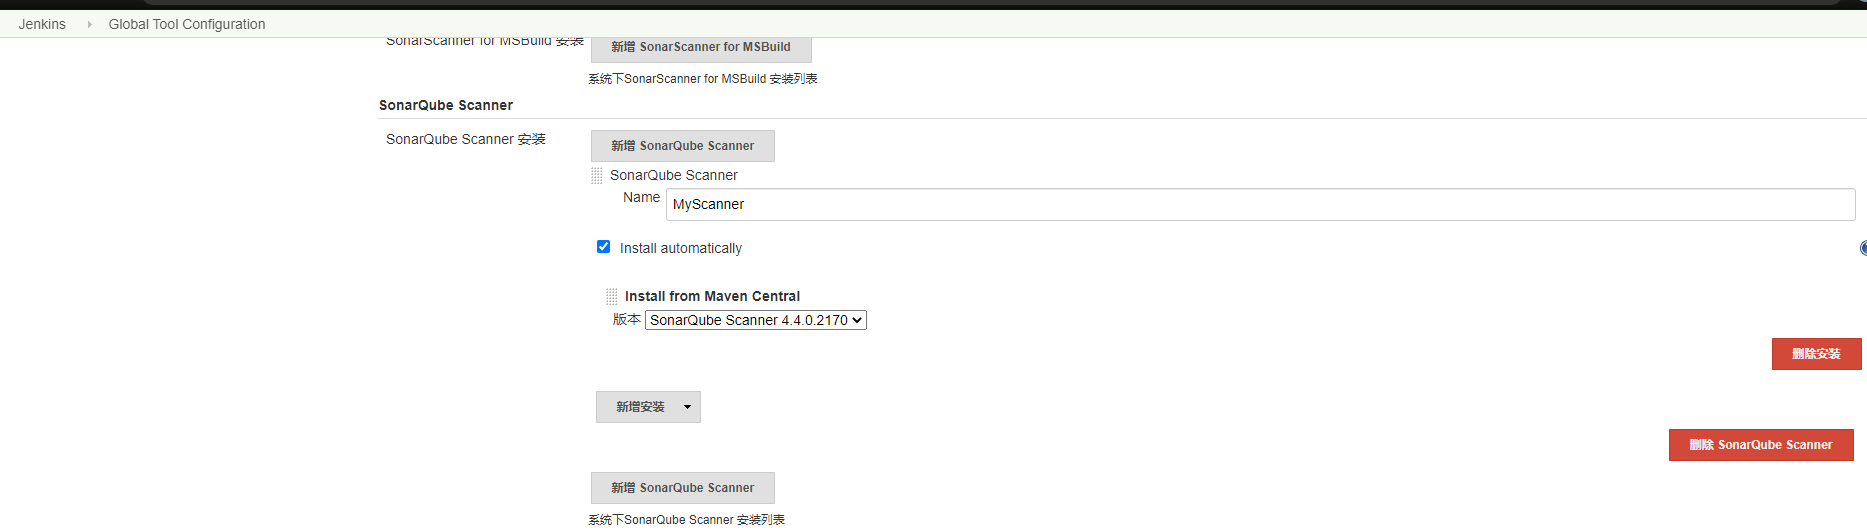
2、全局工具配置安装扫描仪:Scanner
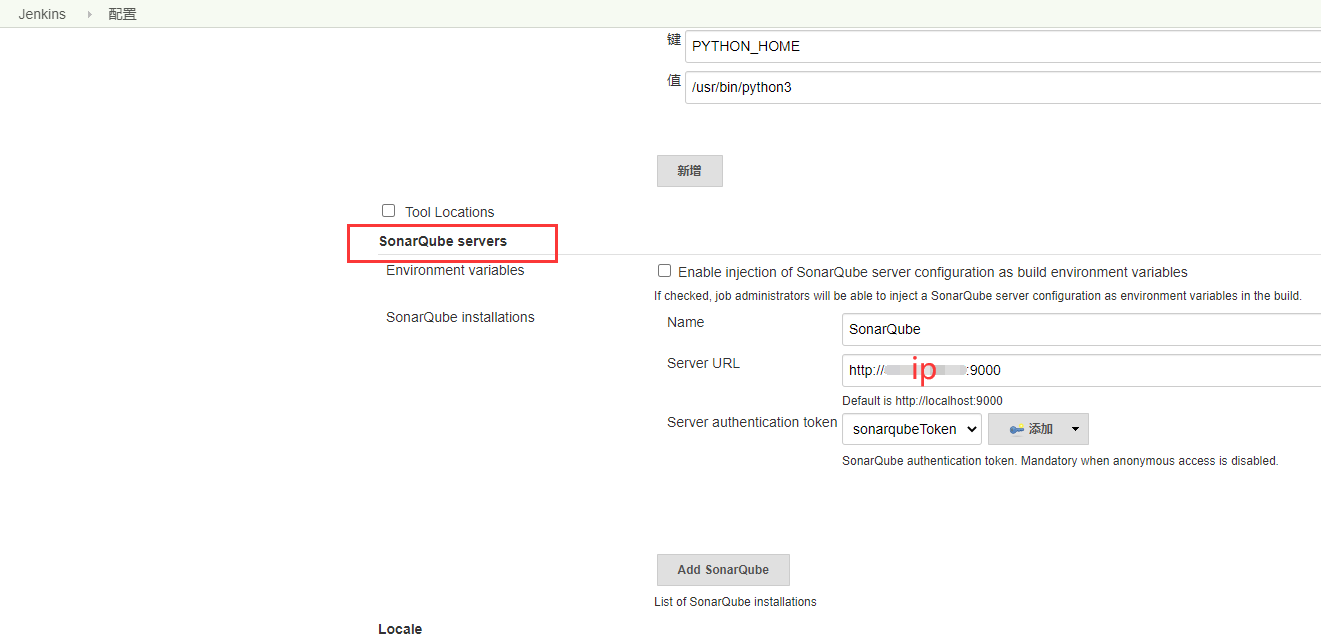
3、配置sonarqube服务信息
设置中配置SonarQube servers
二、新建项目
1、新建自由风格项目

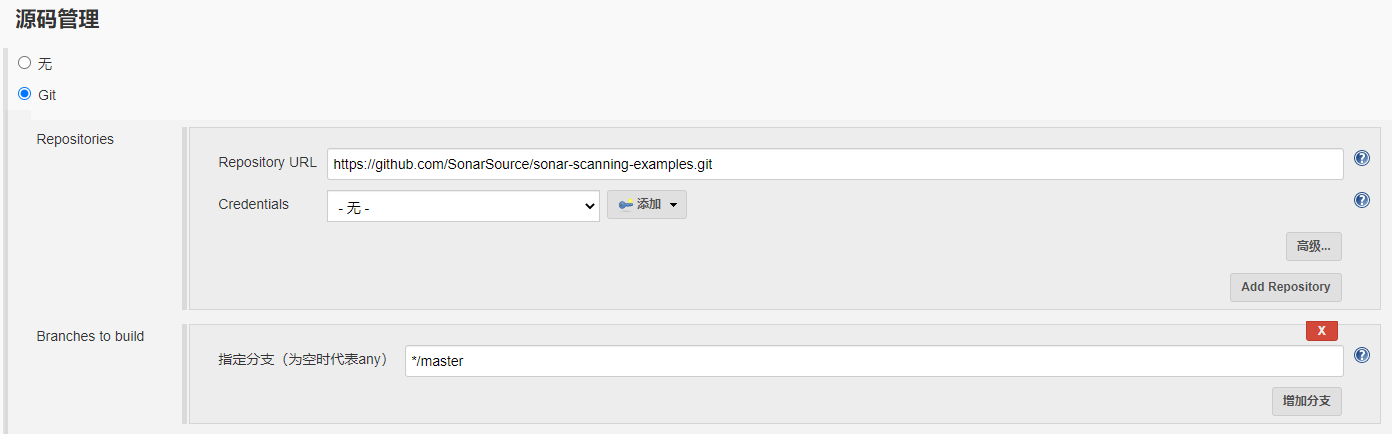
2、配置git地址
官方样例:https://github.com/SonarSource/sonar-scanning-examples.git
3、构建选择:Execute SonarQube Scanner

4、输入构建的:Analysis properties
可以直接复制:
参数可以自行改动,扫描指定java源码目录等,参数点击输入框旁边的“?”问号查看
sonar.projectKey=gsxl
sonar.projectName=java_project
sonar.projectVersion=1.0

sonar.language=java
sonar.sourceEncoding=UTF-8

sonar.sources=$WORKSPACE
sonar.java.binaries=$WORKSPACE

5、保存。
三、构建
1、直接点构建。
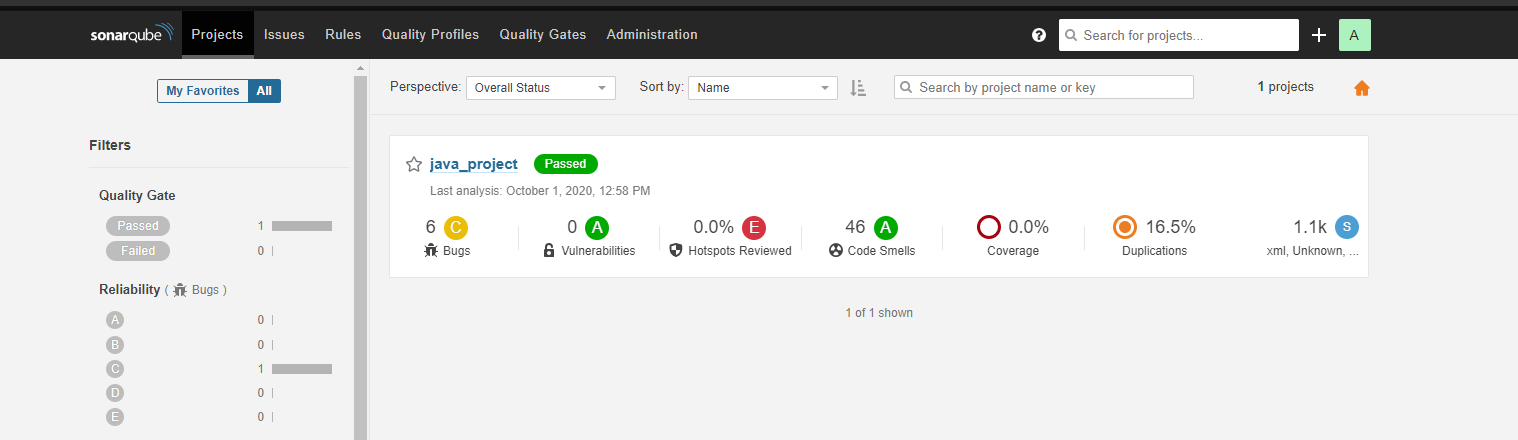
2、构建完成后,在sonarqube中能直接看到此项目扫描的结果。
3、最后可以通过jenkins构建流水前中接入,没当开发提交代码构建后就触发此job。
通过钉钉或者邮件通知,我们可以第一时间提交完代码能看到扫描的质量。是不是很棒呢?(需要代码权限)
这里还需要配置规则、定义质量的规则,还得多多学习。
欢迎来大家QQ交流群一起学习:482713805