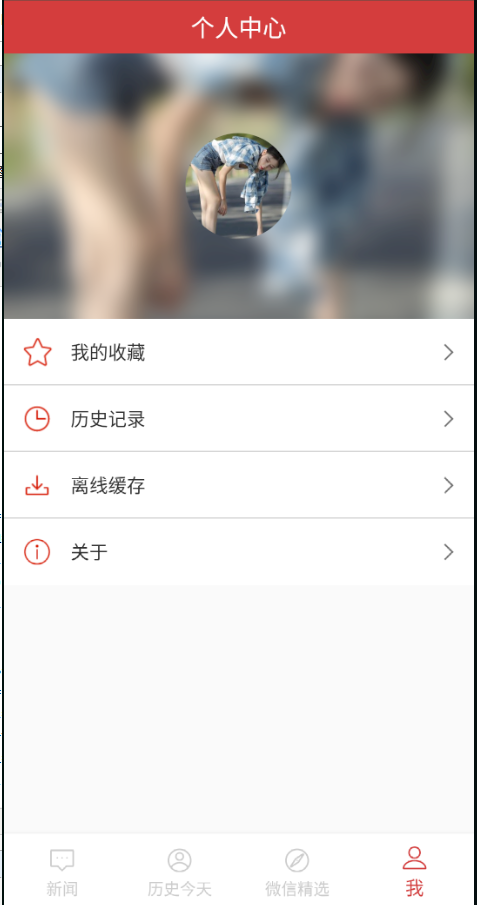
效果图

1、自定义一个布局
![]()
xml布局文件:
<?xml version="1.0" encoding="utf-8"?>
<RelativeLayout xmlns:android="http://schemas.android.com/apk/res/android"
    android:layout_width="match_parent"
    android:layout_height="50dp"
    android:orientation="vertical">

    <ImageView
        android:id="@+id/account_icon"
        android:layout_width="30dp"
        android:layout_height="30dp"
        android:layout_centerVertical="true"
        android:layout_margin="10dp"
        android:src="@drawable/wechat" />

    <TextView
        android:id="@+id/account_title"
        android:layout_width="wrap_content"
        android:layout_height="wrap_content"
        android:layout_centerVertical="true"
        android:layout_toRightOf="@+id/account_icon"
        android:text="姓名"
        android:textColor="@color/colorBlack" />

    <ImageView
        android:id="@+id/account_rightArrow"
        android:layout_width="20dp"
        android:layout_height="20dp"
        android:layout_alignParentRight="true"
        android:layout_centerVertical="true"
        android:layout_marginRight="10dp"
        android:src="@drawable/right"
        android:visibility="visible" />

    <TextView
        android:id="@+id/account_text"
        android:layout_width="wrap_content"
        android:layout_height="wrap_content"
        android:layout_centerInParent="true"
        android:layout_toLeftOf="@+id/account_rightArrow"
        android:text="张三"
        android:visibility="visible" />

    <TextView
        android:id="@+id/account_bottom"
        android:layout_width="match_parent"
        android:layout_height="1dp"
        android:layout_alignParentBottom="true"
        android:background="@color/colorGray" />
</RelativeLayout>
2、在res资源目录下的values 目录下新建一个attres 文件
<?xml version="1.0" encoding="utf-8"?>
<resources>
    <declare-styleable name="item_view">
        <attr name="left_icon" format="integer" /><!--左侧图标-->
        <attr name="left_title" format="string" /><!--左侧标题文字-->
        <attr name="right_text" format="string" /><!--右侧描述文字-->
        <attr name="show_right_text" format="boolean" /><!--是否显示右侧描述文字-->
        <attr name="show_right_arrow" format="boolean" /> <!--是否显示右侧箭头-->
        <attr name="show_bottomLine" format="boolean" /> <!--是否显示下划线-->
    </declare-styleable>
</resources>

3、新建一个类 AccountSetUp 继承 布局 如(LinearLayout)
public class AccountSetUp extends LinearLayout {
    private Boolean isBottom;
    private Boolean isRightText;
    private Boolean isRightArrow;
    private ImageView leftIcon;
    private ImageView rightArrow;
    private TextView leftTitle;
    private TextView rightText;
    private TextView bottomView;

    public AccountSetUp(Context context, AttributeSet attrs) {
        super(context, attrs);
        LayoutInflater.from(getContext()).inflate(R.layout.account_item, this);
        TypedArray ta = context.obtainStyledAttributes(attrs, R.styleable.item_view);//解析布局


        isBottom = ta.getBoolean(R.styleable.item_view_show_bottomLine, true); //底部分割线是否显示
        isRightText = ta.getBoolean(R.styleable.item_view_show_right_text, true);//右边描述文字是否显示
        isRightArrow = ta.getBoolean(R.styleable.item_view_show_right_arrow, true);//右边箭头是否显示

        leftIcon = findViewById(R.id.account_icon); //左边图标
        rightArrow = findViewById(R.id.account_rightArrow);//右边箭头
        leftTitle = findViewById(R.id.account_title); //左边标题文字
        rightText = findViewById(R.id.account_text);//左边描述文字
        bottomView = findViewById(R.id.account_bottom); //底部分割线

        leftIcon.setImageDrawable(ta.getDrawable(R.styleable.item_view_left_icon));//赋值
        rightArrow.setVisibility(isRightArrow ? VISIBLE : GONE);
        leftTitle.setText(ta.getText(R.styleable.item_view_left_title));
        rightText.setText(ta.getText(R.styleable.item_view_right_text));
        rightText.setVisibility(isRightText ? View.VISIBLE : INVISIBLE);
        bottomView.setVisibility(isBottom ? View.VISIBLE : View.INVISIBLE);


        //回收属性对象
        ta.recycle();

    }

    /**
     * 设置标题内容
     */
    public void setTitle(String titleText) {
        rightText.setText(titleText);
    }

}

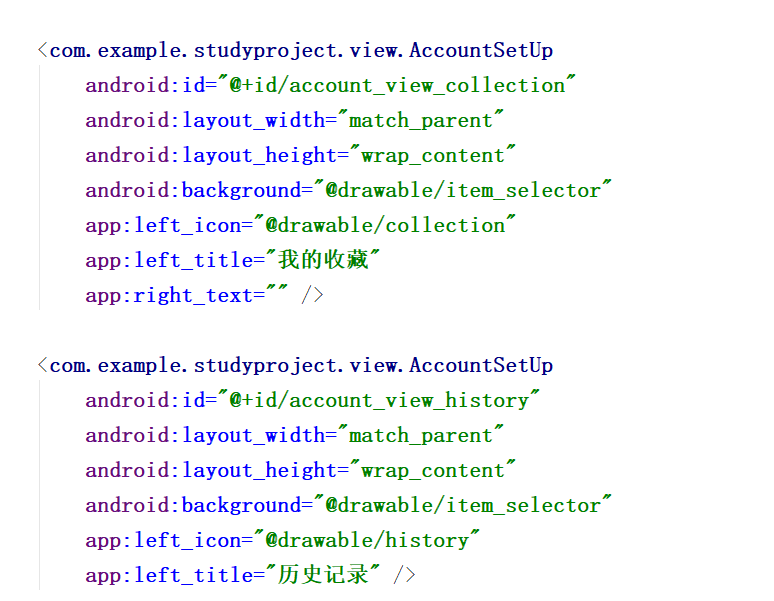
4、在xml中使用

5、设置点击事件
逻辑代码:
初始化:
private AccountSetUp accountCollection;
private AccountSetUp accountHistory;
private AccountSetUp accountCache;
private AccountSetUp accountAbout;
/**
 * 设置点击
 */
private void initItem() {
    accountCollection = view.findViewById(R.id.account_view_collection);//我的收藏
    // accountCollection.setTitle("");
    accountCollection.setOnClickListener(this);
    accountHistory = view.findViewById(R.id.account_view_history); //我的历史
    accountHistory.setOnClickListener(this);
    accountCache = view.findViewById(R.id.account_view_cache); //离线下载
    accountCache.setOnClickListener(this);
    accountAbout = view.findViewById(R.id.account_view_about); //关于
    accountAbout.setOnClickListener(this);
}
/**
 * 全部点击事件
 */
@Override
public void onClick(View view) {
    switch (view.getId()) {
        case R.id.account_view_collection:
            Intent intentCollection = new Intent(getContext(), CollectionActivity.class);
            startActivity(intentCollection);
            break;
        case R.id.account_view_history:
            Intent intentHistory = new Intent(getContext(), HistoryActivity.class);
            startActivity(intentHistory);
            break;
        case R.id.account_view_cache:
            Intent intentCache = new Intent(getContext(), CollectionActivity.class);
            startActivity(intentCache);
            break;
        case R.id.account_view_about:
            Intent intentAbout = new Intent(getContext(), CollectionActivity.class);
            startActivity(intentAbout);
            break;
        default:
            break;
    }
}
文章:https://blog.csdn.net/asfang/article/details/79144127
https://blog.csdn.net/q15037911903/article/details/82773279