1. tf.train.Saver()
- tf.train.Saver()是一个类,提供了变量、模型(也称图Graph)的保存和恢复模型方法。
- TensorFlow是通过构造Graph的方式进行深度学习,任何操作(如卷积、池化等)都需要operator,保存和恢复操作也不例外。
- 在tf.train.Saver()类初始化时,用于保存和恢复的save和restore operator会被加入Graph。所以,下列类初始化操作应在搭建Graph时完成。
saver = tf.train.Saver()
TensorFlow的保存和恢复分为两种:
- 保存和恢复变量
- 保存和恢复模型
saver.save()保存模型
#举例:
保存一个训练好的手写数据集识别模型
保存在当前路径的net文件夹中


 1 import os
 2 os.environ['TF_CPP_MIN_LOG_LEVEL'] = '2'
 3 import tensorflow as tf
 4 from tensorflow.examples.tutorials.mnist import input_data
 5
 6 #载入数据集
 7 mnist = input_data.read_data_sets('MNIST_data', one_hot=True)
 8
 9 #每个批次100张照片
10 batch_size = 100
11 #计算一个需要多少个批次
12 n_batch = mnist.train.num_examples // batch_size
13
14 #定义两个placeholder
15 x = tf.placeholder(tf.float32, [None, 784])
16 y = tf.placeholder(tf.float32, [None, 10])
17
18 #创建一个简单的神经网络,输入层784个神经元,输出层10个神经元
19 W = tf.Variable(tf.zeros([784, 10]))
20 b = tf.Variable(tf.zeros([10]))
21 prediction = tf.nn.softmax(tf.matmul(x, W) + b)
22 #代价函数
23 loss = tf.reduce_mean(tf.nn.softmax_cross_entropy_with_logits(labels=y, logits=prediction))
24 #使用梯度下降法
25 train_step = tf.train.GradientDescentOptimizer(0.2).minimize(loss)
26
27 #初始化变量
28 init = tf.global_variables_initializer()
29
30 #结果存放在一个布尔型列表中
31 correct_prediction = tf.equal(tf.argmax(y, 1), tf.argmax(prediction, 1))
32
33 accuracy = tf.reduce_mean(tf.cast(correct_prediction, tf.float32))
34
35 saver = tf.train.Saver()
36
37 with tf.Session() as sess:
38     sess.run(init)
39     for epoch in range(11):
40         for batch in range(n_batch):
41             batch_xs, batch_ys = mnist.train.next_batch(batch_size)
42             sess.run(train_step, feed_dict={x:batch_xs, y:batch_ys})
43         acc = sess.run(accuracy, feed_dict={x:mnist.test.images, y:mnist.test.labels})
44         print('Iter = ' + str(epoch) +', Testing Accuracy = ' + str(acc))
45     #保存模型
46     saver.save(sess, 'net/my_net.ckpt')
#保存路径中的文件为:
    checkpoint:保存当前网络状态的文件
    my_net.ckpt.data-00000-of-00001
    my_net.ckpt.index
    my_net.ckpt.meta:保存Graph结构的文件

#关于函数saver.save(),常用的参数就是前三个:
save(
    sess,  # 必需参数,Session对象
    save_path,  # 必需参数,存储路径
    global_step=None,  # 可以是Tensor, Tensor name, 整型数
    latest_filename=None,  # 协议缓冲文件名,默认为'checkpoint',不用管
    meta_graph_suffix='meta',  # 图文件的后缀,默认为'.meta',不用管
    write_meta_graph=True,  # 是否保存Graph
    write_state=True,  # 建议选择默认值True
    strip_default_attrs=False  # 是否跳过具有默认值的节点
saver.restore()加载已经训练好的模型
#举例:
通过加载刚才保存的训练好的手写数据集识别模型进行手写数据集的识别
 1 import os
 2 os.environ['TF_CPP_MIN_LOG_LEVEL'] = '2'
 3 import tensorflow as tf
 4 from tensorflow.examples.tutorials.mnist import input_data
 5
 6 mnist = input_data.read_data_sets('MNIST_data', one_hot=True)
 7 batch_size = 100
 8 n_batch = mnist.train.num_examples // batch_size
 9
10 x = tf.placeholder(tf.float32, [None, 784])
11 y = tf.placeholder(tf.float32, [None, 10])
12
13 W = tf.Variable(tf.zeros([784, 10]))
14 b = tf.Variable(tf.zeros([10]))
15 prediction = tf.nn.softmax(tf.matmul(x, W) + b)
16
17 loss = tf.reduce_mean(tf.nn.softmax_cross_entropy_with_logits(labels=y, logits=prediction))
18 train_step = tf.train.GradientDescentOptimizer(0.2).minimize(loss)
19
20 init = tf.global_variables_initializer()
21
22 correct_prediction = tf.equal(tf.argmax(y, 1), tf.argmax(prediction, 1))
23 accuracy = tf.reduce_mean(tf.cast(correct_prediction, tf.float32))
24
25 saver = tf.train.Saver()
26
27 with tf.Session() as sess:
28     sess.run(init)
29     print(sess.run(accuracy, feed_dict={x:mnist.test.images, y:mnist.test.labels}))
30     saver.restore(sess, 'net/my_net.ckpt')
31     print(sess.run(accuracy, feed_dict={x:mnist.test.images, y:mnist.test.labels}))
#执行结果:

0.098
0.9178

#直接得到的准确率相当低,通过加载训练好的模型,识别准确率大大提升。
2. 下载google图像识别网络inception-v3并查看结构
模型背景:
Inception(v3) 模型是Google 训练好的最新一个图像识别模型,我们可以利用它来对我们的图像进行识别。
下载地址:
https://storage.googleapis.com/download.tensorflow.org/models/inception_dec_2015.zip
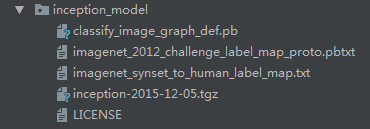
文件描述:
- classify_image_graph_def.pb 文件就是训练好的Inception-v3模型。
- imagenet_synset_to_human_label_map.txt是类别文件,包含人类标签和uid之间的映射的文件。
- imagenet_2012_challenge_label_map_proto.pbtxt是包含类号和uid之间的映射的文件。
代码实现
 1 import os
 2 os.environ['TF_CPP_MIN_LOG_LEVEL'] = '2'
 3 import tensorflow as tf
 4 import tarfile
 5 import requests
 6
 7 #inception模型下载地址
 8 inception_pretrain_model_url = 'http://download.tensorflow.org/models/image/imagenet/inception-2015-12-05.tgz'
 9
10 #inception模型存放地址
11 inception_pretrain_model_dir = 'inception_model'
12 if not os.path.exists(inception_pretrain_model_dir):
13     os.makedirs(inception_pretrain_model_dir)
14 #获取文件名,以及文件路径
15 filename = inception_pretrain_model_url.split('/')[-1]
16 filepath = os.path.join(inception_pretrain_model_dir, filename)
17
18 #下载模型
19 if not os.path.exists(filepath):
20     print('download: ', filename)
21     r = requests.get(inception_pretrain_model_url, stream=True)
22     with open(filepath, 'wb') as f:
23         for chunk in r.iter_content(chunk_size=1024):
24             if chunk:
25                 f.write(chunk)
26     print('finish: ', filename)
27 #解压文件
28 tarfile.open(filepath, 'r:gz').extractall(inception_pretrain_model_dir)
29
30 #模型结构存放文件
31 log_dir = 'inception_log'
32 if not os.path.exists(log_dir):
33     os.makedirs(log_dir)
34
35 #classify_image_graph_def.pb为google训练好的模型
36 inception_graph_def_file = os.path.join(inception_pretrain_model_dir, 'classify_image_graph_def.pb')
37 with tf.Session() as sess:
38     #创建一个图来存放google训练好的模型
39     with tf.gfile.FastGFile(inception_graph_def_file, 'rb') as f:
40         graph_def = tf.GraphDef()
41         graph_def.ParseFromString(f.read())
42         tf.import_graph_def(graph_def, name='')
43     #保存图的结构
44     writer = tf.summary.FileWriter(log_dir, sess.graph)
45     writer.close()
#在下载过程中,下的特别慢,不知道是网络原因还是什么
#程序总卡着不动
#所以我就手动下载压缩包并进行解压
下载结果
3. 使用inception-v3做各种图像的识别
#代码实现:
 1 import os
 2 os.environ['TF_CPP_MIN_LOG_LEVEL'] = '2'
 3 import tensorflow as tf
 4 import numpy as np
 5 import re
 6 from PIL import Image
 7 import matplotlib.pyplot as plt
 8
 9 #这部分是对标签号和类别号文件进行一个预处理
10
11 class NodeLookup(object):
12     def __init__(self):
13         label_lookup_path = 'inception_model/imagenet_2012_challenge_label_map_proto.pbtxt'
14         uid_lookup_path = 'inception_model/imagenet_synset_to_human_label_map.txt'
15         self.node_lookup = self.load(label_lookup_path, uid_lookup_path)
16     def load(self, label_lookup_path, uid_lookup_path):
17         #加载分类字符串n********对应分类名称的文件
18         proto_as_ascii_lines = tf.gfile.GFile(uid_lookup_path).readlines()
19         uid_to_human={}
20         #一行一行读取数据
21         for line in proto_as_ascii_lines:
22             #去掉换行符
23             line = line.strip('
')
24             #按照‘	’进行分割
25             parsed_items = line.split('	')
26             #获取分类编号
27             uid = parsed_items[0]
28             #获取分类名称
29             human_string = parsed_items[1]
30             #保存编号字符串n********与分类名称的映射关系
31             uid_to_human[uid] = human_string
32
33         #加载分类字符串n********对应分类编号1-1000的文件
34         proto_as_ascii = tf.gfile.GFile(label_lookup_path).readlines()
35         node_id_to_uid = {}
36         for line in proto_as_ascii:
37             if line.startswith('  target_class:'):
38                 #获取分类编号1-1000
39                 target_class = int(line.split(': ')[1])
40             if line.startswith('  target_class_string:'):
41                 #获取编号字符串nn********
42                 target_class_string = line.split(': ')[1]
43                 # 保存分类编号1-1000与编号字符串n********映射关系
44                 node_id_to_uid[target_class] = target_class_string[1:-2]
45         # 建立分类编号1-1000对应分类名称的映射关系
46         node_id_to_name = {}
47         for key, val in node_id_to_uid.items():
48             #获取分类名称
49             name = uid_to_human[val]
50             # 建立分类编号1-1000到分类名称的映射关系
51             node_id_to_name[key] = name
52         return node_id_to_name
53     # 传入分类编号1-1000返回分类名称
54     def id_to_string(self, node_id):
55         if node_id not in self.node_lookup:
56             return ''
57         return self.node_lookup[node_id]
58
59 #创建一个图来存放google训练好的模型
60
61 with tf.gfile.FastGFile('inception_model/classify_image_graph_def.pb', 'rb') as f:
62     graph_def = tf.GraphDef()
63     graph_def.ParseFromString(f.read())
64     tf.import_graph_def(graph_def, name='')
65
66 with tf.Session() as sess:
67     softmax_tensor = sess.graph.get_tensor_by_name('softmax:0')
68     #遍历目录
69     for root, dirs, files in os.walk('images/'):
70         for file in files:
71             #载入图片
72             image_data = tf.gfile.FastGFile(os.path.join(root, file), 'rb').read()
73             predictions = sess.run(softmax_tensor, {'DecodeJpeg/contents:0': image_data})#图片格式是jpg格式
74             predictions = np.squeeze(predictions)#把结果转为1维数据
75
76             #打印图片路径及名称
77             image_path = os.path.join(root, file)
78             print(image_path)
79
80             # 显示图片
81             img = Image.open(image_path)
82             plt.imshow(img)
83             plt.axis('off')
84             plt.show()
85
86             #排序
87             top_k = predictions.argsort()[-5:][::-1]
88             node_lookup = NodeLookup()
89             for node_id in top_k:
90                 # 获取分类名称
91                 human_string = node_lookup.id_to_string(node_id)
92                 # 获取该分类的置信度
93                 score = predictions[node_id]
94                 print('%s(score = %.5f)' % (human_string, score))
95             print()
#执行结果:
images/1.jpg
giant panda, panda, panda bear, coon bear, Ailuropoda melanoleuca(score = 0.87265)
badger(score = 0.00260)
lesser panda, red panda, panda, bear cat, cat bear, Ailurus fulgens(score = 0.00205)
brown bear, bruin, Ursus arctos(score = 0.00102)
ice bear, polar bear, Ursus Maritimus, Thalarctos maritimus(score = 0.00099)

images/2.jpg
French bulldog(score = 0.94474)
bull mastiff(score = 0.00559)
pug, pug-dog(score = 0.00352)
Staffordshire bullterrier, Staffordshire bull terrier(score = 0.00165)
boxer(score = 0.00116)

images/3.jpg
zebra(score = 0.94011)
tiger, Panthera tigris(score = 0.00080)
pencil box, pencil case(score = 0.00066)
hartebeest(score = 0.00059)
tiger cat(score = 0.00042)

images/4.jpg
hare(score = 0.87019)
wood rabbit, cottontail, cottontail rabbit(score = 0.04802)
Angora, Angora rabbit(score = 0.00612)
wallaby, brush kangaroo(score = 0.00181)
fox squirrel, eastern fox squirrel, Sciurus niger(score = 0.00056)

images/5.jpg
fox squirrel, eastern fox squirrel, Sciurus niger(score = 0.95047)
marmot(score = 0.00265)
mongoose(score = 0.00217)
weasel(score = 0.00201)
mink(score = 0.00199)
