Mybatis-Plus 分页插件
前言
参考文档:https://mp.baomidou.com/guide/page.html
笔者使用的是SpringBoot结合Mybatis-Plus。
如果读者对SpringBoot创建项目已经熟悉,或者只想了解分页插件的内容,请直接看章节”使用Mybatis-Plus分页插件“。
工程结构
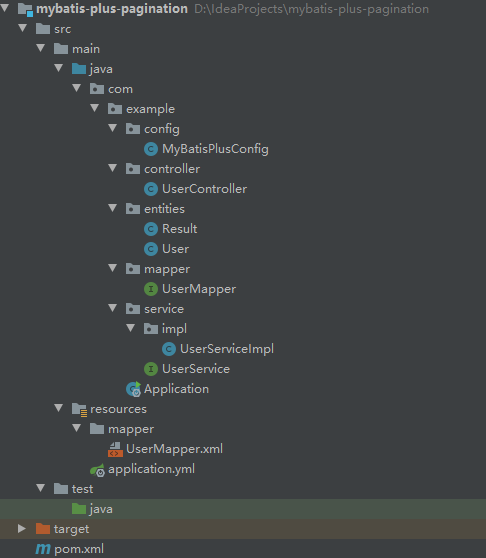
准备
首先,创建SpringBoot项目,实现从前端到后台跑通。
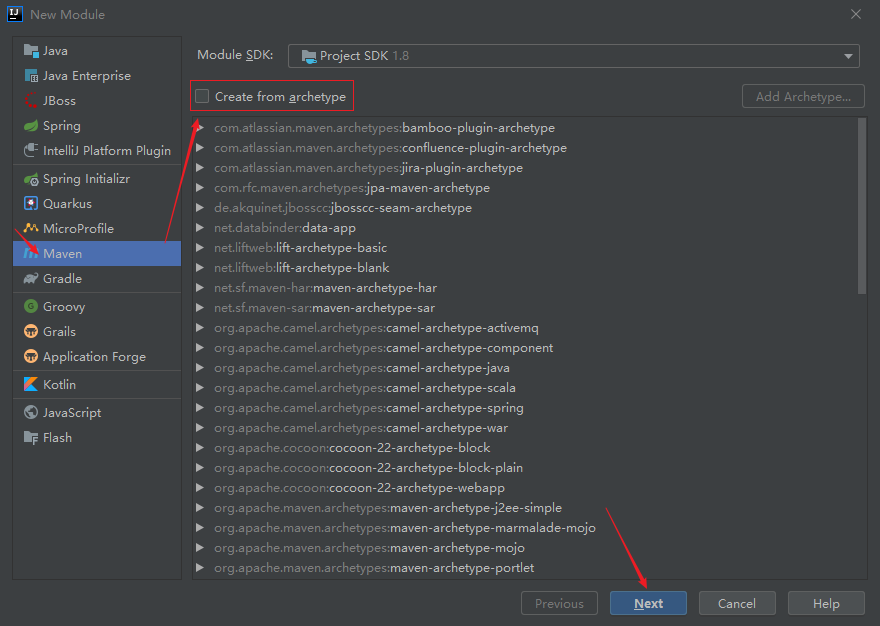
创建Maven工程
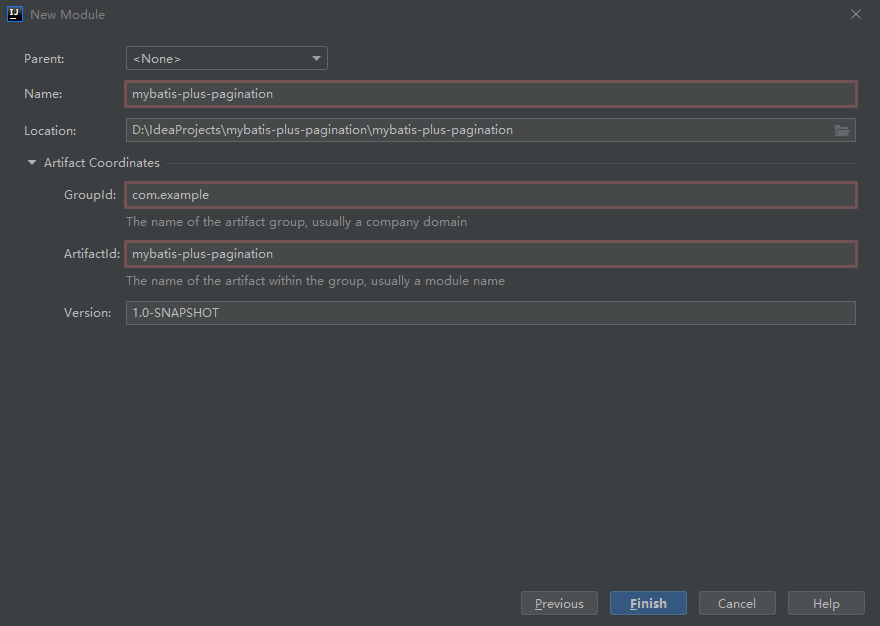
因为我已经创建过了,这里爆红。
修改POM文件
<?xml version="1.0" encoding="UTF-8"?>
<project xmlns="http://maven.apache.org/POM/4.0.0"
         xmlns:xsi="http://www.w3.org/2001/XMLSchema-instance"
         xsi:schemaLocation="http://maven.apache.org/POM/4.0.0 http://maven.apache.org/xsd/maven-4.0.0.xsd">
    <modelVersion>4.0.0</modelVersion>

    <groupId>com.example</groupId>
    <artifactId>mybatis-plus-pagination</artifactId>
    <version>1.0-SNAPSHOT</version>

    <parent>
        <groupId>org.springframework.boot</groupId>
        <artifactId>spring-boot-starter-parent</artifactId>
        <version>2.1.6.RELEASE</version>
    </parent>

    <properties>
        <project.build.sourceEncoding>UTF-8</project.build.sourceEncoding>
        <project.reporting.outputEncoding>UTF-8</project.reporting.outputEncoding>
        <java.version>1.8</java.version>
    </properties>

    <dependencies>
        <dependency>
            <groupId>org.springframework.boot</groupId>
            <artifactId>spring-boot-starter-web</artifactId>
            <exclusions>
                <exclusion>
                    <groupId>org.springframework.boot</groupId>
                    <artifactId>spring-boot-starter-logging</artifactId>
                </exclusion>
            </exclusions>
        </dependency>

        <dependency>
            <groupId>org.springframework.boot</groupId>
            <artifactId>spring-boot-starter-log4j2</artifactId>
        </dependency>
        <!--lombok简化开发插件-->
        <dependency>
            <groupId>org.projectlombok</groupId>
            <artifactId>lombok</artifactId>
            <version>1.18.2</version>
        </dependency>
        <!--jdbc-->
        <dependency>
            <groupId>org.springframework.boot</groupId>
            <artifactId>spring-boot-starter-jdbc</artifactId>
        </dependency>
        <!--springboot支持的是jpa,mybatisplus自己做了启动器-->
        <dependency>
            <groupId>com.baomidou</groupId>
            <artifactId>mybatis-plus-boot-starter</artifactId>
            <version>3.1.2</version>
        </dependency>
        <!--mysql-->
        <dependency>
            <groupId>mysql</groupId>
            <artifactId>mysql-connector-java</artifactId>
            <version>5.1.47</version>
        </dependency>
        <!--spring-test-->
        <dependency>
            <groupId>org.springframework.boot</groupId>
            <artifactId>spring-boot-starter-test</artifactId>
        </dependency>
    </dependencies>
    <!--maven插件-->
    <build>
        <plugins>
            <plugin>
                <groupId>org.springframework.boot</groupId>
                <artifactId>spring-boot-maven-plugin</artifactId>
            </plugin>
        </plugins>
    </build>

</project>
编写yml文件
在 resource文件夹下创建application.yml
# 端口
server:
  port: 8080
# 数据源
spring:
  datasource:
    driver-class-name: com.mysql.jdbc.Driver
    url: jdbc:mysql://localhost:3306/springbootdemo?characterEncoding=utf-8&useSSL=false
    username: root
    password: root

# mybatis-plus设置
mybatis-plus:
  mapper-locations: classpath:mapper/*.xml  #mapper.xml文件位置,如果没有映射文件,请注释掉。
注:这里的数据库名称、用户名和密码记得改成自己的。
useSSL=false,是为了去掉一个检测,不至于控制台报红,不影响运行。
启动类
创建Application.java
package com.example;

import org.mybatis.spring.annotation.MapperScan;
import org.springframework.boot.SpringApplication;
import org.springframework.boot.autoconfigure.SpringBootApplication;

@SpringBootApplication
@MapperScan("com.example.mapper")
public class Application {

    public static void main(String[] args) {
        SpringApplication.run(Application.class, args);
    }

}
@MapperScan 用来扫描Mapper文件
业务类
这部分内容包扩:实体类、Dao、Service、Controller
实体类
User.java
import java.io.Serializable;

@Data
@TableName("user")
public class User implements Serializable {

    @TableId(type = IdType.AUTO, value = "userId") //自增
    private Long userId;

    @TableField(value = "userName")
    private String userName;

    @TableField(value = "password")
    private String password;

    @TableField(value = "status")
    private int status;
}
@Data为lombok注解
@TableName 用来映射数据表名称
@TableId 用来映射主键,value属性用来映射字段名称
如果不指定,mybatis-plus会根据属性名自动映射,如“userId”映射为“user_id"。
Result.java 统一的前端返回类型
package com.example.entities;

import lombok.AllArgsConstructor;
import lombok.Data;
import lombok.NoArgsConstructor;

import java.io.Serializable;

@Data
@AllArgsConstructor
@NoArgsConstructor
public class Result  implements Serializable {

    private boolean success;
    private String message;
    private Object data;

    public Result(boolean success, String message) {
        this.success = success;
        this.message = message;
    }
}
@AllArgsConstructor 全参构造
@NoArgsConstructor 无参构造,它们都是lombok的注解
Dao层
UserMapper.java
package com.example.mapper;

import com.baomidou.mybatisplus.core.mapper.BaseMapper;
import com.example.entities.User;

public interface UserMapper extends BaseMapper<User> {

}
在之前的yml编写中有这么一句:
# mybatis-plus设置
mybatis-plus:
  mapper-locations: classpath:mapper/*.xml  #mapper.xml文件位置,如果没有映射文件,请注释掉。
接下来,我们创建映射的xml文件
在resource文件夹下,创建mapper文件夹,再创建UserMapper.xml文件,内容如下
<?xml version="1.0" encoding="UTF-8" ?>
<!DOCTYPE mapper
        PUBLIC "-//mybatis.org//DTD Mapper 3.0//EN"
        "http://mybatis.org/dtd/mybatis-3-mapper.dtd">
<mapper namespace="com.example.mapper.UserMapper">

</mapper>
Service层
首先,创建UserService接口。
package com.example.service;

import com.example.entities.User;

import java.util.List;

public interface UserService {

    List<User> findList();

}
再创建它的实现类UserServiceImpl
package com.example.service.impl;

import com.example.entities.User;
import com.example.mapper.UserMapper;
import com.example.service.UserService;
import org.springframework.stereotype.Service;

import javax.annotation.Resource;
import java.util.List;

@Service
public class UserServiceImpl implements UserService {

    @Resource
    private UserMapper userMapper;

    @Override
    public List<User> findList() {
        return userMapper.selectList(null);
    }
}
Controller层
创建UserController.java
package com.example.controller;

import com.example.entities.Result;
import com.example.entities.User;
import com.example.service.UserService;
import org.springframework.web.bind.annotation.GetMapping;
import org.springframework.web.bind.annotation.RestController;

import javax.annotation.Resource;
import java.util.List;

@RestController
public class UserController {

    @Resource
    private UserService userService;

    @GetMapping("user/findList")
    public Result findList() {
        List<User> list = userService.findList();
        if (list != null && list.size() > 0) {
            return new Result(true, "查询成功", list);
        } else {
            return new Result(false, "查询失败");
        }
    }
}
测试
运行启动类>Application.java
访问:http://localhost:8080/user/findList
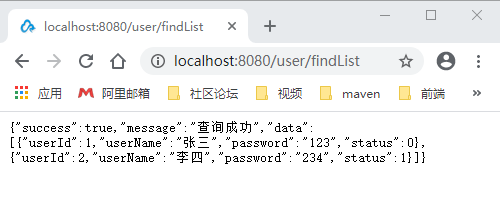
访问成功!
使用Mybatis-Plus分页插件
在pom文件中,导入所需坐标:(这一步,准备中已经做过)
<!--springboot支持的是jpa,mybatisplus自己做了启动器-->
<dependency>
    <groupId>com.baomidou</groupId>
    <artifactId>mybatis-plus-boot-starter</artifactId>
    <version>3.1.2</version>
</dependency>
第一步:编写分页插件配置类
创建MyBatisPlusConfig配置类,内容如下:
package com.example.config;

import com.baomidou.mybatisplus.extension.plugins.PaginationInterceptor;
import org.mybatis.spring.annotation.MapperScan;
import org.springframework.context.annotation.Bean;
import org.springframework.context.annotation.Configuration;
import org.springframework.transaction.annotation.EnableTransactionManagement;

@EnableTransactionManagement
@Configuration
@MapperScan("com.example.mapper")
public class MyBatisPlusConfig {

    /**
     * 分页插件
     */
    @Bean
    public PaginationInterceptor paginationInterceptor() {
        PaginationInterceptor paginationInterceptor = new PaginationInterceptor();
        //你的最大单页限制数量,默认 500 条,小于 0 如 -1 不受限制
        //paginationInterceptor.setLimit(2);
        return paginationInterceptor;
    }
}
第二步:编写Dao层代码
修改UserMapper.java ,内容如下:
public interface UserMapper extends BaseMapper<User> {

    IPage<User> selectPage(Page page);
}
编写对应的xml映射文件UserMapper.xml:
<?xml version="1.0" encoding="UTF-8" ?>
<!DOCTYPE mapper
        PUBLIC "-//mybatis.org//DTD Mapper 3.0//EN"
        "http://mybatis.org/dtd/mybatis-3-mapper.dtd">
<mapper namespace="com.example.mapper.UserMapper">

    <select id="selectPage" resultType="com.example.entities.User">
        select * FROM user
    </select>
</mapper>
编写一个普通 list 查询,mybatis-plus 自动替你分页
加不加where取决于你是否携带查询条件
第三步:调用分页方法
修改UserService接口:
public interface UserService {

    List<User> findList();

    IPage<User> selectPage(Page<User> page);
}
修改UserServiceImpl实现类:
@Service
public class UserServiceImpl implements UserService {

    @Resource
    private UserMapper userMapper;

    @Override
    public List<User> findList() {
        return userMapper.selectList(null);
    }

    @Override
    public IPage<User> selectPage(Page<User> page) {
        return userMapper.selectPage(page);
    }
}
第四步:编写Controller
@RestController
public class UserController {

    @Resource
    private UserService userService;

    @GetMapping("user/findList")
    public Result findList() {
        List<User> list = userService.findList();
        if (list != null && list.size() > 0) {
            return new Result(true, "查询成功", list);
        } else {
            return new Result(false, "查询失败");
        }
    }

    @GetMapping("user/selectPage")
    public IPage<User> selectPage() {
        /**
         * Page(current,size)
         * current:当前页,long类型
         * size:每页显示的数量,long类型
         * 可参考其构造方法
         */
        IPage<User> userIPage = userService.selectPage(new Page<>(1, 5));
        return userIPage;
    }
}
测试
运行启动类>Application.java
访问:http://localhost:8080/user/findList
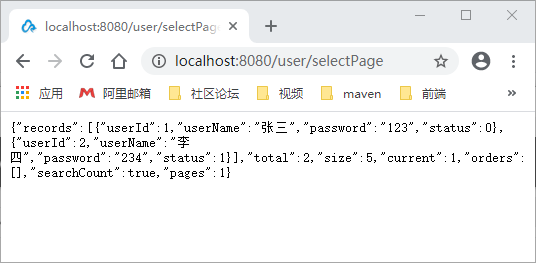
使用浏览器访问:
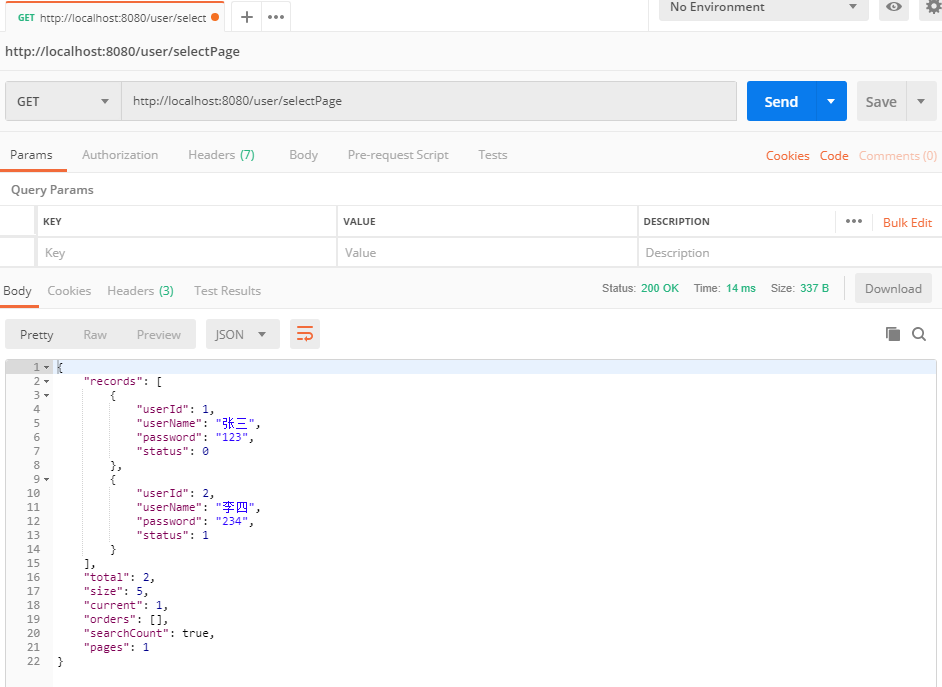
使用postman工具访问:
可以看到,分页插件自动帮助我们实现了分页功能。