本章介绍SpringBoot与Mybatis整合
整合流程
1、准备一个数据库,建一个表,内容如下:
 1 CREATE DATABASE test_mybatis;
 2 USE test_mybatis;
 3
 4 -- ----------------------------
 5 -- Table structure for employee
 6 -- ----------------------------
 7 DROP TABLE IF EXISTS `employee`;
 8 CREATE TABLE `employee` (
 9   `id` int(11) NOT NULL AUTO_INCREMENT,
10   `last_name` varchar(255) DEFAULT NULL,
11   `gender` char(1) DEFAULT NULL,
12   `email` varchar(255) DEFAULT NULL,
13   `dept_id` int(11) DEFAULT NULL COMMENT '部门ID',
14   PRIMARY KEY (`id`)
15 ) ENGINE=InnoDB AUTO_INCREMENT=36 DEFAULT CHARSET=utf8;
16
17 -- ----------------------------
18 -- Records of employee
19 -- ----------------------------
20 BEGIN;
21 INSERT INTO `employee` VALUES (1, '大白', '1', 'dabai@163.com', 1);
22 INSERT INTO `employee` VALUES (2, '小明', '1', 'xiaoming@163.com', 1);
23 INSERT INTO `employee` VALUES (3, '小红', '1', 'xiaohong@163.com', 1);
24 COMMIT;
2、新建一个SpringBoot Web项目


 1 <?xml version="1.0" encoding="UTF-8"?>
 2 <project xmlns="http://maven.apache.org/POM/4.0.0"
 3          xmlns:xsi="http://www.w3.org/2001/XMLSchema-instance"
 4          xsi:schemaLocation="http://maven.apache.org/POM/4.0.0 http://maven.apache.org/xsd/maven-4.0.0.xsd">
 5     <modelVersion>4.0.0</modelVersion>
 6
 7     <groupId>com.test</groupId>
 8     <artifactId>test-springboot-mybatis</artifactId>
 9     <version>1.0-SNAPSHOT</version>
10
11     <parent>
12         <groupId>org.springframework.boot</groupId>
13         <artifactId>spring-boot-starter-parent</artifactId>
14         <version>2.1.8.RELEASE</version>
15     </parent>
16
17     <properties>
18
19         <project.build.sourceEncoding>UTF-8</project.build.sourceEncoding>
20         <project.reporting.outputEncoding>UTF-8</project.reporting.outputEncoding>
21         <java.version>1.8</java.version>
22     </properties>
23
24     <dependencies>
25
26         <dependency>
27             <groupId>org.springframework.boot</groupId>
28             <artifactId>spring-boot-starter-web</artifactId>
29         </dependency>
30
31         <dependency>
32             <groupId>org.mybatis.spring.boot</groupId>
33             <artifactId>mybatis-spring-boot-starter</artifactId>
34             <version>2.0.1</version>
35         </dependency>
36
37         <!-- mysql -->
38         <dependency>
39             <groupId>mysql</groupId>
40             <artifactId>mysql-connector-java</artifactId>
41             <version>8.0.12</version>
42         </dependency>
43
44         <dependency>
45             <groupId>org.springframework.boot</groupId>
46             <artifactId>spring-boot-starter-test</artifactId>
47             <scope>test</scope>
48         </dependency>
49
50     </dependencies>
51
52
53     <!-- SpringBoot打包插件,可以将代码打包成一个可执行的jar包 -->
54     <build>
55         <plugins>
56             <plugin>
57                 <groupId>org.springframework.boot</groupId>
58                 <artifactId>spring-boot-maven-plugin</artifactId>
59             </plugin>
60         </plugins>
61     </build>
62 </project>
3、mybatis-spring-boot-starter以及数据库相关依赖
1 <dependency>
2     <groupId>org.mybatis.spring.boot</groupId>
3     <artifactId>mybatis-spring-boot-starter</artifactId>
4     <version>2.0.1</version>
5 </dependency>
4、在application.yml文件配置数据库相关信息
1 spring:
2   datasource:
3     username: admin
4     password: 123456
5     url: jdbc:mysql://127.0.0.1:3306/test_mybatis
6     driver-class-name: com.mysql.jdbc.Driver
4、编辑一个controller
 1 package com.test.springboot.controller;
 2
 3 import com.test.springboot.entities.Employee;
 4 import com.test.springboot.mapper.EmployeeMapper;
 5 import org.springframework.beans.factory.annotation.Autowired;
 6 import org.springframework.web.bind.annotation.RequestMapping;
 7 import org.springframework.web.bind.annotation.RestController;
 8
 9 import java.util.List;
10
11 @RestController
12 public class EmployeeController {
13
14     @Autowired
15     private EmployeeMapper employeeMapper;
16
17     @RequestMapping("/emps")
18     public List<Employee> emps(){
19         return employeeMapper.getEmps();
20     }
21
22 }
5、编写Mapper接口
 1 package com.test.springboot.mapper;
 2
 3 import com.test.springboot.entities.Employee;
 4 import org.apache.ibatis.annotations.Mapper;
 5 import org.apache.ibatis.annotations.Select;
 6
 7 import java.util.List;
 8
 9 @Mapper
10 public interface EmployeeMapper {
11
12     @Select("select * from employee")
13     public List<Employee> getEmps();
14
15 }
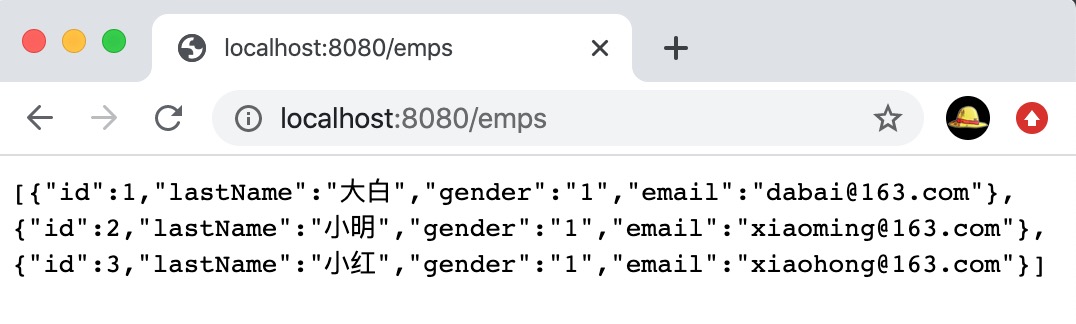
6、测试,启动项目,使用地址:http://localhost:8080/emps,进行访问

Mybtis全局配置
7、解决属性名lastName与字段名last_name不匹配问题,需要设置mybatis全局变量,
在SpringBoot中可以自定义MyBatis的配置规则;给容器中添加一个ConfigurationCustomizer;
 1 package com.test.springboot.config;
 2
 3 import org.mybatis.spring.boot.autoconfigure.ConfigurationCustomizer;
 4 import org.springframework.context.annotation.Bean;
 5 import org.springframework.context.annotation.Configuration;
 6
 7 @Configuration
 8 public class MybitsConfig {
 9
10     @Bean
11     public ConfigurationCustomizer configurationCustomizer() {
12
13         return new ConfigurationCustomizer(){
14
15             @Override
16             public void customize(org.apache.ibatis.session.Configuration configuration) {
17                 configuration.setMapUnderscoreToCamelCase(true);
18             }
19         };
20
21     }
22 }
效果如下:

8、使用MapperScan批量扫描所有的Mapper接口;@MapperScan(value="com.test.springboot.mapper")
@MapperScan可以用在主类Applicaiton上或者,带@Configuration注解的配置类上
a、在Applicaiton上使用@MapperScan
1 @MapperScan(value="com.test.springboot.mapper")
2 @SpringBootApplication
3 public class Application {
b、去掉Mapper类上的@Mapper注解
1 //@Mapper
2 public interface EmployeeMapper {
c、重启项目测试,效果一样
Mybtis XML配置文件使用
9、xml全局配置文件,可以在application.xml文件中,指定mybatis全局配置文件位置
mybatis:
  # 指定全局配置文件位置
  config-location: classpath:mybatis/mybatis-config.xml
10、新建mybatis-config.xml,配置文件
 1 <?xml version="1.0" encoding="UTF-8" ?>
 2 <!DOCTYPE configuration
 3         PUBLIC "-//mybatis.org//DTD Config 3.0//EN"
 4         "http://mybatis.org/dtd/mybatis-3-config.dtd">
 5 <configuration>
 6
 7     <settings>
 8         <setting name="mapUnderscoreToCamelCase" value="true"/>
 9     </settings>
10 </configuration>
11、去掉给容器中注入的ConfigurationCustomizer类,重启项目,测试,发现转换效果依然在
12、mapper的xml文件,可以在application.xml文件中,指定mapper配置文件位置
1 mybatis:
2   # 指定全局配置文件位置
3   config-location: classpath:mybatis/mybatis-config.xml
4   # 指定sql映射文件位置
5   mapper-locations: classpath:mybatis/mapper/*.xml
13、编写EmployeeMapper.xml文件
 1 <?xml version="1.0" encoding="UTF-8" ?>
 2 <!DOCTYPE mapper
 3         PUBLIC "-//mybatis.org//DTD Mapper 3.0//EN"
 4         "http://mybatis.org/dtd/mybatis-3-mapper.dtd">
 5 <mapper namespace="com.test.springboot.mapper.EmployeeMapper">
 6     <!--    public Employee getEmpById(Integer id);
 7
 8      public void insertEmp(Employee employee);-->
 9     <select id="getEmpById" resultType="com.test.springboot.entities.Employee">
10         SELECT * FROM employee WHERE id=#{id}
11     </select>
12
13 </mapper>
14、在EmployeeMapper接口中增加一个方法getEmpById
1 public Employee getEmpById(Integer id);
15、在EmployeeController,增加一个映射调用方法
1 @RequestMapping("/emp/{id}")
2 public Employee emp(@PathVariable("id") Integer id){
3     return employeeMapper.getEmpById(id);
4 }
16、测试,重启项目,在浏览器中访问地址:http://localhost:8080/emp/1

17、插入单个数据时,返回主键id,并下次使用这个对象是能够使用id,代码如下
1 @Options(useGeneratedKeys = true,keyProperty = "id")
2 @Insert("INSERT INTO employee(lastName,email,gender) VALUES (#{lastName},#{email},#{gender})")
3 public int insert(Employee employee);