介绍Spring Cloud Config 客户端之前,先了解一下Spring Cloud应用的 bootstrap上下文
Bootstrap应用程序上下文
Spring Cloud应用程序通过创建“ bootstrap ”上下文来运行,该上下文是主应用程序的父上下文。它负责从外部源加载配置属性,并负责解密本地外部配置文件中的属性。这两个上下文共享一个Environment,它是任何Spring应用程序的外部属性的来源。默认情况下,引导程序属性(不是bootstrap.properties,而是引导程序阶段加载的属性)具有较高的优先级,因此它们不能被本地配置覆盖。
引导上下文使用与主应用程序上下文不同的约定来定位外部配置。可以使用bootstrap.yml来代替application.yml(或.properties),而将引导程序和外部环境的外部配置很好地分开。以下清单显示了一个示例:
bootstrap.yml
1 spring:
2   application:
3     name: foo
4   cloud:
5     config:
6       uri: ${SPRING_CONFIG_URI:http://localhost:8888}
如果应用程序需要来自服务器的任何特定于应用程序的配置,则最好设置spring.application.name(在bootstrap.yml或application.yml中)。为了将属性spring.application.name用作应用程序的上下文ID,必须在bootstrap.[properties | yml]中进行设置。
如果要检索特定的配置文件配置,还应该在bootstrap.[properties | yml]中设置spring.profiles.active。
可以通过设置spring.cloud.bootstrap.enabled=false来完全禁用引导过程(例如,在系统属性中)。
application.yml是用户级的资源配置项,bootstrap.yml是系统级的,优先级更高
要在client模块中的resources下添加一个bootstrap.yml,这很关健的,因为bootstrap.yml是比application.yml先加载的。bootstrap.yml优先级高于application.yml
Spring Cloud Config客户端搭建
准备:
使用上一章(【SpringCloud】Spring Cloud Config 配置中心(二十))的项目,包含一个Github仓库、一个Eureka注册中心、一个SpringCloud Config Server端
搭建:
1、新建一个SpringCloud模块springcloud-config-client8889,作为配置的客户端
2、在pom中,引入spring-cloud-starter-config和spring-cloud-starter-netflix-eureka-client依赖
 1 <!-- spring cloud config client-->
 2 <dependency>
 3     <groupId>org.springframework.cloud</groupId>
 4     <artifactId>spring-cloud-starter-config</artifactId>
 5 </dependency>
 6
 7 <!-- eureka client -->
 8 <dependency>
 9     <groupId>org.springframework.cloud</groupId>
10     <artifactId>spring-cloud-starter-netflix-eureka-client</artifactId>
11 </dependency>
完整POM依赖如下:


 1 <?xml version="1.0" encoding="UTF-8"?>
 2 <project xmlns="http://maven.apache.org/POM/4.0.0"
 3          xmlns:xsi="http://www.w3.org/2001/XMLSchema-instance"
 4          xsi:schemaLocation="http://maven.apache.org/POM/4.0.0 http://maven.apache.org/xsd/maven-4.0.0.xsd">
 5     <parent>
 6         <artifactId>test-springcloud</artifactId>
 7         <groupId>com.test</groupId>
 8         <version>1.0-SNAPSHOT</version>
 9     </parent>
10     <modelVersion>4.0.0</modelVersion>
11
12     <artifactId>springcloud-config-client8889</artifactId>
13
14     <dependencies>
15
16         <!-- spring cloud config client-->
17         <dependency>
18             <groupId>org.springframework.cloud</groupId>
19             <artifactId>spring-cloud-starter-config</artifactId>
20         </dependency>
21
22         <!-- eureka client -->
23         <dependency>
24             <groupId>org.springframework.cloud</groupId>
25             <artifactId>spring-cloud-starter-netflix-eureka-client</artifactId>
26         </dependency>
27
28         <!-- spring boot -->
29         <dependency>
30             <groupId>org.springframework.boot</groupId>
31             <artifactId>spring-boot-starter-web</artifactId>
32         </dependency>
33         <dependency>
34             <groupId>org.springframework.boot</groupId>
35             <artifactId>spring-boot-starter-actuator</artifactId>
36         </dependency>
37         <dependency>
38             <groupId>org.springframework.boot</groupId>
39             <artifactId>spring-boot-devtools</artifactId>
40             <scope>runtime</scope>
41             <optional>true</optional>
42         </dependency>
43         <dependency>
44             <groupId>org.projectlombok</groupId>
45             <artifactId>lombok</artifactId>
46             <optional>true</optional>
47         </dependency>
48         <dependency>
49             <groupId>org.springframework.boot</groupId>
50             <artifactId>spring-boot-starter-test</artifactId>
51             <scope>test</scope>
52         </dependency>
53
54     </dependencies>
55 </project>
3、在resources下添加一个bootstrap.yml配置文件,内容如下:
 1 spring:
 2   application:
 3     name: cloud-config-client
 4   cloud:
 5     # Config客户端配置
 6     config:
 7       # 分支名称
 8       label: master
 9       # 配置文件名称
10       name: config
11       # 读取后缀名称
12       profile: dev
13       # 上述3个综合:master分支上config-dev.yml配置文件
14       # 读取http://localhost:8888/master/config-dev.yml
15       # 配置中心地址
16       uri: http://localhost:8888
17
4、在resources下添加一个application.yml配置文件,内容如下:
 1 # 端口
 2 server:
 3   port: 8889
 4
 5 eureka:
 6   client:
 7     service-url:
 8       defaultZone: http://localhost:8761/eureka
5、编辑主启动类
1 @EnableEurekaClient
2 @SpringBootApplication
3 public class ConfigClientMain8889 {
4     public static void main(String[] args) {
5         SpringApplication.run(ConfigClientMain8889.class, args);
6     }
7 }
6、编辑一个controller
 1 @RestController
 2 public class ConfigClientController {
 3
 4     @Value("${config.info}")
 5     private String configInfo;
 6
 7     @GetMapping("/configInfo")
 8     public String getConfigInfo(){
 9         return  configInfo;
10     }
11 }
7、测试
1)启动项目
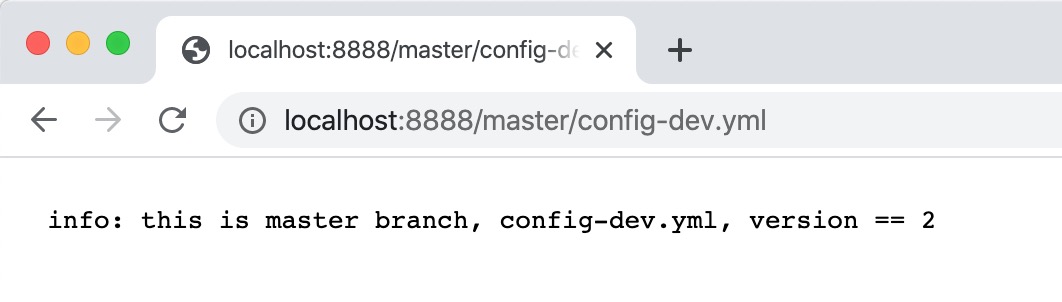
2)访问地址:http://localhost:8888/master/config-dev.yml,验证配置中心配置文件能正常访问
3)访问地址:http://localhost:8889/configInfo,验证Config Client能正常获取配置中心文件内容

Config客户端动态刷新配置
现象:
1)Config客户端运行中,修改github中配置仓库的master分支config-dev.yml文件内容,将version 改为3
2)访问地址:http://localhost:8888/master/config-dev.yml,获取配置,发现获取内容(version==3)已更新
3)访问地址:http://localhost:8889/configInfo,获取配置内容(version==2),Config客户端未及时更新配置内容
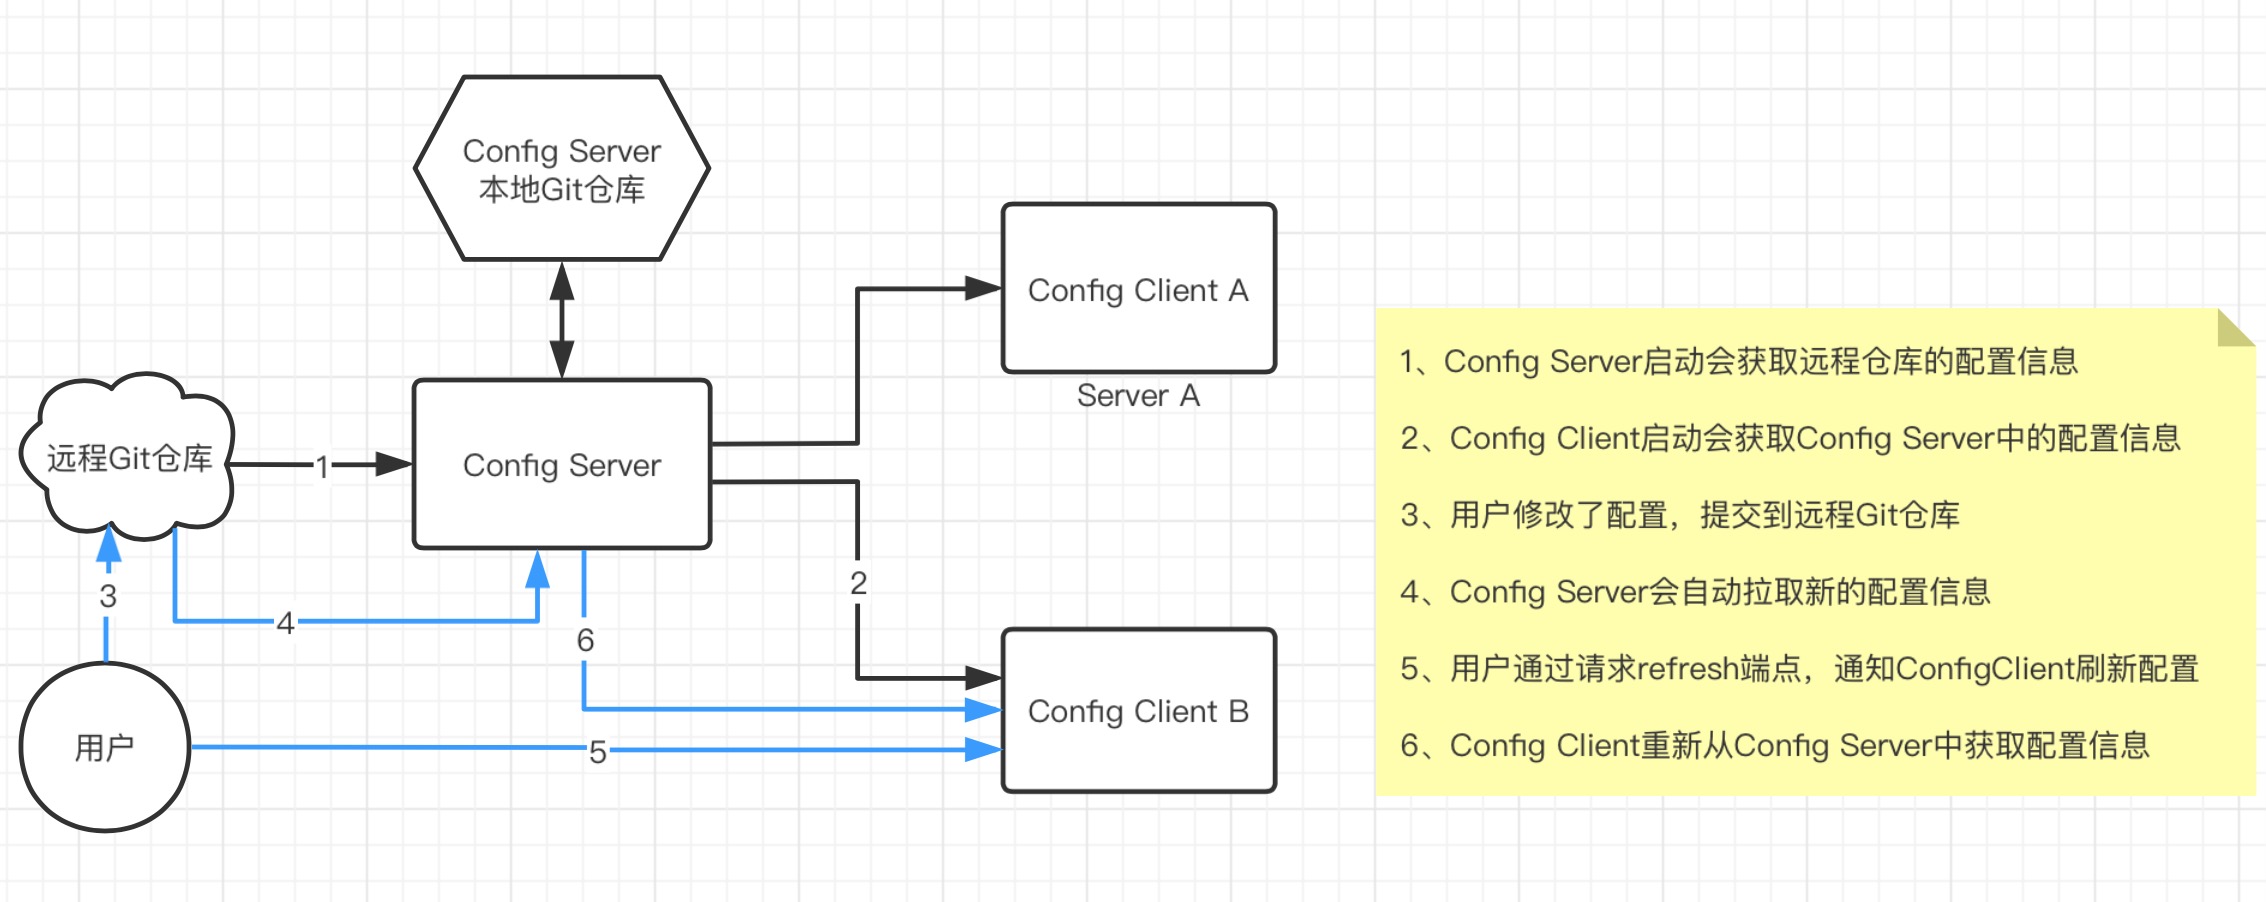
动态刷新流程:
动态刷新配置:
1、Config客户端的pom依赖中,引入依赖:
1 <dependency>
2     <groupId>org.springframework.boot</groupId>
3     <artifactId>spring-boot-starter-actuator</artifactId>
4 </dependency>
2、在application.yml配置文件中,暴露刷新端点
1 management:
2   endpoints:
3     web:
4       exposure:
5         # 暴露刷新端点
6         include: refresh
3、修改controller,增加注解@RefreshScope,使配置文件自动刷新
 1 @RestController
 2 //配置文件自动刷新
 3 @RefreshScope
 4 public class ConfigClientController {
 5
 6     @Value("${config.info}")
 7     private String configInfo;
 8
 9     @GetMapping("/configInfo")
10     public String getConfigInfo(){
11         return  configInfo;
12     }
13 }
4、测试
1)重新启动,Config客户端项目
2)访问地址:http://localhost:8889/configInfo,获取配置内容(version==3)
3)Config客户端运行时,修改github中配置仓库的master分支config-dev.yml文件内容,将version 改为4
4)访问地址:http://localhost:8888/master/config-dev.yml,获取配置,发现获取内容(version==4)已更新,配置中心及时更新配置内容
5)使用curl命令,访问地址:curl -X POST http://localhost:8889/actuator/refresh,必须是post请求,刷新Config客户端配置
6)访问地址:http://localhost:8889/configInfo,获取配置内容(version==4),验证Config客户端及时更新配置内容
5、思考:要刷新所有客户端节点,难道要一个一个请求客户端刷新?有没有什么办法通知所有客户端节点刷新配置?
见下一章