转载:https://null-byte.wonderhowto.com/how-to/hack-radio-frequencies-hijacking-fm-radio-with-raspberry-pi-wire-0177007/
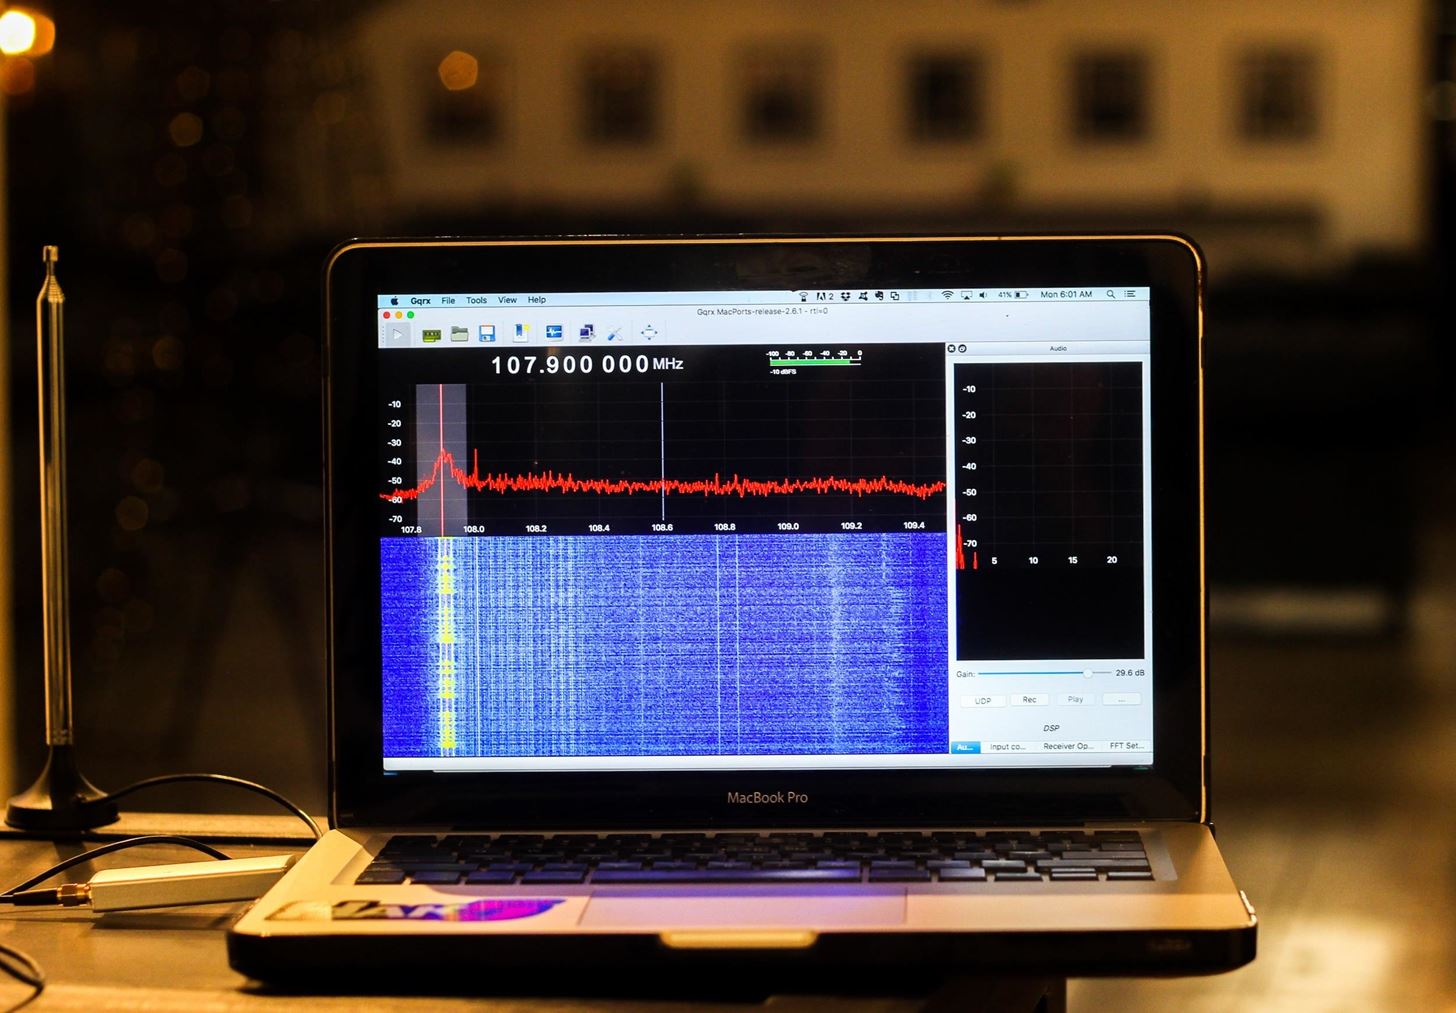
In our first part on software-defined radio and signals intelligence, we learned how to set up a radio listening station to find and decode hidden radio signals — just like the hackers who triggered the emergency siren system in Dallas, Texas, probably did. Now that we can hear in the radio spectrum, it's time to explore the possibilities of broadcasting in a radio-connected world.
So how did the hackers in Dallas broadcast the code they found to control the sirens and why? Was it a distraction to divert attention from their real goal, a test of a foreign government probing American infrastructure, or were they just engaging in the time-honored American pastime of being annoying?
Whatever their goal, the attack was done by rebroadcasting a series of codes in the emergency band around 900 MHz to trigger a series of repeaters to scare the crap out of some Texans. Did they need thousands of dollars of sophisticated equipment to do so? Likely not. In fact, we can take over some radio systems without knowing any codes at all simply by being closer to our target.
This tutorial will show you a technique to use this effect to hack civilian FM radio bands and play your own social engineering payload. Maybe you simply don't like the music a radio station in a particular business or vehicle is playing and you'd like to play your own. Maybe you'd like to play a message to get your target to do something you want them to. Whatever the goal, all you really need to rebroadcast signals in the radio spectrum is a $35 Raspberry Pi and a piece of wire for an antenna.
Previous: Building a Radio Listening Station to Decode Digital Audio & Police Dispatches
The Pi as a Software-Defined Radio Transmitter for Hacking
The Raspberry Pi, with the addition of some free software, is capable of pulsing power on one of its general purpose input-output (GPIO) pins to transmit on any civilian FM radio frequency from around 87.5 MHz to 108 MHz. Without a wire, the range is only a foot or two. We'll focus on using this ability to insert our messages into the most common type of radio signals everyone has access to. FM radios exist in almost every car and in many businesses and homes. The ability to broadcast directly to them gives us a powerful way of speaking to someone anonymously, seemingly from a trusted source.
Hobbyists have embraced the Pi FM radio hack by adding a wire as an antenna for streaming music, short-range communications, and even as an FM modem for exchanging information between devices. Applications like rpitx can even transmit slow-scan TV images via FM. This hack is fun and useful for creating a signal with an intentionally limited range, and through some testing, I've found the signal is just powerful enough to overpower FM stations at close range.
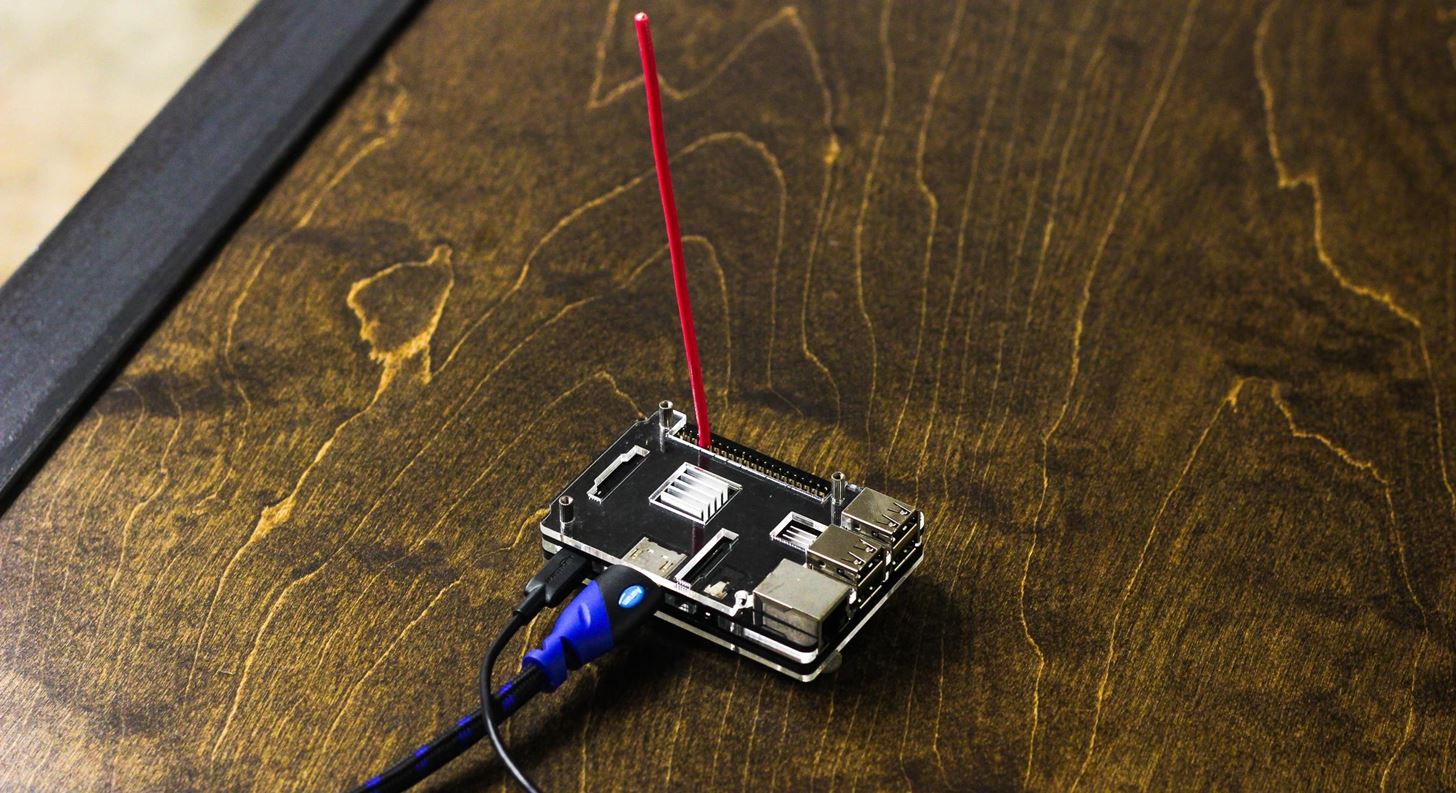
A do-it-yourself Raspberry Pi pirate radio.Image by SADMIN/Null Byte
Overpowering a station, also known as "broadcast signal intrusion," has the effect of hijacking the signal and allowing you to insert messages, songs, programming, or other seemingly legitimate information or news to support social engineering strategies. Signal hijacking on the Pi is particularly useful against businesses playing FM radio or vehicle radio systems and can help you to influence a target's beliefs or actions by posing as a media outlet.
Why a Raspberry Pi Works Well for This
The fact that you can get started broadcasting in the radio spectrum with only a wire is incredibly useful to anyone interested in radio projects or software defined radio, but how does it work?
The Pi's GPIO pins allow it to connect to peripherals, but in this case, pin number 4 can be pulsed using the Pi's clock to square wave oscillator. While this works, there are a number of issues that must be considered as a result of the way the Pi creates the transmission. These issues mean increasing the power also increases the likelihood of causing chaos in the radio frequency and getting caught by the FCC, which means this tool is for surgical strikes only without using additional filters.
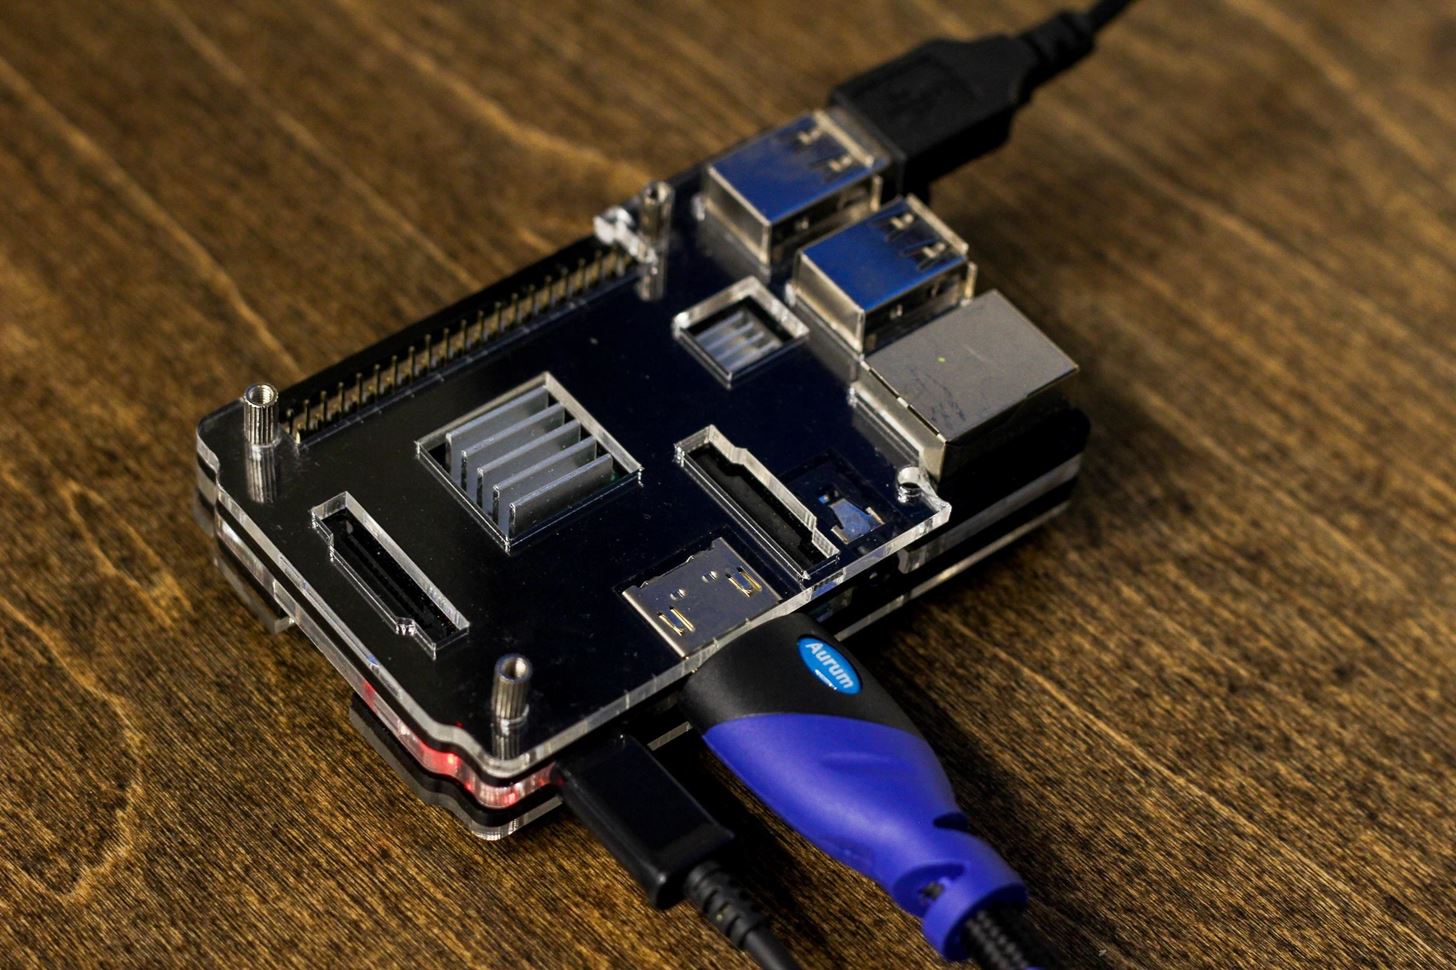
All that is needed for this attack is a Raspberry Pi 3 and a wire.Image by SADMIN/Null Byte
The biggest issue in using a Pi is the square wave oscillator used to generate the signal, which generates harmonics that can interfere with frequencies beyond those you're intending to broadcast on. In fact, these harmonics can go pretty far out of band into restricted frequencies, meaning boosting the power on a Pi FM transmitter without applying a filter will interfere with all kinds of radio signals around you.
The History of Broadcast Signal Intrusions
A broadcast signal intrusion is the hijacking of a radio or TV signal to play another message over the official programming, and it is relatively simple to pull off against radio stations.
While more advanced techniques involve splicing the message into the broadcast by breaking into the receiver site, all that is really needed is an FM transmitter capable of power powering the legitimate broadcasting signal to the target antenna. If your target is just one antenna, the Raspberry Pi can easily accomplish a surgical application of a broadcast intrusion.
Historically, broadcast signal instructions have been employed by hackers wanting to get their message out to the public, although few, if any, attempted to hide the fact that the station had been hijacked. Motives range from political protests to trolling and jamming of the Playboy Network for religious reasons. While most hackers perpetrating large-scale broadcast intrusions were caught, one of the most notorious and strangest incidents remains unsolved.
Perhaps the best-documented incident of intentional signal intrusion was the Max Headroom incident in Chicago. In 1987, the WGN and WTTW TV stations were hijacked during an episode of Dr. Who to play a slow-scan message featuring a man in a Max Headroom mask rambling and screaming, calling the radio station operators "nerds," and eventually being spanked by a woman in a French maid outfit with a flyswatter.
The clip ran for nearly 90 seconds and only got more confusing as engineers were helpless to regain control, making national news and leading to FBI involvement in the case. Despite the attention, no one is sure who the Max Headroom hacker was or what the purpose of his bizarre and brazen takeover of WGN was supposed to accomplish beyond trolling tens of thousands of people.
It's believed this hack was accomplished without physical access to the stations and instead used sophisticated radio transmitters to overpower the legitimate signal that was repeated to a larger broadcasting antenna. If you're a fan of the Mr. Robotseries, #fsociety used this hack many times to get their video communications on the airwaves of major TV networks.
Don't Miss: Learn the Hacks from Mr. Robot Here on Null Byte
Surgical Signal Intrusions for Social Engineering
By overpowering the legitimate signal with ours, we are presented with two options: perform a denial of service attack or attempt to impersonate legitimate traffic on the channel. Both of these options, by the way, are illegal in most countries due to the fact that we are jamming a legitimate radio broadcast.
In a DOS attack, we can flood an FM radio channel used for communication with a signal that prevents the legitimate transmission from being heard and makes no attempt to pretend to be the real transmission. In the second attack, we craft a message designed to be perceived as legitimate and insert it into programming to provoke a response. This can be as simple as a report of heavy traffic on a certain freeway requiring a different route, or as elaborate as playing a SIGALERT emergency alert describing the subject's car as the vehicle of a manhunt suspect.
Nuclear missiles coming from North Korea?!
Because of the trust placed in the media and the surreptitious nature of the hijacking, a subject is unlikely to know the signal has been hijacked unless the beginning or end of the transmission switch seems out of place.
Step 1: Hardware & Software Requirements
To begin broadcasting, we don't need much. A Raspberry Pi 2 or 3 will both work, and the wire can be sourced from cords or whatever you have around. I used both stranded and solid core copper wire and both worked fine, although solid core was better.
Don't Miss: How to Set Up a Headless Raspberry Pi Hacking Platform Running Kali Linux
Here's all the hardware and software that you'll need for this guide:
- a piece of wire around 3 feet long for an antenna
- a fully updated Raspberry Pi 2/3
- knowledge of which frequency you're trying to jam (or a $20 RTL-SDR dongle to find it yourself)
- a source .wav file
- make and libsndfile1-dev
- PiFmRds from GitHub
To start, let's take care of the software requirements by running apt-get update and apt-get install upgrade. Once our version of Kali is updated and upgraded, we can install dependencies by running the following in a terminal window.
apt-get install make libsndfile1-dev
Step 2: Download & Configure PiFmRds
Connect your Pi to an HDMI display or SSH into it from your laptop. To clone PiFmRds, type the following into a terminal window:
git clone https://github.com/ChristopheJacquet/PiFmRds.git
cd PiFmRds/src
make clean
make
Remember to run make clean as versions for different Raspberry Pi's are not compatible with each other.

Click or tap on this image to enlarge.
Step 3: Test Your First Transmission
That should be it! After navigating to the PiFmRds/src folder, you should be able to test PiFmRds by running:
sudo ./pi_fm_rds -freq 107.0 -audio sound.wav
This will start a test radio transmission on the frequency 100.1. Since we haven't yet attached our wire antenna, we can't expect it to transmit anything, right?
Turns out, even just the GPIO pin is capable of short range transmission. Here, I can see a test broadcast from several feet away even without attaching an antenna.

Still able to receive from a few feet away even without an antenna.Image by SADMIN/Null Byte
You should use the GPIO pin to test your messages whenever possible to avoid interfering with other frequencies unnecessarily. While good for testing, the pin alone cannot overpower a station. Once you've confirmed you're transmitting, let's try hijacking a signal.
Step 4: Add an Antenna to Enable Signal Hijacking
Now that we know we're transmitting, let's up the power. Attach a piece of wire (solid gauge or stranded will do) to the 4th GPIO pin (see diagram to figure out which that is).

Image via Raspberry Pi Foundation
You can use the insulation around the wire to keep it snug on the pin if you work the pin between the insulation and the copper inside the wire. Here is how I attached some solid core wire:
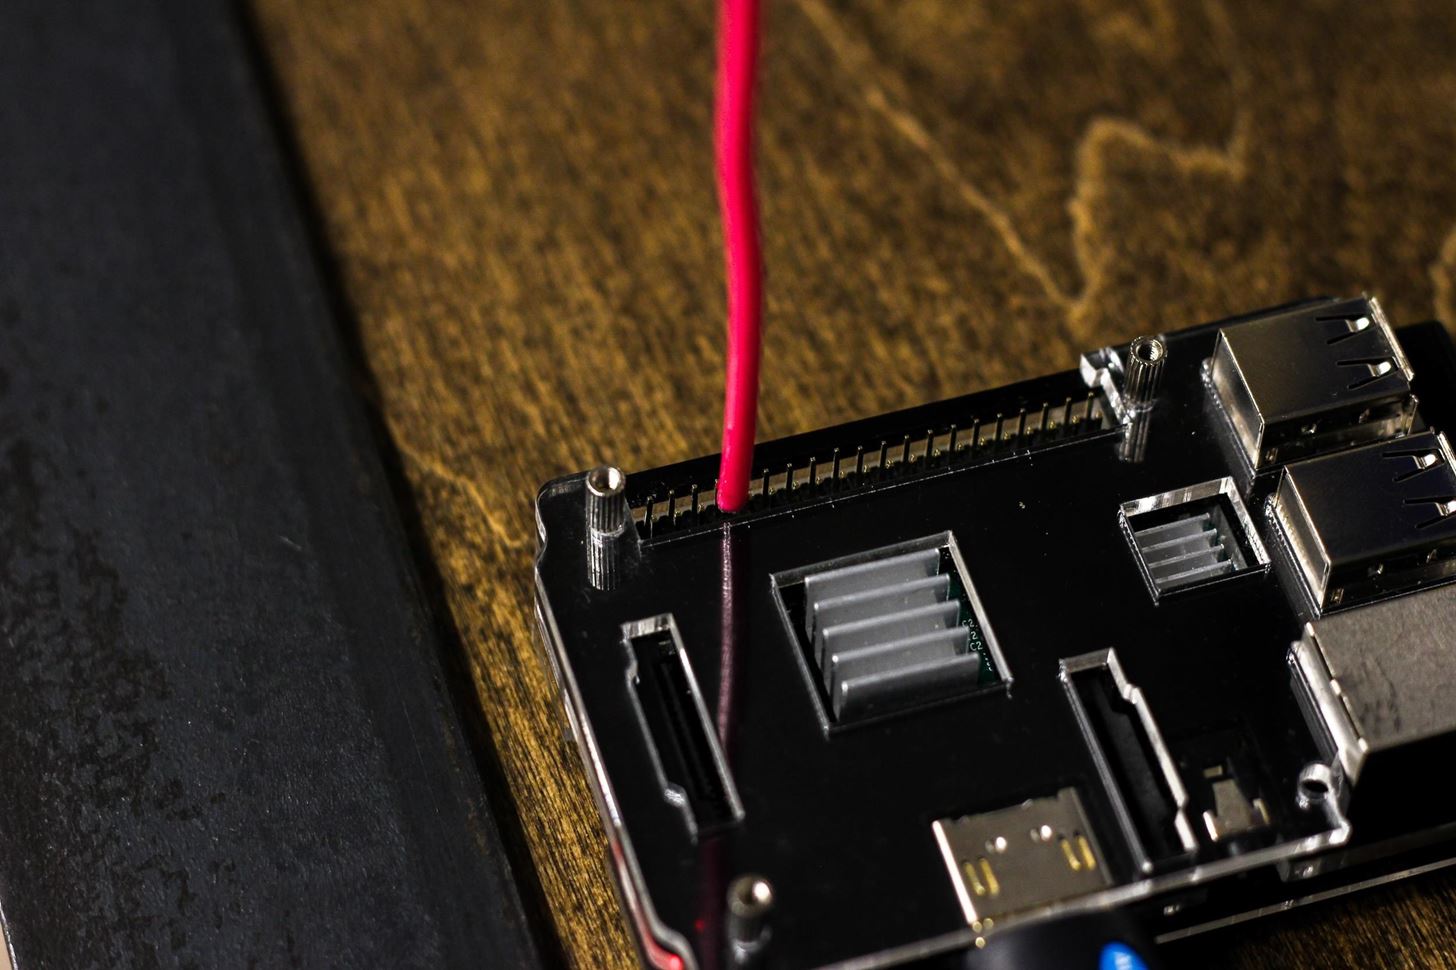
While the wire touched a few pins, pin 4 has been pushed between the insulation and the solid core copper wire.Image by SADMIN/Null Byte
With this setup, the range is dramatically improved. I can receive the radio transmission all over the building, including on floors above and below me.
The signal is significantly boosted when an antenna is added.Image by SADMIN/Null Byte
Step 5: Load a WAV File & Overpower an FM Signal
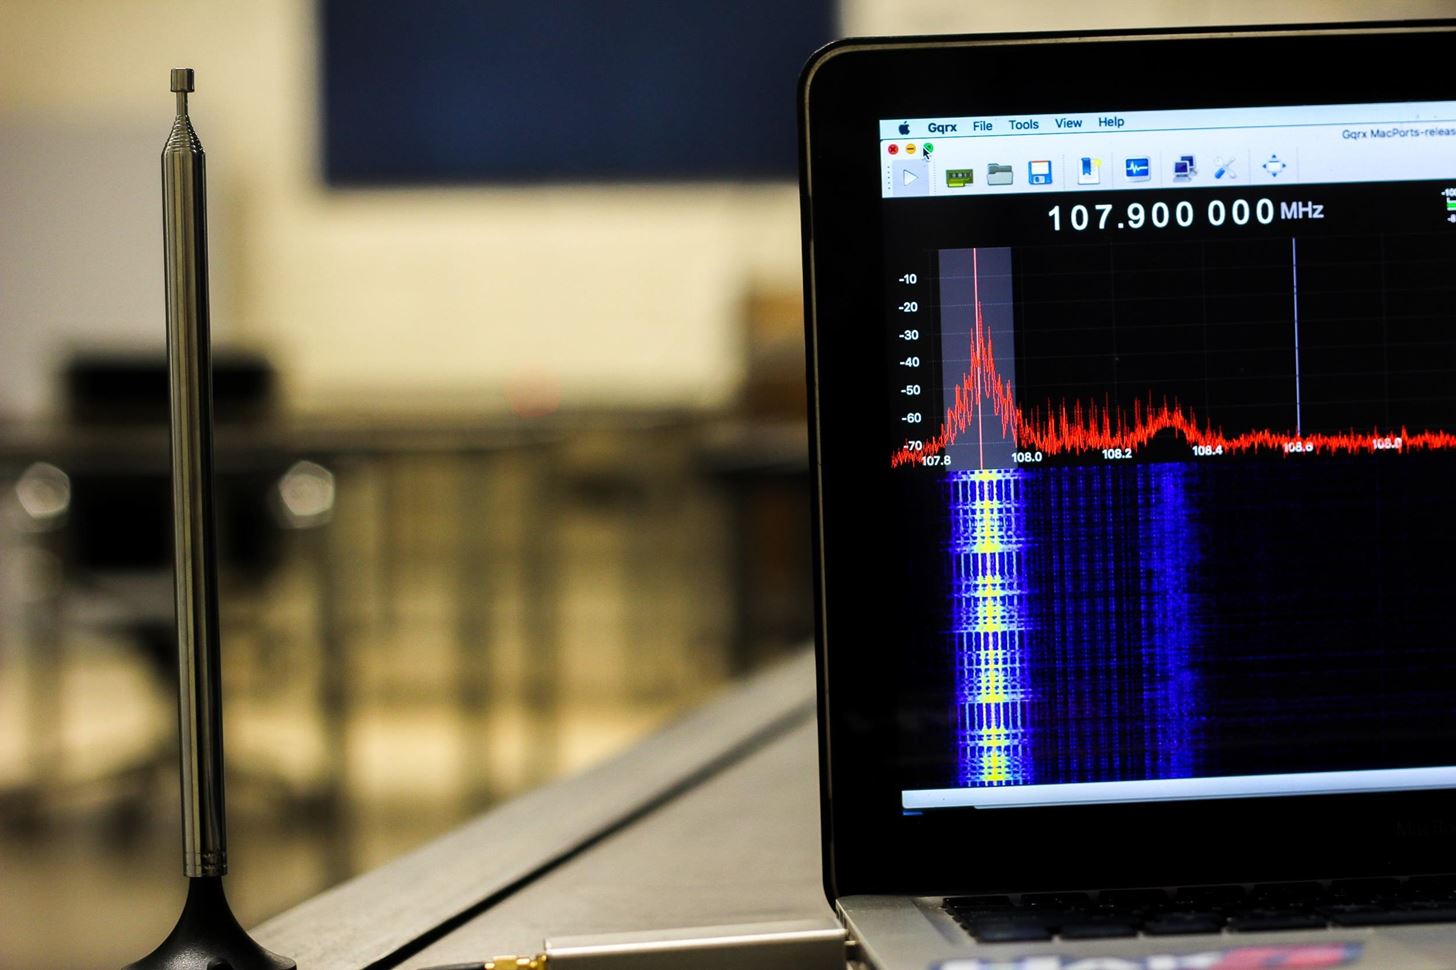
Now that we've boosted the power, we can expect to be able to hijack any radio station when we're within about twenty to thirty feet of the transmitter. Identify the station you want to hijack and note the frequency in megahertz. For this example, we will assume the station we are transmitting against is 107.9 MHz.
On your Pi with the antenna attached, run the following in terminal to target and hijack 107.9 and play the audio file audio.wav.
sudo ./pi_fm_rds -freq 107.9 -audio audio.wav
You should hear the audio demo break into the legitimate transmission.
Hijacking 107.9 at nearly 40 feet away (end of range).Image by SADMIN/Null Byte
Put any WAV file in the PiFmRds/src folder and change the name in the command above to play your own custom message.
Final Warning
While the methods described are extremely easy and effective, intentionally jamming a legitimate broadcast is illegal in the US, and most likely elsewhere. While the likelihood of being detected doing so on a small scale is low, increasing the power or operating in out-of-band frequencies can get you in trouble and interfere with military, police, and first responder radio signals.
The range of this device is short, and by experimenting with a radio to gauge the range, you can vary the length of wire to adjust the range. In addition, playing messages that could alarm or frighten people deliberately is a great way to get in trouble as well. While funny, my inbound North Korean nuclear missile example (in the video above) could cause panic, thus is best used in a lab setting only.
Use common sense when deciding on the message you want to transmit and keep in mind it is likely the subject will really believe it.
As always, thanks for reading, and make sure to keep an eye on Null Byte for more hacking tutorials. You can ask me questions here or @sadmin2001 on Twitter or Instagram.
Don't Miss: How to Load & Use Keystroke Injection Payloads on the USB Rubber Ducky