注意: Qt5发布之前,Qt实现串口通信一般是采用第三方类库qextserialport。Qt5发布后自带了QtSerialPort 能够支持串口通信。
1、Qextserialport类介绍
在Qt5之前的版本中并没有特定的串口控制类,现在大部分人使用的是第三方写的qextserialport类,本文章主要是讲解怎样利用此类实现串口通信。
2、文件下载地址:
最新文件下载在文章最后!
http://sourceforge.net/projects/qextserialport/files/
3、文件内容:
3.1.下载到的文件为qextserialport-1.2win-alpha ,解压并打开后其内容如下。
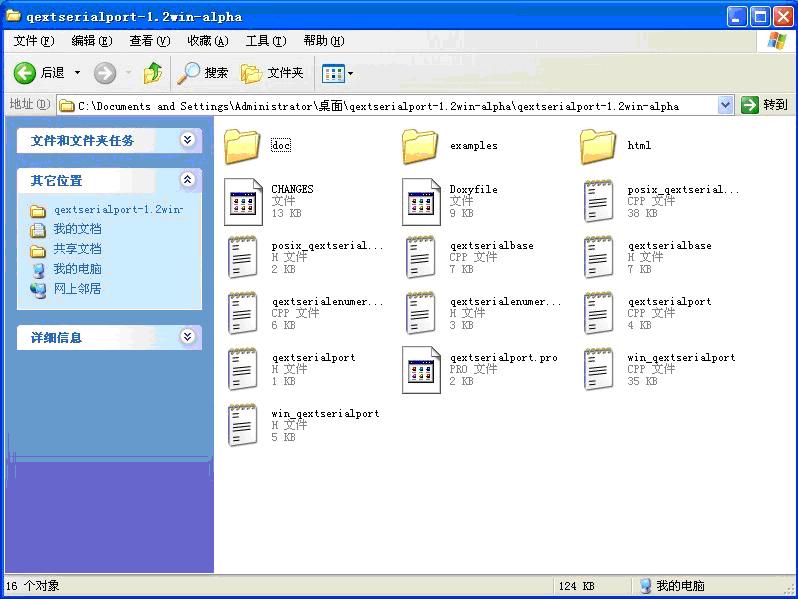
(1)doc文件夹中的文件内容是QextSerialPort类和QextBaseType的简单的说明,我们可以使用记事本程序将它们打开。
(2)examples文件夹中是几个例子程序,可以看一下它的源码,不过想运行它们好像会出很多问题啊。
(3)html文件夹中是QextSerialPort类的使用文档。
(4)然后就是剩下的几个文件了。其中qextserialenumerator.cpp及qextserialenumerator.h文件中定义的QextSerialEnumerator类是用来获取平台上可用的串口信息的。不过,这个类好像并不怎么好用,而且它不是我们关注的重点,所以下面就不再介绍它了。
(5)qextserialbase.cpp和qextserialbase.h文件定义了一个QextSerialBase类,win_qextserialport.cpp和win_qextserialport.h文件定义了一个Win_QextSerialPort类,posix_qextserialport.cpp和posix_qextserialport.h文件定义了一个Posix_QextSerialPort类,qextserialport.cpp和qextserialport.h文件定义了一个QextSerialPort类。这个QextSerialPort类就是我们上面所说的那个,它是所有这些类的子类,是最高的抽象,它屏蔽了平台特征,使得在任何平台上都可以使用它。

在Windows下是:
qextserialbase.cpp和qextserialbase.h 以及win_qextserialport.cpp和win_qextserialport.h
在Linux下是:
qextserialbase.cpp和qextserialbase.h 以及posix_qextserialport.cpp和posix_qextserialport.h
而在Windows下我们可以使用事件驱动EventDriven方式,也可以使用查询Polling方式,但是在Linux下我们只能使用查询Polling方式。
4、串口通信的实现
4.1 声明串口对象 :
Win_QextSerialPort  *myCom;      //Windows系统内
Posix_QextSerialPort *myCom;      //Linux系统内
4.2 串口定义:
//Windows中有两种查询模式,一种polling模式,一种EventDriven模式
myCom = new Win_QextSerialPort("COM1",QextSerialBase::Polling);                 //
myCom = new Win_QextSerialPort("COM1",QextSerialBase::EventDriven);
//Linux中只有Polling模式
myCom = new Posix_QextSerialPort("/dev/ttyS0",QextSerialBase::Polling);
事件驱动方式EventDriven就是使用事件处理串口的读取,一旦有数据到来,就会发出readyRead()信号,我们可以关联该信号来读取串口的数据。在事件驱动的方式下,串口的读写是异步的,调用读写函数会立即返回,它们不会冻结调用线程。
查询方式Polling则不同,读写函数是同步执行的,信号不能工作在这种模式下,而且有些功能也无法实现。但是这种模式下的开销较小。我们需要自己建立定时器来读取串口的数据。
在Windows下支持以上两种模式,而在Linux下只支持Polling模式。
4.3 串口打开模式
myCom ->open(QIODevice::ReadWrite); //打开模式
| QIODevice::Unbuffered | 0x0020 | 描述 |
| QIODevice::NotOpen | 0x0000 | |
| QIODevice::ReadOnly | 0x0001 | |
| QIODevice::WriteOnly | 0x0002 | |
| QIODevice::ReadWrite | ReadOnly | WriteOnly | |
| QIODevice::Append | 0x0004 | |
| QIODevice::Truncate | 0x0008 | |
| QIODevice::Text | 0x0010 |
4.4 串口的配置函数

myCom->setBaudRate(BAUD9600);          //波特率设置,我们设置为9600
myCom->setDataBits(DATA_8);            //数据位设置,我们设置为8位数据位
myCom->setParity(PAR_NONE);           //奇偶校验设置,我们设置为无校验
myCom->setStopBits(STOP_1);            //停止位设置,我们设置为1位停止位
myCom->setFlowControl(FLOW_OFF);      //控制流

myCom->setTimeout(long);              //设置时间间隔
setTimeout(long)参数决定了Polling查询模式的读取串口的速度。
4.5 串口工作
connect(myCom,SIGNAL(readyRead()),this,SLOT(readMyCom()));    //EventDriven模式下才能触发readyRead()信号
connect(readTimer,SIGNAL(timeout()),this,SLOT(readMyCom()));  //Polling模式定时器触发timeout()信
4.6 串口读取数据
QByteArray temp = myCom->readAll();    //返回读取的字节
int byteLen = myCom->bytesAvailable(); //返回串口缓冲区字节数
4.7 串口写数据
myCom -> Write(const char * data, qint64 maxSize );          //
myCom -> Write(const char * data );                          //
myCom -> Write(const QByteArray & byteArray);                //
int byteLen = myCom->bytesToWrite();                        //输出写数据的字节数
//bytesWritten()信号函数来获取已经发送的数据的大小。
5、Qt5以后版本QSerialPort介绍
5.1 .pro文件内需要加上如下代码
QT += serialport //加在第一行或者第二行
5.2 网上一段利用QSerialPort写的串口通信代码(转自:http://www.doc88.com/p-645858545768.html)
#include "dialog.h"
#include "ui_dialog.h"

Dialog::Dialog(QWidget *parent) :
    QDialog(parent),
    ui(new Ui::Dialog)
{
    ui->setupUi(this);
    read_port = new mythread(this);
    connect(this->read_port, SIGNAL(read_port_data()), this,  SLOT(display_data()));
}

Dialog::~Dialog()
{
    //delete this->my_serialport;
    delete ui;
}

void Dialog::on_pushButton_clicked()                   //open serial,打开串口
{
    this->read_port->start();
}

void Dialog::display_data()                            //显示数据
{
    ui->textBrowser->setText(this->read_port->requestData);
}
//对话框头文件
#ifndef DIALOG_H
#define DIALOG_H

#include "mythread.h"

namespace Ui
{
    class Dialog;
}

class Dialog : public QDialog
{
    Q_OBJECT
public:
    explicit Dialog(QWidget *parent = 0);
    ~Dialog();
private slots:
    void on_pushButton_clicked();
    void display_data();
private:
    Ui::Dialog *ui;
    mythread *read_port;
};

#endif // DIALOG_H
#include "mythread.h"

mythread::mythread(QObject *parent) :
    QThread(parent)
{
    my_serialport = new QSerialPort(this);
}

void mythread::run()
{
    this->my_serialport->setPortName("com3");
    this->my_serialport->open(QIODevice::ReadWrite);
    this->my_serialport->setBaudRate(115200);
    this->my_serialport->setDataBits(QSerialPort::Data8);
    this->my_serialport->setParity(QSerialPort::NoParity);
    this->my_serialport->setStopBits(QSerialPort::OneStop);
    this->my_serialport->setFlowControl(QSerialPort::NoFlowControl);

    while(1)
    {
        requestData = "";
        while(this->my_serialport->waitForReadyRead(10))
        {
            requestData += this->my_serialport->readAll();
        }

        if(!requestData.isEmpty())
        {
            emit(this->read_port_data());
            qDebug() << "===============" <<requestData;
        }
    }
}
6、如何抓取串口数据
6.1 、使用超级终端
Windows XP之前(包括Windows XP)版本系统自带,程序位置:
开始 ->程序->附件->通讯 ->超级终端。
6.2、使用串口调试助手
串口调试助手软件非常多:例如CommAssistant.exe、
3、使用Bus Hound工具(推荐使用)
下载地址:http://www.xz7.com/dir/208/248/200604121464.html
6.4 虚拟串口调试工具
常用的两款虚拟串口调试工具:
1、VSPD下载地址: http://www.cr173.com/soft/21406.html
2、VSPM下载地址:http://www.onlinedown.net/soft/58180.htm
通过虚拟软件,进行虚拟设置后,并以串口调试助手工具配合工作。这样就可以在没有物理串口的条件下进行调试测试等。