引言:
本人所属施工单位,在建项目较多,通讯录是以项目为单位挂接在公司内部网站通讯录板块,以静态页面展示。一直以来都是项目部办公室通过电话、邮件等方式通知总部信息部门变更通讯录,日常维护的工作量较大。最近受领导委托设计一款能让项目部自助维护通讯录的软件,一二级部门标题要加以区分,要方便排序,方便维护,还要统一风格显示。

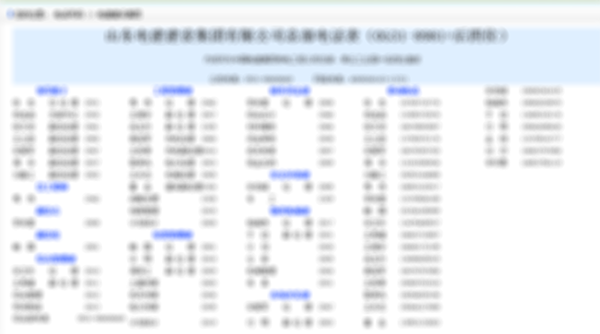
↑公司现有通讯录效果展示
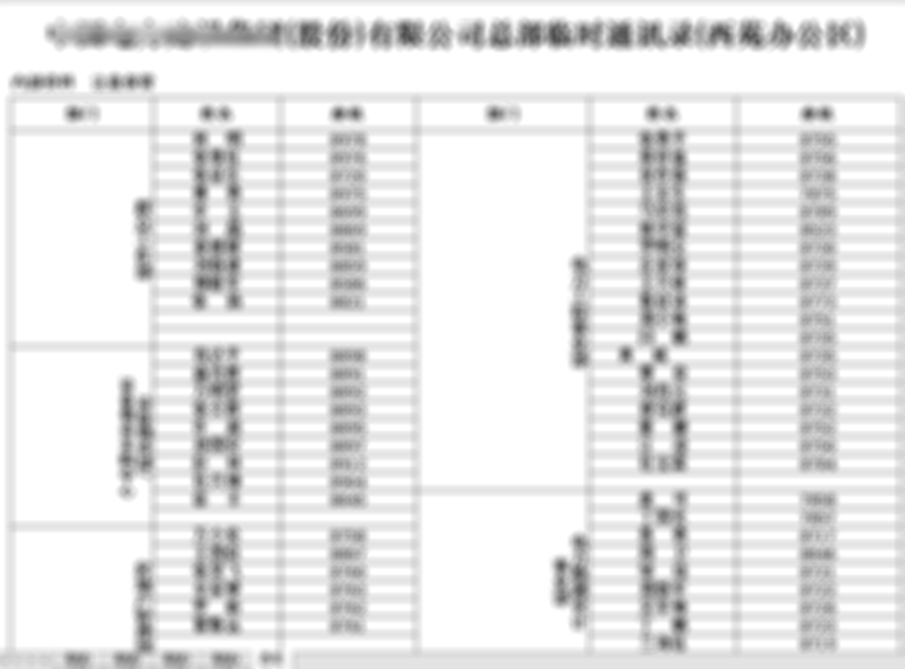
第一种方案是后台挂接Excel表格,前台展示,这种显示效果一般,不符合要求。

↑Excel通讯录效果展示
第二种方案是后台单条录入,前台用表格(XXGrid,Repeater)展示,这种维护方便,但是不太方便排版。

↑第三方表格通讯录效果展示
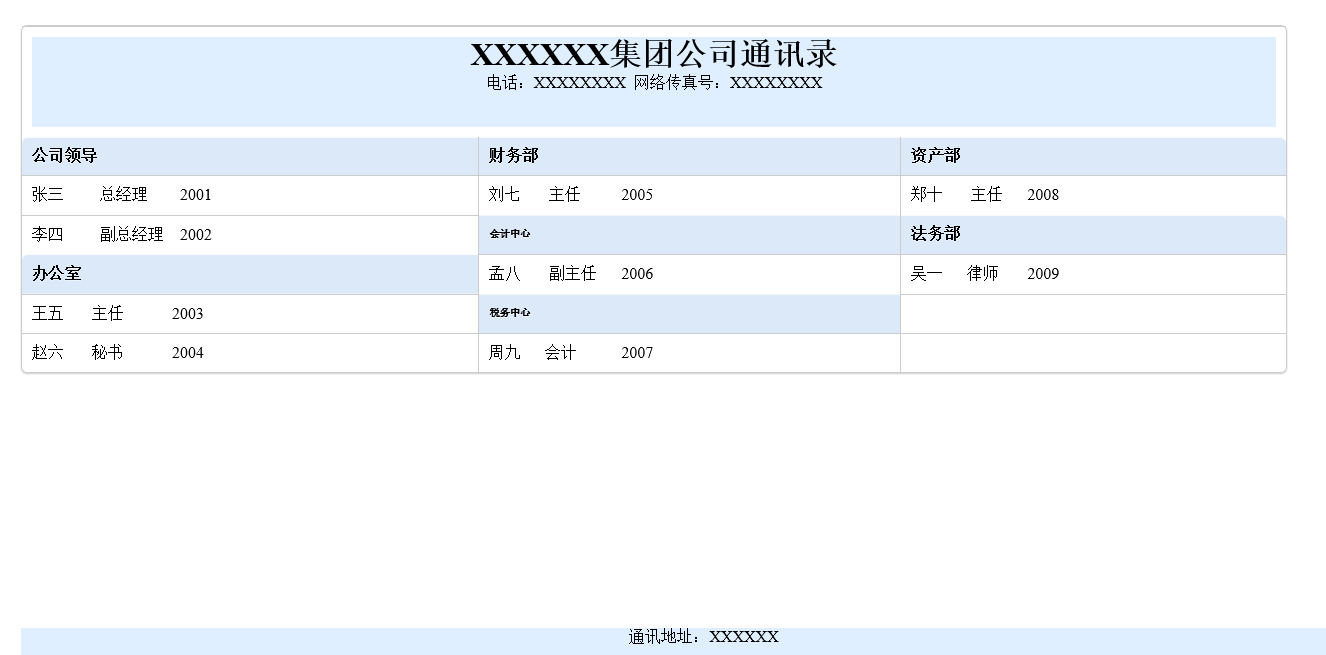
第三种方案是后台编辑HTML表格,前台使用css样式调整显示风格。这种方案符合预期,但是让非技术人员编辑HTML表格,而且要统一风格,难度有点大。于是构思怎样简化用户操作,想到了用在线编辑器固定Table样式,然后通过自定义按钮实现简单的文字调整。

↑预期效果展示
其实技术实现并不难,主要是细节问题处理和调试工作繁琐,本人花费两天时间研究并实现了这个功能,下面详细展开说一下。
我这里使用的是KindEditor,最新版可以到官网下载。
首先新建一个空白页面,引用以下脚本文件:
<script src="Script/jquery-1.8.2.min.js"></script>
<script src="Script/kindeditor/kindeditor-all-min.js"></script>
<script src="Script/kindeditor/lang/zh-CN.js"></script>
然后自己设计或从网上找一些漂亮的table样式,比如我在百度找了一段css样式(版权归原作者啊):

 * {
            margin: 0;
            padding: 0;
        }

        body {
            padding: 40px 50px;
        }

        .demo {
             600px;
            margin: 40px auto;
            font-family: 'trebuchet MS', 'Lucida sans', Arial;
            font-size: 14px;
            color: #444;
        }
        .header {
            text-align:center;
            background-color:#dfefff;
            height:90px;
            100%;
        }
        .footer {
            text-align:center;
            background-color:#dfefff;
            height:30px;
            100%;
            position:fixed;
            bottom:0;
        }
        table {
            *border-collapse: collapse; /* IE7 and lower */
            border-spacing: 0;
             100%;
            border: solid #ccc 1px;
            -moz-border-radius: 6px;
            -webkit-border-radius: 6px;
            border-radius: 6px;
            -webkit-box-shadow: 0 1px 1px #ccc;
            -moz-box-shadow: 0 1px 1px #ccc;
            box-shadow: 0 1px 1px #ccc;
        }

            table tr {
                -o-transition: all 0.1s ease-in-out;
                -webkit-transition: all 0.1s ease-in-out;
                -moz-transition: all 0.1s ease-in-out;
                -ms-transition: all 0.1s ease-in-out;
                transition: all 0.1s ease-in-out;
            }

                table .highlight,
                table tr:hover {
                    background: #fbf8e9;
                }

            table td,
            table th {
                border-left: 1px solid #ccc;
                border-top: 1px solid #ccc;
                padding: 10px;
                text-align: left;
            }

            table th {
                background-color: #dce9f9;
                -ms-filter: "progid:DXImageTransform.Microsoft.gradient (GradientType=0, startColorstr=#ebf3fc, endColorstr=#dce9f9)";
            -webkit-box-shadow: 0 1px 0 rgba(255, 255, 255, .8) inset;
            -moz-box-shadow: 0 1px 0 rgba(255, 255, 255, .8) inset;
            box-shadow: 0 1px 0 rgba(255, 255, 255, .8) inset;
            text-shadow: 0 1px 0 rgba(255, 255, 255, .5);
            background-image: linear-gradient(top, #ebf3fc, #dce9f9);
            border-top-style: none;
            border-top-color: inherit;
            border-top- medium;
        }

                table td:first-child,
                table th:first-child {
                    border-left: none;
                }

                table th:first-child {
                    -moz-border-radius: 6px 0 0 0;
                    -webkit-border-radius: 6px 0 0 0;
                    border-radius: 6px 0 0 0;
                }

                table th:last-child {
                    -moz-border-radius: 0 6px 0 0;
                    -webkit-border-radius: 0 6px 0 0;
                    border-radius: 0 6px 0 0;
                }

            table tr:last-child td:first-child {
                -moz-border-radius: 0 0 0 6px;
                -webkit-border-radius: 0 0 0 6px;
                border-radius: 0 0 0 6px;
            }

            table tr:last-child td:last-child {
                -moz-border-radius: 0 0 6px 0;
                -webkit-border-radius: 0 0 6px 0;
                border-radius: 0 0 6px 0;
            }
        /*----------------------*/
        .zebra td,
        .zebra th {
            padding: 10px;
            border-bottom: 1px solid #f2f2f2;
        }

        .zebra .alternate,
        .zebra tbody tr:nth-child(even) {
            background: #f5f5f5;
            -webkit-box-shadow: 0 1px 0 rgba(255,255,255,.8) inset;
            -moz-box-shadow: 0 1px 0 rgba(255,255,255,.8) inset;
            box-shadow: 0 1px 0 rgba(255,255,255,.8) inset;
        }

        .zebra th {
            text-align: left;
            text-shadow: 0 1px 0 rgba(255,255,255,.5);
            border-bottom: 1px solid #ccc;
            background-color: #eee;
            -ms-filter: "progid:DXImageTransform.Microsoft.gradient (GradientType=0, startColorstr=#f5f5f5, endColorstr=#eeeeee)";
            background-image: linear-gradient(top, #f5f5f5, #eee);
        }

            .zebra th:first-child {
                -moz-border-radius: 6px 0 0 0;
                -webkit-border-radius: 6px 0 0 0;
                border-radius: 6px 0 0 0;
            }

            .zebra th:last-child {
                -moz-border-radius: 0 6px 0 0;
                -webkit-border-radius: 0 6px 0 0;
                border-radius: 0 6px 0 0;
            }

        .zebra tfoot td {
            border-bottom: 0;
            border-top: 1px solid #fff;
            background-color: #f1f1f1;
        }

            .zebra tfoot td:first-child {
                -moz-border-radius: 0 0 0 6px;
                -webkit-border-radius: 0 0 0 6px;
                border-radius: 0 0 0 6px;
            }

            .zebra tfoot td:last-child {
                -moz-border-radius: 0 0 6px 0;
                -webkit-border-radius: 0 0 6px 0;
                border-radius: 0 0 6px 0;
            }
第三步需要找一些自定义按钮图标,添加到页面的Body里,为啥不能放到Head里呢,我也有点郁闷,放到Head里自定义按钮都不显示了,为此还调试了老半天。

/*----------编辑器上的自定义按钮图标------------*/

    .ke-icon-settfirst {
        background-image:url(/Resource/first.gif);
        width: 16px;
        height: 16px;
    }
    .ke-icon-settsecond {
        background-image:url(/Resource/second.gif);
        width: 16px;
        height: 16px;
    }
    .ke-icon-cancelthead {
        background-image:url(/Resource/cancel.gif);
        width: 16px;
        height: 16px;
    }
    .ke-icon-moveup {
        background-image:url(/Resource/moveup.gif);
        width: 16px;
        height: 16px;
    }
   .ke-icon-movedown {
        background-image:url(/Resource/movedown.gif);
        width: 16px;
        height: 16px;
    }
第四步在Body里添加textarea元素

<div>
        <textarea id="editor_id" name="content" style="700px;height:300px;">
         </textarea>
</div>
第五步是编写KindEditor脚本,也是难度最大的部分,主要实现的功能就是设置标题,上下左右移动和保存。闲话不说,具体看代码吧。

// 自定义插件 KindEditor.lang({ settfirst: '设置为一级标题', settsecond: '设置为二级标题', cancelthead: '取消标题', moveup: '向上移动', movedown: '向下移动', moveleft: '向左移动', moveright: '向右移动', savedata: '保存' }); KindEditor.plugin('settfirst', function (K) { var self = this, name = 'settfirst'; self.clickToolbar(name, function () { table = self.plugin.getSelectedTable(); if (table) { var cell = self.plugin.getSelectedCell(); if (cell == null) return; cell[0].style.cssText = ''; cell[0].outerHTML = cell[0].outerHTML.replace(/td/g, "th"); } }); }); KindEditor.plugin('settsecond', function (K) { var self = this, name = 'settsecond'; self.clickToolbar(name, function () { table = self.plugin.getSelectedTable(); if (table) { var cell = self.plugin.getSelectedCell(); if (cell == null) return; cell[0].style.cssText = 'font-color:#0000ff;font-size:10px;font-name:隶书'; cell[0].outerHTML = cell[0].outerHTML.replace(/td/g, "th"); } }); }); KindEditor.plugin('cancelthead', function (K) { var self = this, name = 'cancelthead'; self.clickToolbar(name, function () { table = self.plugin.getSelectedTable(); if (table) { var cell = self.plugin.getSelectedThead(); if (cell == null) return; cell[0].style.cssText = ''; cell[0].outerHTML = cell[0].outerHTML.replace(/th/g, "td"); } }); self.plugin.getSelectedThead = function () { return self.cmd.commonAncestor('th'); }; }); KindEditor.plugin('moveup', function (K) { var self = this, name = 'moveup'; self.clickToolbar(name, function () { var table = self.plugin.getSelectedTable(); if (table) { var row = self.plugin.getSelectedRow()[0]; var cells = self.plugin.getSelectedCell(); if (cells == null) cells = self.plugin.getSelectedThead(); var cell = cells[0]; var rowIndex = row.rowIndex, cellIndex = cell.cellIndex, preRowIndex = rowIndex - 1; // 第一行不能移动 if (preRowIndex <= 0) { return; } var prevCell = table[0].rows[preRowIndex].cells[cellIndex]; if (prevCell.innerHTML != "" && prevCell.innerHTML != " ") { if (confirm('目标单元格不为空,是否替换?')) { } else { return; } } prevCell.innerHTML = cell.innerHTML; cell.innerHTML = ""; } }); self.plugin.getSelectedThead = function () { return self.cmd.commonAncestor('th'); }; }); KindEditor.plugin('movedown', function (K) { var self = this, name = 'movedown'; self.clickToolbar(name, function () { var table = self.plugin.getSelectedTable(); if (table) { var row = self.plugin.getSelectedRow()[0]; var cells = self.plugin.getSelectedCell(); if (cells == null) cells = self.plugin.getSelectedThead(); var cell = cells[0]; var rowIndex = row.rowIndex, cellIndex = cell.cellIndex, nextRowIndex = rowIndex + 1; // 最后一行不能移动 if (nextRowIndex >= table[0].rows.length) { return; } var nextCell = table[0].rows[nextRowIndex].cells[cellIndex]; if (nextCell.innerHTML != "" && nextCell.innerHTML != " ") { if (confirm('目标单元格不为空,是否替换?')) { } else { return; } } nextCell.innerHTML = cell.innerHTML; cell.innerHTML = ""; } }); self.plugin.getSelectedThead = function () { return self.cmd.commonAncestor('th'); }; }); KindEditor.plugin('moveleft', function (K) { var self = this, name = 'moveleft'; self.clickToolbar(name, function () { var table = self.plugin.getSelectedTable(); if (table) { var row = self.plugin.getSelectedRow()[0]; var cells = self.plugin.getSelectedCell(); if (cells == null) cells = self.plugin.getSelectedThead(); var cell = cells[0]; var rowIndex = row.rowIndex, cellIndex = cell.cellIndex, prevCellIndex = cellIndex - 1; // 最左一列不能移动 if (prevCellIndex < 0) { return; } var prevCell = table[0].rows[rowIndex].cells[prevCellIndex]; if (prevCell.innerHTML != "" && prevCell.innerHTML != " ") { if (confirm('目标单元格不为空,是否替换?')) { } else { return; } } prevCell.innerHTML = cell.innerHTML; cell.innerHTML = ""; } }); self.plugin.getSelectedThead = function () { return self.cmd.commonAncestor('th'); }; }); KindEditor.plugin('moveright', function (K) { var self = this, name = 'moveright'; self.clickToolbar(name, function () { var table = self.plugin.getSelectedTable(); if (table) { var row = self.plugin.getSelectedRow()[0]; var cells = self.plugin.getSelectedCell(); if (cells == null) cells = self.plugin.getSelectedThead(); var cell = cells[0]; var rowIndex = row.rowIndex, cellIndex = cell.cellIndex, nextCellIndex = cellIndex + 1; // 最右一列不能移动 if (nextCellIndex >= table[0].rows[rowIndex].cells.length) { return; } var nextCell = table[0].rows[rowIndex].cells[nextCellIndex]; if (nextCell.innerHTML != "" && nextCell.innerHTML != " ") { if (confirm('目标单元格不为空,是否替换?')) { } else { return; } } nextCell.innerHTML = cell.innerHTML; cell.innerHTML = ""; } }); self.plugin.getSelectedThead = function () { return self.cmd.commonAncestor('th'); }; }); KindEditor.plugin('savedata', function (K) { var self = this, name = 'savedata'; self.clickToolbar(name, function () { SaveData(); }); }); KindEditor.ready(function (K) { window.editor = K.create('#editor_id', { cssPath: 'Style/table.css', items: ['source', 'settfirst', 'settsecond', 'cancelthead', 'moveup', 'movedown', 'moveleft', 'moveright', '|', 'savedata'], fullscreenMode: true }); });
需要说明的是KindEditor可以引用外部样式,我就是用 cssPath: 'Style/table.css'来把表格样式固定的,也就是说,在外部定义好Table的css样式,在KindEditor里只需要考虑<tr><td>元素的创建合并,不需要考虑样式问题。
表格的保存按钮实现也很简单,我这里是用Ajax实现的保存功能,代码如下:

function SaveData() {

            var postData = { mode: "0", data: encodeURIComponent(window.editor.html()) };

            $.ajax({
                type: 'post',
                dataType: "text",
                url: RootPath() + "/DataHandler.ashx",//请求保存的服务器目录
                data: postData,
                cache: false,
                async: false,
                success: function (data) {
                    if (data == "ok") {
                        location.href = "ShowPhone.html";
                    }
                },
                error: function (data) {
                    alert("error:" + JSON.stringify(data));
                }
            });
        }
其中window.editor.html()是表格的内容,最好用encodeURIComponent函数对内容进行编码,不然到后台接收的时候可能会出现乱码或被拒绝的情况,后台接收到然后在解码即可。我这里用的C#语言,用Uri.UnescapeDataString 方法可实现解码。
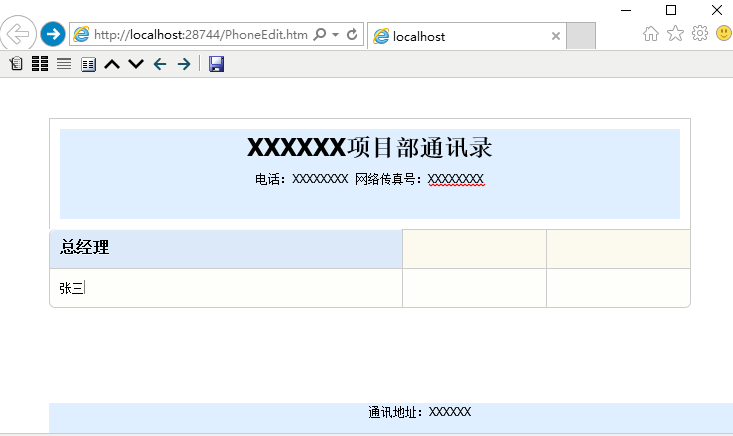
展示页在这里就不介绍了,先引用table的样式文件,再从数据库提取到Table代码,加载到Body里即可。以下是编辑器显示效果。

