[toc]
本博文介绍Nginx在Windows 10、Ubuntu16.04、Centos7下的安装方法
一. Windows 10 安装nginx
在Windows下安装相对简单,只需要下载安装包,解压即可。
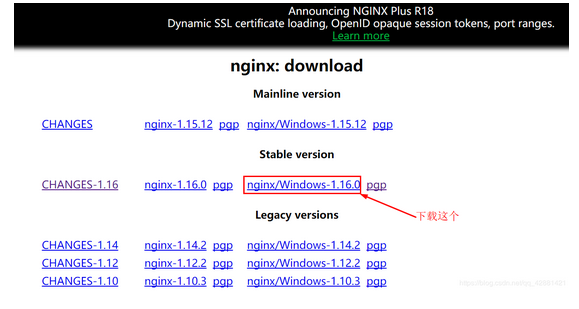
1.下载安装包
http://nginx.org/en/download.html,选择Stable version(最新的稳定版本)下载
2.解压安装
右键ngin-1.16.0.zip-->解压到当前文件夹

得到如下文件夹

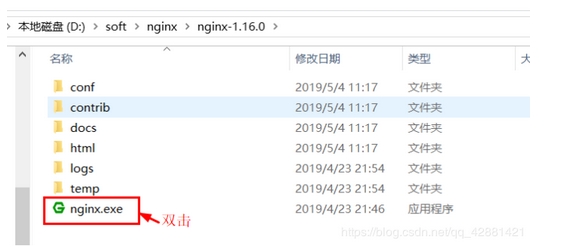
3.启动
进入解压后的文件夹nginx-1.16.0,双击nginx.exe启动nginx服务器
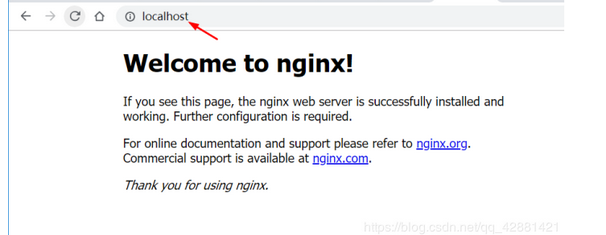
4.测试
浏览器输入localhost:80或者localhost,看到Welcome to nginx为安装成功。
二. Ubuntu16.04 安装apt nginx
1.安装必要的包
sudo apt install curl gnupg2 ca-certificates lsb-release
2.设置apt仓库安装最新稳定版本的nginx,执行以下命令
echo "deb http://nginx.org/packages/ubuntu `lsb_release -cs` nginx"
    | sudo tee /etc/apt/sources.list.d/nginx.list
3.导入官方签名密钥
curl -fsSL https://nginx.org/keys/nginx_signing.key | sudo apt-key add -
4.验证key
sudo apt-key fingerprint ABF5BD827BD9BF62
执行后会有如下输出
pub   rsa2048 2011-08-19 [SC] [expires: 2024-06-14]

573B FD6B 3D8F BC64 1079  A6AB ABF5 BD82 7BD9 BF62

uid   [ unknown] nginx signing key <signing-key@nginx.com>
5.安装nginx
sudo apt update
sudo apt install nginx
6.启动nginx
service nginx start
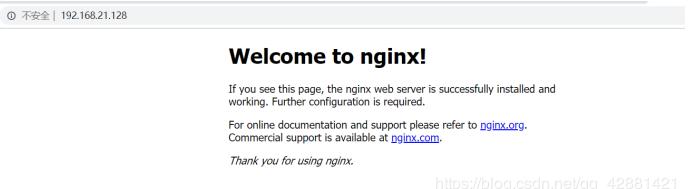
7.测试
浏览器输入ip:80或主机名称:80
三. Centos7 yum安装nginx
1.安装必要的包
sudo yum install yum-utils
2.新建nginx.repo文件
sudo nano /etc/yum.repos.d/nginx.repo
nginx.repo文件内容如下:
[nginx-stable]
name=nginx stable repo
baseurl=http://nginx.org/packages/centos/$releasever/$basearch/
gpgcheck=1
enabled=1
gpgkey=https://nginx.org/keys/nginx_signing.key

[nginx-mainline]
name=nginx mainline repo
baseurl=http://nginx.org/packages/mainline/centos/$releasever/$basearch/
gpgcheck=1
enabled=0
gpgkey=https://nginx.org/keys/nginx_signing.key
4.安装nginx
sudo yum install nginx
5.启动nginx
sudo service nginx start
6.测试
四. ubuntu/centos编译安装nginx
说明:
安装使用的是阿里云ECS ubuntu14.04系统。操作过程中可能不同版本系统,会有些差异。具体问题还请网上查询相关解决办法。相关源码包会不断更新,假如看到本文时间比较久,还是建议直接上官网下载最近的版本。linux下手动编译安装用户软件,源码放在/usr/local/src中,安装路径在/usr/local/下。
准备阶段:
安装nginx的依赖包
1.安装编译需要用到的库和工具
apt-get install build-essential libtool gcc automake autoconf make
2.安装pcre,支持重写rewrite功能
源码下载地址:https://ftp.pcre.org/pub/pcre/
wget https://ftp.pcre.org/pub/pcre/pcre-8.40.tar.gz
tar -zxvf pcre-8.40.tar.gz
cd pcre-8.40.tar.gz
./configure
make && make install
3.安装zlib, 支持gzip压缩
源码下载地址:http://zlib.net
wget http://zlib.net/zlib-1.2.11.tar.gz
tar -zxvf zlib-1.2.11.tar.gz
cd zlib-1.2.11
./configure
make && make install
4.安装ssl
源码地址:https://www.openssl.org/source/
wget https://www.openssl.org/source/openssl-1.0.2o.tar.gz
tar -zxvf openssl-1.0.2o.tar.gz
cd openssl-1.0.2o
./config
make && make install
安装运行NIGINX:
- 下载nginx源码
源码地址:http://nginx.org/en/download.html
wget http://nginx.org/download/nginx-1.13.12.tar.gz
tar -zxvf nginx-1.13.12.tar.gz
cd nginx-1.13.12
./configure --prefix=/usr/local/nginx
make && make install
root@haima-PC:/usr/local/nginx/conf/conf.d# nginx -v
nginx version: nginx/1.13.12 //看到这个就说明已经成功了
root@haima-PC:/usr/local/nginx/conf# tree
.
├── fastcgi.conf
├── fastcgi.conf.default
├── fastcgi_params
├── fastcgi_params.default
├── koi-utf
├── koi-win
├── mime.types
├── mime.types.default
├── nginx.conf
├── nginx.conf_bak
├── nginx.conf.default
├── scgi_params
├── scgi_params.default
├── uwsgi_params
├── uwsgi_params.default
└── win-utf

1 directory, 17 files
nginx.conf 为配置文件
#user  nobody;
worker_processes  1;

#error_log  logs/error.log;
#error_log  logs/error.log  notice;
#error_log  logs/error.log  info;

#pid        logs/nginx.pid;


events {
    worker_connections  1024;
}


http {
    include       mime.types;
    default_type  application/octet-stream;

    #log_format  main  '$remote_addr - $remote_user [$time_local] "$request" '
    #                  '$status $body_bytes_sent "$http_referer" '
    #                  '"$http_user_agent" "$http_x_forwarded_for"';

    #access_log  logs/access.log  main;

    sendfile        on;
    #tcp_nopush     on;

    #keepalive_timeout  0;
    keepalive_timeout  65;

    #gzip  on;

    include /usr/local/nginx/conf/conf.d/*.conf;

    server {
        listen       80;
        server_name  localhost;

        #charset koi8-r;

        #access_log  logs/host.access.log  main;

        location / {
            root   html;
            index  index.html index.htm;
        }

        #error_page  404              /404.html;

        # redirect server error pages to the static page /50x.html
        #
        error_page   500 502 503 504  /50x.html;
        location = /50x.html {
            root   html;
        }

        # proxy the PHP scripts to Apache listening on 127.0.0.1:80
        #
        #location ~ .php$ {
        #    proxy_pass   http://127.0.0.1;
        #}

        # pass the PHP scripts to FastCGI server listening on 127.0.0.1:9000
        #
        #location ~ .php$ {
        #    root           html;
        #    fastcgi_pass   127.0.0.1:9000;
        #    fastcgi_index  index.php;
        #    fastcgi_param  SCRIPT_FILENAME  /scripts$fastcgi_script_name;
        #    include        fastcgi_params;
        #}

        # deny access to .htaccess files, if Apache's document root
        # concurs with nginx's one
        #
        #location ~ /.ht {
        #    deny  all;
        #}
    }


    # another virtual host using mix of IP-, name-, and port-based configuration
    #
    #server {
    #    listen       8000;
    #    listen       somename:8080;
    #    server_name  somename  alias  another.alias;

    #    location / {
    #        root   html;
    #        index  index.html index.htm;
    #    }
    #}


    # HTTPS server
    #
    #server {
    #    listen       443 ssl;
    #    server_name  localhost;

    #    ssl_certificate      cert.pem;
    #    ssl_certificate_key  cert.key;

    #    ssl_session_cache    shared:SSL:1m;
    #    ssl_session_timeout  5m;

    #    ssl_ciphers  HIGH:!aNULL:!MD5;
    #    ssl_prefer_server_ciphers  on;

    #    location / {
    #        root   html;
    #        index  index.html index.htm;
    #    }
    #}

}
新建conf.d/php.hm文件夹
server{
    listen 80;

    server_name php.hm;

    access_log  /var/log/nginx/php.hm.access.log;
    #access_log  /data/logs/nginx/php.hm.access.log  main;

    location / {

        root html;

        index index.php index.html index.htm;

        }

    location ~ .php {

        root /wwwroot/test;

        fastcgi_pass 127.0.0.1:9000;

        fastcgi_index index.php;

        fastcgi_param SCRIPT_FILENAME $DOCUMENT_ROOT$fastcgi_script_name;

        include fastcgi_params;

        }
}
配置域名
vim /etc/hosts
127.0.0.1 php.hm
常用命令
nginx -t
./sbin/nginx
nginx -s reload
nginx -s stop