一、简介
1)、概述
Apache是世界使用排名第一的Web服务器软件。它可以运行在几乎所有广泛使用的计算机平台上,由于其跨平台和安全性被广泛使用,是最流行的Web服务器端软件。同时Apache音译为阿帕奇,是北美印第安人的一个部落,叫阿帕奇族,在美国的西南部。也是一个基金会的名称、一种武装直升机等等。
2)、特点
功能强大、配置简单、速度快、应用广泛、性能稳定可靠,并可做代理服务器或负载均衡来使用
3)、应用场景
使用Apache运行静态HTML网页、图片(处理静态小文件能力不及Nginx)。
使用Apache结合PHP引擎运行PHP、Perl、Python等程序。
使用Apache结合Tomcat/Resion运行JSP,JAVA等程序。
使用Apache作代理、负载均衡、rewrite规则过滤等等。
二、下载
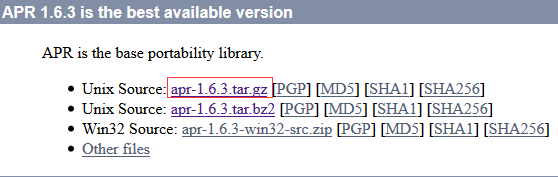
1)、下载apr
http://apr.apache.org/download.cgi
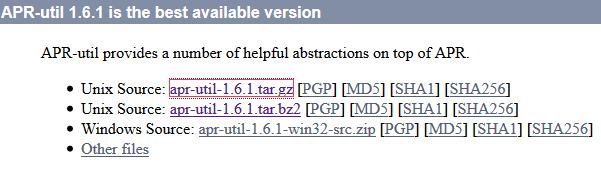
2)、下载apr-util
http://apr.apache.org/download.cgi
3)、下载pcre
https://ftp.pcre.org/pub/pcre/

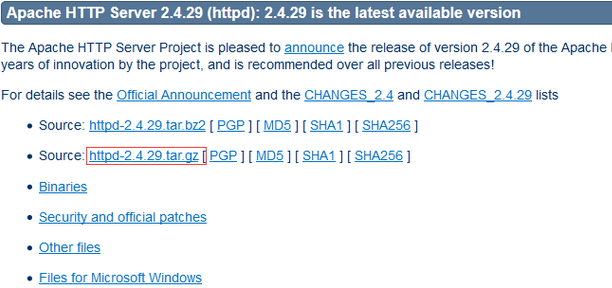
4)、下载 httpd
http://httpd.apache.org/download.cgi#apache24
三、安装
1). 在安装Apache之前先安装查看是否存在httpd
[root@httpd /]# hostname httpd [root@httpd /]# rpm -qa httpd
rpm -e --nodeps 加 rpm -qa httpd 查看到的包名
rpm命令-qa参数
-q 查询的意思
-a 所有软件包
-e 移除的意思
--nodeps 不做软件间的依赖检查
更过参数使用man rpm 或 rpm --help查看
2).安装Apache其他依赖包
1.安装前准备
1.1、 安装包准备图示:
1.2、解压准备安装包
使用 tar -zxvf 安装包名图示:


解压后文件:

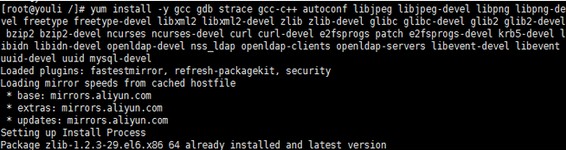
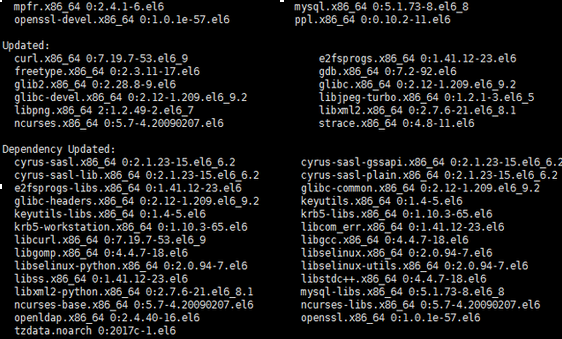
1.3、在CentOS安装软件的时候,可能缺少一部分支持库,而报错。这里首先安装系统常用的支持库。那么在安装的时候就会减少很多的错误的出现。
yum install -y gcc gdb strace gcc-c++ autoconf libjpeg libjpeg-devel libpng libpng-devel freetype freetype-devel libxml2 libxml2-devel zlib zlib-devel glibc glibc-devel glib2 glib2-devel bzip2 bzip2-devel ncurses ncurses-devel curl curl-devel e2fsprogs patch e2fsprogs-devel krb5-devel libidn libidn-devel openldap-devel nss_ldap openldap-clients openldap-servers libevent-devel libevent uuid-devel uuid mysql-devel
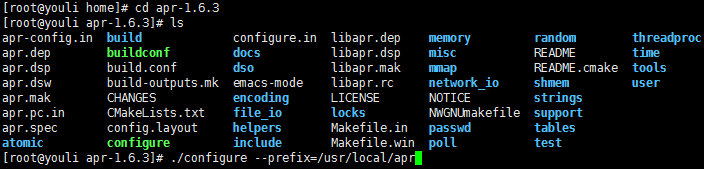
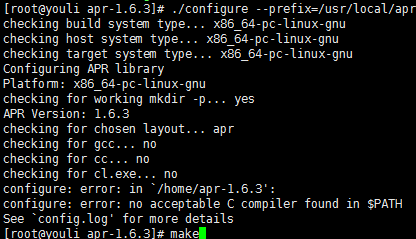
1.4、安装apr
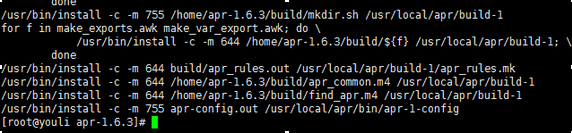
进入解压目录 cd apr-1.6.3 ,配置安装路径 ./configure --prefix=/usr/local/apr
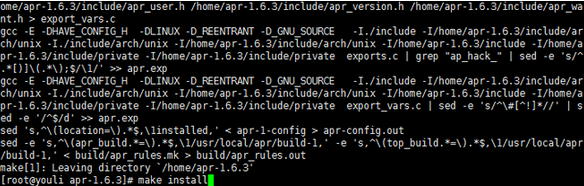
进行编译:make,安装:make install.
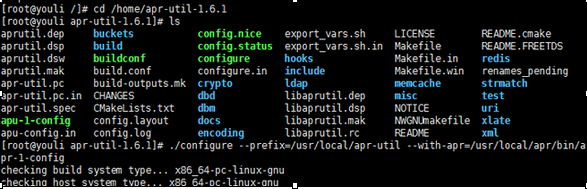
1.5、安装apr-util
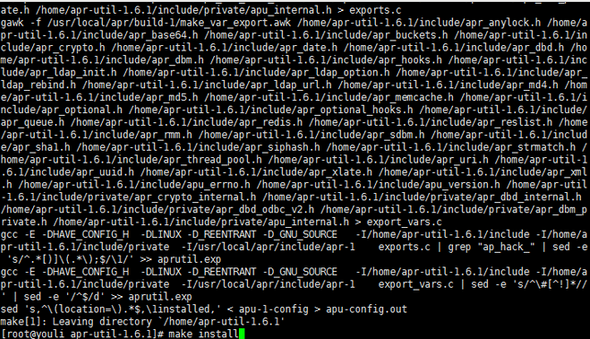
返回home:cd .. 进入解压目录 cd apr-util-1.6.1 ,配置安装路径 ./configure --prefix=/usr/local/apr-util --with-apr=/usr/local/apr/bin/apr-1-config
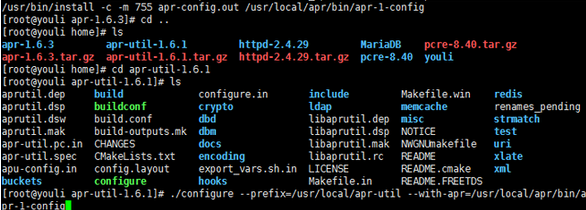
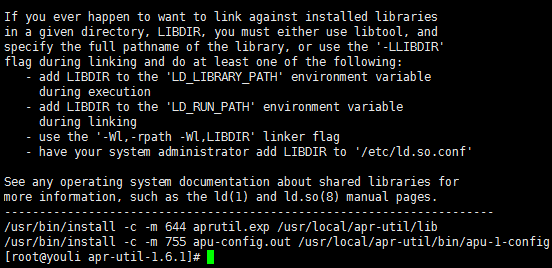
进行编译:make,安装:make install.


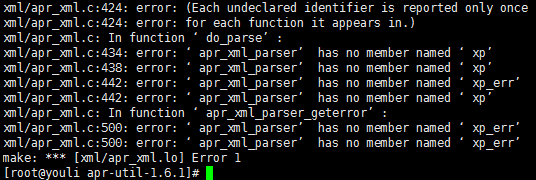
安装出错了!
解决办法:
安装 expat-devel
yum inatsll expat-devel -y
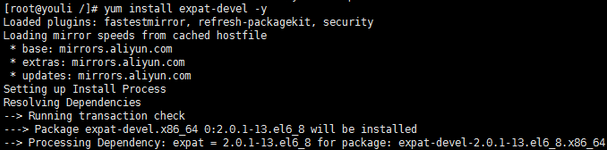
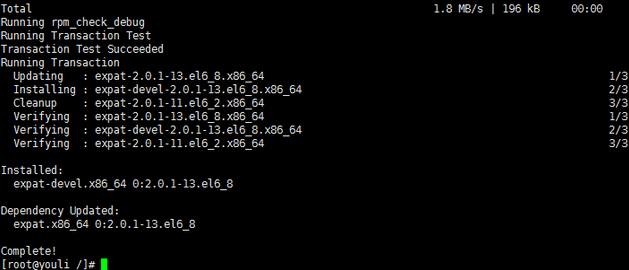
安装成功,返回cd /home/apr-util-1.6.1目录,继续上述编译安装步骤,从配置安装路径开始。

安装成功!
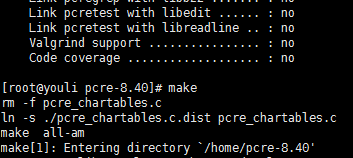
1.6、安装pcre——正则表达式库
返回home:cd .. 进入解压目录 cd pcre-8.40,配置安装路径./configure


进行编译:make,安装:make install.

1.7、安装httpd ——apache
在上述步骤中,我们还未解压httpd-2.4.29
现在我们解压httpd-2.4.29:剪切httpd-2.4.4.tar.bz2到/usr/local/src下,然后进行解压操作
命令:mv httpd-2.4.4.tar.bz2 /usr/local/src tar -xjvf httpd-2.4.4.tar.bz2
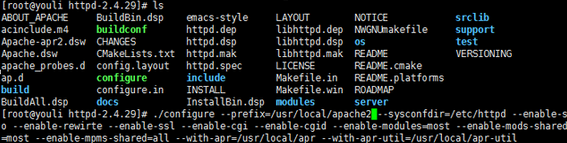
返回到:cd /usr/local/ 创建: mkdir -p /usr/local/apache2

返回home:cd src 进入解压目录 cd httpd-2.4.29, 配置安装路径./configure --prefix=/usr/local/apache2 --sysconfdir=/etc/httpd --enable-so --enable-rewirte --enable-ssl --enable-cgi --enable-cgid --enable-modules=most --enable-mods-shared=most --enable-mpms-shared=all --with-apr=/usr/local/apr --with-apr-util=/usr/local/apr-util
解释:
--enable-so:支持动态共享模块,如果支持php将不能与apache一起工作。必须要有
--enable-ssl:启用ssl功能,如果不启用将无法使用https
--enable-mpms-shared=all:prefork、worker、event
--with-mpm=event:event为默认
--enable-rewrite:支持URL重写
--enable-cgi :支持cgi
--enable-cgid:httpd使用event或者worker得启用被线程方式访问
--enable-modules=most :启用大多数模块
--enable-mods-shared=most:启用大多数共享模块
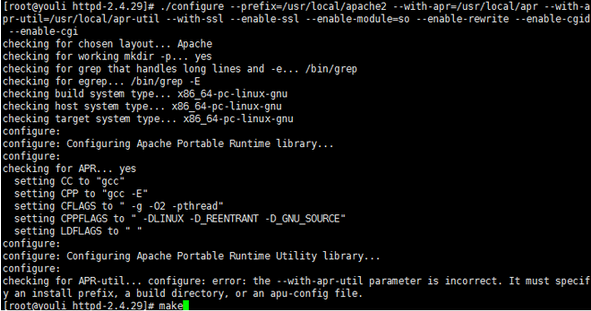
出现上图情况,检查apr-util安装是否成功!去cd /usr/local 用:ls 命令查看是否存在apr-util文件夹
成功安装apr-util后在继续配置Apache的安装目录。
注:如果出现上述情况,作为新手没注意,那么在执行make命令的时候会报如下错误:
make: *** No targets specified and no makefile found. Stop.
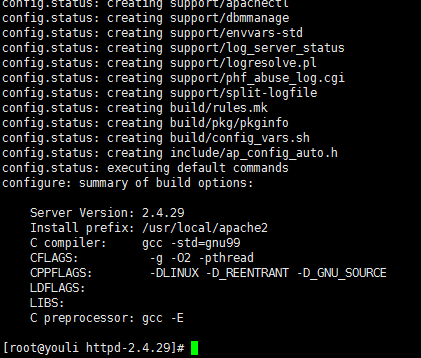
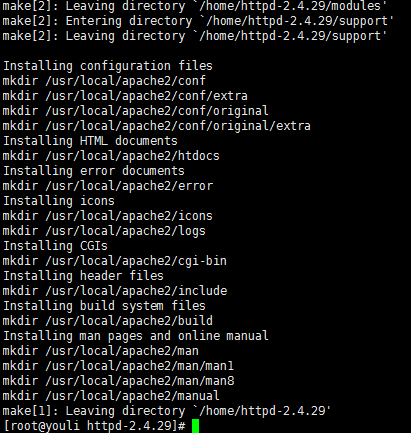
进行编译:make,安装:make install.

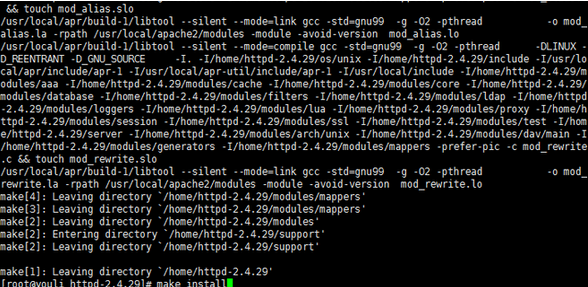
成功安装
四、启动和配置Apache
第一种:直接启动Apache:/usr/local/apache/bin/apachectl start
第二种:配置
1)、为了启动httpd更加方便,配置如下内容:
#!/bin/bash
#
# httpd Startup script for the Apache HTTP Server
#
# chkconfig: - 85 15
# description: Apache is a World Wide Web server. It is used to serve
# HTML files and CGI.
# processname: httpd
# config: /etc/httpd/conf/httpd.conf
# config: /etc/sysconfig/httpd
# pidfile: /var/run/httpd.pid
# Source function library.
. /etc/rc.d/init.d/functions
if [ -f /etc/sysconfig/httpd ]; then
. /etc/sysconfig/httpd
fi
# Start httpd in the C locale by default.
HTTPD_LANG=${HTTPD_LANG-"C"}
# This will prevent initlog from swallowing up a pass-phrase prompt i f
# mod_ssl needs a pass-phrase from the user.
INITLOG_ARGS=""
# Set HTTPD=/usr/sbin/httpd.worker in /etc/sysconfig/httpd to use a server
# with the thread-based "worker" MPM; BE WARNED that some modules may not
# work correctly with a thread-based MPM; notably PHP will refuse to start.
# Path to the apachectl script, server binary, and short-form for messages.
apachectl=/usr/local2/apache/bin/apachectl
httpd=${HTTPD-/usr/local2/apache/bin/httpd}
prog=httpd
pidfile=${PIDFILE-/var/run/httpd.pid}
lockfile=${LOCKFILE-/var/lock/subsys/httpd}
RETVAL=0
start() {
echo -n $"Starting $prog: "
LANG=$HTTPD_LANG daemon --pidfile=${pidfile} $httpd $OPTIONS
RETVAL=$?
echo
[ $RETVAL = 0 ] && touch ${lockfile}
return $RETVAL
}
stop() {
echo -n $"Stopping $prog: "
killproc -p ${pidfile} -d 10 $httpd
RETVAL=$?
echo
[ $RETVAL = 0 ] && rm -f ${lockfile} ${pidfile}
}
reload() {
echo -n $"Reloading $prog: "
if ! LANG=$HTTPD_LANG $httpd $OPTIONS -t >&/dev/null; then
RETVAL=$?
echo $"not reloading due to configuration syntax error"
failure $"not reloading $httpd due to configuration syntax error"
else
killproc -p ${pidfile} $httpd -HUP
RETVAL=$?
fi
echo
}
# See how we were called.
case "$1" in
start)
start
;;
stop)
stop
;;
status)
status -p ${pidfile} $httpd
RETVAL=$?
;;
restart)
stop
start
;;
condrestart)
if [ -f ${pidfile} ] ; then
stop
start
fi
;;
reload)
reload
;;
graceful|help|configtest|fullstatus)
$apachectl $@
RETVAL=$?
;;
*)
echo $"Usage: $prog {start|stop|restart|condrestart|reload|status|fullstatus|graceful|help|configtest}"
exit 1
esac
exit $RETVAL
将以上代码加入到vim /etc/init.d/httpd中
而后为此脚本赋予执行权限:
chmod +x /etc/rc.d/init.d/httpd
加入服务列表:
chkconfig --add httpd
给3,5启动
chkconfig --level 3,5 httpd on
2)、执行命令:vim /etc/httpd/httpd.conf 增加PidFile “/var/run/httpd.pid”

实质上在这一步配置基本完成了,当由于实际操作中,之前启动的Apache服务未关闭。在执行Apache命令的时候报错:

后来查到可能服务已开启,尝试用ps查看进程:ps -ef | grep httpd,在杀掉killall httpd,就ok了。
不过我的实际后续操作是在进行完该步操作的第五步的时候执行的,图示:
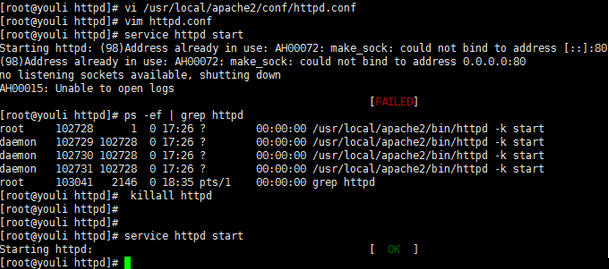
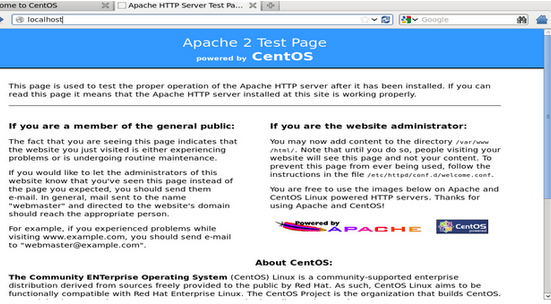
Apache启动成功!
成功后页面访问
3)、开启apache支持伪静态
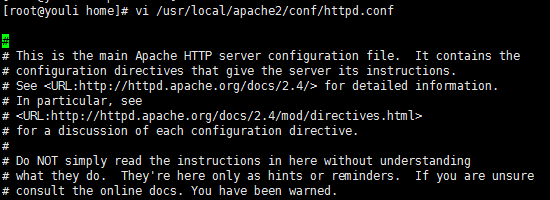
命令:vim /etc/httpd/httpd.conf
开启apache支持伪静态,
查找 LoadModule rewrite_module modules/mod_rewrite.so
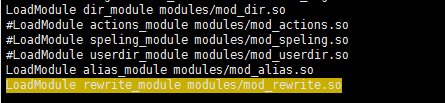
取消前面的注释,开启apache支持伪静态
找到:AllowOverride None
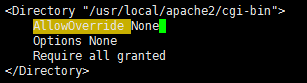
修改为:AllowOverride All 有三处都做修改,他的修改穿插在这一步,和下面一次两步。
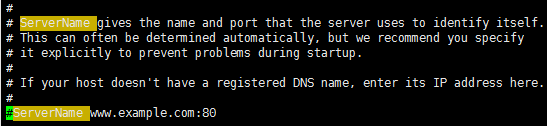
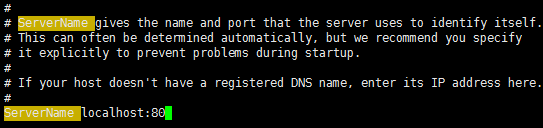
4)、配置ServerName
命令:vim /etc/httpd/httpd.conf
找到#ServerName www.example.com:80修改为:ServerName localhost:80。
5)、配置不显示目录结构
命令:vim /etc/httpd/httpd.conf
找到:Options Indexes FollowSymLinks
技巧:
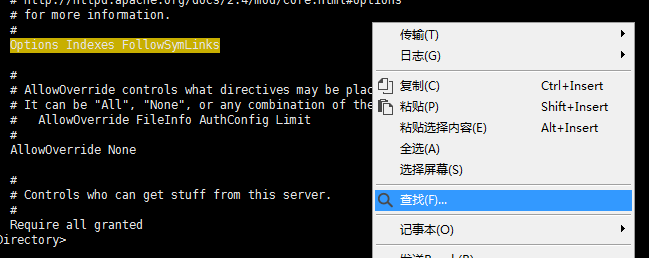
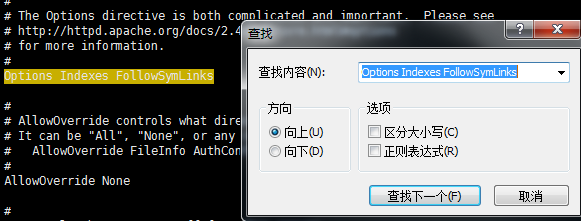
修改为:Options FollowSymLinks
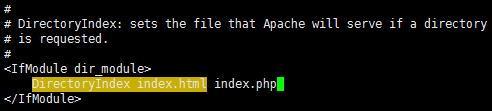
2)、配置DirectoryIndex
命令:vim /etc/httpd/httpd.conf
找到:DirectoryIndex index.html

修改为:DirectoryIndex index.html index.php
上述内容修改完后保存退出:Esc :wq!
5)、添加apache服务系统环境变量
vi /etc/profile #添加apache服务系统环境变量
在最后添加下面这一行
export PATH=$PATH:/usr/local/apache2/bin
6)、把apache加入到系统启动
命令:
1.cp /usr/local/apache2/bin/apachectl /etc/rc.d/init.d/httpd
2.vi /etc/init.d/httpd

在#!/bin/sh下面添加以下两行
#chkconfig:2345 10 90
#description:Activates/Deactivates Apache Web Server

7)、更改目录所有者与权限
chown daemon.daemon -R /usr/local/apache2/htdocs #更改目录所有者
chmod 700 /usr/local/apache2/htdocs -R #更改apache网站目录权限
8)、设置开机启动
命令:chkconfig httpd on
9)、启动停止重启
1、启动
service httpd start
2、停止
service httpd stop
3、重启
service httpd restart
4、查看端口状态
netstat -an | grep 80
10)、修改防火墙配置或者关闭防火墙
1. #修改防火墙配置:
命令: vi + /etc/sysconfig/iptables
#添加配置项
-A INPUT -m state --state NEW -m tcp -p tcp --dport 80 -j ACCEPT
-A INPUT -m state --state NEW -m tcp -p tcp --dport 443 -j ACCEPT
#重启防火墙
命令: service iptables restart
2.关闭防火墙
[root@localhost httpd-2.2.31]# /etc/init.d/iptables stop
iptables: Setting chains to policy ACCEPT: filter [ OK ]
iptables: Flushing firewall rules: [ OK ]
iptables: Unloading modules: [ OK ]