根据不同的环境来装配不同的bean
企业级开发中,我们一般有多种环境,比如开发环境、测试环境、UAT环境和生产环境。而系统中有些配置是和环境强相关的,比如数据库相关的配置,与其他外部系统的集成等。
如何才能实现一个部署包适用于多种环境呢?
Spring给我们提供了一种解决方案,这便是条件化装配bean的机制。最重要的是这种机制是在运行时决定该注入适用于哪个环境的bean对象,不需要重新编译构建。
下面使用Spring的profile机制实现dataSource对象的条件化装配。
1、给出开发环境、测试环境、生产环境dataSource的不同实现类
说明:此处只为演示条件化装配bean,不做真实数据源对象模拟。
public interface DataSource {
    void show();
}

public class DevDataSource implements DataSource{

    public DevDataSource(){
        show();
    }
    public void show() {
        System.out.println("开发环境数据源对象");
    }
}

public class TestDataSource implements DataSource{

    public TestDataSource() {
        show();
    }

    public void show() {
        System.out.println("测试环境数据源对象");
    }
}

public class ProDataSource implements DataSource{

    public ProDataSource() {
        show();
    }

    public void show() {
        System.out.println("生产环境数据源对象");
    }
}
2、使用profile配置条件化bean
其实profile的原理就是将不同的bean定义绑定到一个或多个profile之中,在将应用部署到不同的环境时,确保对应的profile处于激活状态即可。
这里我们使用JavaConfig的方式配置profile bean
@Configuration
public class DataSourceConfig {

    @Bean
    @Profile("dev")
    public DataSource devDataSource(){
        return new DevDataSource();
    }

    @Bean
    @Profile("test")
    public DataSource testDataSource(){
        return new TestDataSource();
    }

    @Bean
    @Profile("pro")
    public DataSource proDataSource(){
        return new ProDataSource();
    }
}
可以看到我们使用了@Profile注解,将不同环境的bean绑定到了不同的profile中。
3、激活profile
只要上面的两步还不行,我们还必须激活profile,这样Spring会依据激活的哪个profile,来创建并装配对应的bean对象。
激活profile需要两个属性。
spring.profiles.active
spring.profiles.default
可以在web.xml中配置Web应用的上下文参数,来激活profile属性。比如在web.xml中增加如下配置来激活dev的profile:
    <context-param>
        <param-name>spring.profiles.active</param-name>
        <param-value>dev</param-value>
    </context-param>
4、测试条件化装配
使用@ActiveProfiles注解在测试类中激活指定profile。
@RunWith(SpringJUnit4ClassRunner.class)
@ContextConfiguration(classes = {DataSourceConfig.class})
@ActiveProfiles("dev")
public class TestConditionDataSource {

    @Autowired
    private DataSource dataSource;

    @Test
    public void testDataSource(){
        Assert.assertNotNull(dataSource);
    }

}
输出:
开发环境数据源对象
我们profile换成生产环境的pro试下,
@RunWith(SpringJUnit4ClassRunner.class)
@ContextConfiguration(classes = {DataSourceConfig.class})
@ActiveProfiles("pro")
public class TestConditionDataSource {

    @Autowired
    private DataSource dataSource;

    @Test
    public void testDataSource(){
        Assert.assertNotNull(dataSource);
    }

}
输出:
生产环境数据源对象
通过spring的profile机制,我们实现了不同环境dataSource数据源对象的条件化装配。比较简单,就两步:1、使用@Profile注解为不同的bean配置profile(当然这里也可以是xml的方式),2、根据不同环境激活不同的profile。
使用@Conditional注解实现条件化的bean
Spring 4.0引入的新注解@Conditional注解,它可以用到带有@Bean注解的方法上,如果给定的条件计算结果为true,就会创建这个bean,否则不创建。
1、我们创建一个helloWorld对象
public class HelloWorld {

    public void sayHello(){
        System.out.println("conditional 装配helloworld");
    }
}
2、创建配置类
在该配置类中我们首先使用了@PropertySource注解加载了属性文件hello.properties,其次可以看到在helloWorld的bean配置中,除了@Bean注解外,多了一个@Conditional注解,不错,@Conditional注解是我们实现条件化装配bean的核心注解。
@Conditional注解中有一个HelloWorldConditional类,该类定义了我们创建该bean对象的条件。
@Configuration
@PropertySource("classpath:hello.properties")
public class HelloWorldConfig {

    @Bean
    @Conditional(HelloWorldConditional.class)
    public HelloWorld helloWorld(){
        return new HelloWorld();
    }
}
3、创建条件类HelloWorldConditional,需要实现Condition接口。
实现了Condition接口,重写了matches方法,在该方法中我们检测了环境变量中是否有hello属性,如果有就创建。没有则忽略。
注意:hello.properties中属性会存储到spring的Environment对象中,因此我们可以检测到其中的属性是否存在。
public class HelloWorldConditional implements Condition {
    public boolean matches(ConditionContext conditionContext, AnnotatedTypeMetadata annotatedTypeMetadata) {
        return conditionContext.getEnvironment().containsProperty("hello");
    }
}
4、测试条件装配
public class HelloWorldConditionTest {
    public static void main(String[] args) {
        ApplicationContext applicationContext = new AnnotationConfigApplicationContext(HelloWorldConfig.class);
        HelloWorld helloWorld = applicationContext.getBean("helloWorld",HelloWorld.class);
        helloWorld.sayHello();
    }
}
开始,我们在hello.properties中增加一条属性,
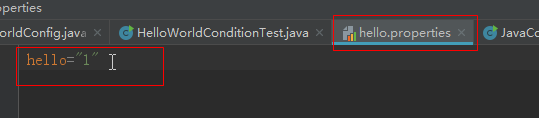
运行测试示例,会输出:
conditional 装配helloworld
说明此时,bean已成功装配。
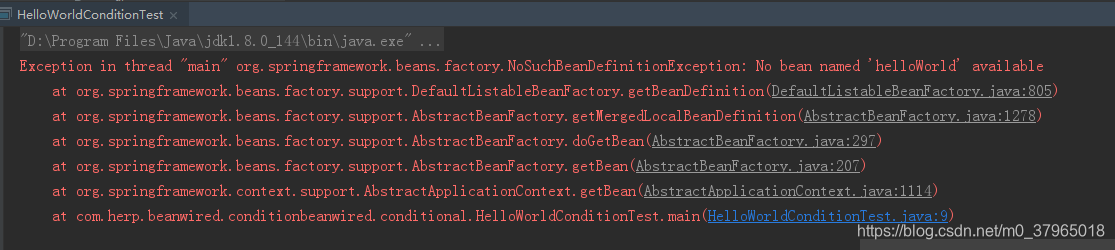
如果我们注释掉hello.properties的这行属性。再次运行示例,则会提示bean不存在。

提示没有“helloWorld”的bean对象,说明了条件不满足不会创建bean对象。
总结
Spring条件化装配bean的两种方式,第一种是使用profile机制,在bean的配置类中使用@profile注解,标识哪些bean对应哪个profile配置,然后在web.xml或Servlet启动参数中配置激活哪个profile来实现条件装配;第二种是使用@Conditional注解,在带有@Bean注解的方法上增加@Conditional注解,在注解属性值中提供一个实现了Condition接口的类(该类会重写matches方法,定义具体的创建条件)。<完>
