课程设计-第二周进展
- 本周计划完成的任务
- 本周实际完成情况(代码,文档,程序运行截图...),未完成计划的原因?如何改进?
- 本周遇到的问题与解决过程(要详细)
本周计划完成的任务
- Qt安装
- Qt学习
- Qt界面的初步设计
本周实际完成情况
Qt安装和使用
Qt简介
Qt是一款基于C++的跨平台开发框架,不仅提供了便捷好用的图形库,而且提供的框架比C++本身更好用(个人感觉)。
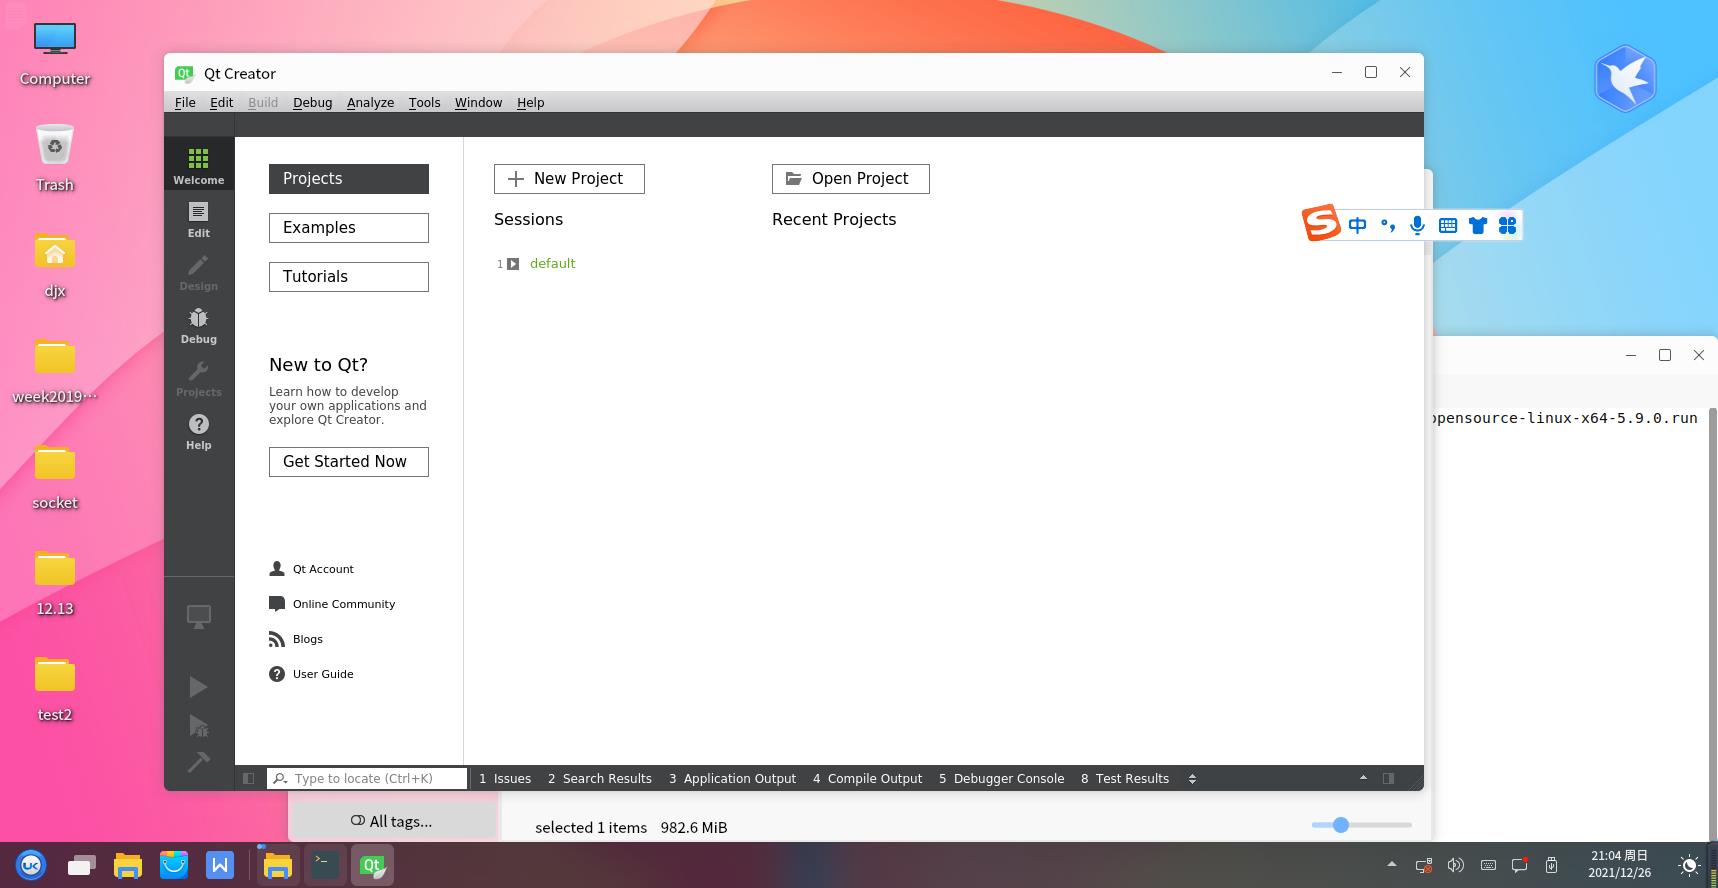
Qt和QtCreator
有些人可能会把Qt和QtCreator弄混,但是这两个是不同的概念。
- Qt:跨平台开发框架,包括图形库、其他功能库(多媒体、网络等)以及对C++的扩展。
- QtCreator:专为使用Qt框架开发的集成开发环境(IDE)。QtCreator本身基于Qt框架开发的。
QtCreator不是Qt,它运行起来只需要部分Qt库,所以QtCreator能运行,根本不代表Qt所有模块已经被完整安装了。
Qt版本
开发时经常涉及Qt版本问题,因为最新的版本可能提供更多的功能,但是有些以前的代码是用旧版本写的,因此要特别注意自己的版本。
- 查看Qt版本的方法:
菜单栏 -> 工具(Tools) -> 选项(options)
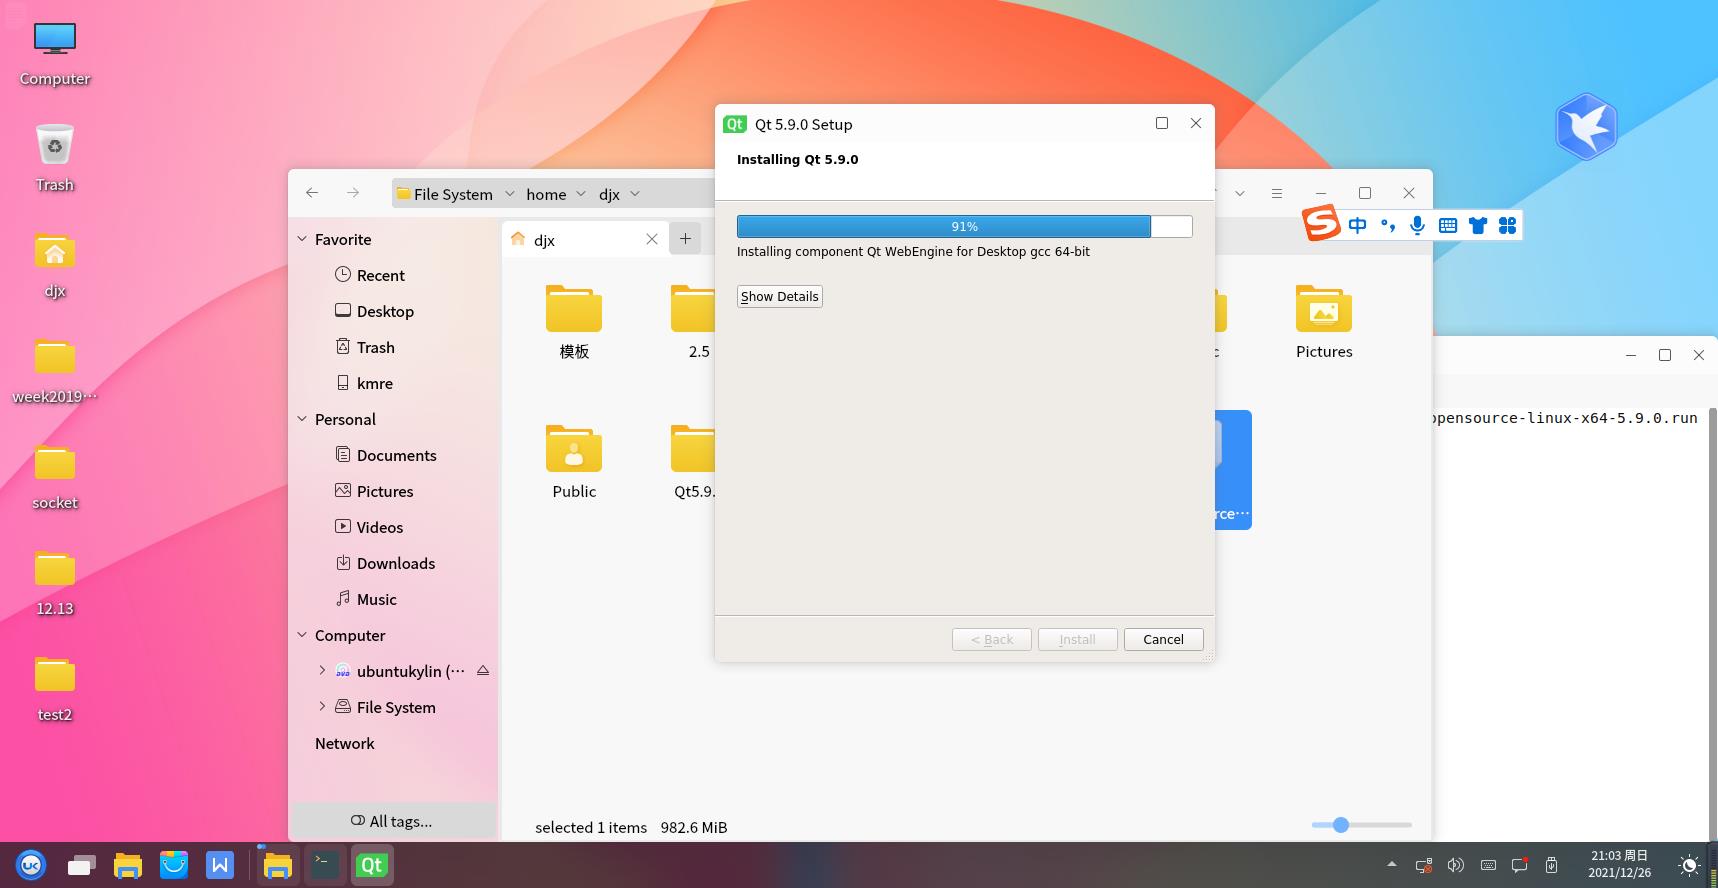
Qt安装
参考该教程完成安装和配置 http://c.biancheng.net/view/3858.html

Qt模块
Qt框架是由多个模块构成的。最核心的是QtCore,也是必须的。如果不使用这个核心模块,那其实是在用纯C++编程,跟Qt无关了。其他模块还有:
- GUI 图形界面
- Multimedia 多媒体
- Network 网络功能
- SQL 数据库
Qt学习
信号与槽函数
- 信号和槽是Qt特有的消息传输机制,它能将相互独立的控件关联起来。
- 在Qt中,用户和控件的每次交互过程称为一个事件,比如“用户点击按钮”是一个事件,“用户关闭窗口”也是一个事件。每个事件都会发出一个信号,例如用户点击按钮会发出“按钮被点击”的信号,用户关闭窗口会发出“窗口被关闭”的信号。
Qt 中的所有控件都具有接收信号的能力,一个控件还可以接收多个不同的信号。对于接收到的每个信号,控件都会做出相应的响应动作。例如,按钮所在的窗口接收到“按钮被点击”的信号后,会做出“关闭自己”的响应动作;再比如输入框自己接收到“输入框被点击”的信号后,会做出“显示闪烁的光标,等待用户输入数据”的响应动作。在 Qt 中,对信号做出的响应动作就称为槽。 - Qt Creator 提供了很强大的 Qt GUI 开发手册,很容易就能查到某个控件类中包含哪些信号函数和槽函数。举个例子,查看 QPushButton 类中信号函数和槽函数的过程是:
- 在程序中引入
头文件,双击选中“QPushButton”并按 "Fn+F1" 快捷键,就会弹出 QPushButton 类的使用手册,如下图所示。
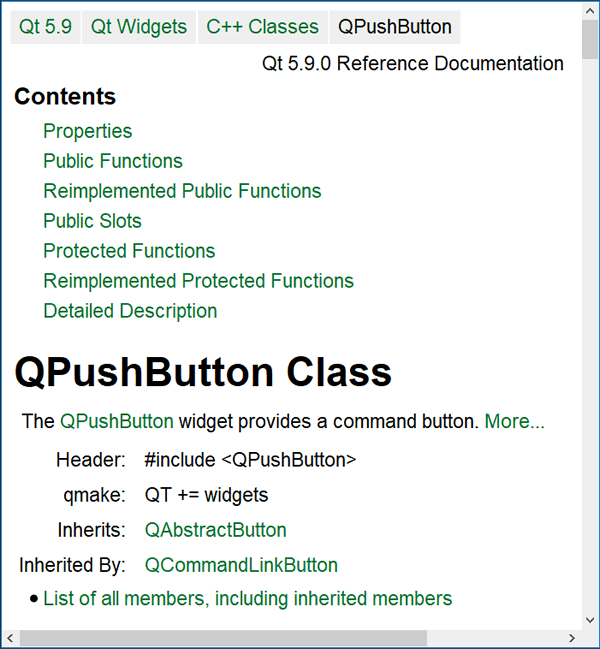
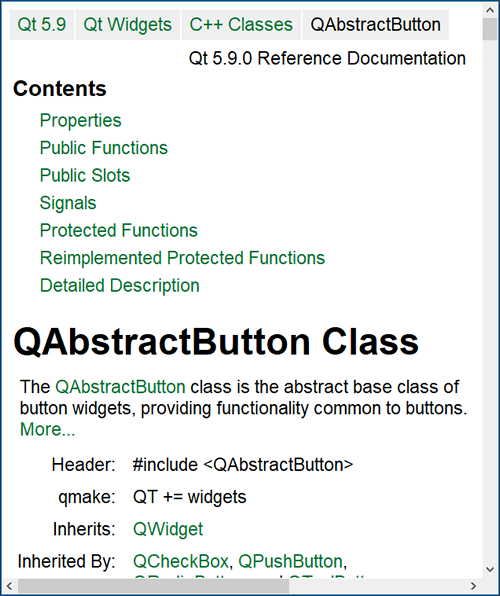
- 在 Contents 部分可以看到,QPushButton 类只提供了一些Public Slots属性的槽函数,没有提供信号函数。对于 QPushButton 类按钮,除了可以使用自己类提供的槽函数,还可以使用从父类继承过来的信号函数和槽函数。而QPushButton 的父类是 QAbstractButton,点击 QAbstractButton 就可以直接跳转到此类的使用手册,如下图所示:
connect()函数实现信号和槽
connect() 是 QObject 类中的一个静态成员函数,专门用来关联指定的信号函数和槽函数。
关联某个信号函数和槽函数,需要搞清楚以下 4 个问题:信号发送者是谁?哪个是信号函数?信号的接收者是谁?哪个是接收信号的槽函数?
仍以实现“按下按钮后窗口关闭”为例,先创建一个窗口和一个按钮,如下所示:
QWidget widget;
//定义一个按钮,它位于 widget 窗口中
QPushButton But("按钮控件",&widget);
//信号发送者是 But 按钮对象,要发送的信号是“按钮被点击”,可以用 QPushButton 类提供的 clicked() 信号函数表示;信号的接收者是 widget 主窗口对象,“窗口关闭”作为信号对应的槽,可以用 QWidget 类提供的 close() 函数表示。
在 Qt5 版本之前,connect() 函数最常用的语法格式是:
QObject::connect(const QObject *sender, const char *signal, const QObject *receiver, const char *method, Qt::ConnectionType type = Qt::AutoConnection)
各个参数的含义分别是:
-
- sender:指定信号的发送者;
- signal:指定信号函数,信号函数必须用 SIGNAL() 宏括起来;
- reveiver:指定信号的接收者;
- method:指定接收信号的槽函数,槽函数必须用 SLOT() 宏括起来;
- type 用于指定关联方式,默认的关联方式为 Qt::AutoConnection,通常不需要手动设定。
用 connect() 函数将 But 按钮的 clicked() 信号函数和 widget 窗口的 close() 槽函数关联起来,实现代码如下:
connect(&But, SIGNAL(clicked()), &widget, SLOT(close()));
如此就实现了“按下按钮会关闭窗口”的功能。
Qt5 版本中,connect() 函数引入了新的用法,常用的语法格式是:
QObject::connect(const QObject *sender, PointerToMemberFunction signal, const QObject *receiver, PointerToMemberFunction method, Qt::ConnectionType type = Qt::AutoConnection)
和旧版本相比,新版的 connect() 函数改进了指定信号函数和槽函数的方式,不再使用 SIGNAL() 和 SLOT() 宏。
例如,用新版 connect() 函数关联 But 按钮的 clicked() 信号函数和 widget 窗口的 close() 槽函数,实现代码为:
connect(&But, &QPushButton::clicked, &widget, &QWidget::close);
可以看到,新版 connect() 函数指定信号函数和槽函数的语法格式是&+函数所在类+函数名。
一个 connect() 函数只能关联一个信号函数和一个槽函数,程序中可以包含多个 connect() 函数,能实现以下几种效果:
-
- 关联多个信号函数和多个槽函数;
- 一个信号函数可以关联多个槽函数,当信号发出时,与之关联的槽函数会一个接一个地执行,但它们执行的顺序是随机的,无法人为指定哪个先执行、哪个后执行;
- 多个信号函数可以关联同一个槽函数,无论哪个信号发出,槽函数都会执行。
ui设计
初步设计
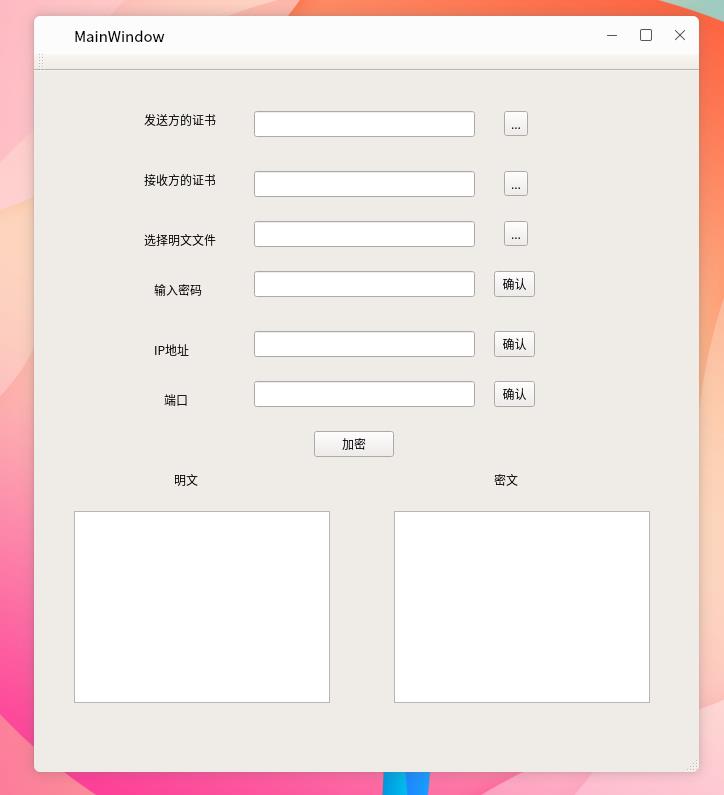
最终代码
点击查看代码
<?xml version="1.0" encoding="UTF-8"?>
<ui version="4.0">
 <class>MainWindow</class>
 <widget class="QMainWindow" name="MainWindow">
  <property name="geometry">
   <rect>
    <x>0</x>
    <y>0</y>
    <width>665</width>
    <height>718</height>
   </rect>
  </property>
  <property name="windowTitle">
   <string>MainWindow</string>
  </property>
  <widget class="QWidget" name="centralWidget">
   <widget class="QTextBrowser" name="textBrowser">
    <property name="geometry">
     <rect>
      <x>40</x>
      <y>440</y>
      <width>256</width>
      <height>192</height>
     </rect>
    </property>
   </widget>
   <widget class="QTextBrowser" name="textBrowser_2">
    <property name="geometry">
     <rect>
      <x>360</x>
      <y>440</y>
      <width>256</width>
      <height>192</height>
     </rect>
    </property>
   </widget>
   <widget class="QLabel" name="label">
    <property name="geometry">
     <rect>
      <x>460</x>
      <y>400</y>
      <width>54</width>
      <height>18</height>
     </rect>
    </property>
    <property name="text">
     <string>密文</string>
    </property>
   </widget>
   <widget class="QLabel" name="label_2">
    <property name="geometry">
     <rect>
      <x>140</x>
      <y>400</y>
      <width>54</width>
      <height>18</height>
     </rect>
    </property>
    <property name="text">
     <string>明文</string>
    </property>
   </widget>
   <widget class="QPushButton" name="pushButton">
    <property name="geometry">
     <rect>
      <x>280</x>
      <y>360</y>
      <width>80</width>
      <height>26</height>
     </rect>
    </property>
    <property name="text">
     <string>加密</string>
    </property>
   </widget>
   <widget class="QLineEdit" name="lineEdit">
    <property name="geometry">
     <rect>
      <x>220</x>
      <y>40</y>
      <width>221</width>
      <height>26</height>
     </rect>
    </property>
   </widget>
   <widget class="QLineEdit" name="lineEdit_2">
    <property name="geometry">
     <rect>
      <x>220</x>
      <y>100</y>
      <width>221</width>
      <height>26</height>
     </rect>
    </property>
   </widget>
   <widget class="QToolButton" name="toolButton_2">
    <property name="geometry">
     <rect>
      <x>470</x>
      <y>40</y>
      <width>24</width>
      <height>25</height>
     </rect>
    </property>
    <property name="text">
     <string>...</string>
    </property>
   </widget>
   <widget class="QToolButton" name="toolButton_3">
    <property name="geometry">
     <rect>
      <x>470</x>
      <y>100</y>
      <width>24</width>
      <height>25</height>
     </rect>
    </property>
    <property name="text">
     <string>...</string>
    </property>
   </widget>
   <widget class="QLabel" name="label_3">
    <property name="geometry">
     <rect>
      <x>140</x>
      <y>50</y>
      <width>54</width>
      <height>18</height>
     </rect>
    </property>
    <property name="text">
     <string/>
    </property>
   </widget>
   <widget class="QLabel" name="label_4">
    <property name="geometry">
     <rect>
      <x>110</x>
      <y>40</y>
      <width>81</width>
      <height>18</height>
     </rect>
    </property>
    <property name="text">
     <string>发送方的证书</string>
    </property>
   </widget>
   <widget class="QLabel" name="label_5">
    <property name="geometry">
     <rect>
      <x>110</x>
      <y>100</y>
      <width>71</width>
      <height>18</height>
     </rect>
    </property>
    <property name="text">
     <string>接收方的证书</string>
    </property>
   </widget>
   <widget class="QToolButton" name="toolButton_4">
    <property name="geometry">
     <rect>
      <x>470</x>
      <y>150</y>
      <width>24</width>
      <height>25</height>
     </rect>
    </property>
    <property name="text">
     <string>...</string>
    </property>
   </widget>
   <widget class="QLabel" name="label_6">
    <property name="geometry">
     <rect>
      <x>110</x>
      <y>160</y>
      <width>81</width>
      <height>18</height>
     </rect>
    </property>
    <property name="text">
     <string>选择明文文件</string>
    </property>
   </widget>
   <widget class="QLineEdit" name="lineEdit_3">
    <property name="geometry">
     <rect>
      <x>220</x>
      <y>150</y>
      <width>221</width>
      <height>26</height>
     </rect>
    </property>
   </widget>
   <widget class="QLabel" name="label_7">
    <property name="geometry">
     <rect>
      <x>120</x>
      <y>210</y>
      <width>81</width>
      <height>18</height>
     </rect>
    </property>
    <property name="text">
     <string>输入密码</string>
    </property>
   </widget>
   <widget class="QLineEdit" name="lineEdit_4">
    <property name="geometry">
     <rect>
      <x>220</x>
      <y>200</y>
      <width>221</width>
      <height>26</height>
     </rect>
    </property>
   </widget>
   <widget class="QPushButton" name="pushButton_2">
    <property name="geometry">
     <rect>
      <x>460</x>
      <y>200</y>
      <width>41</width>
      <height>26</height>
     </rect>
    </property>
    <property name="text">
     <string>确认</string>
    </property>
   </widget>
   <widget class="QLabel" name="label_8">
    <property name="geometry">
     <rect>
      <x>120</x>
      <y>270</y>
      <width>81</width>
      <height>18</height>
     </rect>
    </property>
    <property name="text">
     <string>IP地址 </string>
    </property>
   </widget>
   <widget class="QLabel" name="label_9">
    <property name="geometry">
     <rect>
      <x>130</x>
      <y>320</y>
      <width>81</width>
      <height>18</height>
     </rect>
    </property>
    <property name="text">
     <string>端口</string>
    </property>
   </widget>
   <widget class="QLineEdit" name="lineEdit_5">
    <property name="geometry">
     <rect>
      <x>220</x>
      <y>260</y>
      <width>221</width>
      <height>26</height>
     </rect>
    </property>
   </widget>
   <widget class="QLineEdit" name="lineEdit_6">
    <property name="geometry">
     <rect>
      <x>220</x>
      <y>310</y>
      <width>221</width>
      <height>26</height>
     </rect>
    </property>
   </widget>
   <widget class="QPushButton" name="pushButton_3">
    <property name="geometry">
     <rect>
      <x>460</x>
      <y>260</y>
      <width>41</width>
      <height>26</height>
     </rect>
    </property>
    <property name="text">
     <string>确认</string>
    </property>
   </widget>
   <widget class="QPushButton" name="pushButton_4">
    <property name="geometry">
     <rect>
      <x>460</x>
      <y>310</y>
      <width>41</width>
      <height>26</height>
     </rect>
    </property>
    <property name="text">
     <string>确认</string>
    </property>
   </widget>
  </widget>
  <widget class="QMenuBar" name="menuBar">
   <property name="geometry">
    <rect>
     <x>0</x>
     <y>0</y>
     <width>665</width>
     <height>23</height>
    </rect>
   </property>
  </widget>
  <widget class="QToolBar" name="mainToolBar">
   <attribute name="toolBarArea">
    <enum>TopToolBarArea</enum>
   </attribute>
   <attribute name="toolBarBreak">
    <bool>false</bool>
   </attribute>
  </widget>
  <widget class="QStatusBar" name="statusBar"/>
 </widget>
 <layoutdefault spacing="6" margin="11"/>
 <resources/>
 <connections/>
</ui>
遇到的问题与解决过程
问题1
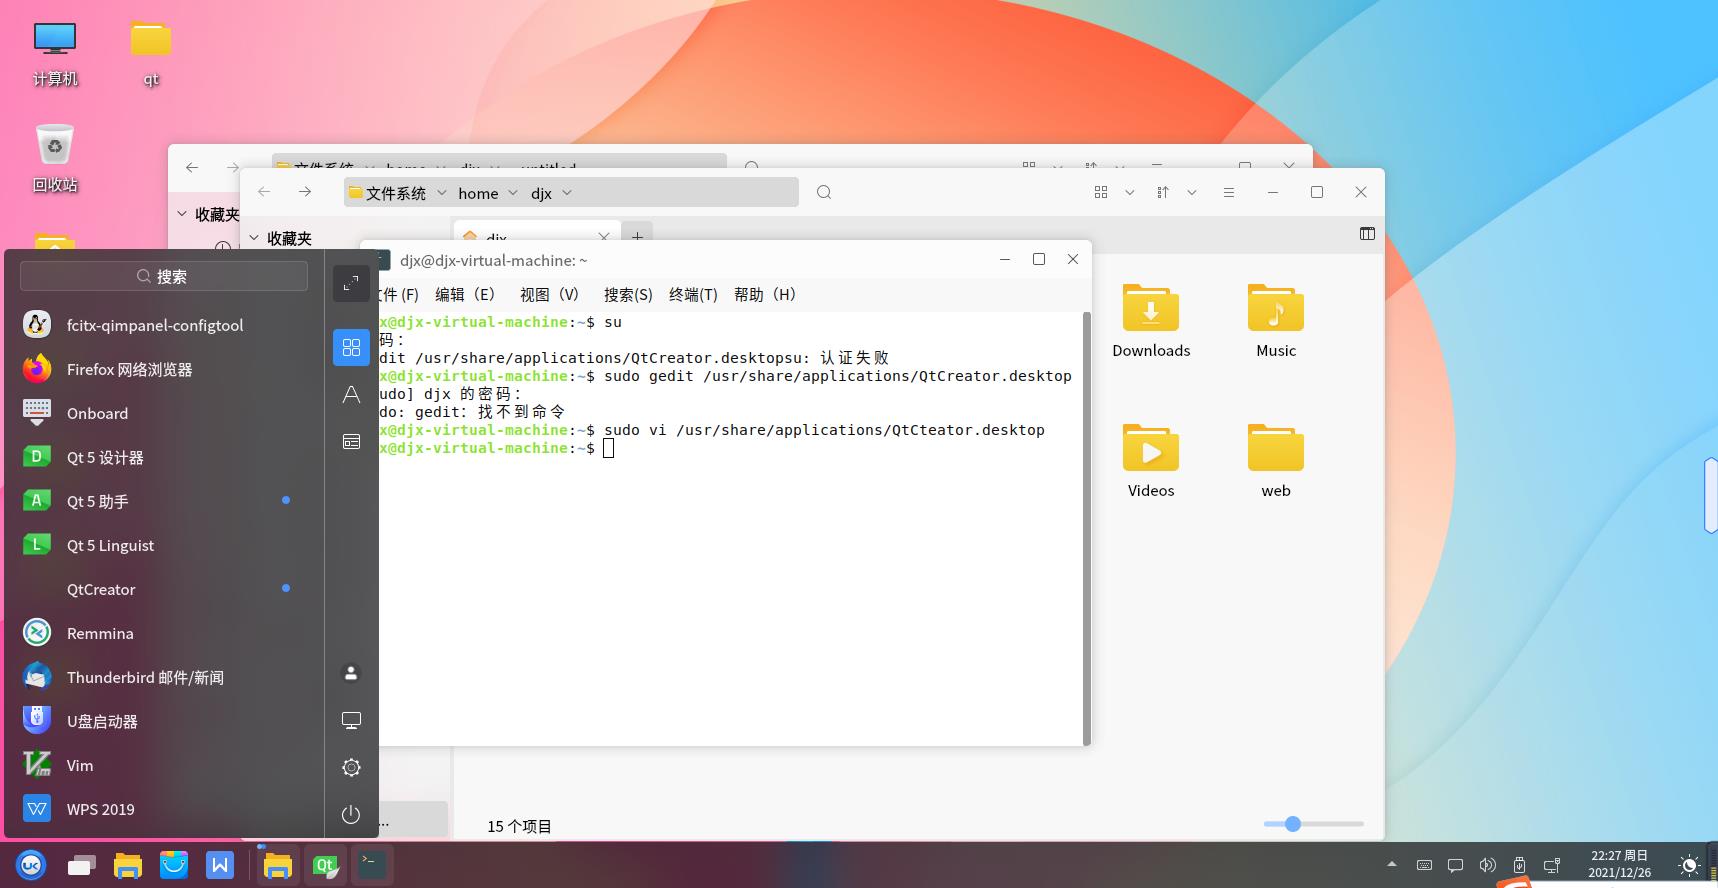
Linux下Qt应用软件没有启动图标?
解决
Ubuntu源码编译安装Qt后,没有自动创建图标,每次启动需要进入到目录下运行脚本,比较麻烦。可通过创建类似于windows系统的快捷方式进行快捷启动。
快捷方式一般以.desktop后缀命名,并保存到/usr/share/applications 目录下,有固定的语法,但常用的应用快捷方式可用以下命令:
[Desktop Entry]
Encoding=UTF-8
Name=软件的名称
Comment=软件注释
Exec=启动脚本路径
Icon=软件的图标
Terminal=是否打开终端
StartupNotify=true
Type=软件类别
Categories=分类
创建Qt5.9快捷方式:
[Desktop Entry]
Encoding=UTF-8
Name=QtCreator
Comment=QtCreator
Exec=/home/jianwang16/Qt5.9.0/Tools/QtCreator/bin/qtcreator  //根据自己电脑的安装路径
Icon=/home/jianwang16/Qt5.9.0/5.9/Src/qtdoc/doc/src/images/qt-logo.png
Terminal=false
StartupNotify=true
Type=Application
Categories=Application;
查看图标:
在/usr/share/applications 目录下找到图标,手动拖拽到启动栏即可。

问题2
cannot find -lGL错误
解决
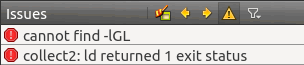
这是因为Qt找不到OpenGL的动态链接库(libGL.so)。OpenGL在大部分 Linux 发行版中都是默认安装的,包括 Ubuntu、CentOS 等,找不到该链接库一般都是路径不对。
Qt 默认在 /usr/lib/ 目录下查找动态链接库,但是很多 Linux 发行版将 OpenGL 链接库放在其它目录,例如我使用的是 CentOS 7,OpenGL 链接库位于 /usr/lib64/ 目录,而对于 Ubuntu,OpenGL 链接库位于 /usr/lib/i386-linux-gnu/mesa/ 目录。只要我们把 libGL.so 拷贝到 /usr/lib/ 目录,或者在 /usr/lib/ 目录下为 libGL.so 创建一个链接,就能解决问题。显然第二种办法更好。
另外,Linux 发行版自带的 OpenGL 链接库在后缀中添加了版本号,例如 libGL.so.1、libGL.so.1.2.0、libGL.so.1.3.1 等,但是 Qt 在链接阶段查找的 OpenGL 链接库是不带版本号的。
总起来说,我们需要在 /usr/lib/ 目录下为 OpenGL 链接库创建一个链接,并去掉版本号。
如果不知道当前 Linux 系统中 libGL.so 的具体路径,可以使用locate libGL命令或find /usr -name libGL*命令查找,然后使用ln -s创建链接。
#查找 libGL 所在位置
[root@localhost ~]# locate libGL
/usr/lib64/libGL.so
/usr/lib64/libGL.so.1
/usr/lib64/libGL.so.1.2.0
/usr/share/doc/mesa-libGL-9.2.5
/usr/share/doc/mesa-libGL-9.2.5/COPYING

#创建链接
[root@localhost ~]# ln -s /usr/lib64/libGL.so.1 /usr/lib/libGL.so
Linux 系统中可能存在多个版本的 libGL.so,为任意一个版本创建链接即可。普通用户没有权限创建链接,所以我使用了 root 用户。
完成以上操作,再次启动 Qt,然后编译或者运行,就不会出现“cannot find -lGL”错误了。