上篇文章介绍了通过定义两个接口和服务类,分别实现这两个接口,并且进行了一个服务的注册。
今天就来建立Controller

接下来就是在控制器中通过构造函数的方式注入接口(见代码块6行)
代码块2行的意思是在构造函数中注入之后,赋值给一个本地只读的变量。
从代码块11行往后就是建立acttion了,一个是做部门查询用的Index方法,一个是做新增部门用的Add方法。并且两种方法都是返回Task<T>。然后第一个Add()方法不需要异步,因为它只做页面的跳转带个new Model也就是新的Department给下面的Add()做方法添加就好了。注意:真正的新增部门数据提交动作是在HttpPost下完成的
DepartmentController控制器:
 1 public class DepartmentController : Controller
 2     {
 3         private readonly IDepartmentService _departmentService;
 4
 5         //构造函数注入
 6         public DepartmentController(IDepartmentService departmentService)
 7         {
 8             _departmentService = departmentService;
 9
10         }
11         public async Task<IActionResult> Index()
12         {
13             ViewBag.Title = "Department Index";
14             var departments =await _departmentService.GetAll();
15             return View(departments);
16         }
17
18         [HttpGet]
19         public IActionResult Add()
20         {
21             ViewBag.Title = "Add Department";
22             return View(new Department());
23         }
24         [HttpPost]
25         public async Task<IActionResult> Add(Department model)
26         {
27             if (ModelState.IsValid)
28             {
29                 await _departmentService.Add(model);
30             }
31             return RedirectToAction(nameof(Index));
32         }
33     }
好了,DepartmentController写完了。接下来就是EmployeeController的建立的。方法总体上和部门控制器基本上类似。。
还是一样注入了两个服务,因为员工表相对于部门表是多对1的关系,在新增员工表示也要相应的带上部门表的相关数据,所以这里注册了两个服务。同样的也是通过构造函数的方式去注入。
首先Index方法是要列出某个部门下面的所有员工所以需要传个部门Id作为参数
Add()方法也是添加某个部门的员工,所有也需要带部门Id作为参数去新增员工数据
Fire()方法是解雇员工,通过员工Id来解雇所有需要员工Id
 1  public class EmployeeController:Controller
 2     {
 3         private readonly IDepartmentService _departmentService;
 4         private readonly IEmployeeService _employeeService;
 5         public EmployeeController(IDepartmentService departmentService,IEmployeeService employeeService)
 6         {
 7             _departmentService = departmentService;
 8             _employeeService = employeeService;
 9         }
10         public async Task<IActionResult> Index(int departmentId)
11         {
12             var department = await _departmentService.GetById(departmentId);
13             ViewBag.Title = $"Employees of {department.Name}";
14             ViewBag.DepartmentId = departmentId;
15             var employees = await _employeeService.GetByDepartmentId(departmentId);
16             return View(employees);
17         }
18         //根据部门添加员工
19         public IActionResult Add(int departmentId)
20         {
21             ViewBag.Title = "Add Employee";
22             return View(new Employee
23             {
24                 DepartmentId=departmentId
25             });
26         }
27         [HttpPost]
28         public async Task<IActionResult> Add(Employee model)
29         {
30             if (ModelState.IsValid)
31             {
32                 await _employeeService.Add(model);
33             }
34             return RedirectToAction(nameof(Index), new { departmentId = model.DepartmentId });
35         }
36         public async Task<IActionResult> Fire(int employeeId)
37         {
38             var employee = await _employeeService.Fire(employeeId);
39             return RedirectToAction(nameof(Index), new { departmentId = employee.DepartmentId });
40         }
41     }
以上两个Controller都建立好了。
接下来就是建立View了。先建立一个Views文件夹,然后建立Shard文件夹做为存放布局页(_Layout.cshtml)的文件夹(学过Mvc一个都清除布局页作用)
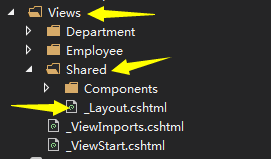
第二步就是建立_ViewStart页面,它的作用就是针对所有的页面都母页面(_Layout)

这两个页面建好之后来看看里面的内容。
_Layout:
asp-append-version:Tag Helper语法,作用见注释。这样做看起来是比较友好的,之前Mvc有HtmlHelper不过不太友好已经被淘汰了。这里就介绍Tag Helper。asp-append-version实际上后边对应了一个C#的类所以说功能还是很强大的。
 1 <!DOCTYPE html>
 2
 3 <html>
 4 <head>
 5     <meta name="viewport" content="width=device-width" />
 6     <title>@ViewBag.Title</title>
 7 </head>
 8 <body>
 9     <div class="container">
10         <div class="row">
11             <div class="col-md-2">
12                 @* Tag Helper asp-append-version防止图片缓存*@
13                 <img asp-append-version="true" src="~/images/1.jpg" style="height:60px;" />
14             </div>
15             <div class="col-md-10">
16                 <span class="h2">@ViewBag.Title</span>
17             </div>
18         </div>
19         <div class="row">
20             <div class="col-md-12">
21                 @RenderBody()
22             </div>
23         </div>
24     </div>
25 </body>
26 </html>
如果我们需要全局启用内置的Tag Helper的话,我们就在Views文件夹下建立一个_ViewImports.cshtml视图。
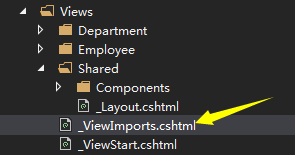
这里面写的代码会自动添加到其他View里面,实际上就是添加了一个程序集。如果你不想全局启用这个Tag Helper,就可以把下面这句话添加到具体的View里面。
@* 配置全局 TagHelper *@
@addTagHelper "*,Microsoft.AspNetCore.Mvc.TagHelpers"
之前介绍了开发的时候可能是分一些环境,比如开发环境,生产环境,这个时候呢我们的代码是不一样的。而我们的Razor里面就可以区分一下这个环境。
include表示在某个环境下是有效的,如果我们开发环境是Development,运行的时候我们的代码就会走到指定的环境中。asp-href-include和asp-href-exclude也是Tag Helper语法,前者表示
在布局页中:
<head>
    <meta name="viewport" content="width=device-width" />
    <title>@ViewBag.Title</title>
    @* Razor区分开发环境 如果开发环境是Development就执行以下区域*@
    <environment include="Development">
        @* 使用css文件,不使用压缩文件 *@
        <link rel="stylesheet" asp-href-include="css/*" asp-href-exclude="css/all.min.css" />
    </environment>

    @* 除了开发环境的模式执行以下区域 *@
    <environment exclude="Development">
        <link asp-href-include="css/all.min.css" rel="stylesheet" />
    </environment>
</head>