zoukankan      html  css  js  c++  java
  • 基于 python 的接口测试框架

    项目背景
    公司内部的软件采用B/S架构,管理实验室数据,实现数据的存储和分析统计。大部分是数据的增删改查,由于还在开发阶段,所以UI界面的变化非常快,之前尝试过用python+selenium进行UI自动化测试,后来发现今天刚写好的脚本第二天前端就改了页面,又得重新去定位元素什么的,消耗大量的精力与时间维护自动化脚本。针对此种情况,对接口测试较为有效。

    工具
    由于开发那里不能提供后台代码给我,只能通过抓包分析。使用fiddler抓包,发现前端与后台都是采用POST方法交互,前端POST数据,后台返回数据。这样也比较简单粗暴,直接针对每个接口POST测试数据,然后观察返回值就好了。

    使用excel编写测试用例和数据,requests发送HTTP请求。

    功能模块
    通过xlrd库读取excel中的测试用例和数据
    requests负责发送数据并接收后台返回的数据
    针对测试结果,需要保存测试日志并生成测试报告,采用python自带的logging记录日志,测试报告采用html格式。
    同时测试完成后,需要将测试报告发送给相关的开发人员,需要有自动发送邮件的功能
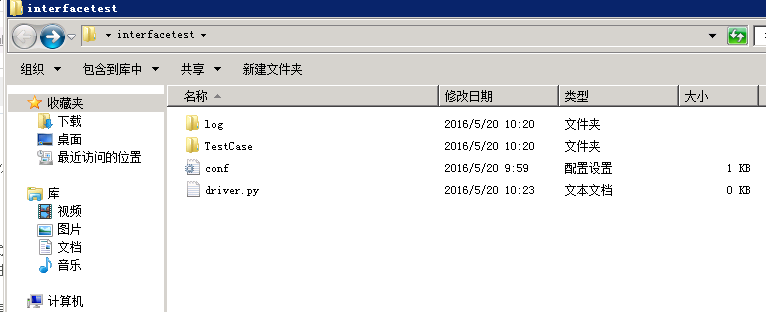
    目录结构


    代码实现

    #通过自带的ConfigParser模块,读取邮件发送的配置文件,作为字典返回
    import ConfigParser
    
    def get_conf():
        conf_file = ConfigParser.ConfigParser()
    
        conf_file.read(os.path.join(os.getcwd(),'conf.ini'))
    
        conf = {}
    
        conf['sender'] = conf_file.get("email","sender")
    
        conf['receiver'] = conf_file.get("email","receiver")
    
        conf['smtpserver'] = conf_file.get("email","smtpserver")
    
        conf['username'] = conf_file.get("email","username")
    
        conf['password'] = conf_file.get("email","password") 
    
        return conf


    配置文件格式


    这个logging不熟悉的可以google一下,还是挺有用的,需要自己配置一下。需要手动新建一个空白的.log文件。

    #此处使用python自带的logging模块,用来作为测试日志,记录测试中系统产生的信息。
    import logging,os
    log_file = os.path.join(os.getcwd(),'log/sas.log')
    log_format = '[%(asctime)s] [%(levelname)s] %(message)s'     #配置log格式
    logging.basicConfig(format=log_format, filename=log_file, filemode='w', level=logging.DEBUG)
    console = logging.StreamHandler()
    console.setLevel(logging.DEBUG)
    formatter = logging.Formatter(log_format)
    console.setFormatter(formatter)
    logging.getLogger('').addHandler(console)


    excel文件如下图


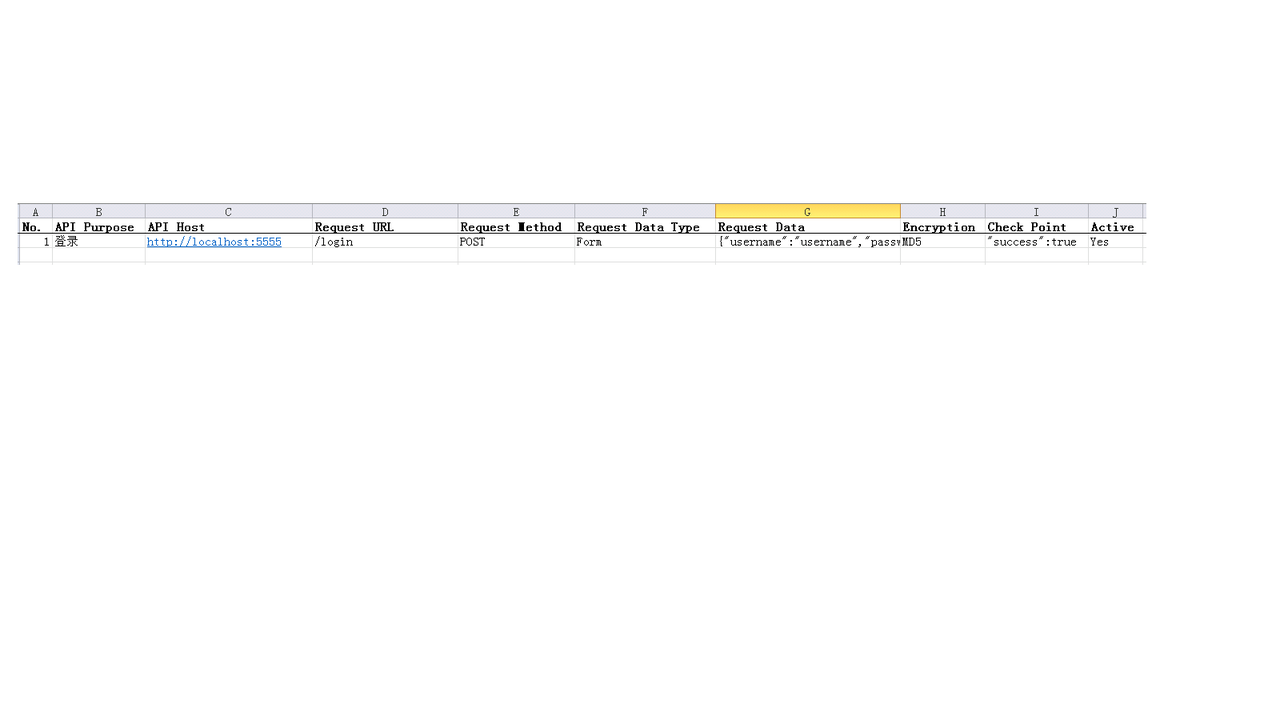
    python读取excel跟读取一个二维数组差不多,下标也是从0开始

    #读取testcase excel文件,获取测试数据,调用interfaceTest方法,将结果保存至errorCase列表中。
    import xlrd,hashlib,json
    
    def runTest(testCaseFile):
          testCaseFile = os.path.join(os.getcwd(),testCaseFile)
          if not os.path.exists(testCaseFile):
              logging.error('测试用例文件不存在!')
              sys.exit()
          testCase = xlrd.open_workbook(testCaseFile)
          table = testCase.sheet_by_index(0)
          errorCase = []                #用于保存接口返回的内容和HTTP状态码
    
          s = None
          for i in range(1,table.nrows):
                if table.cell(i, 9).vale.replace('
    ','').replace('
    ','') != 'Yes':
                    continue
                num = str(int(table.cell(i, 0).value)).replace('
    ','').replace('
    ','')
                api_purpose = table.cell(i, 1).value.replace('
    ','').replace('
    ','')
                api_host = table.cell(i, 2).value.replace('
    ','').replace('
    ','')
                request_method = table.cell(i, 4).value.replace('
    ','').replace('
    ','')
                request_data_type = table.cell(i, 5).value.replace('
    ','').replace('
    ','')
                request_data = table.cell(i, 6).value.replace('
    ','').replace('
    ','')
                encryption = table.cell(i, 7).value.replace('
    ','').replace('
    ','')
                check_point = table.cell(i, 8).value
    
                if encryption == 'MD5':              #如果数据采用md5加密,便先将数据加密
                    request_data = json.loads(request_data)
                    request_data['pwd'] = md5Encode(request_data['pwd'])
                status, resp, s = interfaceTest(num, api_purpose, api_host, request_url, request_data, check_point, request_methon, request_data_type, s)
                if status != 200 or check_point not in resp:            #如果状态码不为200或者返回值中没有检查点的内容,那么证明接口产生错误,保存错误信息。
                    errorCase.append((num + ' ' + api_purpose, str(status), 'http://'+api_host+request_url, resp))
            return errorCase


    下面的就是接口部分
    由于所有的操作必须在系统登录之后进行,一开始没有注意到cookie这一点,每读取一个测试用例,都会新建一个session,导致无法维护上一次请求的cookie。然后将cookie添加入请求头中,但是第二个用例仍然无法执行成功。后来用fiddler抓包分析了一下,发现cookie的值竟然是每一次操作后都会变化的!!!

    所以只能通过session自动维护cookie。
    在interfaceTest函数中,返回三个值,分别是HTTP CODE,HTTP返回值与session。再将上一次请求的session作为入参传入interfaceTest函数中,在函数内部判断session是否存在,如果不为None,那么直接利用传入的session执行下一个用例,如果为None,那么新建一个session。

    #接受runTest的传参,利用requests构造HTTP请求
    import requests
    
    def interfaceTest(num, api_purpose, api_host, request_method,
                      request_data_type, request_data, check_point, s=None)
         headers = {'Content-Type' : 'application/x-www-form-urlencoded; charset=UTF-8',
                          'X-Requested-With' : 'XMLHttpRequest',
                          'Connection' : 'keep-alive',
                          'Referer' : 'http://' + api_host,
                          'User-Agent' : 'Mozilla/5.0 (Windows NT 6.1; WOW64) AppleWebKit/537.36 (KHTML, like Gecko) Chrome/49.0.2623.110 Safari/537.36'
                    }
    
         if s == None:
              s = requests.session()
         if request_method == 'POST':
              if request_url != '/login' :
                  r = s.post(url='http://'+api_host+request_url, data = json.loads(request_data), headers = headers)         #由于此处数据没有经过加密,所以需要把Json格式字符串解码转换成**Python对象**
              elif request_url == '/login' :
                  s = requests.session()
                  r = s.post(url='http://'+api_host+request_url, data = request_data, headers = headers)          #由于登录密码不能明文传输,采用MD5加密,在之前的代码中已经进行过json.loads()转换,所以此处不需要解码
         else:
              logging.error(num + ' ' + api_purpose + '  HTTP请求方法错误,请确认[Request Method]字段是否正确!!!')
              s = None
              return 400, resp, s
         status = r.status_code
         resp = r.text
         print resp
         if status == 200 :
            if re.search(check_point, str(r.text)):
                logging.info(num + ' ' + api_purpose + ' 成功,' + str(status) + ', ' + str(r.text))
                return status, resp, s
            else:
                logging.error(num + ' ' + api_purpose + ' 失败!!!,[' + str(status) + '], ' + str(r.text))
                return 200, resp , None
         else:
                logging.error(num + ' ' + api_purpose + '  失败!!!,[' + str(status) + '],' + str(r.text))
                return status, resp.decode('utf-8'), None
    
    
    import hashlib
    
    def md5Encode(data):
          hashobj = hashlib.md5()
          hashobj.update(data.encode('utf-8'))
          return hashobj.hexdigest()
    
    def sendMail(text):
          mail_info = get_conf()
          sender = mail_info['sender']
          receiver = mail_info['receiver']
          subject = '[AutomationTest]接口自动化测试报告通知'
          smtpserver = mail_info['smtpserver']
          username = mail_info['username']
          password = mail_info['password']
          msg = MIMEText(text,'html','utf-8')
          msg['Subject'] = subject
          msg['From'] = sender
          msg['To'] = ''.join(receiver)
          smtp = smtplib.SMTP()
          smtp.connect(smtpserver)
          smtp.login(username, password)
          smtp.sendmail(sender, receiver, msg.as_string())
          smtp.quit()
    
    
    def main():
          errorTest = runTest('TestCase/TestCase.xlsx')
          if len(errorTest) > 0:
              html = '<html><body>接口自动化扫描,共有 ' + str(len(errorTest)) + ' 个异常接口,列表如下:' + '</p><table><tr><th style="100px;text-align:left">接口</th><th style="50px;text-align:left">状态</th><th style="200px;text-align:left">接口地址</th><th   style="text-align:left">接口返回值</th></tr>'
              for test in errorTest:
                  html = html + '<tr><td style="text-align:left">' + test[0] + '</td><td style="text-align:left">' + test[1] + '</td><td style="text-align:left">' + test[2] + '</td><td style="text-align:left">' + test[3] + '</td></tr>'
                  sendMail(html)
    
    if __name__ == '__main__':
        main()
    

    以上就是一个简单的接口测试实现,参考了论坛里的大神们很多东西,还有很多不足之处。例如html格式的邮件很简陋,可以考虑生成一个HTML的测试报告,作为附件发送。
    接口方法只实现了一个POST。
    编码也很随意,基本想到哪写到哪,不规范的地方请指正。

    传送门:https://testerhome.com/topics/4948

  • 相关阅读:
    xgqfrms™, xgqfrms® : xgqfrms's offical website of GitHub!
    xgqfrms™, xgqfrms® : xgqfrms's offical website of GitHub!
    xgqfrms™, xgqfrms® : xgqfrms's offical website of GitHub!
    密码学-学习笔记
    让MySQL速度提升3倍的19种优化方式
    Oracle/云MySQL/MsSQL“大迁移”真相及最优方案
    tf.TFRecordReader()函数解析(最清晰的解释)
    Polkadot(波卡)简介
    Gavin Wood的故事:神级黄皮书、出走以太坊、乱世成名与三代区块链
    从设计哲学对比波卡与Cosmos
  • 原文地址:https://www.cnblogs.com/he12345/p/8342206.html
Copyright © 2011-2022 走看看