Dubbo结构介绍
Apache Dubbo是一款高性能的Java RPC框架。其前身是阿里巴巴公司开源的一个高性能、轻量级的开源Java RPC框架,可以和Spring框架无缝集成。


快速部署
一、配置注册中心,官方推荐使用zookeeper
- zoo.cfg配置文件介绍
// 数据存储目录,修改数据存储目录 ../data 复制的时候注意,小心空格
dataDir=/tmp/zookeeper
//默认配置文件,修改路径如下
dataDir=../data
// 端口
clientPort=2181
-
bin目录下zkEnv文件注意事项

-
启动zookeeper服务:
zkServer
二、简单Dubbo项目部署步骤
开启注册中心服务-->抽取公共接口-->配置提供者-->配置消费者公共接口服务
1. 创建一个公共接口工程 dubbodemo_interface
2. 创建一个HelloService接口
package com.atguigu.service;

/**
 * ClassName: HelloService
 * Description: 提供者服务层接口
 * date: 2020/8/20 10:44
 *
 * @author July
 * @since JDK 1.8
 */
public interface HelloService {
    String sayHello(String name);
}
服务提供者
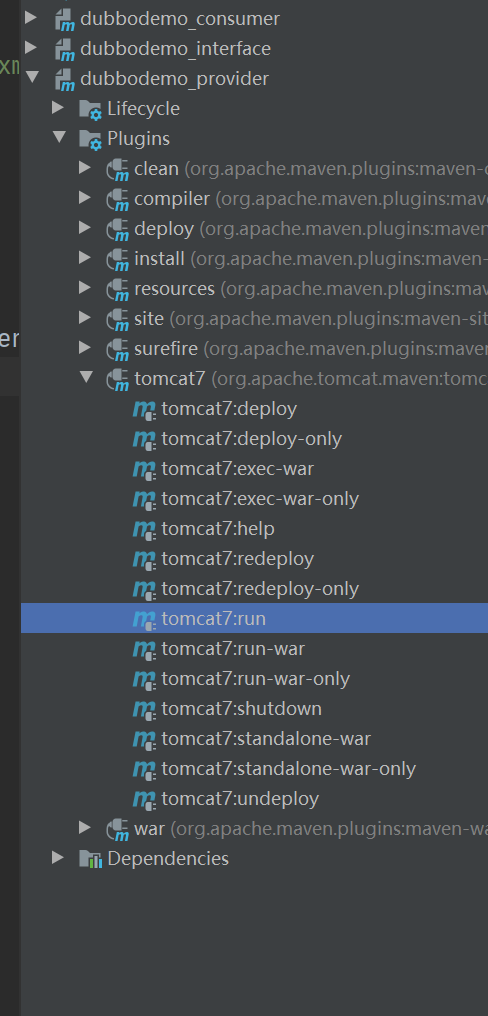
1. 创建一个服务提供者dubbodemo_provider(maven web工程)
2. 导入maven坐标
<?xml version="1.0" encoding="UTF-8"?>

<project xmlns="http://maven.apache.org/POM/4.0.0" xmlns:xsi="http://www.w3.org/2001/XMLSchema-instance"
  xsi:schemaLocation="http://maven.apache.org/POM/4.0.0 http://maven.apache.org/xsd/maven-4.0.0.xsd">
  <modelVersion>4.0.0</modelVersion>

  <groupId>com.gtguigu</groupId>
  <artifactId>dubbodemo_provider</artifactId>
  <version>1.0-SNAPSHOT</version>
  <packaging>war</packaging>


  <properties>
    <project.build.sourceEncoding>UTF-8</project.build.sourceEncoding>
    <maven.compiler.source>1.8</maven.compiler.source>
    <maven.compiler.target>1.8</maven.compiler.target>
    <spring.version>5.0.5.RELEASE</spring.version>
  </properties>
  <dependencies>
    <dependency>
      <groupId>org.springframework</groupId>
      <artifactId>spring-context</artifactId>
      <version>${spring.version}</version>
    </dependency>
    <dependency>
      <groupId>org.springframework</groupId>
      <artifactId>spring-beans</artifactId>
      <version>${spring.version}</version>
    </dependency>
    <dependency>
      <groupId>org.springframework</groupId>
      <artifactId>spring-webmvc</artifactId>
      <version>${spring.version}</version>
    </dependency>
    <dependency>
      <groupId>org.springframework</groupId>
      <artifactId>spring-jdbc</artifactId>
      <version>${spring.version}</version>
    </dependency>
    <dependency>
      <groupId>org.springframework</groupId>
      <artifactId>spring-aspects</artifactId>
      <version>${spring.version}</version>
    </dependency>
    <dependency>
      <groupId>org.springframework</groupId>
      <artifactId>spring-jms</artifactId>
      <version>${spring.version}</version>
    </dependency>
    <dependency>
      <groupId>org.springframework</groupId>
      <artifactId>spring-context-support</artifactId>
      <version>${spring.version}</version>
    </dependency>
    <!-- dubbo相关 -->
    <dependency>
      <groupId>com.alibaba</groupId>
      <artifactId>dubbo</artifactId>
      <version>2.6.0</version>
    </dependency>
    <dependency>
      <groupId>org.apache.zookeeper</groupId>
      <artifactId>zookeeper</artifactId>
      <version>3.4.7</version>
    </dependency>
    <dependency>
      <groupId>com.github.sgroschupf</groupId>
      <artifactId>zkclient</artifactId>
      <version>0.1</version>
    </dependency>
    <dependency>
      <groupId>javassist</groupId>
      <artifactId>javassist</artifactId>
      <version>3.12.1.GA</version>
    </dependency>
    <dependency>
      <groupId>com.alibaba</groupId>
      <artifactId>fastjson</artifactId>
      <version>1.2.47</version>
    </dependency>

    <dependency>
      <groupId>com.atguigu</groupId>
      <artifactId>dubbodemo_interface</artifactId> //导入公共抽取接口坐标
      <version>1.0-SNAPSHOT</version>
    </dependency>

  </dependencies>
  <build>
    <plugins>
      <plugin>
        <groupId>org.apache.maven.plugins</groupId>
        <artifactId>maven-compiler-plugin</artifactId>
        <version>2.3.2</version>
        <configuration>
          <source>1.8</source>
          <target>1.8</target>
        </configuration>
      </plugin>
      <plugin>
        <groupId>org.apache.tomcat.maven</groupId>
        <artifactId>tomcat7-maven-plugin</artifactId>
        <configuration>
          <!-- 指定端口 -->
          <port>8082</port>
          <!-- 请求路径 -->
          <path>/</path>
        </configuration>
      </plugin>
    </plugins>
  </build>
</project>
3. 创建提供者实现类
已经在提供者的pom.xml已经导入了公共接口HelloService的坐标,所以直接可以使用HelloService接口
//直接创建实现类
package com.atguigu.service.impl;

import com.alibaba.dubbo.config.annotation.Service;
import com.atguigu.service.HelloService;

/**
 * ClassName: HelloServiceImpl
 * Description:
 * date: 2020/8/20 10:45
 *
 * @author July
 * @since JDK 1.8
 */
//注意,使用的是com.alibaba.dubbo.config.annotation.Service;
@Service
public class HelloServiceImpl implements HelloService {
    @Override
    public String sayHello(String name) {
        return "Hello " + name;
    }
}
注意事项:@Service 使用的是com.alibaba.dubbo.config.annotation.Service
4. 配置web.xml
<?xml version="1.0" encoding="UTF-8"?>
<web-app xmlns="http://xmlns.jcp.org/xml/ns/javaee"
         xmlns:xsi="http://www.w3.org/2001/XMLSchema-instance"
         xsi:schemaLocation="http://xmlns.jcp.org/xml/ns/javaee http://xmlns.jcp.org/xml/ns/javaee/web-app_3_1.xsd"
         version="3.1">
  <context-param>
    <param-name>contextConfigLocation</param-name>
    <param-value>classpath:applicationContext*.xml</param-value>
  </context-param>
  <listener>
    <listener-class>org.springframework.web.context.ContextLoaderListener</listener-class>
  </listener>

</web-app>
5. 用 Spring 配置声明暴露服务
provida.xml
<?xml version="1.0" encoding="UTF-8"?>
<beans xmlns="http://www.springframework.org/schema/beans"
       xmlns:xsi="http://www.w3.org/2001/XMLSchema-instance"
       xmlns:p="http://www.springframework.org/schema/p"
       xmlns:context="http://www.springframework.org/schema/context"
       xmlns:dubbo="http://code.alibabatech.com/schema/dubbo"
       xmlns:mvc="http://www.springframework.org/schema/mvc"
       xsi:schemaLocation="http://www.springframework.org/schema/beans
		http://www.springframework.org/schema/beans/spring-beans.xsd
         http://www.springframework.org/schema/mvc
         http://www.springframework.org/schema/mvc/spring-mvc.xsd
         http://code.alibabatech.com/schema/dubbo
         http://code.alibabatech.com/schema/dubbo/dubbo.xsd
         http://www.springframework.org/schema/context
         http://www.springframework.org/schema/context/spring-context.xsd">
    <!-- 提供方应用信息,用于计算依赖关系 -->
    <dubbo:application name="hello-world-app"  />

    <!-- 使用注册中心暴露服务地址 -->
    <dubbo:registry address="zookeeper://127.0.0.1:2181" />

    <!-- 用dubbo协议在20880端口暴露服务 -->
    <dubbo:protocol name="dubbo" port="20880" />

    <!-- 扫描指定包,加入@Service注解的类会被发布为服务  -->
    <dubbo:annotation package="com.atguigu.service.impl" />
</beans>
服务消费者(参照提供者配置)
1. 创建一个服务消费者dubbodemo_consumer(maven web工程)
2. 导入坐标,和提供者相同,只需要把tomcat端口号修改下即可
      <plugin>
        <groupId>org.apache.tomcat.maven</groupId>
        <artifactId>tomcat7-maven-plugin</artifactId>
        <configuration>
          <!-- 指定端口 -->
          <port>8083</port>  //修改端口号,不要冲突
          <!-- 请求路径 -->
          <path>/</path>
        </configuration>
      </plugin>
3. 通过 Spring 配置引用远程服务
consumer.xml
<?xml version="1.0" encoding="UTF-8"?>
<beans xmlns="http://www.springframework.org/schema/beans"
       xmlns:xsi="http://www.w3.org/2001/XMLSchema-instance"
       xmlns:p="http://www.springframework.org/schema/p"
       xmlns:context="http://www.springframework.org/schema/context"
       xmlns:dubbo="http://code.alibabatech.com/schema/dubbo"
       xmlns:mvc="http://www.springframework.org/schema/mvc"
       xsi:schemaLocation="http://www.springframework.org/schema/beans
			http://www.springframework.org/schema/beans/spring-beans.xsd
			http://www.springframework.org/schema/mvc
			http://www.springframework.org/schema/mvc/spring-mvc.xsd
			http://code.alibabatech.com/schema/dubbo
			http://code.alibabatech.com/schema/dubbo/dubbo.xsd
			http://www.springframework.org/schema/context
			http://www.springframework.org/schema/context/spring-context.xsd">

    <!-- 当前应用名称,用于注册中心计算应用间依赖关系,注意:消费者和提供者应用名不要一样 -->
    <dubbo:application name="dubbodemo-consumer" />
    <!-- 连接服务注册中心zookeeper ip为zookeeper所在服务器的ip地址-->
    <dubbo:registry address="zookeeper://127.0.0.1:2181"/>
    <!-- 扫描的方式暴露接口  -->
    <dubbo:annotation package="com.atguigu.controller" />

    <!--
        超时全局设置 10分钟
        check=false 不检查服务提供方,开发阶段建议设置为false
        check=true 启动时检查服务提供方,如果服务提供方没有启动则报错
    -->
    <dubbo:consumer timeout="600000" check="false"/>
</beans>
4. 编写消费者实现类
package com.atguigu.controller;

import com.alibaba.dubbo.config.annotation.Reference;
import com.atguigu.service.HelloService;
import org.springframework.stereotype.Controller;
import org.springframework.web.bind.annotation.RequestMapping;
import org.springframework.web.bind.annotation.ResponseBody;

/**
 * ClassName: HelloController
 * Description:
 * date: 2020/8/20 11:09
 *
 * @author July
 * @since JDK 1.8
 */
@Controller
@RequestMapping("/demo")
public class HelloController {
    @Reference //注意使用com.alibaba.dubbo.config.annotation.Reference
    private HelloService helloService; //由于已经在maven依赖中导入了HelloService接口,所以可以直接调用

    //远程调用
    @RequestMapping("/hello")
    @ResponseBody
    public String sayHello(String name){
        String s = helloService.sayHello(name);
        System.out.println(s);
        return s;
    }
}
5. 配置web.xml
<?xml version="1.0" encoding="UTF-8"?>
<web-app xmlns="http://xmlns.jcp.org/xml/ns/javaee"
         xmlns:xsi="http://www.w3.org/2001/XMLSchema-instance"
         xsi:schemaLocation="http://xmlns.jcp.org/xml/ns/javaee http://xmlns.jcp.org/xml/ns/javaee/web-app_3_1.xsd"
         version="3.1">

  <servlet>
    <servlet-name>springmvc</servlet-name>
      <!-- 配置前端控制器 -->
    <servlet-class>org.springframework.web.servlet.DispatcherServlet</servlet-class>
    <!-- 指定加载的配置文件 ,通过参数contextConfigLocation加载 -->
    <init-param>
      <param-name>contextConfigLocation</param-name>
      <param-value>classpath:applicationContext-web.xml</param-value>
    </init-param>
    <load-on-startup>1</load-on-startup>
  </servlet>
  <servlet-mapping>
    <servlet-name>springmvc</servlet-name>
    <url-pattern>/</url-pattern>
  </servlet-mapping>

</web-app>
测试访问
1. 启动zookeeper服务 zkServer
2. 启动tomcat服务
注意事项:需要先启动提供者服务,在启动消费者服务
3. 测试访问资源

可以看到资源访问没问题
Dubbo负载均衡
dubbo提供了4种负载均衡策略
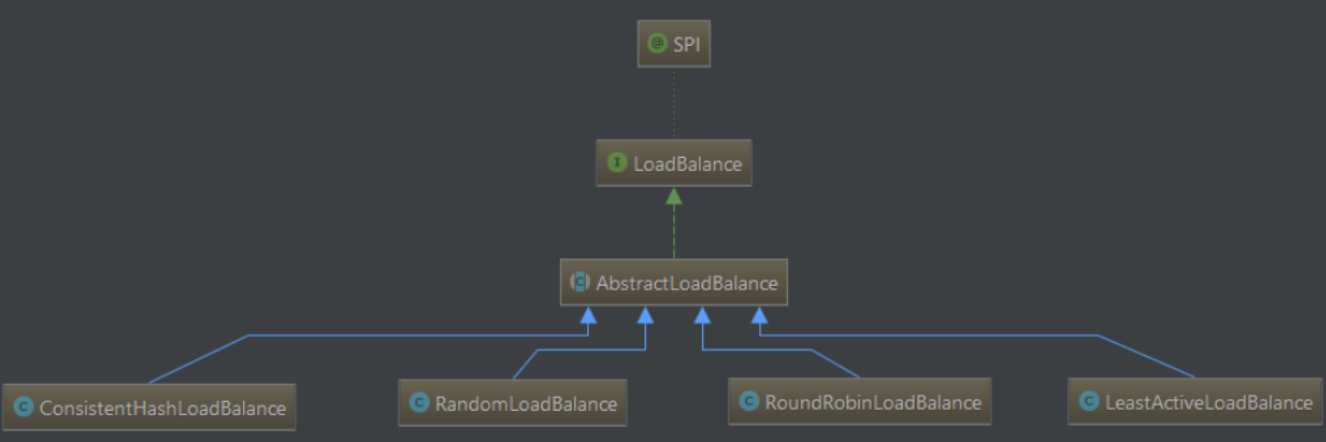
- 随机调用负载均衡RandomLoadBalance类
- 轮询调用RoundRobinLoadBlance类
- 最少活跃数调用法LeastActiveLoadBlance类
- 一致性Hash算法ConsistentHashLoadBalance类
使用方式:@Service(loadbalance = "负载均衡策略")
//在服务提供者一方配置负载均衡
@Service(loadbalance = "random")
public class HelloServiceImpl implements HelloService {
    public String sayHello(String name) {
        return "hello " + name;
    }
}
由@SPI注解可以看到,dubbo默认的负载均衡策略是随机调用法
[具体参考这个链接]https://www.cnblogs.com/wyq178/p/9822731.html()
Dubbo事务解决方案
问题
在使用dubbo 2.5.3之前的版本@Service来发布服务时,当该服务中有@Transactional,是无法正常发布的?
解决方案
因为事务TransactionManagement默认是使用了jdk的代理即基于接口的代理,必须改成基于类的代理,@service才会生效,所以必须修改代理方式。
第一步
- 如果是javaconfig来配置,加上
@EnableTransactionManagement(proxyTargetClass=true) - 如果是xml配置:
<tx:annotation-driven transaction-manager="transactionManager" proxy-target-class="true" />。
第二步
进行了第一步之后,发现仍然不能发布服务,因为dubbo的@Service源码@Inherited,所以没有是不能被代理类继承的,所以还需要修改dubbo @Service的源码,在annotation上加入@Inherited,这样代理类就会继承了这个注解。注意:高版本dubbo已修复此问题,可以点进@Service看是否有加@Inherited注解
第三步
虽然已经发布了,但是会发现发布的服务是spring的代理SpringProxy(可以通过dubbo-admin看到,或者启动日志),不是你想要的,无法正常引用,因为必须在@Service中指定interfaceName,指定发布的服务的名称,例:@Service(version = "1.0.0",interfaceName = "com.zl.dubbotest.api.HelloService")