一.VSCode开发必备插件
1.Beautify:语法高亮;
2.Bracket Pair Colorizer :对括号对进行着色;
3.ESLint:ESLint插件,高亮提示;
4.HTML CSS Support:css提示(支持vue);
5.HTML Snippets:自动帮你输入HTML标签;
6.vetur:目前比较好的Vue语法高亮,快捷提示;
7.vscode-icons:文件图标,方便定位文件;
8.Vue 2 Snippets:API添加了代码片段;
二.页面文件路由跳转文件配置
文件在router文件夹下的index.js下
//首页
import index from '@/components/pages/My/index'
......
routes: [
{
path:'/index',
name:'index',
component:index
}
]
三.跨域解决方法
文件在config文件夹下的index.js下
module.exports = {
dev: {

// Paths
assetsSubDirectory: 'static',
assetsPublicPath: '/',
proxyTable: {
'/api': {
target:'http://192.168.1.240:18080',
changeOrigin: true,
     }
}

},
......
//main.js
import global from './components/global/global';
Vue.prototype.GLOBAL = global;

//global.vue
<script>
// const proxy = 'http://47.92.104.142:8090';
const proxy = '/api';
const userId =12;
const userid =11;
export default
{
proxy,
userId,
userid,
}
</script>
method:'post',
url:this.GLOBAL.proxy+'/app/course/study.do?courseId='+this.courseId+'&userId='+this.GLOBAL.userId,
axios简介:基于 Promise,用于浏览器和 nodejs 的与服务器端通信库。
axios安装:npm install axios --save;
axios引用:import axios from 'axios';
六.vuex的安装使用
1.在项目里安装vux
npm install vux --save;
2.安装vux-loader (这个vux文档似乎没介绍,当初没安装结果报了一堆错误)
npm install vux-loader --save-dev
3.安装less-loader (这个是用以正确编译less源码,否则会出现 ' Cannot GET / ')
npm install less less-loader --save-dev
4.安装yaml-loader (以正确进行语言文件读取, 我没安装似乎也没报错)
npm install yaml-loader --save-dev
5.在build/webpack.base.conf.js 文件进行配置、
'use strict'
const path = require('path')
const utils = require('./utils')
const config = require('../config')
const vueLoaderConfig = require('./vue-loader.conf')


function resolve (dir) {
return path.join(__dirname, '..', dir)
}

//vux的相关配置
const vuxLoader = require('vux-loader')

let webpackConfig = {
entry: {
app: './src/main.js'
},
output: {
path: config.build.assetsRoot,
filename: '[name].js',
publicPath: process.env.NODE_ENV === 'production'
? config.build.assetsPublicPath
: config.dev.assetsPublicPath
},
resolve: {
extensions: ['.js', '.vue', '.json'],
alias: {
'vue$': 'vue/dist/vue.esm.js',
'@': resolve('src'),
}
},
module: {
rules: [
{
test: /.vue$/,
loader: 'vue-loader',
options: vueLoaderConfig
},
{
test: /.js$/,
loader: 'babel-loader',
include: [resolve('src'), resolve('test'), resolve('node_modules/webpack-dev-server/client')]
},
{
test: /.(png|jpe?g|gif|svg)(?.*)?$/,
loader: 'url-loader',
options: {
limit: 10000,
name: utils.assetsPath('img/[name].[hash:7].[ext]')
}
},
{
test: /.(mp4|webm|ogg|mp3|wav|flac|aac)(?.*)?$/,
loader: 'url-loader',
options: {
limit: 10000,
name: utils.assetsPath('media/[name].[hash:7].[ext]')
}
},
{
test: /.(woff2?|eot|ttf|otf)(?.*)?$/,
loader: 'url-loader',
options: {
limit: 10000,
name: utils.assetsPath('fonts/[name].[hash:7].[ext]')
}
}
]
},
node: {
// prevent webpack from injecting useless setImmediate polyfill because Vue
// source contains it (although only uses it if it's native).
setImmediate: false,
// prevent webpack from injecting mocks to Node native modules
// that does not make sense for the client
dgram: 'empty',
fs: 'empty',
net: 'empty',
tls: 'empty',
child_process: 'empty'
}
}
module.exports = vuxLoader.merge(webpackConfig, {
plugins: ['vux-ui', 'progress-bar', 'duplicate-style']
})
//notification.vue

<template>
 <div class="notification-top">
 <div class="notification">
 <div>
 <slot name="left"></slot>
 </div>
 <div><slot name="center"></slot></div>
 <div>
 <slot name="right"></slot>
 </div>
 </div>
 </div>
</template>


<script>
</script>


<style>
       .notification-top{
            100%;
           height: 45px;
           line-height: 45px;
           background-color: #3ba4f5;
       }
       .notification{
            92%;
           height: 45px;
           margin: auto;
           display: flex;
           flex-direction: row;
           align-items: center;
           justify-content: space-between;
           position: relative;
       }
       .notification div:nth-child(1){
            12px;
           height: 20px;
           display: flex;
           justify-content: flex-start;
       }
       .notification div:nth-child(1) img{
            100%;
           height: 100%;
       }
       .notification div:nth-child(2){
           font-size: 16px;
           height: 45px;
           color: #fff;
           position: absolute;
           left: 50%;
           transform: translateX(-50%);
           display: -webkit-box;
           -webkit-box-orient: vertical;
           -webkit-line-clamp: 1;
           overflow: hidden;
       }
        .notification div:nth-child(3){
           font-size: 14px;
           color: #fff;
           display: flex;
           justify-content: flex-end;
           align-items: center;
       }
</style>
//其他页面

<notification>
   <img @click="jumpBack" slot="left" class="backWhite" align="center" src="../../../../../static/imgs/Online_course/icon_arrow_left.png"/>
   <span slot="center">{{chapterTitle||chapterstudy.chapterTitle}}</span>
   <span slot="right" @click="section">章节</span>
</notification>

//顶部标题栏
import notification from '@/components/pages/My/notification'

export default {
 components: {
 notification
 },
 ...
}
八.项目开发项目打包上线
第一步:打开项目目录 > config文件夹 > index.js
assetsPublicPath:'/' 改为:assetsPublicPath:'./' (加一个点变为相对路径,有两处都要更改)
注意:此处解决的问题为,项目目录地址我们将绝对地址改为相对地址,不然的话,后台将取不到我们的css以及js,会为空白页面;
然后,我们需要把
productionSourceMap:true改为:productionSourceMap:false
注意:此处为,如果是为true状态,打包完成后会生成一些map文件,虽然map文件帮我们把代码压缩加密了,但是报错的话我们会根本不知道哪里报错了,因此不行,所以我们改成false,这样我们就能准确获取是哪一行报错了;
第二步:打开项目目录 > build文件夹 >utils.js
在图中区域加上
publicPath:'../../',
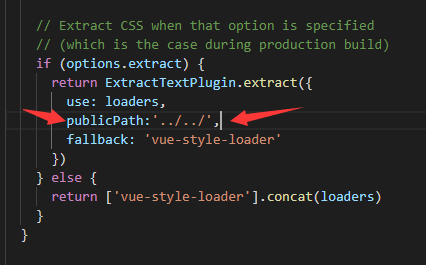
注意:这里是解决项目上线后,背景图片找不到的问题;
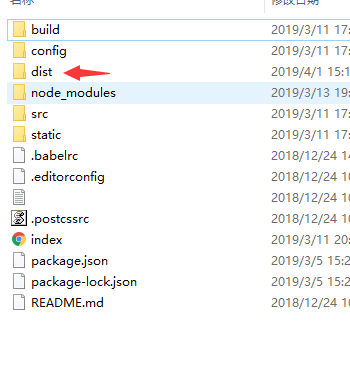
第三步:进行打包,输入命令
npm run build
然后你项目里面会多个dist文件,把这个文件给后台放到服务器即可,图片如下:
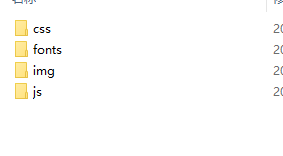
 打开dist文件结构为
第四步:上线完成后,你会发现所有接口都是404,对比看一下,发现上线版本还有/api字段,这是因为你没有判断开发环境和生产环境,然后写相应接口;
现在,打开config/dev.env.js 和 config/prod.env.js两个文件
在config/dev.env.js文件中加入一行代码:API_ROOT: ' "/api" '
'use strict'
const merge = require('webpack-merge')
const prodEnv = require('./prod.env')

module.exports = merge(prodEnv, {
  NODE_ENV: '"development"',
  API_ROOT: ' "/api" '//开发环境
})
在config/prod.env.js文件中加入一行代码: API_ROOT: ' "" '
'use strict'
module.exports = {
  NODE_ENV: '"production"',
  API_ROOT: ' "" '//生产环境
}
然后找到你配置接口的地方,process.env是一个全局变量,能够判断当前环境。
const proxy = process.env.API_ROOT;
//登录模块
const requestLogin = proxy+'/login/';//登录页面
这样我们可以判断到如果是开发环境就是有api的,如果是生产环境就是没有api的,如果你没有全局配置接口文件,你就把页面里面的/api改成process.env.API_ROOT即可。