Fork版本项目地址:SSD
一、数据格式介绍
数据文件夹命名为VOC2012,内部有5个子文件夹,如下,

我们的检测任务中使用JPEGImages文件夹和Annotations文件夹。
JPEGImages文件夹中包含了PASCAL VOC所提供的所有的图片信息,包括了训练图片和测试图片。
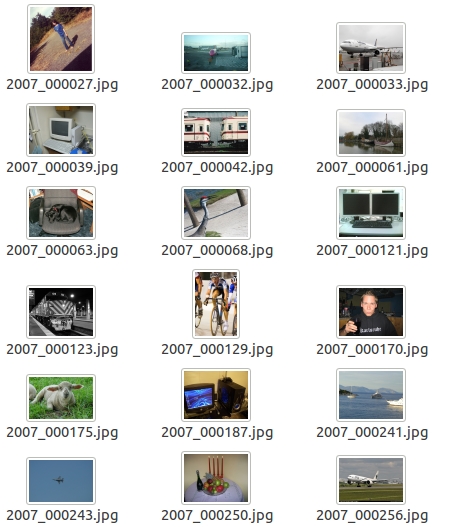
这些图像都是以“年份_编号.jpg”格式命名的。
图片的像素尺寸大小不一,但是横向图的尺寸大约在500*375左右,纵向图的尺寸大约在375*500左右,基本不会偏差超过100。(在之后的训练中,第一步就是将这些图片都resize到300*300或是500*500,所有原始图片不能离这个标准过远。)
这些图像就是用来进行训练和测试验证的图像数据。
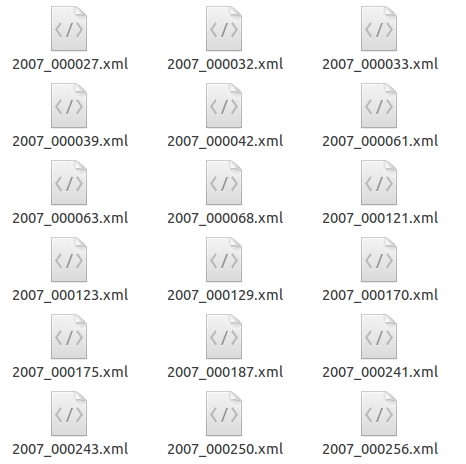
Annotations文件夹中存放的是xml格式的标签文件,每一个xml文件都对应于JPEGImages文件夹中的一张图片。
xml文件的具体格式如下:(对于2007_000392.jpg)
<annotation>
	<folder>VOC2012</folder>
	<filename>2007_000392.jpg</filename>             //文件名
	<source>                                         //图像来源(不重要)
		<database>The VOC2007 Database</database>
		<annotation>PASCAL VOC2007</annotation>
		<image>flickr</image>
	</source>
	<size>					                   //图像尺寸(长宽以及通道数)
		<width>500</width>
		<height>332</height>
		<depth>3</depth>
	</size>
	<segmented>1</segmented>		              //是否用于分割(在图像物体识别中01无所谓)
	<object>                                       //检测目标
		<name>horse</name>                        //物体类别
		<pose>Right</pose>                        //拍摄角度
		<truncated>0</truncated>                  //是否被截断(0表示完整)
		<difficult>0</difficult>                  //目标是否难以识别(0表示容易识别)
		<bndbox>                                  //bounding-box(包含左上角和右下角xy坐标)
			<xmin>100</xmin>
			<ymin>96</ymin>
			<xmax>355</xmax>
			<ymax>324</ymax>
		</bndbox>
	</object>
	<object>                                      //多检测目标
		<name>person</name>
		<pose>Unspecified</pose>
		<truncated>0</truncated>
		<difficult>0</difficult>
		<bndbox>
			<xmin>198</xmin>
			<ymin>58</ymin>
			<xmax>286</xmax>
			<ymax>197</ymax>
		</bndbox>
	</object>
</annotation>
二、TFR数据生成流程
为了加快数据的读取,框架将数据及标签预先读取并写入tfrecord中,这一部分独立于网络或者说训练结构之外,我们单独介绍这一部分。
启动命令如下,注意需要提前建好OUTPUT_DIR文件夹否则会报错(运行命令时去掉注释),
DATASET_DIR=./VOC2012/
OUTPUT_DIR=./tfrecords
python tf_convert_data.py
    --dataset_name=pascalvoc   # 数据集名称,实际作者就实现了这一个数据集的预处理方法
    --dataset_dir=${DATASET_DIR}
    --output_name=voc_2012_train  # tfr文件名,为了兼容后面的程序,命名格式较为固定
    --output_dir=${OUTPUT_DIR}
脚本tf_convert_data.py
这个脚本主要用于和命令行交互,核心功能就一句调用命令:
# './VOC2012/' './tfrecords' 'voc2012_tfr'
pascalvoc_to_tfrecords.run(FLAGS.dataset_dir, FLAGS.output_dir, FLAGS.output_name)
脚本datasets.pascalvoc_to_tfrecords.py
run函数是tfr书写的核心函数,在这个函数中,我们确定具体的每一个tfr文件名,循环的读取图片和标签数据名称,按照指定的容量取书写到每一个tfr文件。
def run(dataset_dir, output_dir, name='voc_train', shuffling=False):
    """Runs the conversion operation.
    Args:
      dataset_dir: The dataset directory where the dataset is stored.
      output_dir: Output directory.
    """
    if not tf.gfile.Exists(dataset_dir):
        tf.gfile.MakeDirs(dataset_dir)

    # Dataset filenames, and shuffling.
    # './VOC2012/' 'Annotations/'
    path = os.path.join(dataset_dir, DIRECTORY_ANNOTATIONS)
    filenames = sorted(os.listdir(path))  # 无路径文件名
    if shuffling:
        random.seed(RANDOM_SEED)
        random.shuffle(filenames)

    # Process dataset files.
    i = 0
    fidx = 0
    while i < len(filenames):  # 循环文件名
        # Open new TFRecord file.
        tf_filename = _get_output_filename(output_dir, name, fidx)  # 获取输出文件名
        with tf.python_io.TFRecordWriter(tf_filename) as tfrecord_writer:
            j = 0
            while i < len(filenames) and j < SAMPLES_PER_FILES:  # 一个文件200张图
                sys.stdout.write('
>> Converting image %d/%d' % (i+1, len(filenames)))
                sys.stdout.flush()  # 这两句的输出不会生成多行报告,而是在同一行不断更新数字

                filename = filenames[i]
                img_name = filename[:-4]  # 图片名称,去掉字符'.jpg'
                _add_to_tfrecord(dataset_dir, img_name, tfrecord_writer)  # 获取数据并书写
                i += 1
                j += 1
            fidx += 1

    # Finally, write the labels file:
    # labels_to_class_names = dict(zip(range(len(_CLASS_NAMES)), _CLASS_NAMES))
    # dataset_utils.write_label_file(labels_to_class_names, dataset_dir)
    print('
Finished converting the Pascal VOC dataset!')
这其中,确定具体的每一个tfr文件名函数_get_output_filename很简单,而由文件名读取数据并书写进tfr函数也就分为读文件和写文件两步骤,都很直观,
def _add_to_tfrecord(dataset_dir, name, tfrecord_writer):
    """Loads data from image and annotations files and add them to a TFRecord.

    Args:
      dataset_dir: Dataset directory;
      name: Image name to add to the TFRecord;
      tfrecord_writer: The TFRecord writer to use for writing.
    """
    image_data, shape, bboxes, labels, labels_text, difficult, truncated =
        _process_image(dataset_dir, name)  # 由文件名读取数据
    example = _convert_to_example(image_data, labels, labels_text,
                                  bboxes, shape, difficult, truncated)  # 书写tfr
    tfrecord_writer.write(example.SerializeToString())


def _get_output_filename(output_dir, name, idx):
    return '%s/%s_%03d.tfrecord' % (output_dir, name, idx)
下面是读取图片、标签数据以及书写example的两个函数,实际工作中就是这样每次读取一个图片文件及其对应的标注文件并处理,
def _process_image(directory, name):
    """
    将图片数据存储为bytes,
    :param directory: voc文件夹
    :param name: 图片名
    :return: 需要写入tfr的数据
    """
    # Read the image file.
    # DIRECTORY_IMAGES = 'JPEGImages/'
    filename = directory + DIRECTORY_IMAGES + name + '.jpg'
    image_data = tf.gfile.FastGFile(filename, 'rb').read()  # 源码中'rb'错写成'r'

    # Read the XML annotation file.
    filename = os.path.join(directory, DIRECTORY_ANNOTATIONS, name + '.xml')
    tree = ET.parse(filename)
    root = tree.getroot()

    # Image shape.
    size = root.find('size')
    shape = [int(size.find('height').text),
             int(size.find('width').text),
             int(size.find('depth').text)]
    # Find annotations.
    bboxes = []
    labels = []
    labels_text = []
    difficult = []
    truncated = []
    for obj in root.findall('object'):
        label = obj.find('name').text
        labels.append(int(VOC_LABELS[label][0]))
        labels_text.append(label.encode('ascii'))

        if obj.find('difficult'):
            difficult.append(int(obj.find('difficult').text))
        else:
            difficult.append(0)
        if obj.find('truncated'):
            truncated.append(int(obj.find('truncated').text))
        else:
            truncated.append(0)

        bbox = obj.find('bndbox')
        bboxes.append((float(bbox.find('ymin').text) / shape[0],
                       float(bbox.find('xmin').text) / shape[1],
                       float(bbox.find('ymax').text) / shape[0],
                       float(bbox.find('xmax').text) / shape[1]
                       ))
    return image_data, shape, bboxes, labels, labels_text, difficult, truncated


def _convert_to_example(image_data, labels, labels_text, bboxes, shape,
                        difficult, truncated):
    """Build an Example proto for an image example.

    Args:
      image_data: string, JPEG encoding of RGB image;
      labels: list of integers, identifier for the ground truth;
      labels_text: list of strings, human-readable labels;
      bboxes: list of bounding boxes; each box is a list of integers;
          specifying [xmin, ymin, xmax, ymax]. All boxes are assumed to belong
          to the same label as the image label.
      shape: 3 integers, image shapes in pixels.
    Returns:
      Example proto
    """
    xmin = []
    ymin = []
    xmax = []
    ymax = []
    for b in bboxes:
        assert len(b) == 4
        # pylint: disable=expression-not-assigned
        [l.append(point) for l, point in zip([ymin, xmin, ymax, xmax], b)]
        # pylint: enable=expression-not-assigned

    image_format = b'JPEG'
    example = tf.train.Example(features=tf.train.Features(feature={
            'image/height': int64_feature(shape[0]),
            'image/width': int64_feature(shape[1]),
            'image/channels': int64_feature(shape[2]),
            'image/shape': int64_feature(shape),
            'image/object/bbox/xmin': float_feature(xmin),
            'image/object/bbox/xmax': float_feature(xmax),
            'image/object/bbox/ymin': float_feature(ymin),
            'image/object/bbox/ymax': float_feature(ymax),
            'image/object/bbox/label': int64_feature(labels),
            'image/object/bbox/label_text': bytes_feature(labels_text),
            'image/object/bbox/difficult': int64_feature(difficult),
            'image/object/bbox/truncated': int64_feature(truncated),
            'image/format': bytes_feature(image_format),  # 图像编码格式
            'image/encoded': bytes_feature(image_data)}))  # 二进制图像数据
    return example
至此,数据预处理tfr文件生成步骤就完成了。
附录、Example feature生成函数
具体的example feature生成函数比较简单,为了完整性,下面给出来,位于程序脚本datasets.dataset_utils.py中:
def int64_feature(value):
    """Wrapper for inserting int64 features into Example proto.
    """
    if not isinstance(value, list):
        value = [value]
    return tf.train.Feature(int64_list=tf.train.Int64List(value=value))


def float_feature(value):
    """Wrapper for inserting float features into Example proto.
    """
    if not isinstance(value, list):
        value = [value]
    return tf.train.Feature(float_list=tf.train.FloatList(value=value))


def bytes_feature(value):
    """Wrapper for inserting bytes features into Example proto.
    """
    if not isinstance(value, list):
        value = [value]
    return tf.train.Feature(bytes_list=tf.train.BytesList(value=value))
标签数字序号对应表
VOC_LABELS = {
    'none': (0, 'Background'),
    'aeroplane': (1, 'Vehicle'),
    'bicycle': (2, 'Vehicle'),
    'bird': (3, 'Animal'),
    'boat': (4, 'Vehicle'),
    'bottle': (5, 'Indoor'),
    'bus': (6, 'Vehicle'),
    'car': (7, 'Vehicle'),
    'cat': (8, 'Animal'),
    'chair': (9, 'Indoor'),
    'cow': (10, 'Animal'),
    'diningtable': (11, 'Indoor'),
    'dog': (12, 'Animal'),
    'horse': (13, 'Animal'),
    'motorbike': (14, 'Vehicle'),
    'person': (15, 'Person'),
    'pottedplant': (16, 'Indoor'),
    'sheep': (17, 'Animal'),
    'sofa': (18, 'Indoor'),
    'train': (19, 'Vehicle'),
    'tvmonitor': (20, 'Indoor'),
}