nextcloud在centos系统下搭建自己的私有云盘
搭建一套自己的私有云盘,让数据存储更加方便、可靠。自己搭建的云存储,首先没有什么容量、下载速度的限制,而且本地访问速度很快。一开始以为Nextcloud只是一个网盘云存储,后来看到Nextcloud内置了Office文档、图片相册、日历联系人、两步验证、文件管理、RSS阅读等丰富的应用,我发现Nextcloud已经仅仅可以用作个人或者团队存储与共享,还可以打造成为一个个人办公平台,几乎相当于一个个人的Dropbox了。
自己搭建私有云其实很简单,首先需要一台主机,然后需要选择一个私有云软件(比如ownCloud、nextCloud、seafile)。以下内容将介绍如何在 CentOS 7 服务器中安装和配置Nextcloud,并且会通过 Nginx 和 PHP7-FPM 来运行 Nextcloud,同时使用 MariaDB 数据库系统。具体部署方法如下:
一 . 部署环境的系统是Centos7版本
[root@nextcloud ~]# cat /etc/redhat-release
CentOS Linux release 7.1.1503 (Core)
二. 安装并配置Nginx和php-fpm
[root@nextcloud ~]# yum -y install epel-release
[root@nextcloud ~]# yum -y install nginx
添加一个yum源来安装php-fpm
rpm -Uvh https://mirror.webtatic.com/yum/el7/webtatic-release.rpm
安装相关组件
yum -y install php70w-fpm php70w-cli php70w-gd php70w-mcrypt php70w-mysql php70w-pear php70w-xml php70w-mbstring php70w-pdo php70w-json php70w-pecl-apcu php70w-pecl-apcu-devel
完成后,检查一下php-fpm是否已正常安装
[root@nextcloud ~]# php -v
PHP 7.0.27 (cli) (built: Jan 14 2018 09:00:22) ( NTS )
Copyright (c) 1997-2017 The PHP Group
Zend Engine v3.0.0, Copyright (c) 1998-2017 Zend Technologies
配置php-fpmvim /etc/php-fpm.d/www.conf.....user = nginx //将用户和组都改为nginxgroup = nginx.....listen = 127.0.0.1:9000 //php-fpm所监听的端口为9000......env[HOSTNAME] = $HOSTNAME //去掉下面几行注释env[PATH] = /usr/local/bin:/usr/bin:/binenv[TMP] = /tmpenv[TMPDIR] = /tmpenv[TEMP] = /tmp在/var/lib目录下为session路径创建一个新的文件夹,并将用户名和组设为nginxmkdir -p /var/lib/php/sessionchown nginx:nginx -R /var/lib/php/session/ 启动Nginx和php-fpm服务,并添加开机启动systemctl start php-fpmsystemctl start nginxsystemctl enable php-fpmsystemctl enable nginx三. 安装并配置MariaDB 或 mysql使用MaraiDB作为Nextcloud数据库。yum安装MaraiDB服务yum -y install mariadb mariadb-server启动MariaDB服务并添加开机启动systemctl start mariadbsystemctl enable mariadbMariaDB [(none)]> create database nextcloud; MariaDB [(none)]> create user nextcloud@localhost identified by '123456';MariaDB [(none)]> grant all privileges on nextcloud.* to nextcloud@localhost identified by '123456';MariaDB [(none)]> flush privileges;四. 配置Nextcloud生成自签名SSL证书
先为SSL证书创建一个新的文件夹:cd /etc/nginx/cert/penssl req -new -x509 -days 365 -nodes -out /etc/nginx/cert/nextcloud.crt -keyout /etc/nginx/cert/nextcloud.key.....Country Name (2 letter code) [XX]:cn //国家State or Province Name (full name) []:beijing //省份Locality Name (eg, city) [Default City]:beijing //地区名字Organization Name (eg, company) [Default Company Ltd]:lxplwh //公司名Organizational Unit Name (eg, section) []:Technology //部门Common Name (eg, your name or your server's hostname) []:lxplwh //CA主机名Email Address []:lxplwh@126.com 然后将证书文件的权限设置为660chmod 700 /etc/nginx/certchmod 600 /etc/nginx/cert/*五. 下载并安装Nextcloudwget https://download.nextcloud.com/server/releases/nextcloud-12.0.4.zipunzip nextcloud-12.0.4.zipmv nextcloud /usr/share/nginx/html/ 并为Nextcloud创建data目录,将Nextcloud的用户和组修改为nginxmkdir -p nextcloud/data/chown nginx:nginx -R nextcloud/ 六. 配置Nginx虚拟主机#user nobody;
worker_processes 1;
events {
worker_connections 1024;
}
http {
include mime.types;
default_type application/octet-stream;
sendfile on;
keepalive_timeout 65;
upstream php-handler {
server 127.0.0.1:9000;
}
server {
listen 80;
server_name nextcloud.lxplwh.com;
return 301 https://$server_name$request_uri;
}
server {
listen 443 ssl;
server_name nextcloud.lxplwh.com;
ssl_certificate /etc/nginx/cert/nextcloud.crt;
ssl_certificate_key /etc/nginx/cert/nextcloud.key;
add_header Strict-Transport-Security "max-age=15768000;
includeSubDomains; preload;";
add_header X-Content-Type-Options nosniff;
add_header X-Frame-Options "SAMEORIGIN";
add_header X-XSS-Protection "1; mode=block";
add_header X-Robots-Tag none;
add_header X-Download-Options noopen;
add_header X-Permitted-Cross-Domain-Policies none;
root /usr/share/nginx/html/nextcloud/;
location = /robots.txt {
allow all;
log_not_found off;
access_log off;
}
location = /.well-known/carddav {
return 301 $scheme://$host/remote.php/dav;
}
location = /.well-known/caldav {
return 301 $scheme://$host/remote.php/dav;
}
client_max_body_size 512M;
fastcgi_buffers 64 4K;
gzip off;
error_page 403 /core/templates/403.php;
error_page 404 /core/templates/404.php;
location / {
rewrite ^ /index.php$uri;
}
location ~ ^/(?:build|tests|config|lib|3rdparty|templates|data)/ {
deny all;
}
location ~ ^/(?:.|autotest|occ|issue|indie|db_|console) {
deny all;
}
location ~ ^/(?:index|remote|public|cron|core/ajax/update|status|ocs/v[12]|updater/.+|ocs-provider/.+|core/templates/40[34]).php(?:$|/) {
include fastcgi_params;
fastcgi_split_path_info ^(.+.php)(/.*)$;
fastcgi_param SCRIPT_FILENAME $document_root$fastcgi_script_name;
fastcgi_param PATH_INFO $fastcgi_path_info;
fastcgi_param HTTPS on;
fastcgi_param modHeadersAvailable true;
fastcgi_param front_controller_active true;
fastcgi_pass php-handler;
fastcgi_intercept_errors on;
fastcgi_request_buffering off;
}
location ~ ^/(?:updater|ocs-provider)(?:$|/) {
try_files $uri/ =404;
index index.php;
}
location ~* .(?:css|js)$ {
try_files $uri /index.php$uri$is_args$args;
add_header Cache-Control "public, max-age=7200";
add_header Strict-Transport-Security "max-age=15768000;includeSubDomains; preload;";
add_header X-Content-Type-Options nosniff;
add_header X-Frame-Options "SAMEORIGIN";
add_header X-XSS-Protection "1; mode=block";
add_header X-Robots-Tag none;
add_header X-Download-Options noopen;
add_header X-Permitted-Cross-Domain-Policies none;
access_log off;
}
location ~* .(?:svg|gif|png|html|ttf|woff|ico|jpg|jpeg)$ {
try_files $uri /index.php$uri$is_args$args;
access_log off;
}
}
确保没有问题后重启Nginx服务[root@nextcloud ~]# nginx -t
nginx: the configuration file /etc/nginx/nginx.conf syntax is ok
nginx: configuration file /etc/nginx/nginx.conf test is successful
解析上面nginx中配置的域名nextcloud.lxplwh.com,邦定hosts. 访问http://nextcloud.lxplwh.com进行Nextcloud界面安装.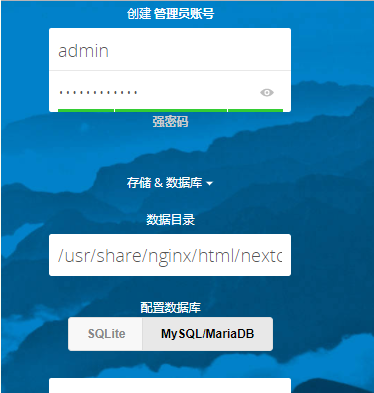
设置帐号密码,以及数据库的连接信息。如果不报错,即可安装完成,进入。

到此安装完成。
下面进行一些安全与性能优化
为了您服务的安全和性能, 请将所有设置配置正确. 我们将会进行一些自动化检查以帮助您完成这项工作. 详情请查看 "小提示" 部分及相关文档.
- HTTP 请求头 "X-Frame-Options" 没有配置为 "SAMEORIGIN". 这是一个潜在的安全或隐私风险, 我们建议您调整这项设置.
修改程序目录下的config目录中的config.php文件,在配置文件中添加多个Memcached实例,也可以添加一个:
'memcache.local' => 'OCMemcacheAPCu','memcache.distributed' => 'OCMemcacheMemcached','memcached_servers' => array( array('localhost', 11211), array('server1.example.com', 11211), array('server2.example.com', 11211), ),在配置文件中添加如下,这个是通过TCP连接的:
'memcache.local' => 'OCMemcacheRedis','redis' => array( 'host' => 'localhost', 'port' => 6379, ),还有性能更好的UNIX连接:'memcache.local' => 'OCMemcacheRedis','redis' => array( 'host' => '/var/run/redis/redis.sock', 'port' => 0, 'dbindex' => 0, 'password' => 'secret', 'timeout' => 1.5, ),同时,官方还推荐加入如下,来用于存储文件锁:'memcache.locking' => 'OCMemcacheRedis',Nextcloud的邮件发信设置
使用管理员账号登陆Nextcloud。点击右上角的设置图标里的"管理"-"其他设置"
转载自:https://www.cnblogs.com/lxplwh/p/8398522.html