本文将介绍NetScaler的VPX部署在Azure China上。包括如何通过vhd文件上传、创建虚拟机,以及如何部署VPX。
一、首先将VHD文件解压,放到目录D:Azure中。VHD文件的获得请联系微软或Citrix的同事。
通过powershell命令,上传vhd文件到Azure:
Add-AzureVhd -Destination https://hweast.blob.core.chinacloudapi.cn/vhds/netscaler.vhd -LocalFilePath D:AzureDynamic.vhd
通过进度条,可以看到上传的过程。

MD5 hash is being calculated for the file  D:AzureDynamic.vhd.
MD5 hash calculation is completed.
Elapsed time for the operation: 00:00:59
Creating new page blob of size 21474836992...
Elapsed time for upload: 00:01:31

LocalFilePath                DestinationUri
-------------                    --------------
D:AzureDynamic.vhd         https://portalvhds6mlqtd15wqmm7.blob.core.chinacloudapi.cn/hwmovie/netscaler.vhd
大约1小时的时间,上传成功。

二、把vhd文件创建成Image,以便用此Image创建虚拟机:
在"虚拟机"菜单的Images下,点击"Create"

点击Create:

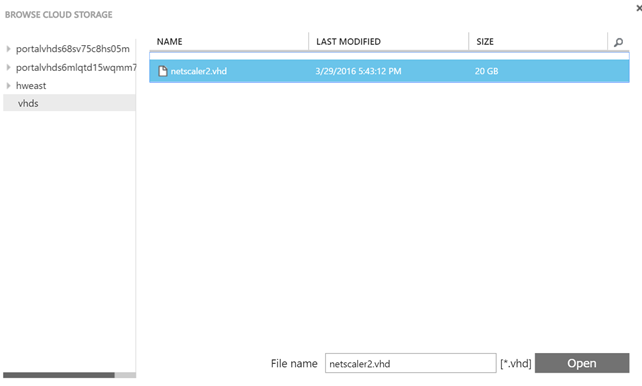
选择VHD所在的storage account和container:
开始创建VM Image:

创建好后,此Image成为"Image Gallery"中的一个Image。可以通过PowerShell命令查看此Image:
PS C:Usershengz> Get-AzureVMImage |Where-Object {$_.ImageName -match "netscaler"}


ImageName            : netscaler_vpx
OS                   : Linux
MediaLink            : https://hweast.blob.core.chinacloudapi.cn/vhds/netscaler2.vhd
LogicalSizeInGB      : 20
AffinityGroup        :
Category             : User
Location             : China East
Label                : netscaler_vpx
Description          :
Eula                 :
ImageFamily          :
PublishedDate        : 0001/1/1 0:00:00
IsPremium            : False
IconUri              :
SmallIconUri         :
PrivacyUri           :
RecommendedVMSize    :
PublisherName        :
IOType               : Standard
ShowInGui            :
IconName             :
SmallIconName        :
OperationDescription : Get-AzureVMImage
OperationId          : ed691a8d-5917-4eaf-97ed-37edf73358fc
OperationStatus      : Succeeded
通过
$vmimg= Get-AzureVMImage |Where-Object {$_.ImageName -match "netscaler"}
通过命令行方式创建虚拟机:
New-AzureVMConfig -Name hwnetscaler2 -InstanceSize Medium -ImageName $vmimg.ImageName | Add-AzureProvisioningConfig -Linux -LinuxUser user -Password Citrix123 | Set-AzureSubnet -SubnetNames Subnet-1 | Set-AzureStaticVNetIP -IPAddress 10.1.1.101 | New-AzureVM -ServiceName hwnetscaler -Location "China East" -VNetName hwvnet
WARNING: The specified DNS name is already taken.
WARNING: VNetName, DnsSettings, DeploymentLabel or DeploymentName Name can only be specified on new deployments.

OperationDescription OperationId                          OperationStatus
-------------------- -----------                          ---------------
New-AzureVM          f32f2849-e9e4-4c04-8db4-ef485af3067d Succeeded
在此命令中,包含了定义用户名和密码:
用户名是: user
密码是: Citrix123
另外,如果忘记用户名密码,可以采用
用户名: nsroot
密码:DeploymentID(在Azure管理页面上获得)
也可以通过图形化方式创建虚拟机:

选择From Gallery。

选择My Image,选中netscaler_vpx。
在创建页面中,填入相应的信息,此时不能用user用户名,可以使用azureuser:

还需要创建:云服务、选择Vnet、选择HASet、做好端口映射(后面部署也可以):

点击确认,创建虚拟机:

三、配置端口映射
对组成HA的两台NetScaler的VPX,需要对创建好的虚拟机进行端口配置,包括http、https的负载均衡,另外,对管理端口也需要做好端口映射:

至此,NetScaler在Azure上创建成功,下面将介绍如何配置NetScaler。