iOS 静态类库项目的建立与使用
新建 Xcode workspace
打开 Xcode , 选择 File -> New -> Workspace , 将 Workspace 命名为 Test.xcworkspace , 并选择合适的目录。
新建 Static Library 项目
选择 File -> New -> Project , 项目模板选择 Cocoa Touch Static Library , 项目名称命名为 MyLib.xcodeproj , 注意选中 Use Automatic Reference Counting 。
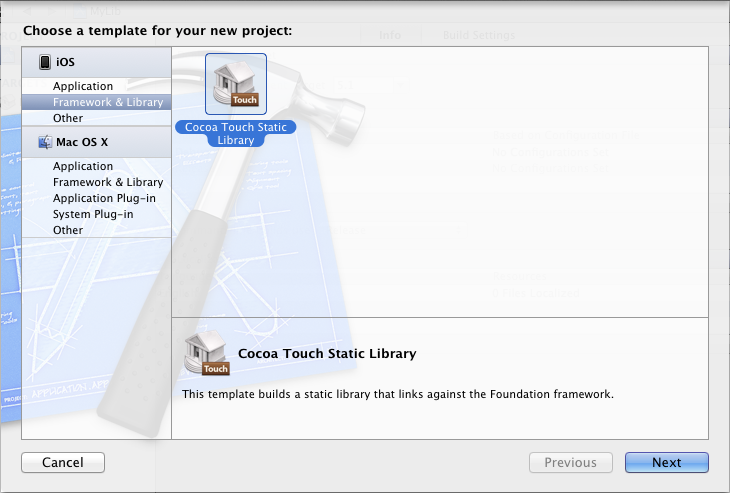
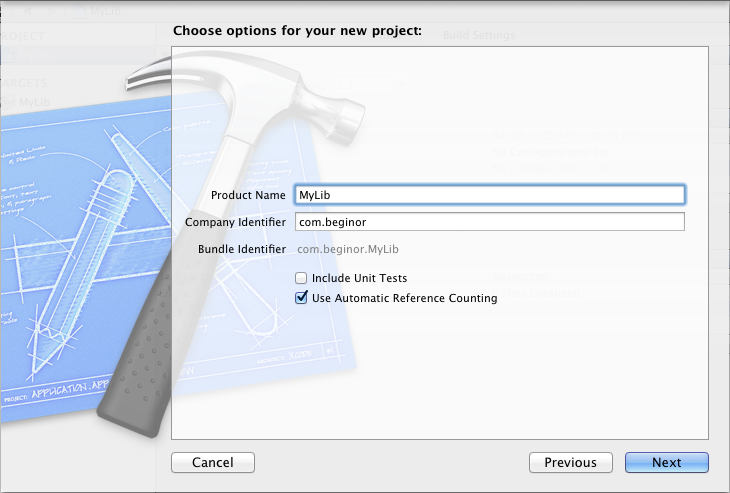
Xcode 会在项目中自动生成 MyLib.h 和 MyLib.m 文件, 单击 MyLib.h 文件, 添加下面的两个方法定义:
|
1
2
|
- (NSInteger) add:(NSInteger)a and:(NSInteger)b; + (NSString*) connect:(NSString*)str1 and:(NSString*)str2; |
再打开 MyLib.m 文件, 添加刚刚定义两个文件的实现:
- (NSInteger) add:(NSInteger)a and:(NSInteger)b {
   return a + b;
}

+ (NSString*) connect:(NSString *)str1 and:(NSString *)str2 {
   return [NSString stringWithFormat:@"%@ %@", str1, str2];
}
现在, 最终的文件看起来是这样的:
|
1
2
3
4
5
6
7
8
9
10
11
12
13
14
15
16
17
18
19
20
21
22
23
24
25
26
27
28
29
30
31
32
33
34
35
36
37
38
|
// // MyLib.h // MyLib // // Created by gdeic on 4/16/12. // Copyright (c) 2012 __MyCompanyName__. All rights reserved. // #import <FOUNDATION foundation.h> @interface MyLib : NSObject - (NSInteger) add:(NSInteger)a and:(NSInteger)b; + (NSString*) connect:(NSString*)str1 and:(NSString*)str2; @end // // MyLib.m // MyLib // // Created by gdeic on 4/16/12. // Copyright (c) 2012 __MyCompanyName__. All rights reserved. // #import "MyLib.h" @implementation MyLib - (NSInteger) add:(NSInteger)a and:(NSInteger)b { return a + b; } + (NSString*) connect:(NSString *)str1 and:(NSString *)str2 { return [NSString stringWithFormat:@"%@ %@", str1, str2]; } @end |
选中 MyLib 项目, 在中间的编辑器窗口中选择项目的 Target , 选择 Build Phases 标签, 展开 Copy Headers 分组, 下面有三个子分组, 分别是 Public 、 Project 与 Private , 将 MyLib.h 拖拽到 Public 分组即可。
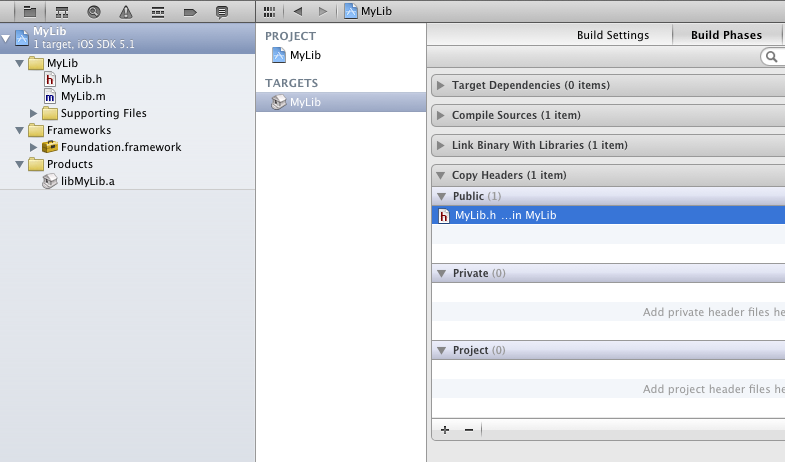
保存所有文件, 选择 Product -> Build , 进行编译, 生成 libMyLib.a 文件, 同时也会将 MyLib.h 文件复制到输出目录。
使用静态类库项目
选择 File -> New -> Project , 项目模板选择 iOS -> Application -> Single View Application , 项目名称命名为 MyApp , 注意勾选 Use Storyboards 和 Use Automatic Reference Counting 。
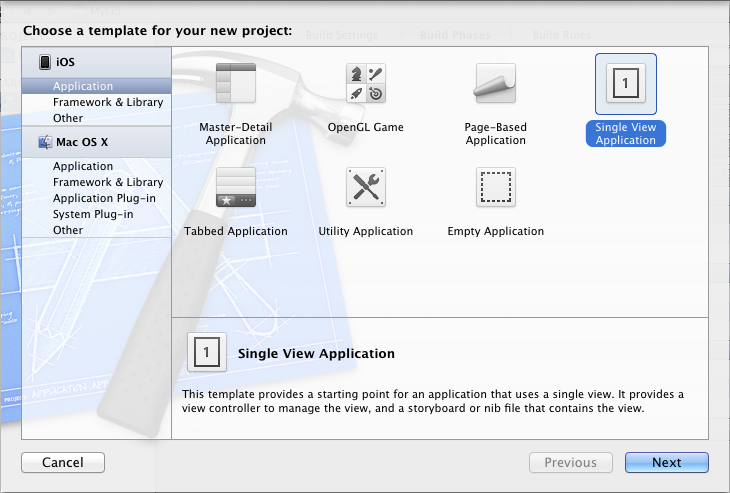
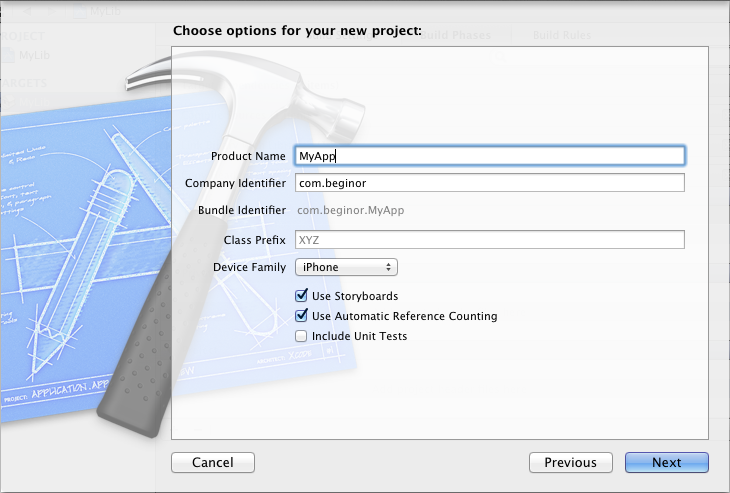
建好项目之后, 项目窗口如下如所示:
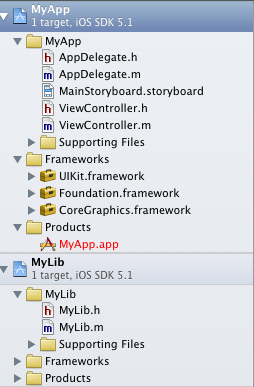
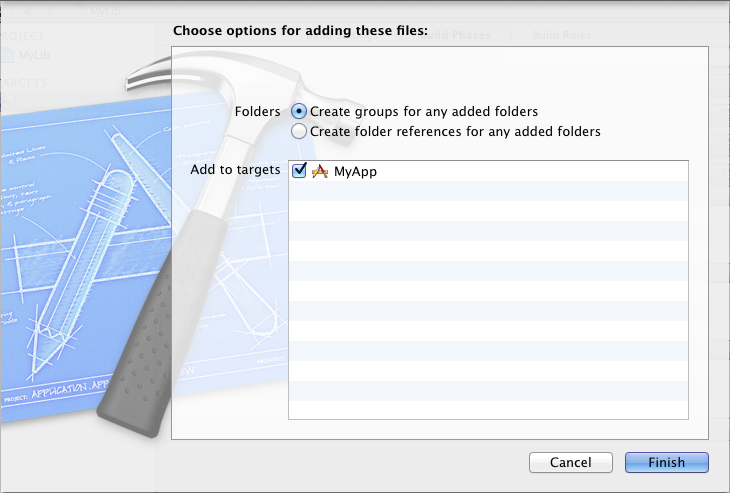
将 MyLib 项目拖拽到 MyApp 项目的 Frameworks 文件夹, 在弹出的对话框中选择 Create groups for any added folders , 然后点击 Finish 按钮。
选中 MyApp 项目, 在选择项目的目标 (Target) , 选中 Summary 标签页下找到 Linked Frameworks and Library 分组选项, 如下图:
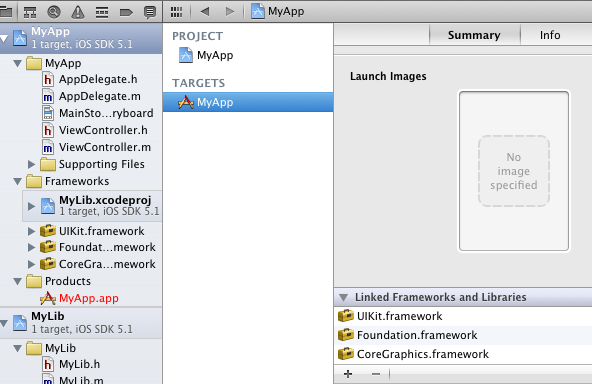
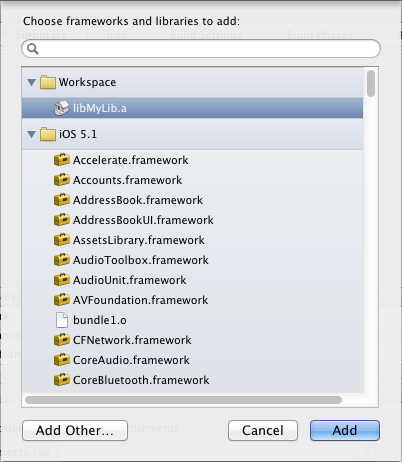
点击下面的加号按钮, 将工作区的 libMyLib.a 添加进去。
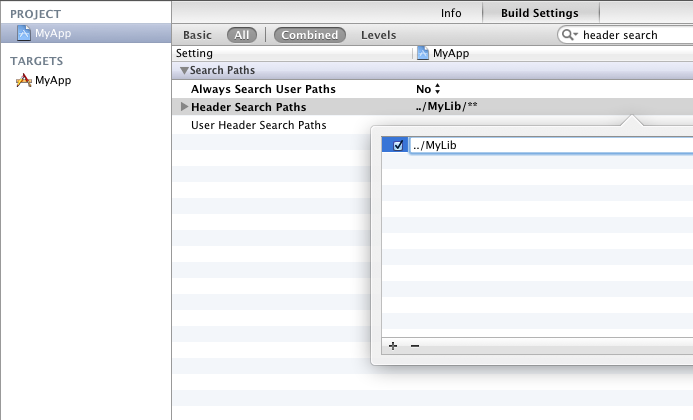
接下来添加头文件搜索目录, 选中 Targets 上面的 Project , 选择 Build Settings 标签页,在搜索框内输入 header search 进行过滤, 找到 Header Search Paths , 添加一行, 输入 ../MyLib , 并选中递归复选框。
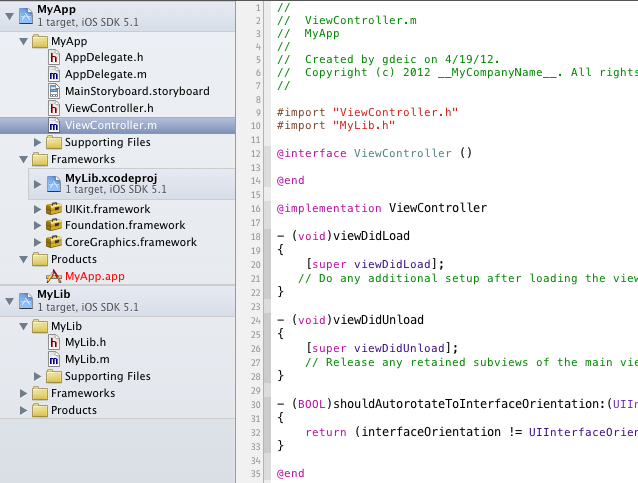
现在要先验证一下对 MyLib 的引用是否正确, 打开 MyApp 项目的 ViewController.m , 添加对 MyLib.h 的引用, 如下图所示, 并编译 MyApp , 如果编译成功, 则表示引用正确。
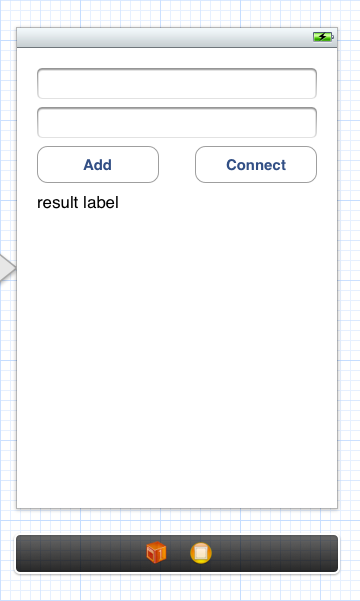
打开 MainStoryboard.storyboard 文件, 在生成的 ViewController 上添加两个 UITextField 、 两个 UIButton 以及一个 UILabel, 如下图所示:
并添加相应的 outlet 和 action , ViewController.h 如下:
|
1
2
3
4
5
6
7
8
9
10
11
12
13
14
15
16
17
18
19
20
21
22
23
|
// // ViewController.h // MyApp // // Created by gdeic on 4/19/12. // Copyright (c) 2012 __MyCompanyName__. All rights reserved. // #import <UIKIT uikit.h> @interface ViewController : UIViewController @property (weak, nonatomic) IBOutlet UITextField *textField1; @property (weak, nonatomic) IBOutlet UITextField *textField2; @property (weak, nonatomic) IBOutlet UILabel *resultLabel; - (IBAction)addButtonClick:(id)sender; - (IBAction)connectButtonClick:(id)sender; @end |
打开 ViewController.m 文件, 实现 addButtonClick: 和 connectButtonClick: 方法, 在 addButtonClick: 方法中调用 MyLib 的实例方法 add:and: , 在 connectButtonClick: 方法中调用 MyLib 的静态方法 connect:and: , 如下所示:
|
1
2
3
4
5
6
7
8
9
10
11
12
13
14
15
16
17
18
19
20
21
|
- (IBAction)addButtonClick:(id)sender { // 获取用户输入的两个数字 NSInteger num1 = [self.textField1.text integerValue]; NSInteger num2 = [self.textField2.text integerValue]; // 初始化一个新的 MyLib 实例 MyLib* myLib = [[MyLib alloc] init]; // 调用实例方法相加 NSInteger result = [myLib add:num1 and:num2]; // 显示结果 self.resultLabel.text = [NSString stringWithFormat:@"%d + %d = %d", num1, num2,result]; } - (IBAction)connectButtonClick:(id)sender { // 获取用户输入的两个字符串 NSString* str1 = self.textField1.text; NSString* str2 = self.textField2.text; // 调用 MyLib 的静态方法连两个字符串 NSString* result = [MyLib connect:str1 and:str2]; // 显示结果 self.resultLabel.text = result; } |
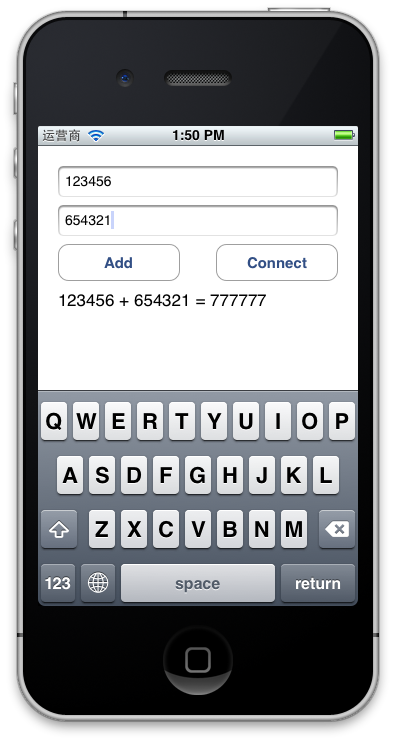
点击添加按钮时, 效果如下图所示:
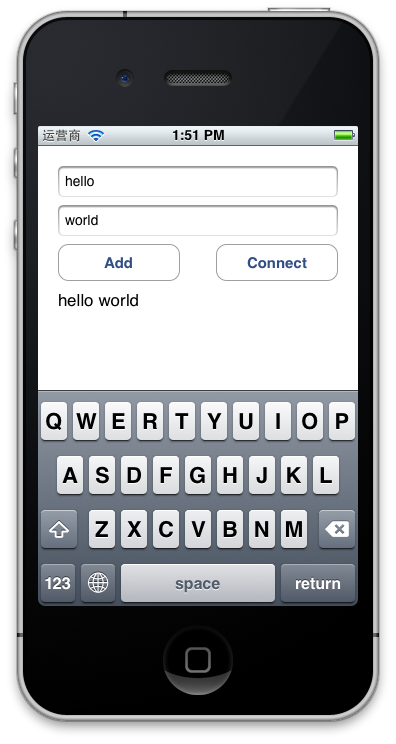
点击 Connect 按钮时, 效果如下图所示:
张志敏所有文章遵循创作共用版权协议,要求署名、非商业 、保持一致。在满足创作共用版权协议的基础上可以转载,但请以超链接形式注明出处。