惠普 hpacucli工具使用
命令组成
hpacucli [parameter=value]
查看:
查看所有控制器状态
hpacucli ctrl all show
查看slot 0阵列信息详细状态 (可以查看物理磁盘和逻辑磁盘的对应关系)
1)hpacucli ctrl slot=0 show config detail
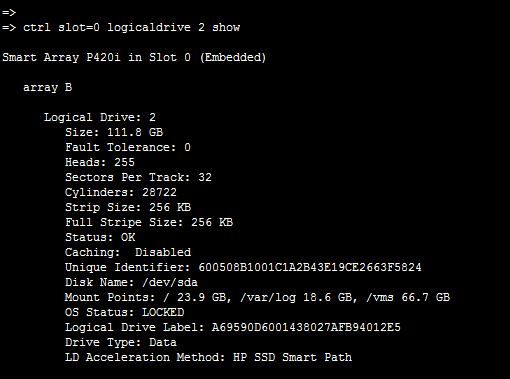
2)hpacucli ctrl slot=0 logicaldrive 2 show(逻辑磁盘信息)

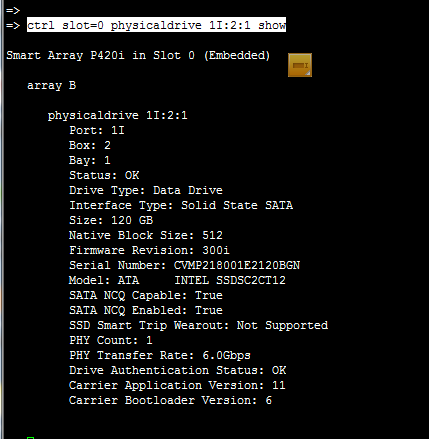
3)hpacucli ctrl slot=0 physicaldrive 1I:2:1 show(物理磁盘信息)

查看slot 0 所有阵列信息
hpacucli ctrl slot=0 array all show
查看slot 0 阵列B 所有逻辑驱动器信息
hpacucli ctrl slot=0 array B ld all show
查看slot 0 阵列B 所有物理驱动器信息
hpacucli ctrl slot=0 array B pd all show
查看slot 0 阵列B 所有物理驱动器状态
hpacucli ctrl slot=0 array B pd all show status
创建:
用3,4,5,6号盘创建一个raid1+0阵列
hpacucli ctrl slot=0 create type=ld drives=1I:1:3,1I:1:4,2I:1:5,2I:1:6 raid=1+0
用3,4,5号盘创建一个raid5阵列
hpacucli ctrl slot=0 create type=ld drives=1I:1:3,1I:1:4,2I:1:5 raid=5
用3号盘创建一个raid0阵列
hpacucli ctrl slot=0 create type=ld drives=1I:1:3 raid=0
删除:
强制删除阵列 B
hpacucli ctrl slot=0 array B delete forced
强制删除逻辑磁盘2
hpacucli ctrl slot=0 logicaldrive 2 delete forced
缓存:
关闭物理磁盘cache
hpacucli ctrl slot=0 modify drivewritecache=disable
打开逻辑磁盘缓存
hpacucli ctrl slot=0 logicaldrive 2 modify caching=enable
在没有电池的情况下开启raid写缓存
hpacucli ctrl slot=0 modify nobatterywritecache=enable
设置读写百分比
hpacucli ctrl slot=0 modify cacheratio=10/90
指示灯:
打开array B磁盘的led灯
hpacucli ctrl slot=0 array B modify led=on
打开3号磁盘的led灯
hpacucli ctrl slot=0 pd 1I:1:3 modify led=on
查看cache信息:
hpacucli ctrl all show config detail | grep -i cache
查看阵列号及SSDSmartPath:
hpssacli ctrl all show config detail| egrep -i 'Array:|HP SSD Smart Path'
SSD需要注意:(打开逻辑缓存需要关闭SSD Smart Path功能)
hpssacli ctrl slot=0 array A modify ssdsmartpath=disable
遇到的问题:
SSD 做成raid0后,开启逻辑磁盘缓存时报错,如下
ctrl slot=0 logicaldrive 8 modify caching=enable forced
Error: Invalid drive specified: 8
观察状态:ctrl slot=0 logicaldrive 6 show 注意最后一项为
LD Acceleration Method: HP SSD Smart Path (这种状态不能给逻辑磁盘做缓存)
使用命令
ctrl slot=0 array F modify ssdsmartpath=disable
切换成 LD Acceleration Method: Controller Cache
就可以成功设置了。
ctrl slot=0 logicaldrive 6 show