完整的项目案例: springmvc.zip
目录

实例
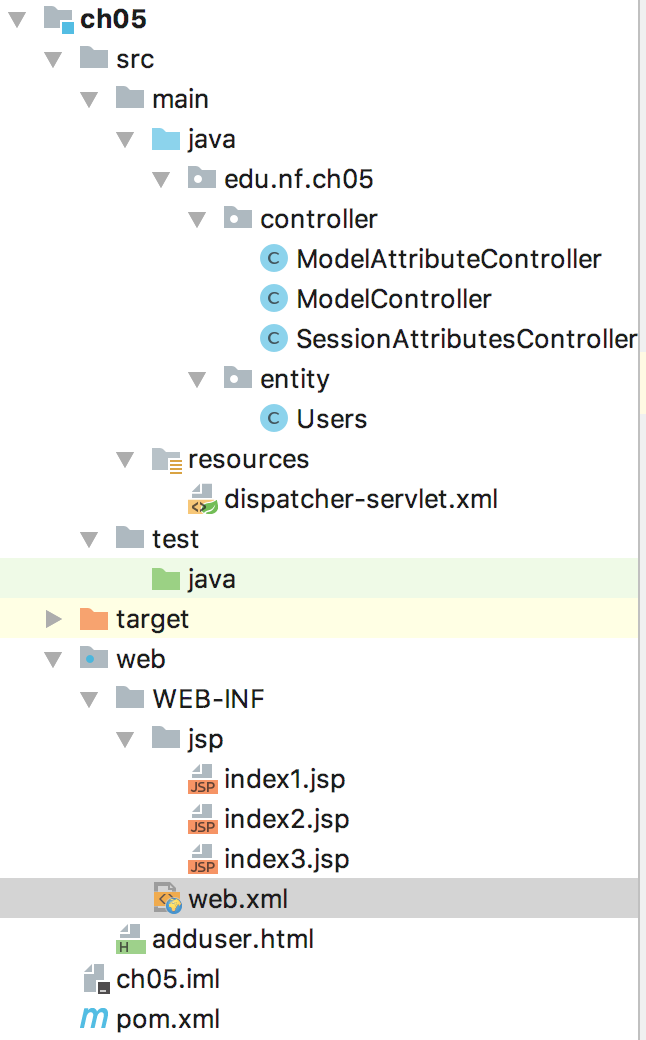
项目结构:
配置web.xml


<?xml version="1.0" encoding="UTF-8"?>
<web-app xmlns="http://xmlns.jcp.org/xml/ns/javaee"
         xmlns:xsi="http://www.w3.org/2001/XMLSchema-instance"
         xsi:schemaLocation="http://xmlns.jcp.org/xml/ns/javaee http://xmlns.jcp.org/xml/ns/javaee/web-app_4_0.xsd"
         version="4.0">

    <!-- 请求总控器 -->
    <servlet>
        <servlet-name>dispatcher</servlet-name>
        <servlet-class>org.springframework.web.servlet.DispatcherServlet</servlet-class>
        <init-param>
            <param-name>contextConfigLocation</param-name>
            <param-value>classpath:dispatcher-servlet.xml</param-value>
        </init-param>
    </servlet>
    <servlet-mapping>
        <servlet-name>dispatcher</servlet-name>
        <url-pattern>/</url-pattern>
    </servlet-mapping>
</web-app>
配置dispatcher-servlet.xml
<?xml version="1.0" encoding="UTF-8"?>
<beans xmlns="http://www.springframework.org/schema/beans"
       xmlns:xsi="http://www.w3.org/2001/XMLSchema-instance"
       xmlns:context="http://www.springframework.org/schema/context"
       xmlns:mvc="http://www.springframework.org/schema/mvc"
       xsi:schemaLocation="http://www.springframework.org/schema/beans http://www.springframework.org/schema/beans/spring-beans.xsd http://www.springframework.org/schema/context http://www.springframework.org/schema/context/spring-context.xsd http://www.springframework.org/schema/mvc http://www.springframework.org/schema/mvc/spring-mvc.xsd">

    <context:component-scan base-package="edu.nf.ch05.controller"/>

    <mvc:annotation-driven/>

    <mvc:default-servlet-handler/>

    <bean class="org.springframework.web.servlet.view.InternalResourceViewResolver">
        <property name="prefix" value="/WEB-INF/jsp/"/>
        <property name="suffix" value=".jsp"/>
    </bean>

</beans>
Controller
1、(ModelAttributeController)
package edu.nf.ch05.controller;

import edu.nf.ch05.entity.Users;
import org.springframework.stereotype.Controller;
import org.springframework.web.bind.annotation.GetMapping;
import org.springframework.web.bind.annotation.ModelAttribute;
import org.springframework.web.bind.annotation.PostMapping;
import org.springframework.web.bind.annotation.RequestParam;
import org.springframework.web.servlet.ModelAndView;

/**
 * @author wangl
 * @date 2018/10/30
 */
@Controller
public class ModelAttributeController {

    /**
     * @ModelAttribute标注的方法都会在controller方法执行前先执行
     * 其实就是在执行请求方法前,先将一些数据放入到Model中
     * @return
     */
    @ModelAttribute("user")
    public Users getUsers(){
        Users user = new Users();
        user.setUserName("user5");
        user.setAge(25);
        return user;
    }

    /**
     * 在执行test4之前,先执行getUsers()方法
     * @return
     */
    @GetMapping("/test4")
    public ModelAndView test4(){
        return new ModelAndView("index2");
    }

    /**
     * 在方法参数前标注@ModelAttribute,表示映射参数后将该参数存入Model中
     *
     * 注意:在执行test5之前,同样先执行getUsers()方法,
     * 如果Model中已经存在相同key的对象,那么映射的参数就会覆盖
     * 原先Model中的数据
     * @param user
     * @return
     */
    @PostMapping("/test5")
    public ModelAndView test5(@ModelAttribute("user") Users user){
        return new ModelAndView("index2");
    }
}
2、(ModelController)
package edu.nf.ch05.controller;

import org.springframework.stereotype.Controller;
import org.springframework.ui.Model;
import org.springframework.ui.ModelMap;
import org.springframework.web.bind.annotation.GetMapping;
import org.springframework.web.servlet.ModelAndView;

import java.util.HashMap;
import java.util.Map;

/**
 * @author wangl
 * @date 2018/10/30
 * 使用Model、ModelMap、Map来绑定数据
 * 注意:这个三个类在运行时都是同一个对象
 */
@Controller
public class ModelController {

    /**
     * 使用ModelAndView将数据加入到model中
     * @return
     */
    @GetMapping("/test")
    public ModelAndView test(){
        ModelAndView mv = new ModelAndView("index1");
        //将数据添加到Model中(其实就是放入请求作用域)
        //mv.addObject("userName", "user1");
        //mv.addObject("age", 21);
        //将数据封装到一个Map中,然后再将map存入Model
        Map<String, Object> modelMap = new HashMap<>();
        modelMap.put("userName", "user2");
        modelMap.put("age", 22);
        mv.addAllObjects(modelMap);
        return mv;
    }

    /**
     * 由Spring传入一个map对象,将数据直接存入这个map中
     * @param map
     * @return
     */
    @GetMapping("/test1")
    public ModelAndView test1(Map<String, Object> map){
        map.put("userName", "user3");
        map.put("age", 23);
        return new ModelAndView("index1");
    }

    /**
     * 也可以使用Spring提供的ModelMap对象,
     * 然后传递给ModelAndView
     * @param map
     * @return
     */
    @GetMapping("/test2")
    public ModelAndView test1(ModelMap map){
        map.put("userName", "user4");
        map.put("age", 24);
        return new ModelAndView("index1");
    }

    /**
     * 也可以使用Spring提供的Model对象,直接将数据存入Model中
     * @param model
     * @return
     */
    @GetMapping("/test3")
    public ModelAndView test2(Model model){
        model.addAttribute("userName", "user4");
        model.addAttribute("age", 24);
        return new ModelAndView("index1");
    }
}
3、(SessionAttributesController)
package edu.nf.ch05.controller;

import edu.nf.ch05.entity.Users;
import org.springframework.stereotype.Controller;
import org.springframework.ui.Model;
import org.springframework.web.bind.annotation.GetMapping;
import org.springframework.web.bind.annotation.ModelAttribute;
import org.springframework.web.bind.annotation.PostMapping;
import org.springframework.web.bind.annotation.SessionAttributes;
import org.springframework.web.servlet.ModelAndView;

/**
 * @author wangl
 * @date 2018/10/30
 */
@Controller
/**
 * 将model中对象存入会话作用域,value属性对应model的key,
 * 并且可以存放多个key,它是一个数组,例如:
 * @SessionAttributes({"user","user2"})
 * 注意:能放入会话作用域的只能标注了@ModelAttribute的方法返回值,
 * 以及手动存入Map、Model、ModelMap中的值
 */
@SessionAttributes({"addr","user"})
public class SessionAttributesController {

    @ModelAttribute("user")
    public Users getUsers(){
        Users user = new Users();
        user.setUserName("user5");
        user.setAge(25);
        return user;
    }

    /**
     * 此方法转发到index3.jsp后可以从请求和会话作用域中取值
     * @return
     */
    @GetMapping("/test6")
    public ModelAndView test6(Model model){
        //注意:如果类上修饰了@SessionAttributes,并且也指定了addr的键,
        //那么addr的值也会存入会话作用域
        model.addAttribute("addr","zhuhai");
        return new ModelAndView("index3");
    }

    /**
     * 如果类上修饰了@SessionAttributes并且指定了user的键,同时方法参数上
     * 修饰了@ModelAttribute并且也指定了user的键,那么此时会从会话作用域中
     * 获取一个一个user的值存入model中
     * 另外,当有表单映射数据时会覆盖原有的model中的user对象信息和会话作用域中的user对象信息
     * @param user
     * @return
     */
    @PostMapping("/test7")
    public ModelAndView test7(@ModelAttribute("user") Users user){
        return new ModelAndView("index3");
    }
}
前台页面
(adduser.html)
<!DOCTYPE html>
<html lang="en">
<head>
    <meta charset="UTF-8">
    <title>Title</title>
</head>
<body>
<h1>测试覆盖ModelAttribute</h1>
 <form method="post" action="test5">
    Name:<input type="text" name="userName"/><br/>
    Age:<input type="text" name="age"/><br/>
    <input type="submit" value="submit"/>
 </form>
<h1>测试覆盖SessionAttributes</h1>
<form method="post" action="test7">
    Name:<input type="text" name="userName"/><br/>
    Age:<input type="text" name="age"/><br/>
    <input type="submit" value="submit"/>
</form>
</body>
</html>
index1.jsp
<%--
  Created by IntelliJ IDEA.
  User: wangl
  Date: 2018/10/30
  Time: 15:44
  To change this template use File | Settings | File Templates.
--%>
<%@ page contentType="text/html;charset=UTF-8" language="java" %>
<html>
<head>
    <title>Title</title>
</head>
<body>
${requestScope.userName},${requestScope.age}<br/>
</body>
</html>
index2.jsp
<%--
  Created by IntelliJ IDEA.
  User: wangl
  Date: 2018/10/30
  Time: 15:45
  To change this template use File | Settings | File Templates.
--%>
<%@ page contentType="text/html;charset=UTF-8" language="java" %>
<html>
<head>
    <title>Title</title>
</head>
<body>
${user.userName},${user.age}
</body>
</html>
index3.jsp
<%--
  Created by IntelliJ IDEA.
  User: wangl
  Date: 2018/10/30
  Time: 15:45
  To change this template use File | Settings | File Templates.
--%>
<%@ page contentType="text/html;charset=UTF-8" language="java" %>
<html>
<head>
    <title>Title</title>
</head>
<body>
<h2>请求作用域</h2>
${requestScope.user.userName},${requestScope.user.age}
<h2>会话作用域</h2>
${sessionScope.user.userName},${sessionScope.user.age}
</body>
</html>