在LVS1的基础上进行搭建 https://www.cnblogs.com/hikoukay/p/12860476.html keeplived主机 用node01,node04两台 先清掉原先node01的配置 ipvsadm -C 清掉原先配置 ifconfig eth0:8 down down掉原先配置 node01,node04安装镜像源 yum install keepalived ipvsadm -y 完成之后做如下配置 cd /etc/keepalived/ cp keepalived.conf keepalived.conf.bak vi keepalived.conf node01: vrrp:虚拟路由冗余协议! vrrp_instance VI_1 { state MASTER // node04设为 BACKUP interface eth0 virtual_router_id 51 priority 100 // node04设为 50 advert_int 1 authentication { auth_type PASS auth_pass 1111 } virtual_ipaddress { 192.168.65.110/24 dev eth0 label eth0:3 } } virtual_server 192.168.65.110 80 { delay_loop 6 lb_algo rr lb_kind DR nat_mask 255.255.255.0 persistence_timeout 0 protocol TCP real_server 192.168.65.20 80 { weight 1 HTTP_GET { url { path / status_code 200 } connect_timeout 3 nb_get_retry 3 delay_before_retry 3 } } real_server 192.168.65.30 80 { weight 1 HTTP_GET { url { path / status_code 200 } connect_timeout 3 nb_get_retry 3 delay_before_retry 3 } }
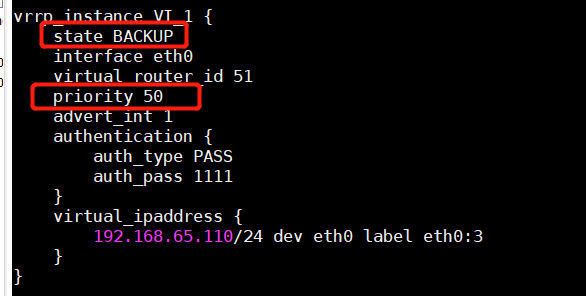
} scp ./keepalived.conf root@node04: /etc/keepalived/keepalived.conf 远程复制,从node01将node01的keeplived配置文件复制到node04并改部分配置
配置好之后就可以启动了
service keepalived start

启动之后就可以访问了
用虚拟ip去访问 我这里是192.168.65.110
可以将主keepalived下线测试故障转移
访问确实不受影响