在图形界面中绘制二维的坐标系统,其中x轴位于绘图区正中,y轴位于绘图区的最左边。实现以下基本功能:
(1)设计界面接受用户输入的实验数据,同时绘制数据点,每个数据点用一个小圆号表示。最后,用直线或曲线拟合这些数据点。
(2)编写程序跟踪用户的鼠标,并时刻把鼠标位置显示出来。
(3)编写图形界面的Java程序响应鼠标单击和键盘事件,从鼠标单击的位置开始横向显示用户键入的字符,若鼠标双击则清空屏幕。
1.首先要在图形界面中绘制一个二维坐标系,这里给两种方法,其实原理还是一样的。
代码一:
import java.awt.*;
import javax.swing.*;
public class DrawFigurs extends JFrame{
JPanel pan=new Mypan();
public DrawFigurs()
{
add(pan);
pan.setBounds(0, 0, 640, 480);
this.setLayout(null);
this.setVisible(true);
this.setSize(400, 400);
this.setDefaultCloseOperation(EXIT_ON_CLOSE); // 关闭时会调用
this.setVisible(true);
}
static class Mypan extends JPanel{
public void paintComponent(Graphics g)
{
super.paintComponents(g);
g.setColor(Color.RED); 坐标轴颜色
g.translate(0, 200);//原点位置
g.drawLine(0,0, 640, 0);//画出x轴
g.drawLine(0, 240, 0, -240);//画出Y轴
}
}
public static void main(String args[])
{
DrawFigurs dd=new DrawFigurs();
}
}
运行如图:
注:画X,Y轴时可能不懂,我相信看完下面代码你就懂了!
drawLine(int x1, int y1, int x2, int y2)
     在此图形上下文的坐标系中,使用当前颜色在点 (x1, y1) 和 (x2, y2) 之间画一条线。
drawRect(int x, int y, int width, int height)
     绘制指定矩形的边框。
JAVA是以屏幕左上角为原点(0,0)往右X增加,往下Y增加

g.drawLine(10,10,10,50);就是在(10,10)、(10,50)之间画一条直线,也就是一条40像素长的垂直直线
g.drawRect(100,100,150,150);以(100,100)坐标划一个宽150,高150的矩形
还有第二种方法。
代码二:
import java.awt.*;
//import java.awt.event.*;
import java.applet.*;
public class completeAxis extends Applet {
/**
*
*/
private static final long serialVersionUID = 1L;
public void paint(Graphics g){
g.setColor(Color.blue);
g.drawLine(10,20,10,280);
g.drawLine(10,280,280,280);
g.drawLine(5,25,10,20);
g.drawLine(10,20,15,25);
g.drawLine(275,275,280,280);
g.drawLine(275,285,280,280);
}
//Construct the applet
public completeAxis() {
}
//Initialize the applet
public void init() {
try {
jbInit();
}
catch(Exception e) {
e.printStackTrace();
}
}
//Component initialization
private void jbInit() throws Exception {
}
//Get Applet information
public String getAppletInfo() {
return "Applet Information";
}
}
这就画出了一个常规的坐标。
当画出坐标系时,就可以完成下面的了。
代码如下:
import java.awt.*;
import java.awt.event.ActionEvent;
import java.awt.event.ActionListener;
import java.util.Vector;
import javax.swing.*;
public class 测试五 extends JFrame{
JPanel pan=new Mypan();
public 测试五()
{
add(pan);
pan.setBounds(0, 0, 640, 550);
this.setLayout(null);
this.setVisible(true);
this.setSize(640, 550);
this.setDefaultCloseOperation(EXIT_ON_CLOSE);
this.setVisible(true);
}
static class Mypan extends JPanel{
static JLabel label_x = new JLabel("X:");
static JLabel label_y = new JLabel("Y:");
static JTextField jtf_x = new JTextField();
static JTextField jtf_y = new JTextField();
static JButton btn = new JButton("绘制");
static Vector v = new Vector();
static Point p1 = new Point();
static Point p2 = new Point();
static int flag = 1;
public Mypan()
{
this.setLayout(null);
label_x.setBounds(40,480, 20, 20);
jtf_x.setBounds(60, 480, 80, 20);
jtf_x.setEditable(true);
label_y.setBounds(160, 480, 20, 20);
jtf_y.setBounds(180, 480, 80, 20);
jtf_y.setEditable(true);
btn.setBounds(300, 480, 80, 20);
btn.setMargin(new Insets(0,0,0,0));
this.add(jtf_x);
this.add(jtf_y);
this.add(label_x);
this.add(label_y);
this.add(btn);
btn.addActionListener(new ActionListener(){
public void actionPerformed(ActionEvent e)
{
if (flag == 1)
{
p1.x = Integer.parseInt(jtf_x.getText());
p1.y = Integer.parseInt(jtf_y.getText());
}
else
{
p2.x = Integer.parseInt(jtf_x.getText());
p2.y = Integer.parseInt(jtf_y.getText());
}
if (v.size() == 0) v.add(p1);
else if (v.size() == 1) v.add(p2);
repaint();
}
});
}
public void drawPoint(Graphics g)
{
int i = flag - 1;
if (v.size() != 0)
{
g.setColor(Color.BLUE);
g.drawLine(((Point)v.get(i)).x-5, ((Point)v.get(i)).y-5, ((Point)v.get(i)).x+5, ((Point)v.get(i)).y+5);
g.drawLine(((Point)v.get(i)).x+5, ((Point)v.get(i)).y-5, ((Point)v.get(i)).x-5, ((Point)v.get(i)).y+5);
g.drawString("(" + ((Point)v.get(i)).x + "," + ((Point)v.get(i)).y + ")", ((Point)v.get(i)).x+8, ((Point)v.get(i)).y+5);
}
if (v.size() >= 2)
{
for(int ii = 0; ii < v.size()-1; ii++)
{
g.setColor(Color.BLACK);
System.out.println("画线");
g.drawLine(((Point)v.get(ii)).x, ((Point)v.get(ii)).y, ((Point)v.get(ii+1)).x, ((Point)v.get(ii+1)).y);
System.out.println(((Point)v.get(ii)).x + "," + ((Point)v.get(ii)).y + "; ");
}
}
if (flag ==1) flag = 2;
else flag = 1;
}
public void paintComponent(Graphics g)
{
super.paintComponents(g);
g.setColor(Color.RED);
g.translate(0, 200);
g.drawLine(0, 240, 640, 240);
g.drawLine(0, 0, 0, 480);
drawPoint(g);
}
}
public static void main(String args[])
{
测试五 dd=new 测试五();
}
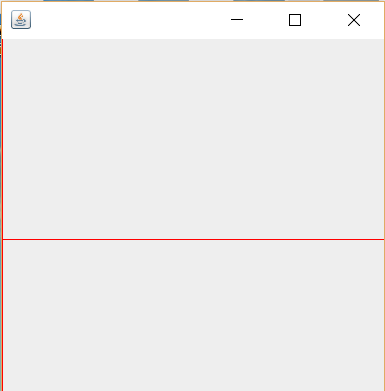
}
运行结果:

2.编写程序跟踪用户的鼠标,并时刻把鼠标位置显示出来,这也有两种方法,具体如下:
代码一:
import javax.swing.*;
import java.awt.event.*;
import java.awt.*;
public class Mouse extends JFrame{
private JPanel pan = new MyPanel();
Mouse()
{
pan.setBounds(0, 0, 640, 480);
this.add(pan);
this.setLayout(null);
this.setBounds(500, 500, 640, 480);
this.setVisible(true);
this.setDefaultCloseOperation(EXIT_ON_CLOSE);
}
public static void main(String[] args)
{
new Mouse();
}
public class MyPanel extends JPanel
{
MyPanel()
{
this.addMouseMotionListener(new MyMouseMoution());
}
}
public class MyMouseMoution extends MouseMotionAdapter
{
public void mouseMoved(MouseEvent e)
{
clear();
drawString(e.getX(),e.getY());
}
}
public void drawString(int x, int y)
{
Graphics g = this.getGraphics();
g.drawString("(" + x + "," + y + ")", x+30, y+40);
}
public void clear()
{
Graphics g = this.getGraphics();
g.clearRect(0, 0, 640, 480);
}
}
这就可以获取鼠标位置,还有一个更简单的,如下:
代码二:
import java.applet.*;
import java.awt.*;
public class 鼠标位置 extends Applet {
int pointx, pointy;
public void init() {
pointx = -1;
pointy = -1;
resize(800, 600); // 显示区大小。
}
public void paint(Graphics g) {
if (pointx != -1)
g.drawString("I am here.(X:"+pointx+" Y:"+pointy+")", pointx, pointy);
}
@Override
public boolean mouseMove(Event evt, int x, int y) {
pointx = x;
pointy = y; // 在这里捕捉到鼠标的x和y的坐标。
repaint();
return super.mouseMove(evt, x, y);
}
}
运行结果:

3.编写图形界面的Java程序响应鼠标单击和键盘事件,从鼠标单击的位置开始横向显示用户键入的字符,若鼠标双击则清空屏幕。
代码如下:
import javax.swing.*;
import java.awt.event.*;
import java.awt.*;
import java.awt.print.*;
public class 实验4 extends JFrame{
private JPanel pan = new MyPanel();
private Point p = new Point();
static int charXLocation=0;
实验4()
{
pan.setBounds(0, 0, 640, 480);
this.add(pan);
this.setLayout(null);
this.setResizable(false);
this.setBounds(500, 500, 640, 480);
this.setVisible(true);
this.setDefaultCloseOperation(EXIT_ON_CLOSE);
}
public static void main(String[] args)
{
new 实验4();
}
public class MyPanel extends JPanel{
MyPanel()
{
this.setFocusable(true);
this.addMouseListener(new MyMouse());
this.addKeyListener(new MyKey());
}
}
public class MyMouse extends MouseAdapter
{
public void mouseClicked(MouseEvent e)
{
charXLocation = e.getX();
p.x = e.getX();
p.y = e.getY();
int clicktimes = e.getClickCount();
if (clicktimes == 2)
{
clear();
clicktimes = 0;
}
}
}
public void clear()
{
Graphics g = this.getGraphics();
g.clearRect(0, 0, 640, 480);
}
public class MyKey extends KeyAdapter
{
public void keyPressed(KeyEvent e)
{
char ch = e.getKeyChar();
drawChar(ch);
}
}
public void drawChar(char c)
{
Graphics g = this.getGraphics();
g.setColor(Color.blue);
g.drawString(String.valueOf(c), p.x+charXLocation-105, p.y+30);
charXLocation += 8;
}
}
运行结果:
