| ip地址 | 主机名 | 服务名 | 安装软件 |
| 192.168.0.7 | es-server-1 | Es01 | ES JDK es-head |
| 192.168.0.8 | es-server-2 | Es02 | ES JDK |
| 192.168.0.12 | es-server-3 | Es03 | ES JDK |
系统环境
[root@es-server-1 config]# cat /etc/redhat-release
CentOS Linux release 7.5.1804 (Core)
每台服务器配置/etc/sysctl.conf,添加内容
vm.max_map_count = 655360 #修改文件句柄数
添加之后 sysctl -p 让其生效
2.每台服务器配置/etc/security/limits.conf ,添加内容
* soft nofile 65535
* hard nofile 65535
* soft nproc 65535
* hard nproc 65535
es - nproc 65536
es - nofile 65536
3, 每台服务器配置主机名
vim /etc/hosts
192.168.0.7 es-server-1
192.168.0.8 es-server-2
192.168.0.12 es-server-3
每台服务器安装 JDK(jdk 版本必须在 1.8 版本之上)
mkdir –p /usr/java
cd /usr/java
下载jdk1.8.0_181.tar.gz
tar –zxvf jdk1.8.0_181.tar.gz
vim /etc/profile 最后添加
export JAVA_HOME=/usr/java/jdk1.8.0_181
export PATH=$JAVA_HOME/bin:$PATH export CLASSPATH=.:$JAVA_HOME/lib/dt.jar:$JAVA_HOME/lib/tools.jar
使其生效: source /etc/profile
查看安装版本:
[root@es-server- 1config]# java -version
java version "1.8.0_181"
Java(TM) SE Runtime Environment (build 1.8.0_181-b13)
Java HotSpot(TM) 64-Bit Server VM (build 25.181-b13, mixed mode)
每台服务器安装 elasticsearch
1,安装之前环境准备
创建存储目录
mkdir /data/
创建 Elasticisearch 用户 es 并授予权限
useradd -d /data/es -m es
cd /data/es
wget https://artifacts.elastic.co/downloads/elasticsearch/elasticsearch-6.8.0.tar.gz
tar -xvf elasticsearch-6.8.0.tar.gz
mv elasticsearch-6.8.0.tar.gz elasticsearch
创建存放数据、日志目录
mkdir -p /data/es/elasticsearch/es_data
mkdir -p /data/es/elasticsearch/es_log
chown -R es:es /data/es
2,修改配置文件
先备份
[root@es-server-1 ~]# cd /data/es/elasticsearch/config/
[root@es-server-1 config]#
[root@es-server-1 config]# cp elasticsearch.yml elasticsearch.yml_0528bak
对配置文件添加参数
[root@es-server- 1config]#cat elasticsearch.yml
cluster.name: yuxi_es
node.name: es01
node.master: true
node.data: false
network.host: 0.0.0.0
http.port: 8900 #默认是9200可以不修改
discovery.zen.ping.unicast.hosts: ["192.168.0.7", "192.168.0.8", "192.168.0.12"]
http.cors.enabled: true #为es设置跨域访问
http.cors.allow-origin: "*" #为es设置跨域访问
path.data: /data/es/elasticsearch_data
path.logs: /data/es/elasticsearch_log
discovery.zen.fd.ping_timeout: 120s
discovery.zen.fd.ping_retries: 6
discovery.zen.fd.ping_interval: 30s
另外两台服务器,同样操作仅仅配置文件 node.name 分别为 es02 es03
启动每台 ES
授权后,并切换用户
[root@es-server- 1 usr]# chown -R es.es /usr/java/
[root@es-server- 1 usr]# su - es
Last login: Thu May 28 14:48:54 CST 2020 on pts/7
启动 ES
/data/es/elasticsearch/bin/elasticsearch -d
启动后观察集群状态:
[es@es-server-1 ~]$ curl http://192.168.0.7:8900
{
"name" : "Es01",
"cluster_name" : "yuxi_es",
"cluster_uuid" : "kEEpj9SYReKvMxELkyLspQ",
"version" : {
"number" : "6.8.0",
"build_flavor" : "default",
"build_type" : "tar",
"build_hash" : "65b6179",
"build_date" : "2019-05-15T20:06:13.172855Z",
"build_snapshot" : false,
"lucene_version" : "7.7.0",
"minimum_wire_compatibility_version" : "5.6.0",
"minimum_index_compatibility_version" : "5.0.0"
},
"tagline" : "You Know, for Search"
}
另外两台服务器同样操作
安装 es head 插件
1,在第一台服务器创建目录,并下载插件
mkdir -p /data/software
cd /data/software
yum install git
git clone https://github.com/mobz/elasticsearch-head.git
yum install -y nodejs nodejs-npm
注:如yum安装nodejs没有包
通过官方查询需要安装的版本
https://github.com/nodesource/distributions
在CentOS下获取相应版本的nodejs资源(以NodeJS 8.x为例)
键入 curl -sL https://rpm.nodesource.com/setup_8.x | bash -
在执行yum安装
2,安装 head 插件
[root@es-server- 1 ~]$ npm -v 3.10.10
[root@es-server- 1 elasticsearch-head]# cd /data/software/elasticsearch-head
[root@es-server-1 elasticsearch-head]# npm install -g configurable-http-proxy
3,启动插件
[root@es-server-1 elasticsearch-head]# nohup npm run start & 或是运行grunt server 启动
[1] 54923
[root@es-server-1 elasticsearch-head]# nohup: ignoring input and appending output to ‘nohup.out’
如启动报错可以根据报错安装需要的包
npm install grunt-contrib-clean --registry=https://registry.npm.taobao.org
npm install grunt-contrib-concat --registry=https://registry.npm.taobao.org
npm install grunt-contrib-watch --registry=https://registry.npm.taobao.org
npm install grunt-contrib-connect --registry=https://registry.npm.taobao.org
npm install grunt-contrib-copy --registry=https://registry.npm.taobao.org
npm install grunt-contrib-jasmine --registry=https://registry.npm.taobao.org
查看启动
[root@es-server-1 elasticsearch-head]# cat nohup.out
> elasticsearch-head@0.0.0 start /data/software/elasticsearch-head
> grunt server
>> Local Npm module "grunt-contrib-jasmine" not found. Is it installed?
Running "connect:server" (connect) task
Waiting forever...
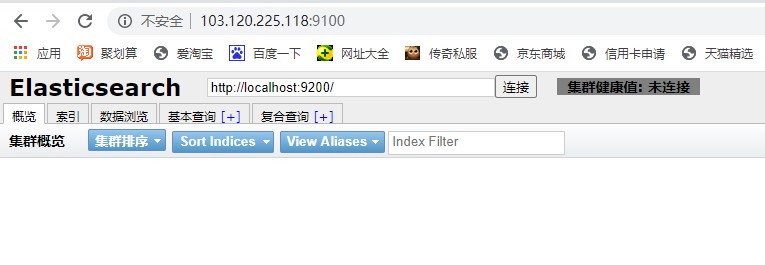
Started connect web server on http://localhost:9100
进入图形界面展示