附:整个项目的截图。

第一步:先要编写页面布局文件。(定义三个线性布局,之后用属性include嵌入头部,中间部,底部不同的布局文件,这样做的好处是可以类似实现MVC模式)
 1 <LinearLayout xmlns:android="http://schemas.android.com/apk/res/android"
 2     xmlns:tools="http://schemas.android.com/tools"
 3     android:layout_width="match_parent"
 4     android:layout_height="match_parent"
 5     android:orientation="vertical">
 6
 7    <LinearLayout
 8         android:layout_width="match_parent"
 9         android:layout_height="50dp">
10
11        <include layout="@layout/head"/>
12
13    </LinearLayout>
14
15    <LinearLayout
16        android:layout_width="match_parent"
17        android:layout_height="wrap_content"
18        android:layout_weight="1" >
19
20        <include layout="@layout/listview" />
21
22    </LinearLayout>
23
24    <LinearLayout
25        android:layout_width="match_parent"
26        android:layout_height="wrap_content">
27
28        <include layout="@layout/bottom"/>
29
30    </LinearLayout>
31
32 </LinearLayout>
第二步:分别编写头部,中间部,底部的布局文件。
头部:
<?xml version="1.0" encoding="utf-8"?>
<LinearLayout xmlns:android="http://schemas.android.com/apk/res/android"
    android:layout_width="match_parent"
    android:layout_height="match_parent"
    android:orientation="horizontal" >

    <LinearLayout
        android:layout_width="match_parent"
    	android:layout_height="50dp"
    	android:background="#21292c"
    	android:orientation="horizontal"
        >
        <!--微信  -->
         <TextView
	        android:layout_width="wrap_content"
	    	android:layout_height="wrap_content"
	    	android:text="@string/weixiin"
	    	android:textSize="18sp"
	    	android:textColor="#ffffff"
	    	android:padding="15dp"
	    	android:layout_gravity="center"
        />

         <!--给一个空白的textview来填充中间的部分。  -->
         <TextView
             android:layout_width="wrap_content"
	    	 android:layout_height="wrap_content"
	    	 android:layout_weight="1"
             />

         <!--放大镜图片  -->
         <ImageView
             	android:layout_width="40dp"
	            android:layout_height="27dp"
	    	 	android:src="@drawable/fdj"
	    	 	android:layout_gravity="center"
	    	 	android:layout_marginRight="8dp"
             />

         <!--十字架图片  -->
         <ImageView
	            android:layout_width="40dp"
	            android:layout_height="33dp"
	            android:src="@drawable/barbuttonicon_add"
	            android:layout_gravity="center"
	            android:layout_marginRight="10dp"
	            />
    </LinearLayout>

</LinearLayout>
资源文件的引用:
value资源文件中的style.xml文件的引用:

value资源文件中的string.xml资源文件:
<?xml version="1.0" encoding="utf-8"?>
<resources>

    <string name="app_name">微 信</string>
    <string name="hello_world">Hello world!</string>
    <string name="action_settings">Settings</string>
    <string name="weixiin">微 信</string>
    <string name="weixin">微 信</string>
    <string name="tongxunlu">通 讯 录</string>
    <string name="faxian">发 现</string>
    <string name="wo">我</string>

</resources>
value资源文件中的color.xml资源文件:
<?xml version="1.0" encoding="utf-8"?>
<resources>
     <color name="grey">#999999</color>
     <color name="green">#07bb07</color>
</resources>
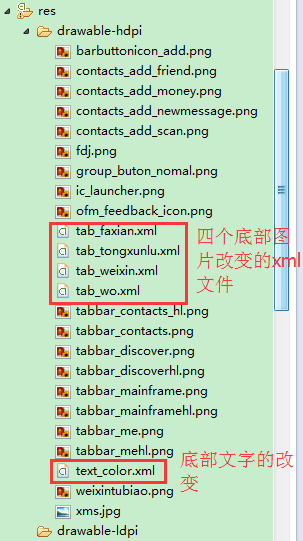
图片资源文件中的tab_color.xml文件的编写:
<?xml version="1.0" encoding="utf-8"?>
<selector xmlns:android="http://schemas.android.com/apk/res/android" >

    <!--Android中的Selector主要是用来改变ListView和Button控件的默认背景。  -->

    <item
        android:state_checked="true"
        android:color="@color/green"
        ></item>

    <item
        android:state_checked="false"
        android:color="@color/grey"
        ></item>
</selector>
图片资源文件中的tab_weixin.xml文件的编写:
<?xml version="1.0" encoding="utf-8"?>
<selector xmlns:android="http://schemas.android.com/apk/res/android" >
     <!--Android中的Selector主要是用来改变ListView和Button控件的默认背景。  -->

    <item
        android:state_checked="true"
        android:drawable="@drawable/tabbar_mainframehl"
        ></item>

    <item
        android:state_checked="false"
        android:drawable="@drawable/tabbar_mainframe"
        ></item>

</selector>
图片资源文件中的tab_faxian.xml文件的编写:
<?xml version="1.0" encoding="utf-8"?>
<selector xmlns:android="http://schemas.android.com/apk/res/android" >
     <!--Android中的Selector主要是用来改变ListView和Button控件的默认背景。  -->

    <item
        android:state_checked="true"
        android:drawable="@drawable/tabbar_discoverhl"
        ></item>

    <item
        android:state_checked="false"
        android:drawable="@drawable/tabbar_discover"
        ></item>

</selector>
图片资源文件中的tab_tongxunlu.xml文件的编写:
<?xml version="1.0" encoding="utf-8"?>
<selector xmlns:android="http://schemas.android.com/apk/res/android" >
     <!--Android中的Selector主要是用来改变ListView和Button控件的默认背景。  -->

    <item
        android:state_checked="true"
        android:drawable="@drawable/tabbar_contacts_hl"
        ></item>

    <item
        android:state_checked="false"
        android:drawable="@drawable/tabbar_contacts"

        ></item>

</selector>
图片资源文件中的tab_wo.xml文件的编写:
<?xml version="1.0" encoding="utf-8"?>
<selector xmlns:android="http://schemas.android.com/apk/res/android" >
     <!--Android中的Selector主要是用来改变ListView和Button控件的默认背景。  -->

    <item android:state_checked="true"
        android:drawable="@drawable/tabbar_mehl">

    </item>

	<item
        android:state_checked="false"
        android:drawable="@drawable/tabbar_me"
        ></item>
</selector>
底部xml文件的编写:
bottom.xml
<?xml version="1.0" encoding="utf-8"?>
<LinearLayout xmlns:android="http://schemas.android.com/apk/res/android"
    android:layout_width="match_parent"
    android:layout_height="wrap_content"
    android:orientation="horizontal" >

    <RadioGroup
        android:id="@+id/radioGroup1"
        android:layout_width="match_parent"
        android:layout_height="wrap_content"
        android:orientation="horizontal"
        android:background="@drawable/group_buton_nomal"

         >

        //  android:drawableTop引用图片资源文件中的xml文件资源

        <RadioButton
            android:id="@+id/radio0"
			style="@style/radioStyle"
            android:checked="true"
            android:text="@string/weixin"
           	android:drawableTop="@drawable/tab_weixin"
             />

        <RadioButton
            android:id="@+id/radio1"

            style="@style/radioStyle"
            android:text="@string/tongxunlu"
            android:drawableTop="@drawable/tab_tongxunlu"
             />

        <RadioButton
            android:id="@+id/radio2"
            style="@style/radioStyle"
            android:text="@string/faxian"
            android:drawableTop="@drawable/tab_faxian"
             />

        <RadioButton
            android:id="@+id/radio3"
            style="@style/radioStyle"

            android:text="@string/wo"
            android:drawableTop="@drawable/tab_wo"
             />


    </RadioGroup>

</LinearLayout>
中间部的编写:
listview.xml:
<?xml version="1.0" encoding="utf-8"?>
<LinearLayout xmlns:android="http://schemas.android.com/apk/res/android"
    android:layout_width="match_parent"
    android:layout_height="match_parent"
    android:orientation="vertical" >

    <!--
    	在android开发中ListView是比较常用的组件,
    	它以列表的形式展示具体内容,并且能够根据数据的长度自适应显示。
      -->

    <ListView
           android:id="@+id/listView1"
           android:layout_width="match_parent"
           android:layout_height="wrap_content"
           android:layout_margin="5dp"
           android:divider="#dddddd"
           android:dividerHeight="1dp">
    </ListView>

</LinearLayout>
在中间部中存放一些列表的数据文件:
MainActivity.java:
package com.huanglinbin.weixintext;

import java.util.ArrayList;
import java.util.HashMap;
import java.util.List;
import java.util.Map;
import android.app.Activity;
import android.os.Bundle;
import android.widget.ListView;
import android.widget.RadioGroup;
import android.widget.SimpleAdapter;

public class MainActivity extends Activity {
	//私有化Listview的控件。
	private ListView listView;
	//私有化ListView的适配器。
	private SimpleAdapter simpleAdapter;
	//私有化list集合。
	private List<Map<String,Object>> list = new ArrayList<Map<String,Object>>();
	//私有化radiogub的控件。
	private RadioGroup radioGroup;

    @Override
    protected void onCreate(Bundle savedInstanceState) {
        super.onCreate(savedInstanceState);
        setContentView(R.layout.activity_main);

        //先要找到那两个控件。
        listView = (ListView) findViewById(R.id.listView1);
        radioGroup = (RadioGroup) findViewById(R.id.radioGroup1);

        //把数据源赋值到集合里面。
        list = getDate();

        simpleAdapter = new SimpleAdapter(
	        		this,//上下问对象。
	        		list, //数据源(也就是从数据库里面取出来的数据存放到这来,之后就循环输出出来)
	        		R.layout.item,//页面输出的模板。
	        		new String[]{"pic","text1","text2","text3"}, //这个相当于实体类中的属性,把这些属性存放到数组里面。
	        		new int[]{R.id.pic,R.id.text1,R.id.text2,R.id.text3} //这个相对于句柄,通过句柄来找到模板中的数据源。
        		);
        //把这个适配器加入到listview的控件中去。
        listView.setAdapter(simpleAdapter);

    }


  //定义数据源。
    private List<Map<String,Object>> getDate(){
    	//定义一个循环,把数据循环输出出来。
    	for(int i=0;i<5;i++){
    		//定义一个map集合,把集合加入到map的集合里面。
    		Map<String,Object> map = new HashMap<String, Object>();
    		map.put("pic",R.drawable.xms);
    		map.put("text1", "小魔神");
    		map.put("text2", "Android一班老师");
    		map.put("text3", "昨天");
    		//把map集合加到list集合里面去。
    		list.add(map);
    	}

    	return list;
    }


}
这里要定义一个页面输出是的数据模板(相当于把实体类存放到不同的textview中之后保存到listview中去输出到页面中):
item.xml:
<?xml version="1.0" encoding="utf-8"?>
<RelativeLayout xmlns:android="http://schemas.android.com/apk/res/android"
    android:layout_width="match_parent"
    android:layout_height="match_parent" >

    <ImageView
        android:id="@+id/pic"
        android:layout_width="50dp"
        android:layout_height="50dp"
        android:layout_alignParentLeft="true"
        android:layout_alignParentTop="true"
        android:layout_marginLeft="10dp"
        android:layout_marginTop="5dp"
        android:src="@drawable/xms"
        android:layout_marginBottom="5dp"/>

    <TextView
        android:id="@+id/text1"
        android:layout_width="wrap_content"
        android:layout_height="wrap_content"
        android:layout_marginLeft="10dp"
        android:layout_toRightOf="@+id/pic"

        android:textSize="16sp"
        android:textColor="#333"
        android:layout_marginTop="10dp"/>

    <TextView
        android:id="@+id/text2"
        android:layout_width="wrap_content"
        android:layout_height="wrap_content"
        android:layout_alignLeft="@+id/text1"
        android:layout_below="@+id/text1"

        android:textColor="#666"
        android:textSize="14sp"/>

    <TextView
        android:id="@+id/text3"
        android:layout_width="wrap_content"
        android:layout_height="wrap_content"
        android:layout_above="@+id/text2"
        android:layout_alignParentRight="true"

        android:textColor="#666"
        android:textSize="12sp"
        android:layout_marginRight="5dp"/>

</RelativeLayout>
这样的话就可以实现微信的页面的布局。