本文将以一个很简单的案例实现 Springmvc框架的基于注解搭建,一下全为个人总结 ,如有错请大家指教!!!!!!!!!
第一步:创建一个动态web工程(在创建时 记得选上自动生成 web.xml 文件),导入相关的架包 ,架包目录如下
: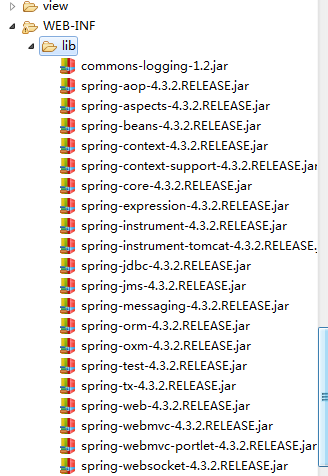
注意架包 放在 web-inf- lib 文件夹下。
第二步 配置web.xml 代码如下
 <servlet>
  	<servlet-name>springmvc</servlet-name>
  	<servlet-class>org.springframework.web.servlet.DispatcherServlet</servlet-class>
  	<load-on-startup>2</load-on-startup>
  </servlet>
  <servlet-mapping>
  	<servlet-name>springmvc</servlet-name>
  	<url-pattern>*.do</url-pattern>
  </servlet-mapping>
第三步 配置Springmvc-servlet.xml 该文件在web-inf 下自行创建 代码如下 可拷贝直接用
<?xml version="1.0" encoding="UTF-8"?>
<beans xmlns="http://www.springframework.org/schema/beans" xmlns:xsi="http://www.w3.org/2001/XMLSchema-instance"
       xmlns:context="http://www.springframework.org/schema/context"
       xmlns:mvc="http://www.springframework.org/schema/mvc"
       xsi:schemaLocation="http://www.springframework.org/schema/beans http://www.springframework.org/schema/beans/spring-beans-3.0.xsd
       http://www.springframework.org/schema/mvc
       http://www.springframework.org/schema/mvc/spring-mvc-3.0.xsd
       http://www.springframework.org/schema/context http://www.springframework.org/schema/context/spring-context.xsd"
       default-lazy-init="true">

   <!-- springmvc 注解驱动 -->
   <mvc:annotation-driven />
   <!-- 扫描器 -->
    <context:component-scan base-package="com"/>
   <!-- 配置视图解析器 -->
  <bean class="org.springframework.web.servlet.view.InternalResourceViewResolver">
 <!-- 前缀 -->
 <property name="prefix" value="/view/" />
 <!-- 后缀 -->
 <property name="suffix" value=".jsp" />
</bean>


</beans>
第四步创建JSP页面 hello.jsp
 <form action="hello.do" method="post">
   hello:<input type="text" name="userName"/>
   <input type="submit" value="提交"/>
  </form>
第五步创建 应用控制器 Hellocontroller 在Java包下创建
import org.springframework.stereotype.Controller;
import org.springframework.ui.Model;
import org.springframework.web.bind.annotation.RequestMapping;

@Controller
public class HellController {
	@RequestMapping(value="/hello.do")
	 public String hello(String userName,Model model){
		System.out.println(userName);
		model.addAttribute("helloword", "Hello:"+userName);
		return "index";
	 }
}
第六步 创建跳转页面 创建 view 文件下创建 index.jsp
<h1>${helloword} </h1>
文件目录如下
