前言
本文记录Vue2.x + Element-UI + TypeScript语法入门实例
为什么要用TypeScript?
1、TypeScript是JavaScript的超集,利用es6语法,实现对js的面向对象编程思想;
2、TypeScript会像强类型语言一样,可以避免出现不可预期的运行时bug;
Vue官网:https://cn.vuejs.org/
Element-UI官网:https://element.eleme.cn/#/zh-CN
Vue对TypeScript的支持:https://cn.vuejs.org/v2/guide/typescript.html
TypeScript的学习可以看回我们之前的《typescript》系列:https://www.cnblogs.com/huanzi-qch/category/1509796.html
vue+typescript整合,推荐阅读这篇文章:https://segmentfault.com/a/1190000011744210
安装、启动
vue项目需要node环境,开始安装之前,先安装node环境,安装node环境看之前的博客:TypeScript环境安装,以及配置idea开发环境
装好node环境之后,先安装Vue CLI手脚架,通过手脚架来快速创建项目
npm install -g @vue/cli

装好之后使用命令查看版本号,确认一下
vue --version

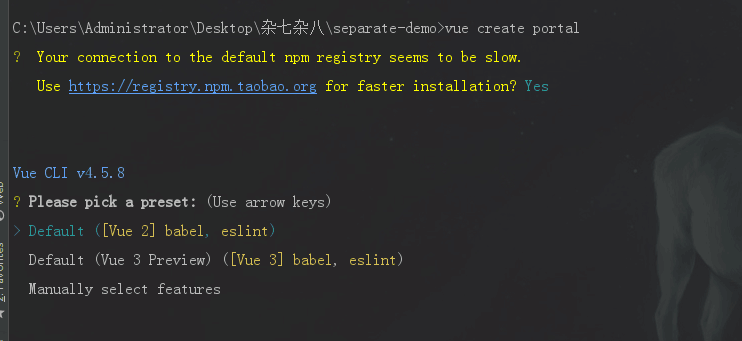
装好了手脚架,然后就可以通过手脚架快速创建portal门户项目
PS:element-ui现在还不支持Vue3,所以我们现在Vue2就可以了,选择自定义安装把配置项全都勾上,或者可以先选择默认安装
vue create portal
后续再在package.json里面指定依赖包,直接使用IDE(或者手敲命令也一样),运行安装命令下载依赖包

package.json依赖配置
  "dependencies": {
    "core-js": "^3.6.5",
    "register-service-worker": "^1.7.1",
    "vue": "^2.6.11",
    "vue-class-component": "^7.2.3",
    "vue-property-decorator": "^8.4.2",
    "vue-router": "^3.2.0",
    "vuex": "^3.4.0",
    "axios": "0.21.0",
    "element-ui": "^2.13.2",
    "js-cookie": "2.2.1"
  },
在src的同级目录下面,创建vue.config.js配置文件,配置端口等
module.exports = {
    publicPath: './',
    outputDir: 'dist',
    assetsDir: 'static',
    lintOnSave: true,
    productionSourceMap: false,
    devServer: {
        port: '10010',
        open: false,
        overlay: {
            warnings: false,
            errors: true
        },
        proxy: {
            '/auth': {
                target: 'http://localhost:10086',
                secure: false,
                changeOrigin: true,
                pathRewrite: {
                    '^/auth': '/'
                }
            },
            '/api': {
                target: 'http://localhost:10086',
                secure: false,
                changeOrigin: true,
                pathRewrite: {
                    '^/api': '/'
                }
            }
        }
    }
}
使用idea打开项目,配置config,即可在idea运行vue项目
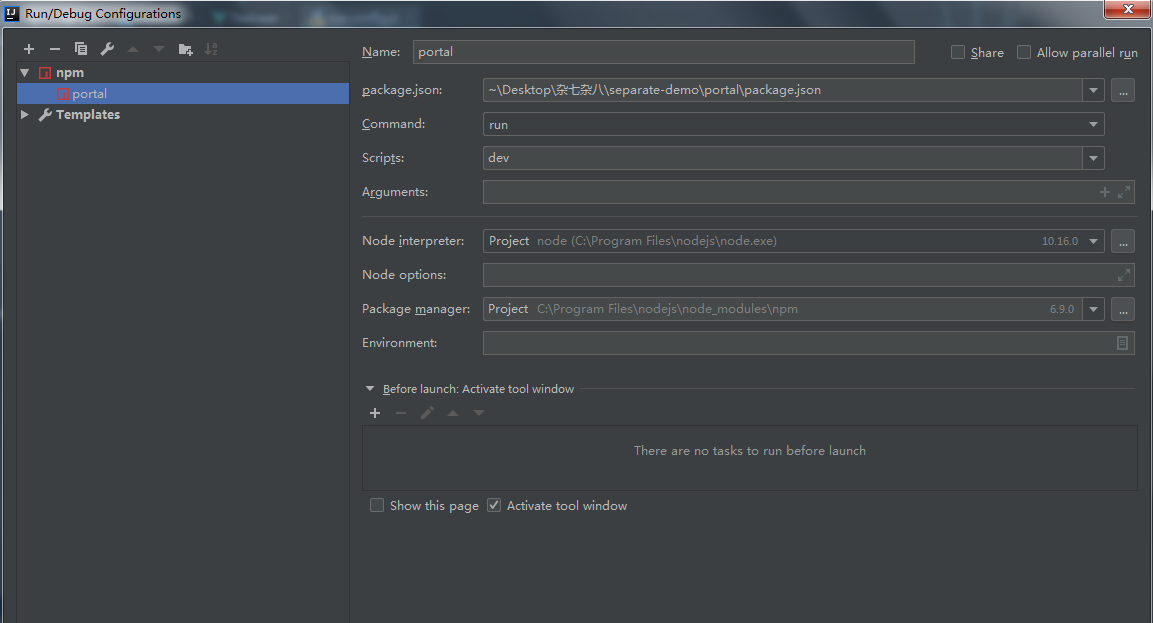
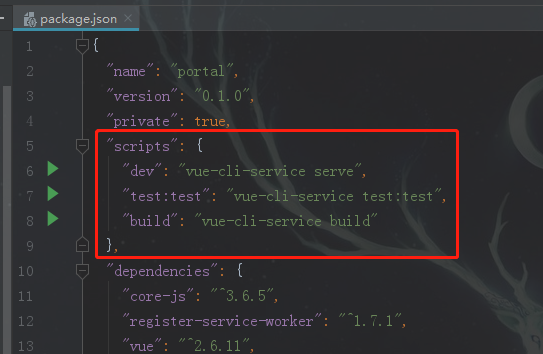
或者也可以手动输入命令启动项目(vue-cli-service serve),或者在package.json文件中运行脚本
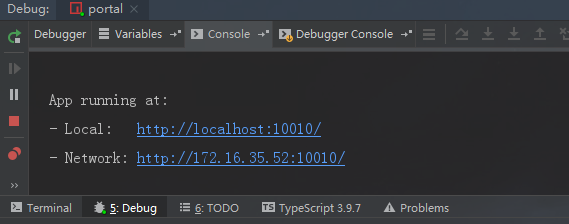
启动成功
项目结构

Vue Router
Vue Router官网:https://router.vuejs.org/zh/
路由配置
import Vue from 'vue'
import VueRouter, { RouteConfig } from 'vue-router'

Vue.use(VueRouter);

/* 公用模块菜单路由 */
const commonRoutes: Array<RouteConfig> = [
    {
        path: '/',
        name: 'Home',
        meta: { title: '主页' },
        component: () => import( '@/views/Home.vue')
    },
    {
        path: '/404',
        name: '404',
        meta: { title: '404' },
        component: () => import('@/views/common/404.vue')
    },
    { path: '*', redirect: '/404'}
];

/* test模块菜单路由 */
const testRoutes: Array<RouteConfig> = [
    {
        path: '/test',
        name: 'Test',
        meta: { title: 'demo测试' },
        component: () => import( '@/views/test/Test.vue')
    }
];

const router = new VueRouter({
  base:"/",
  mode: 'hash',//history   hash
  routes:commonRoutes.concat(testRoutes)
});

router.beforeEach(async(to, from, next) => {
    console.log("跳转开始,目标:"+to.path);
    document.title = `${to.meta.title}`;

    //跳转页面
    next();
});

router.afterEach(() => {
    console.log("跳转结束");

});

export default router
路由跳转、页面接参
/**
 * 工具类
 */
export default class CommonUtil {

    /**
     * 从url中获取参数
     * 实例:http://xxxxx/index?id=1&name=张三
     * getQueryVariable("id")//1
     * getQueryVariable("name")//张三
     */
    public static getQueryVariable(variable:string): string {
        let vars = window.location.search.substring(1).split("&");
        for (let i = 0; i < vars.length; i++) {
            let pair = vars[i].split("=");
            if (pair[0] === variable) {
                return pair[1];
            }
        }
        return "";
    };
}
import CommonUtil from  "@/utils/commonUtil"

//跳转 params 是路由的一部分,必须要有。query 是拼接在url后面的参数,没有也没关系
this.$router.push({name:'Home',
    params: {id:'001'},
    query: {id:'001'}
});

//接参
let id = this.$route.params.id;
//如果为空,尝试从url中获取参数
if(!id){
    id = CommonUtil.getQueryVariable("id");
}
或者直接在浏览器上输入path路径,即可跳转页面
Vuex
Vuex官网:https://vuex.vuejs.org/zh/
vuex配置
import Vue from 'vue'
import Vuex from 'vuex'

Vue.use(Vuex);

/*
  约定,组件不允许直接变更属于 store 实例的 state,而应执行 action 来分发 (dispatch) 事件通知 store 去改变
 */
export default new Vuex.Store({
  state: {
  },
  getters:{
  },
  mutations: {
  },
  actions: {
  },
  modules: {
  }
})
项目入口
App.vue
<!-- 这里是项目路口,配置<router-view/>即可 -->
<template>
  <div id="app">
    <router-view/>
  </div>
</template>

<script lang="ts">

</script>

<style lang="less">
  html,body{
    margin: 0 !important;
    padding: 0 !important;
  }
</style>
main.ts
import Vue from 'vue'
import App from './App.vue'
import './registerServiceWorker'
import router from './router'
import store from './store'
import ElementUI from 'element-ui'
import 'element-ui/lib/theme-chalk/index.css'
// @ts-ignore
import locale from 'element-ui/lib/locale/lang/zh-CN'

Vue.use(ElementUI, { locale });

Vue.config.productionTip = false;

new Vue({
  router,
  store,
  render: h => h(App)
}).$mount('#app');
TypeScript语法
Vue对TypeScript的支持:https://cn.vuejs.org/v2/guide/typescript.html
vue+typescript整合,推荐阅读这篇文章:https://segmentfault.com/a/1190000011744210
在使用typescript语法的过程中,我们使用官方维护的 vue-class-component 装饰器,这里是它的文档:https://class-component.vuejs.org/
这个就是它一个简单的写法
<template>
  <div>
    简单页面
  </div>
</template>

<script lang="ts">
import { Component,  Vue } from 'vue-property-decorator';

@Component
export default class Home extends Vue {

}
</script>

<style scoped>

</style>
完整测试例子
接下来介绍具体的使用,里面包含了常用的:data 数据、生命周期钩子函数、methods 普通方法、computed 获取/设置计算属性、watch 监听、props 组件数据传递
HelloWorld组件
<template>
  <div class="hello">
    <h1>{{ msg }}</h1>
  </div>
</template>

<script lang="ts">
import { Component, Prop, Vue } from 'vue-property-decorator';

@Component
export default class HelloWorld extends Vue {

  //props 组件数据传递
  @Prop({ type: String,default: 'default value' }) private msg!: string;
}
</script>

<style scoped lang="less">

</style>
Test.vue测试页面
<template>
    <div style="padding: 20px;">
        <el-row>
            <el-col :span="12">
                <div style="padding: 20px;">
                    <el-divider content-position="left">数据绑定测试</el-divider>
                    <el-row>
                        <el-input placeholder="请输入新msg内容" v-model="msg" clearable></el-input>
                        <p>直接绑定data数据:{{msg}}</p>
                        <p>普通方法获取data数据:{{getMsg()}}</p>
                        <p>computed的get方法获取data数据:{{computedTest}}</p>
                        <el-button type="primary" plain @click="buttonClick">调用computed的set方法修改data数据</el-button>
                    </el-row>

                    <el-divider content-position="left">引用HelloWorld组件测试</el-divider>
                    <el-row>
                        <HelloWorld :msg="msg"/>
                    </el-row>

                    <el-divider content-position="left">if-else条件渲染测试</el-divider>
                    <el-row>
                        <p style="color: green" v-if="flag">if条件渲染:true</p>
                        <p style="color: red" v-else="flag">if条件渲染:false</p>
                        <el-button type="primary" plain @click="flag=!flag">if条件渲染取反</el-button>
                    </el-row>
                </div>
            </el-col>
            <el-col :span="12">
                <div style="padding: 20px;">

                    <el-divider content-position="left">for循环-数组渲染测试</el-divider>
                    <el-row>
                        <p v-for="(item,index) in items">
                            序号:{{index}},编号:{{item.id}},姓名:{{item.name}}
                        </p>
                        <el-button type="primary" plain @click="items.push({id:'0000',name:'new item'})">新增记录</el-button>
                    </el-row>

                    <el-divider content-position="left">for循环-对象渲染测试</el-divider>
                    <el-row>
                        <p v-for="(value,key,index) in itemsByObj">
                            序号:{{index}},{{key}}:{{value}}
                        </p>
                    </el-row>

                </div>
            </el-col>
        </el-row>
    </div>
</template>

<script lang="ts">
    import { Component, Emit, Watch, Prop, Vue } from 'vue-property-decorator';
    import HelloWorld from '@/components/HelloWorld.vue';

    @Component({
        components: {
            HelloWorld,
        },
    })
    export default class Test extends Vue {
        //data 数据
        private msg:string = "test测试";
        private flag:boolean = true;
        private items:any = [
            {id:1001,name:"张三"},
            {id:1002,name:"李四"},
            {id:1002,name:"王五"},
        ];
        private itemsByObj:object = {
            id:1001,
            name:"huanzi-qch",
            age:18,
            email:"huanzi-qch@qq.com",
            phone:"12345678900",
        };

        //生命周期钩子函数
        created(){
            console.log("created");
        };
        mounted(){
            console.log("mounted");
        };

        //methods 普通方法
        @Emit()
        getMsg(): string{
            return this.msg;
        }
        @Emit()
        buttonClick(): void{
            this.computedTest = 'test测试0001';
        }

        //computed 获取/设置计算属性
        get computedTest(): string{
            return this.msg;
        }
        set computedTest(newMsg:string){
            this.msg = newMsg;
        }

        //watch 监听
        @Watch('msg')
        onMsgChanged(newVal: string, oldVal: string) {
            this.$message.info("msg值发生改变,旧值:" + oldVal + ",新值:" + newVal);
        }
    }
</script>

<style scoped>

</style>
效果演示
路由配置哪里要注意
  //history:路径直接是/test,部署到Tomcat后不能直接访问地址栏
  //hash:路径会多一层/#/test,部署到Tomcat后能直接访问地址栏
  mode: 'hash',
环境配置文件
配置文件的key,要以VUE_APP_开头

读取
<template>
  <div>
    {{adminUrl}}
  </div>
</template>

<script lang="ts">
import { Component,  Vue } from 'vue-property-decorator';

@Component
export default class Home extends Vue {
    //读取环境配置值
    private adminUrl:string = process.env.VUE_APP_ADMIN_URL;
}
</script>

<style scoped>

</style>
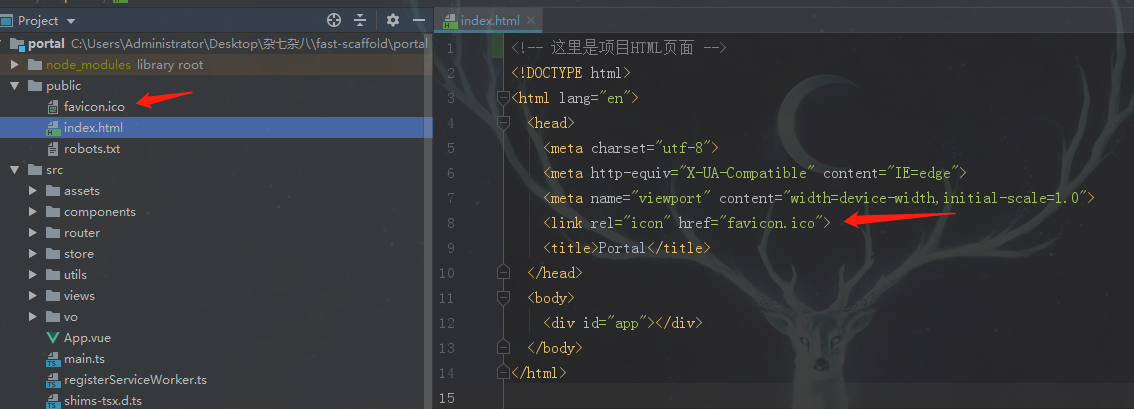
favicon.ico图标
通常情况下,我们是这样设置自己的favicon.ico
在项目HTML页面中,引入我们的favicon图片
但是不管是在运行之后的页面,还是打包之后的页面,这行代码都是被注释起来的
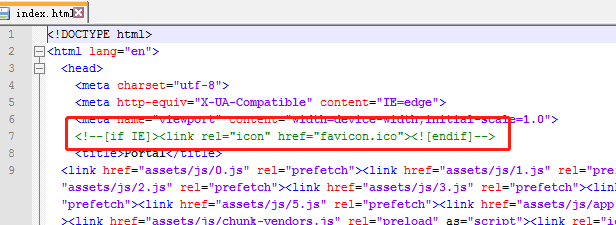
我们可以再打包生成的index页面中,把这个注释放开,这样就可以正常显示我们的favicon图片了
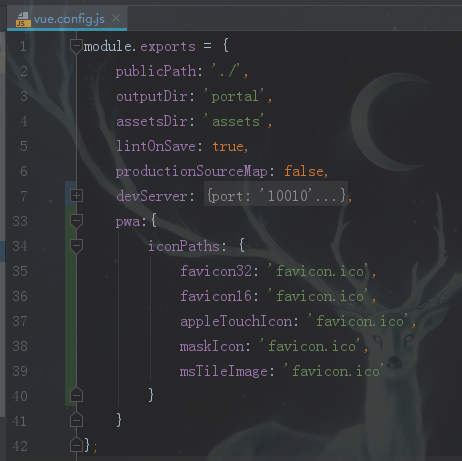
同时、我们可以再vue.config.js中进行设置
pwa配置项说明:https://cli.vuejs.org/zh/config/#pwa

效果

打包、部署
vue.conifg.js中指定好打包路径
    publicPath: './',
    outputDir: 'dist',
    assetsDir: 'static',
同时,路由配置那里要注意,模式要改成mode: 'hash'
const router = new VueRouter({
  base:"/",
  mode: 'hash',//history   hash
  routes:commonRoutes.concat(testRoutes,adminRoutes)
});
直接运行打包脚本,或者手动输入命令
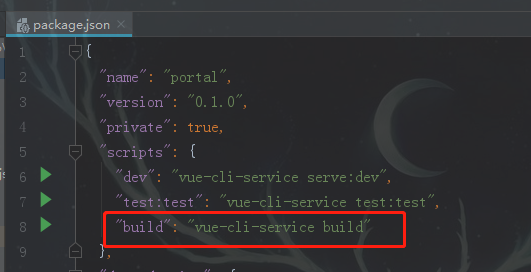
打包成功
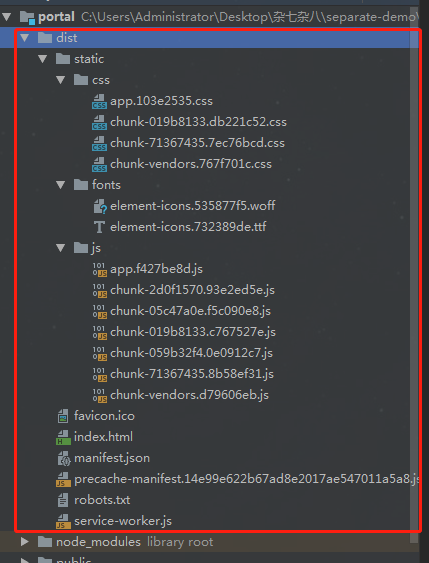
复制dist文件夹到Tomcat容器,把Tomcat运行起来

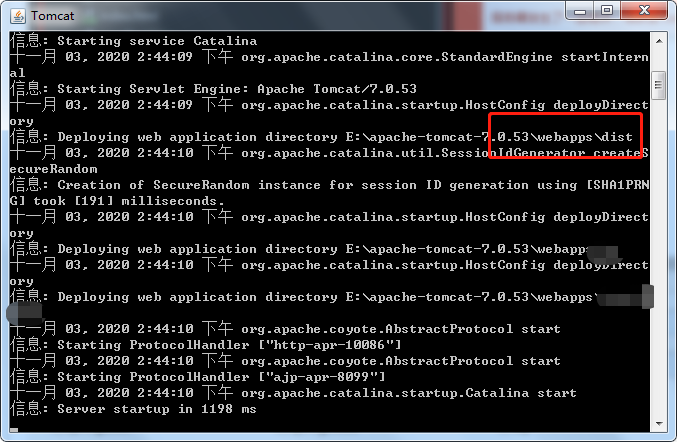
访问:http://172.16.35.52:10086/dist/,即可跳转到我们配置的 / 路径页面

在此路径基础上就可以访问我们配置的路由路径了,如:http://172.16.35.52:10086/dist/#/test

2020-11-20更新
路由的配置要注意
  //history:路径直接是/test,文件丢到Tomcat的webapps,文件夹名 + url路径不能访问(需要把文件放在ROOT默认文件夹下面)
  //hash:路径会多一层/#,/#/test,文件丢到Tomcat的webapps,文件夹名 + url路径能访问

const router = new VueRouter({
  base:"/portal",
  mode: 'history',
  routes:commonRoutes.concat(testRoutes)
});
同时要注意,我们在vue.conifg.js中配置的服务信息,依赖node环境,如果是Tomcat,没有代理功能,需要配合nginx上配置代理地址
    devServer: {
        port: '10010',
        open: false,
        overlay: {
            warnings: false,
            errors: true
        },
        proxy: {
            '/auth': {
                target: 'http://localhost:10086',
                secure: false,
                changeOrigin: true,
                pathRewrite: {
                    '^/auth': '/'
                }
            },
            '/api': {
                target: 'http://localhost:10086',
                secure: false,
                changeOrigin: true,
                pathRewrite: {
                    '^/api': '/'
                }
            }
        }
    }
后记
Vue项目入门实例就暂时记录到这,后续再继续更新
代码开源
注:portal前端就是本文中的vue项目
代码已经开源、托管到我的GitHub、码云: