SpringBoot整合配置详解
生产端:
- publisher-confirms,实现一个监听器用于监听Broker端给我们返回的确认请求:RabbitTemplate.ConfirmCallback
- publisher-returns,保证消息对Broker端是可达的,如果出现路由键不可达的情况,则使用监听器对不可达的消息进行后续的处理,保证消息的路由成功:RabbitTemplate.ReturnCallback
- 注意一点,在发送消息的时候对template进行配置mandatory=true保证监听有效
- 生产端还可以配置其他属性,比如发送重试、超时时间、次数、间隔等
pom.xml
<dependency>
    <groupId>com.rabbitmq</groupId>
    <artifactId>amqp-client</artifactId>
    <version>5.7.3</version>
</dependency>
application.yml
spring:
  rabbitmq:
    addresses: 127.0.0.1:5672
    username: root
    password: 123456
    virtual-host: /test001
    connection-timeout: 15000
    publisher-confirms: true
    publisher-returns: true
    template:
      mandatory: true
    publisher-confirm-type=correlated: correlated
RebbitSender 生产端
package com.cx.temp.common.rabbitmq.spring.producer;

import lombok.extern.slf4j.Slf4j;
import org.springframework.amqp.rabbit.core.RabbitTemplate;
import org.springframework.amqp.rabbit.support.CorrelationData;
import org.springframework.beans.factory.annotation.Autowired;
import org.springframework.messaging.Message;
import org.springframework.messaging.MessageHeaders;
import org.springframework.messaging.support.MessageBuilder;
import org.springframework.stereotype.Component;

import java.util.Map;

@Slf4j
@Component
public class RebbitSender {

  @Autowired
  private RabbitTemplate rabbitTemplate;

  RabbitTemplate.ConfirmCallback confirmCallback = new RabbitTemplate.ConfirmCallback() {
      @Override
      public void confirm(CorrelationData correlationData, boolean ack, String cause) {
          log.error("confirm进来了");
          System.err.println("correlationData:" + correlationData);
          System.err.println("ack:" + ack);
          if(!ack) {
              System.err.println("异常处理。。。。");
          }
          System.err.println("cause:" + cause);
      }
  };

  //如果消息未能投递成功,则会调用returnCallback
  RabbitTemplate.ReturnCallback returnCallback = new RabbitTemplate.ReturnCallback() {
      @Override
      public void returnedMessage(org.springframework.amqp.core.Message message, int replyCode, String replyText, String exchange, String routingKey) {
          log.error("returnedMessage进来了");
          System.err.println("return exchange:" + exchange + ",routingKey:" + routingKey
                  + ",replyCode:" + replyCode + ",replyText:" + replyText);
      }
  };

  public void send(Object message, Map<String, Object> properties) throws Exception {
      MessageHeaders mhs = new MessageHeaders(properties);
      Message msg = MessageBuilder.createMessage(message, mhs);
      rabbitTemplate.setConfirmCallback(confirmCallback);
      rabbitTemplate.setReturnCallback(returnCallback);
      //id + 时间戳 全局唯一
      CorrelationData cd = new CorrelationData("12345678901");
      rabbitTemplate.convertAndSend("exchange-1", "springboot.hello", msg, cd);
      try {
          Thread.sleep(10000);
      } catch (InterruptedException e) {
          e.printStackTrace();
      }
  }

}
RabbitMQTest 测试类
package com.cx.temp.rabbitmq;

import com.cx.temp.admin.AdminApplication;
import com.cx.temp.common.rabbitmq.spring.entity.Order;
import com.cx.temp.common.rabbitmq.spring.entity.Packaged;
import com.cx.temp.common.rabbitmq.spring.producer.DemoSender;
import com.cx.temp.common.rabbitmq.spring.producer.RebbitSender;
import com.fasterxml.jackson.databind.ObjectMapper;
import org.junit.Test;
import org.junit.runner.RunWith;
import org.springframework.amqp.AmqpException;
import org.springframework.amqp.core.*;
import org.springframework.amqp.rabbit.core.RabbitAdmin;
import org.springframework.amqp.rabbit.core.RabbitTemplate;
import org.springframework.beans.factory.annotation.Autowired;
import org.springframework.boot.test.context.SpringBootTest;
import org.springframework.test.context.junit4.SpringJUnit4ClassRunner;

import java.io.File;
import java.nio.file.Files;
import java.nio.file.Paths;
import java.text.SimpleDateFormat;
import java.util.Date;
import java.util.HashMap;
import java.util.Map;

@RunWith(SpringJUnit4ClassRunner.class)
@SpringBootTest(classes = AdminApplication.class)
public class RabbitMQTest {

    @Autowired
    private RebbitSender rebbitSender;

    private SimpleDateFormat simpleDateFormat = new SimpleDateFormat("yyyy-MM-dd HH:mm:ss.SSS");

    @Test
    public void testSend1() throws Exception {
        try {
            Map<String, Object> properties = new HashMap<>();
            properties.put("number", "12345");
            properties.put("send_time", simpleDateFormat.format(new Date()));
            rebbitSender.send("Heelo RabbitMQ For Spring Boot!", properties);
        } catch (Exception e) {
            e.printStackTrace();
        }
    }


}
测试类执行完毕控制台打印,打印消息确认回调的日志打印confirmCallback,自己也可以将springboot.hello路由key改为spring.hello测试异常回调的日志打印

消费端:
- 消费端核心配置
- spring.rabbitmq.listener.simple.acknowledge-mode=MANUAL 手动签收模式
- spring.rabbitmq.istener.simple.concurrency=1 监听限制默认1
- spring.rabbitmq.listener.simple.max-concurrency=5 最大5
- 首先配置手工确认模式, 用于ACK的手工处理, 这样我们可以保证消息的可靠性送达,或者再消费端消费失败的时候可以做到重回队列、根据业务记录日志等处理
- 可以设置消费端的监听个数和最大个数,用于控制消费端的并发情况
- 消费端监听@RabbitMQListener注解这个对于在实际工作中非常的好用
- @RabbitListener是一个组合注解,里面可以注解配置@QueueBinding、@Queue、@Exchange直接通过这个组合注解一次性搞定消费端交换机、队列、绑定、路由、并且配置监听功能等
注:由于类配置写在代码里非常不友好,所以强烈建议大家使用配置文件配置
pom.xml
<dependency>
    <groupId>com.rabbitmq</groupId>
    <artifactId>amqp-client</artifactId>
    <version>5.7.3</version>
</dependency>
application.yml
spring:
  rabbitmq:
    addresses: 127.0.0.1:5672
    username: root
    password: 123456
    virtual-host: /test001
    connection-timeout: 15000
    publisher-confirms: true
    publisher-returns: true
    template:
      mandatory: true
    publisher-confirm-type=correlated: correlated
    listener:
      simple:
        acknowledge-mode: manual #签收模式为手动签收
        concurrency: 5 #初始化监听个数
        max-concurrency: 10 #最大监听个数
MainConfig扫描包配置
package com.cx.temp.common.rabbitmq.spring;

import org.springframework.context.annotation.ComponentScan;
import org.springframework.context.annotation.Configuration;

@Configuration
@ComponentScan({"com.cx.temp.*"})
public class MainConfig {
}
RabbitReceiver
package com.cx.temp.web.rabbitmq.consumer;

import com.rabbitmq.client.Channel;
import org.springframework.amqp.rabbit.annotation.*;
import org.springframework.amqp.support.AmqpHeaders;
import org.springframework.messaging.Message;
import org.springframework.stereotype.Component;

@Component
public class RabbitReceiver {

    /**
     * RabbitMQ代理将不允许声明具有不匹配参数的队列。例如,如果queue已经存在,没有time to live参数,
     * 并且尝试使用key =“x-message-ttl”value =“100”进行声明,则会抛出异常。
     * 默认情况下,当发生任何异常时,RabbitAdmin将立即停止处理所有声明;这可能会导致下游问题,
     * 例如监听器容器无法初始化,因为未声明另一个队列(在错误之后定义)。
     * 可以通过在RabbitAdmin上将ignore-declaration-exceptions属性设置为true来修改此行为。
     * 此选项指示RabbitAdmin记录异常,并继续声明其他元素。当使用java配置RabbitAdmin时,
     * 此属性为ignoreDeclarationExceptions。这是一个适用于所有元素,队列,交换和绑定的全局设置,具有仅适用于这些元素的类似属性。
     */
    @RabbitListener(bindings = @QueueBinding(
            value = @Queue(value = "queue-1", durable = "true"),
            exchange = @Exchange(value = "exchange-1", durable = "true", type = "topic"
                    , ignoreDeclarationExceptions = "true"),
            key = "springboot.*"
    ))
    @RabbitHandler
    public void onMessage(Message message, Channel channel) throws Exception {
        System.err.println("-----------------------------------------");
        System.err.println("消息端Payload" + message.getPayload());

        Long deliveryTag = (Long)message.getHeaders().get(AmqpHeaders.DELIVERY_TAG);
        //手工ACK
        channel.basicAck(deliveryTag, false);

    }
}
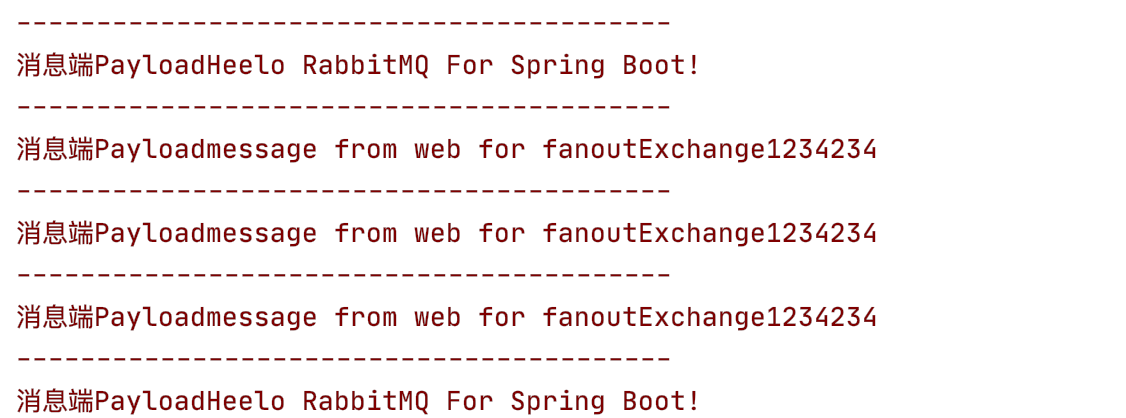
执行Springboot ApptionApplication,控制台打印,接收之前测试的数据
使用配置文件来配置exchange、queue、bind:
生产端配置
application.yml
spring:
  rabbitmq:
    addresses: 127.0.0.1:5672
    username: root
    password: 123456
    virtual-host: /test001
    connection-timeout: 15000
    publisher-confirms: true
    publisher-returns: true
    template:
      mandatory: true
    publisher-confirm-type=correlated: correlated
RebbitSender生产者
package com.cx.temp.rabbitmq.producer;

import com.cx.temp.common.rabbitmq.spring.entity.Order;
import lombok.extern.slf4j.Slf4j;
import org.springframework.amqp.rabbit.core.RabbitTemplate;
import org.springframework.amqp.rabbit.support.CorrelationData;
import org.springframework.beans.factory.annotation.Autowired;
import org.springframework.messaging.Message;
import org.springframework.messaging.MessageHeaders;
import org.springframework.messaging.support.MessageBuilder;
import org.springframework.stereotype.Component;

import java.util.Map;

@Slf4j
@Component
public class RebbitSender {

  @Autowired
  private RabbitTemplate rabbitTemplate;

  RabbitTemplate.ConfirmCallback confirmCallback = new RabbitTemplate.ConfirmCallback() {
      @Override
      public void confirm(CorrelationData correlationData, boolean ack, String cause) {
          log.error("confirm进来了");
          System.err.println("correlationData:" + correlationData);
          System.err.println("ack:" + ack);
          if(!ack) {
              System.err.println("异常处理。。。。");
          }
          System.err.println("cause:" + cause);
      }
  };

  RabbitTemplate.ReturnCallback returnCallback = new RabbitTemplate.ReturnCallback() {
      @Override
      public void returnedMessage(org.springframework.amqp.core.Message message, int replyCode, String replyText, String exchange, String routingKey) {
          log.error("returnedMessage进来了");
          System.err.println("return exchange:" + exchange + ",routingKey:" + routingKey
                  + ",replyCode:" + replyCode + ",replyText:" + replyText);
      }
  };

    public void sendOrder(Order order, Map<String, Object> properties) throws Exception {
        MessageHeaders mhs = new MessageHeaders(properties);
//        Message msg = MessageBuilder.createMessage(order, mhs); //如果没有额外的参数需要传递,可以免去这步,直接在convertAndSend传order
        rabbitTemplate.setConfirmCallback(confirmCallback);
        rabbitTemplate.setReturnCallback(returnCallback);
        //id + 时间戳 全局唯一
        CorrelationData cd = new CorrelationData("0987654321");
        rabbitTemplate.convertAndSend("exchange-2", "springboot.def", order, cd);
        try {
            Thread.sleep(10000);
        } catch (InterruptedException e) {
            e.printStackTrace();
        }
    }

}
生产测试类
package com.cx.temp.rabbitmq;

import com.cx.temp.admin.AdminApplication;
import com.cx.temp.common.rabbitmq.spring.entity.Order;
import com.cx.temp.common.rabbitmq.spring.entity.OrderR;
import com.cx.temp.common.rabbitmq.spring.entity.Packaged;
import com.cx.temp.rabbitmq.producer.RebbitSender;
import com.fasterxml.jackson.databind.ObjectMapper;
import org.junit.Test;
import org.junit.runner.RunWith;
import org.springframework.amqp.AmqpException;
import org.springframework.amqp.core.*;
import org.springframework.amqp.rabbit.core.RabbitAdmin;
import org.springframework.amqp.rabbit.core.RabbitTemplate;
import org.springframework.beans.factory.annotation.Autowired;
import org.springframework.boot.test.context.SpringBootTest;
import org.springframework.test.context.junit4.SpringJUnit4ClassRunner;

import java.nio.file.Files;
import java.nio.file.Paths;
import java.text.SimpleDateFormat;
import java.util.Date;
import java.util.HashMap;
import java.util.Map;

@RunWith(SpringJUnit4ClassRunner.class)
@SpringBootTest(classes = AdminApplication.class)
public class RabbitMQTest {

    @Autowired
    private RebbitSender rebbitSender;

    private SimpleDateFormat simpleDateFormat = new SimpleDateFormat("yyyy-MM-dd HH:mm:ss.SSS");

    @Test
    public void testSend2() throws Exception {
        try {
            Order order = new Order();
            order.setId("001");
            order.setName("第一个订单");

            Map<String, Object> properties = new HashMap<>();
            properties.put("number", "12345");
            properties.put("send_time", simpleDateFormat.format(new Date()));
            rebbitSender.sendOrder(order, properties);
        } catch (Exception e) {
            e.printStackTrace();
        }
    }

}
Order对象,生产端和消费端共用,实际开发中,建议将该类相关公共基础打包成jar给对方使用
package com.cx.temp.common.rabbitmq.spring.entity;

import java.io.Serializable;

public class Order implements Serializable {

    private static final long serialVersionUID = 1L;
    private String id;

    private String name;

    public Order() {
    }

    public Order(String id, String name) {
        this.id = id;
        this.name = name;
    }

    public String getId() {
        return id;
    }

    public void setId(String id) {
        this.id = id;
    }

    public String getName() {
        return name;
    }

    public void setName(String name) {
        this.name = name;
    }
}
执行测试类testSend2,控制台输出

消费端配置
application.yml
spring:
  rabbitmq:
    addresses: 127.0.0.1:5672
    username: root
    password: 123456
    virtual-host: /test001
    connection-timeout: 15000
    publisher-confirms: true
    publisher-returns: true
    template:
      mandatory: true
    publisher-confirm-type=correlated: correlated
    listener:
      simple:
        acknowledge-mode: manual #签收模式为手动签收
        concurrency: 5 #初始化监听个数
        max-concurrency: 10 #最大监听个数
      order:
        queue:
          name: queue-2
          durable: true
        exchange:
          name: exchange-2
          durable: true
          type: topic
          ignoreDeclarationExceptions: true
        key: springboot.*
RabbitReceiver消费者
package com.cx.temp.web.rabbitmq.consumer;

import com.cx.temp.common.rabbitmq.spring.entity.Order;
import com.rabbitmq.client.Channel;
import org.springframework.amqp.rabbit.annotation.*;
import org.springframework.amqp.support.AmqpHeaders;
import org.springframework.messaging.Message;
import org.springframework.messaging.handler.annotation.Headers;
import org.springframework.messaging.handler.annotation.Payload;
import org.springframework.stereotype.Component;

import java.util.Map;

@Component
public class RabbitReceiver {

    @RabbitListener(bindings = @QueueBinding(
            value = @Queue(value = "${spring.rabbitmq.listener.order.queue.name}", durable = "${spring.rabbitmq.listener.order.queue.durable}"),
            exchange = @Exchange(value = "${spring.rabbitmq.listener.order.exchange.name}", durable = "${spring.rabbitmq.listener.order.exchange.durable}"
                    , type = "${spring.rabbitmq.listener.order.exchange.type}"
                    , ignoreDeclarationExceptions = "${spring.rabbitmq.listener.order.exchange.ignoreDeclarationExceptions}"),
            key = "${spring.rabbitmq.listener.order.key}"
    ))
    @RabbitHandler
    public void onOrderMessage(@Payload Order order, Channel channel, @Headers Map<String, Object> headers) throws Exception {
        System.err.println("-----------------------------------------");
        System.err.println("消息端order" + order.getId());
        Long deliveryTag = (Long)headers.get(AmqpHeaders.DELIVERY_TAG);
        //手工ACK
        channel.basicAck(deliveryTag, false);
    }

}
启动SpringbootApplication,控制台输出
