安装nginx相关依赖软件
1.选定源码目录
选定目录 /usr/local/
cd /usr/local/
2.安装PCRE库
yum -y install pcre-devel
3.安装zlib库
cd /usr/local/
wget http://www.zlib.net/zlib-1.2.11.tar.gz
tar -xvf zlib-1.2.11.tar.gz
cd zlib-1.2.11
./configure
make
make install
4.安装ssl
cd /usr/local/
wget https://www.openssl.org/source/openssl-1.0.2t.tar.gz
tar -xvf openssl-1.0.2t.tar.gz
cd openssl-1.0.2t
./config
make
make install
5.安装nginx
Nginx 一般有两个版本,分别是稳定版和开发版,您可以根据您的目的来选择这两个版本的其中一个,下面是把 Nginx 安装到 /usr/local/nginx 目录下的详细步骤:
cd /usr/local/
wget http://nginx.org/download/nginx-1.14.0.tar.gz
tar -xvf nginx-1.14.0.tar.gz
 cd nginx-1.14.0/
./configure --prefix=/usr/local/nginx
make
make install
使用 /usr/local/nginx/sbin/nginx -t可查看应用nginx.conf的位置
6.the HTTP rewrite module requires the PCRE library报错
./configure: error: the HTTP rewrite module requires the PCRE library.
You can either disable the module by using --without-http_rewrite_module
option, or install the PCRE library into the system, or build the PCRE library
statically from the source with nginx by using --with-pcre=<path> option.
安装pcre-devel解决问题
yum -y install pcre-devel
7.启动
确保系统的 80 端口没被其他程序占用
/usr/local/nginx/sbin/nginx
检查是否启动成功:
netstat -ano|grep 80 有结果输入说明启动成功
打开浏览器访问此机器的 IP,如果浏览器出现 Welcome to nginx! 则表示 Nginx 已经安装并运行成功。
8.重启
/usr/local/nginx/sbin/nginx –s reload
9.修改配置文件
cd /usr/local/nginx/conf
vi nginx.conf
nginx.conf内容
user  root; #这步是防止静态资源权限提示503
worker_processes  1;

error_log  logs/error.log;
#error_log  logs/error.log  notice;
#error_log  logs/error.log  info;

#pid        logs/nginx.pid;


events {
    worker_connections  1024;
}


http {
    include       mime.types;
    default_type  application/octet-stream;

    log_format  main  '$remote_addr - $remote_user [$time_local] "$request" '
                      '$status $body_bytes_sent "$http_referer" '
                      '"$http_user_agent" "$http_x_forwarded_for"';

    access_log  logs/access.log  main;
    underscores_in_headers on;
    sendfile        on;
    keepalive_timeout  65;
    client_max_body_size  80m;

    include  vhost/*.conf;

}
我在conf目录创建vhost文件夹,专门放各个项目或者域名的配置,所以这里用到include vhost/*.conf;
cd vhost
vi test.conf
server { listen 80; server_name www.test.com; server_name_in_redirect off; proxy_set_header Host $host:$server_port; proxy_set_header X-Real-IP $remote_addr; proxy_set_header REMOTE-HOST $remote_addr; proxy_set_header X-Forwarded-For $proxy_add_x_forwarded_for; fastcgi_connect_timeout 1200; location /test-admin { proxy_pass http://127.0.0.1:6001/test-admin; } location /test-file/ { alias /home/test/test-file/; } }
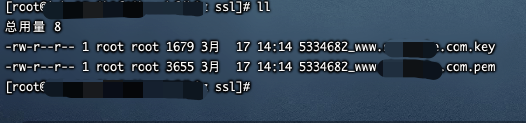
#如无需配置SSL证书,请忽略以下配置 server { listen 443; server_name www.test.com; #填写绑定证书的域名 ssl on; ssl_certificate ssl/5334682_www.test.com.pem; # hps文件夹下的.crt文件 ssl_certificate_key ssl/5334682_www.test.com.key; #hps文件夹下的.key文件 ssl_session_timeout 5m; ssl_protocols TLSv1 TLSv1.1 TLSv1.2; #按照这个协议配置 ssl_ciphers ECDHE-RSA-AES128-GCM-SHA256:HIGH:!aNULL:!MD5:!RC4:!DHE; #按照这个套件配置 ssl_prefer_server_ciphers on; location /test-admin { proxy_pass http://127.0.0.1:6001/test-admin; } location /test-file/ { alias /home/test/test-file/; } }
这里我配置SSL证书,在conf目录下创建ssl文件夹,专门储存申请的SSL证书
如无需配置SSL证书,请忽略以下步骤
由于我们未装SSL模块,启动时,会提示nginx:[emerg]unknown directive ssl错误
因为我们配置这个SSL证书需要引用到nginx的中SSL这模块,然而我们一开始编译的Nginx的时候并没有把SSL模块一起编译进去,所以导致这个错误的出现。
解决方案:
步骤一:我们先来到当初下载nginx的包压缩的解压目录,如果你是看小编写的教程安装的,解压目录应该在“/usr/loacl/nginx-1.14.0/”,绝大多数应该都是在这个目录下的。
步骤二:来到解压目录下后,按顺序执行一下命令:
命令1、./configure --with-http_ssl_module //重新添加这个ssl模块
注意如果没有出现错误,则直接看命令2即可
执行以上一条命令出现这个错误(./configure:错误:SSL模块需要OpenSSL库。),原因是因为缺少了OpenSSL,那我们再来安装一个即可执行:yum -y install openssl openssl-devel
等待OpenSSL的安装完成后,再执行./configure --with-http_ssl_module ,最后在执行” 命令1" 即可
命令2、执行make命令,但是不要执行make install,因为make是用来编译的,而make install是安装,不然你整个nginx会重新覆盖的。
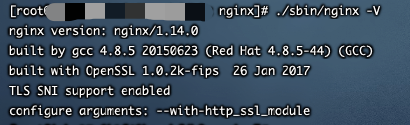
命令3、在我们执行完做命令后,我们可以查看到在nginx解压目录下,objs文件夹中多了一个nginx的文件,这个就是新版本的程序了。首先我们把之前的nginx先备份一下,然后把新的程序复制过去覆盖之前的即可。
cp /usr/local/nginx/sbin/nginx /usr/local/nginx/sbin/nginx.bak
cp objs/nginx /usr/local/nginx/sbin/nginx