一、配置环境变量(Windows系统下要重启)
1、JAVA_HOME即JDK安装路径bin上一级,java -version命令验证
2、CXF_HOME即cxf安装路径bin上一级,cxf解压包下有samples文件夹,下有java_first_pojo文件夹,此处shift+右键打开命令窗口,ant server启动案例WebService服务,如果报错版本问题,打开samples下文件common_build.xml添加上面的JDK版本(如<equals arg1="${ant.java.version}" arg2="1.7"/>),ant client启动客户端
3、ANT_HOME即ant安装路径bin上一级,ant -version命令验证
二、发布WebService服务
Demo1、ServerFactoryBean类这种方式创建出的WSDL文档名字不符合开发规范,一般不用
1、新建PersonService类


package com.hjp.server;

public class PersonService {

    public String sayHello(String name){
        return "Hello "+name;
    }

}
2、创建发布服务类,记得添加cxf安装文件下lib下jar包
package com.hjp.server;

import org.apache.cxf.frontend.ServerFactoryBean;

public class Publisher {

    public static void main(String[] args) {
        //创建cxf发布的服务对象
        ServerFactoryBean serverFactoryBean=new ServerFactoryBean();
        //设置服务的类
        serverFactoryBean.setServiceClass(PersonService.class);
        //设置服务地址
        serverFactoryBean.setAddress("http://localhost:5555/hello");
        //设置服务对象
        serverFactoryBean.setServiceBean(new PersonService());
        //发布
        serverFactoryBean.create();
    }

}
Demo2、JaxWsServerFactoryBean类这种方式结合@WebService注解,WSDL文档名称比较规范
1、新建PersonService1类
package com.hjp.server;

import javax.jws.WebService;

@WebService
public class PersonService1 {

    public String sayHello(String name){
        return "Hello "+name;
    }

}
2、创建发布服务类
package com.hjp.server;

import org.apache.cxf.frontend.ServerFactoryBean;
import org.apache.cxf.jaxws.JaxWsServerFactoryBean;

public class Publisher1 {

    public static void main(String[] args) {
        //创建cxf发布的服务对象
        JaxWsServerFactoryBean serverFactoryBean=new JaxWsServerFactoryBean();
        //设置服务的类
        serverFactoryBean.setServiceClass(PersonService1.class);
        //设置服务地址
        serverFactoryBean.setAddress("http://localhost:5555/hello");
        //设置服务对象
        serverFactoryBean.setServiceBean(new PersonService1());
        //发布
        serverFactoryBean.create();
    }

}
Demo3、JaxWsServerFactoryBean发布接口类服务,@WebService注解加在接口上,在实现类上方法无效
1、新建UserService接口及其实现类UserServiceImpl
package com.hjp.server;

import javax.jws.WebService;

@WebService
public interface UserService {

    public String sayHello(String name);

}
package com.hjp.server;

public class UserServiceImpl implements UserService {
    @Override
    public String sayHello(String name) {
        return "Hello "+name;
    }
}
2、创建发布服务类
package com.hjp.server;

import org.apache.cxf.jaxws.JaxWsServerFactoryBean;

public class Publisher2 {

    public static void main(String[] args) {
        //创建cxf发布的服务对象
        JaxWsServerFactoryBean serverFactoryBean=new JaxWsServerFactoryBean();
        //设置服务的接口类
        serverFactoryBean.setServiceClass(UserService.class);
        //设置服务地址
        serverFactoryBean.setAddress("http://localhost:5555/hello");
        //设置服务对象
        serverFactoryBean.setServiceBean(new UserServiceImpl());
        //发布
        serverFactoryBean.create();
    }

}
三、WebService服务客户端调用
1、使用wsimport命令方式,省略
2、使用cxf中wsdl2java命令(wsimport不支持soap12协议下生成客户端代码)
wsdl2java -d . -p com.hjp.stub.soap12 http://localhost:5555/hello?wsdl
-d生成的客户端代码存放路径,点代表当前路径;-p 第一个参数是生成客户端代码的包路径,第二个参数是wsdl访问地址;如果省略第一个参数,默认包路径为xmlns:tns后面域名倒序
附SOAP12协议代码:
package com.hjp.server;

import javax.jws.WebService;
import javax.xml.ws.BindingType;

import static javax.xml.ws.soap.SOAPBinding.SOAP12HTTP_BINDING;

@WebService
//默认是SOAP11,如果使用SOAP12,需要使用BindingType注解
@BindingType(value = SOAP12HTTP_BINDING)
public interface UserService {

    public String sayHello(String name);

}
四、配置CXFServlet发布服务
1、新建JavaWeb项目
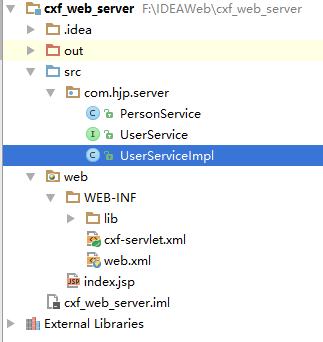
2、面向发布普通类的服务
新建PersonService类
package com.hjp.server;

import javax.jws.WebService;

@WebService
public class PersonService {

    public String sayHello(String name){
        return "Hello "+name;
    }

}
在WEB-INF下新建lib文件夹,将cxf所有相关jar包引入
在WEB-INF下新建cxf-servlet.xml文件,配置如下
<?xml version="1.0" encoding="UTF-8"?>
<beans xmlns="http://www.springframework.org/schema/beans"
       xmlns:xsi="http://www.w3.org/2001/XMLSchema-instance" xmlns:jaxws="http://cxf.apache.org/jaxws"
       xmlns:jaxrs="http://cxf.apache.org/jaxrs" xmlns:cxf="http://cxf.apache.org/core"
       xsi:schemaLocation="http://www.springframework.org/schema/beans
          http://www.springframework.org/schema/beans/spring-beans.xsd
            http://cxf.apache.org/jaxrs http://cxf.apache.org/schemas/jaxrs.xsd
            http://cxf.apache.org/jaxws http://cxf.apache.org/schemas/jaxws.xsd
            http://cxf.apache.org/core http://cxf.apache.org/schemas/core.xsd">
    <!-- 引入CXF Bean定义如下,早期的版本中使用 -->
    <import resource="classpath:META-INF/cxf/cxf.xml"/>
    <import resource="classpath:META-INF/cxf/cxf-extension-soap.xml"/>
    <import resource="classpath:META-INF/cxf/cxf-servlet.xml"/>

    <!--
    endpoint:发布类的形式的服务配置
    address:配置时前必须加/
    implementor:具体的服务类
    -->
    <jaxws:endpoint id="personService" address="/personService" implementor="com.hjp.server.PersonService">
        <jaxws:inInterceptors>
            <bean class="org.apache.cxf.interceptor.LoggingInInterceptor"></bean>
        </jaxws:inInterceptors>
        <jaxws:outInterceptors>
            <bean class="org.apache.cxf.interceptor.LoggingOutInterceptor"></bean>
        </jaxws:outInterceptors>
    </jaxws:endpoint>
</beans>
在web.xml中配置CXFServlet
<?xml version="1.0" encoding="UTF-8"?>
<web-app xmlns="http://xmlns.jcp.org/xml/ns/javaee"
         xmlns:xsi="http://www.w3.org/2001/XMLSchema-instance"
         xsi:schemaLocation="http://xmlns.jcp.org/xml/ns/javaee http://xmlns.jcp.org/xml/ns/javaee/web-app_3_1.xsd"
         version="3.1">

    <servlet>
        <servlet-name>mycxf</servlet-name>
        <servlet-class>org.apache.cxf.transport.servlet.CXFServlet</servlet-class>
    </servlet>

    <servlet-mapping>
        <servlet-name>mycxf</servlet-name>
        <url-pattern>/services/*</url-pattern>
    </servlet-mapping>
</web-app>
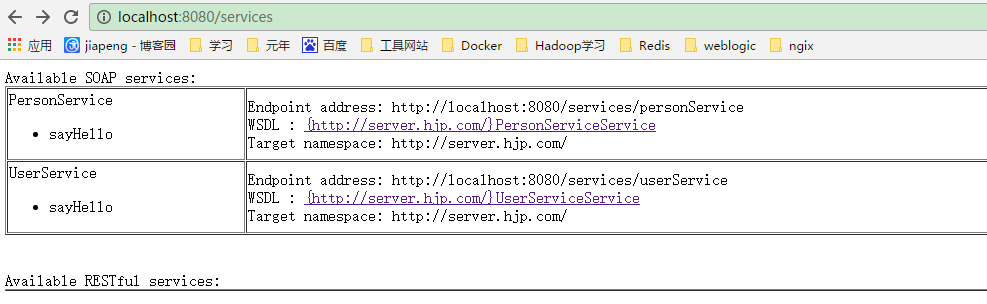
访问地址:http://localhost:8080/services如下图,点击WSDL链接,指向WSDL地址

3、面向发布接口的服务
新建接口及其实现类
package com.hjp.server;

import javax.jws.WebService;

@WebService
public interface UserService {
    public String sayHello(String name);
}
package com.hjp.server;

public class UserServiceImpl implements UserService {
    @Override
    public String sayHello(String name) {
        return "Hello "+name;
    }
}
修改cxf-servlet.xml配置文件
<?xml version="1.0" encoding="UTF-8"?>
<beans xmlns="http://www.springframework.org/schema/beans"
       xmlns:xsi="http://www.w3.org/2001/XMLSchema-instance" xmlns:jaxws="http://cxf.apache.org/jaxws"
       xmlns:jaxrs="http://cxf.apache.org/jaxrs" xmlns:cxf="http://cxf.apache.org/core"
       xsi:schemaLocation="http://www.springframework.org/schema/beans
          http://www.springframework.org/schema/beans/spring-beans.xsd
            http://cxf.apache.org/jaxrs http://cxf.apache.org/schemas/jaxrs.xsd
            http://cxf.apache.org/jaxws http://cxf.apache.org/schemas/jaxws.xsd
            http://cxf.apache.org/core http://cxf.apache.org/schemas/core.xsd">
    <!-- 引入CXF Bean定义如下,早期的版本中使用 -->
    <import resource="classpath:META-INF/cxf/cxf.xml"/>
    <import resource="classpath:META-INF/cxf/cxf-extension-soap.xml"/>
    <import resource="classpath:META-INF/cxf/cxf-servlet.xml"/>

    <!--
    endpoint:发布类的形式的服务配置
    address:配置时前必须加/
    implementor:具体的服务类
    -->
    <jaxws:endpoint id="personService" address="/personService" implementor="com.hjp.server.PersonService">
        <jaxws:inInterceptors>
            <bean class="org.apache.cxf.interceptor.LoggingInInterceptor"></bean>
        </jaxws:inInterceptors>
        <jaxws:outInterceptors>
            <bean class="org.apache.cxf.interceptor.LoggingOutInterceptor"></bean>
        </jaxws:outInterceptors>
    </jaxws:endpoint>

    <!--
    server:发布接口类形式服务
    serviceClass:接口类
    -->
    <jaxws:server id="userService" address="/userService" serviceClass="com.hjp.server.UserService">
        <!--配置接口实现类-->
        <jaxws:serviceBean>
            <bean class="com.hjp.server.UserServiceImpl"></bean>
        </jaxws:serviceBean>

        <jaxws:inInterceptors>
            <bean class="org.apache.cxf.interceptor.LoggingInInterceptor"></bean>
        </jaxws:inInterceptors>
        <jaxws:outInterceptors>
            <bean class="org.apache.cxf.interceptor.LoggingOutInterceptor"></bean>
        </jaxws:outInterceptors>
    </jaxws:server>
</beans>
访问地址:http://localhost:8080/services如下图,点击相应WSDL链接,指向相应WSDL地址
五、WebService发布方式和客户端代码生成方式相互独立,只要有WSDL地址,就可以用某种客户端代码生成工具生成客户端代码