Docker Registry 分类
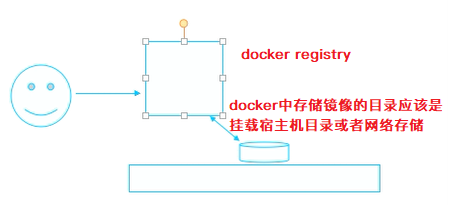
Registry 用于保存 docker 镜像,包括镜像的层次结构和元数据
用户可自建Registry,也可使用官方的 Docker Hub
分类:
- Sponsor Registry:第三方的 registry,供客户和Docker社区使用
- Mirror Registry:第三方的 registry,只让客户使用
- Vendor Registry:由发布 Docker镜像的供应商提供的 registry
- Private Registry:通过设有防火墙和额外的安全层的私有实体提供的 Registry
为了帮我们快速创建私有 registry docker 专门提供了一个程序包 docker-distribution ,docker私有仓库也可运行在容器中,在hub.docker.com 搜索 registry 镜像即可。
运行 docker-registry 还有另外一种方式,可以通过 yum 直接安装 docker-distribution
[root@localhost ~]#yum install docker-registry -y

[root@localhost ~]#rpm -ql docker-registry
package docker-registry is not installed
[root@localhost ~]#rpm -ql docker-distribution
/etc/docker-distribution/registry/config.yml
/usr/bin/registry
/usr/lib/systemd/system/docker-distribution.service
/usr/share/doc/docker-distribution-2.6.2
/usr/share/doc/docker-distribution-2.6.2/AUTHORS
/usr/share/doc/docker-distribution-2.6.2/CONTRIBUTING.md
/usr/share/doc/docker-distribution-2.6.2/LICENSE
/usr/share/doc/docker-distribution-2.6.2/MAINTAINERS
/usr/share/doc/docker-distribution-2.6.2/README.md
/var/lib/registry # 存储镜像的目录


# 配置文件
[root@localhost ~]#vim /etc/docker-distribution/registry/config.yml

# 启动服务,默认5000端口
[root@localhost ~]#systemctl start docker-distribution
接下来,将之前练习的 nginx 镜像推送到 docker-registry 中看看效果。在非官方的镜像必须要给定registry的IP和端口信息,如果不是顶层仓库还要给用户名。
- 首先要打标
[root@docker ~]#docker tag myweb:v0.3-1 192.168.118.46:5000/myweb:v0.3-1
- 推送到服务器
[root@docker ~]#docker push 192.168.118.46:5000/myweb:v0.3-1
# 这里 docker push 默认是 https 协议,docker registry 也必须要 https 协议工作
The push refers to repository [192.168.118.46:5000/myweb]
Get https://192.168.118.46:5000/v2/: http: server gave HTTP response to HTTPS client

# 这里如果是在内网,不想采用https协议,也是可行的。修改需要推送的docker服务器
[root@docker ~]#vim  /etc/docker/daemon.json
...
# 申明不安全但可信任的 registry 仓库地址
"insecure-registries": ["192.168.118.46:5000"]
...

# 重启docker,注意这里重启docker服务,所有容器都会关闭
[root@docker ~]#systemctl restart docker

# 再次推送镜像到 docker registry
[root@docker ~]#docker push 192.168.118.46:5000/myweb:v0.3-1
The push refers to repository [192.168.118.46:5000/myweb]
eefd61d2a9c8: Pushed
076c58d2644f: Pushed
b2cbae4b8c15: Pushed
5ac9a5170bf2: Pushed
a464c54f93a9: Pushed
v0.3-1: digest: sha256:93dfa9e178b342c90badd55d0c336d575412ac03b749db02281a0ad386cc8793 size: 1360
- 其他docker主机下载镜像
[root@localhost ~]#cat /etc/docker/daemon.json
{
    "registry-mirrors": ["http://hub-mirror.c.163.com"],
    "bip": "10.0.0.1/16",
    "insecure-registries": ["192.168.118.46:5000"]
}
[root@localhost ~]#systemctl restart docker
[root@localhost ~]#docker pull 192.168.118.46:5000/myweb:v0.3-1
Trying to pull repository 192.168.118.46:5000/myweb ...
v0.3-1: Pulling from 192.168.118.46:5000/myweb
bdf0201b3a05: Pull complete
3d0a573c81ed: Pull complete
8129faeb2eb6: Pull complete
3dc99f571daf: Pull complete
2252d751e740: Pull complete
Digest: sha256:93dfa9e178b342c90badd55d0c336d575412ac03b749db02281a0ad386cc8793
Status: Downloaded newer image for 192.168.118.46:5000/myweb:v0.3-1
[root@localhost ~]#docker images
REPOSITORY                  TAG                 IMAGE ID            CREATED             SIZE
192.168.118.46:5000/myweb   v0.3-1              9de60f94258a        2 days ago          16 MB
Harbor 私有仓库
作为一个企业级私有 Registry 服务器,Harbor 提供了更好的性能和安全。提升用户使用 Registry 构建和运行环境传输镜像的效率。
- 基于角色的访问控制 - 用户与 Docker 镜像仓库通过“项目”进行组织管理,一个用户可以对多个镜像仓库在同一命名空间(project)里有不同的权限。
- 镜像复制 - 镜像可以在多个 Registry 实例中复制(同步)。尤其适合于负载均衡,高可用,混合云和多云的场景
- 图形化用户界面 - 用户可以通过浏览器来浏览,检索当前 Docker 镜像仓库,管理项目和命名空间。
- AD/LDAP 支持 - Harbor 可以集成企业内部已有的 AD/LDAP,用于鉴权认证管理。
- 审计管理 - 所有针对镜像仓库的操作都可以被记录追溯,用于审计管理。
- 国际化 - 已拥有英文、中文、德文、日文和俄文的本地化版本。更多的语言将会添加进来。
- RESTful API - RESTful API 提供给管理员对于 Harbor 更多的操控, 使得与其它管理软件集成变得更容易。
- 部署简单 - 提供在线和离线两种安装工具, 也可以安装到 vSphere 平台(OVA 方式)虚拟设备。
Harbro在安装的时候需要借助 docker 单机编排工具 docker-compose
百度云下载:
链接:https://pan.baidu.com/s/18IJxWRvdh6Y7qCX0YuRvgg
提取码:p401
安装Harbor
下载harbor 后,解压执行 install.sh 脚本。
[root@localhost ~]#tar xf harbor-offline-installer-v2.1.0.tgz  -C /usr/local/
[root@localhost ~]#cd /usr/local/harbor/
[root@localhost /usr/local/harbor]#ls
common.sh  harbor.v2.1.0.tar.gz  harbor.yml.tmpl  install.sh  LICENSE  prepare

# 需要提供配置文件
[root@localhost /usr/local/harbor]#cp -a harbor.yml.tmpl harbor.yml
### 查看配置文件,这里有几个关键的配置项,可以修改 ###
[root@localhost /usr/local/harbor]#vim harbor.yml
...
hostname: 192.168.118.45 # 监听地址,可以是域名或IP
# 如果不需要https服务,则注释下面项
# https:
  # https port for harbor, default is 443
  # port: 443
  # The path of cert and key files for nginx
  # certificate: /your/certificate/path
  # private_key: /your/private/key/path


harbor_admin_password: Harbor12345 # web界面登录密码
database:
  # The password for the root user of Harbor DB. Change this before any production use.
  password: root123	# 数据库密码
...

# 执行安装
[root@localhost /usr/local/harbor]#./install.sh

[Step 0]: checking if docker is installed ...

Note: docker version: 19.03.13

[Step 1]: checking docker-compose is installed ...
✖ Need to install docker-compose(1.18.0+) by yourself first and run this script again.
上面提示需要安装 docker-compose 1.18.0+ 之后的版本。
[root@localhost /usr/local/harbor]#yum install docker-compose -y
[root@localhost /usr/local/harbor]#./install.sh
...
✔ ----Harbor has been installed and started successfully.----
查看监听端口
[root@localhost ~]#netstat -ntplu | egrep 80
tcp6       0      0 :::80                   :::*                    LISTEN      4477/docker-proxy
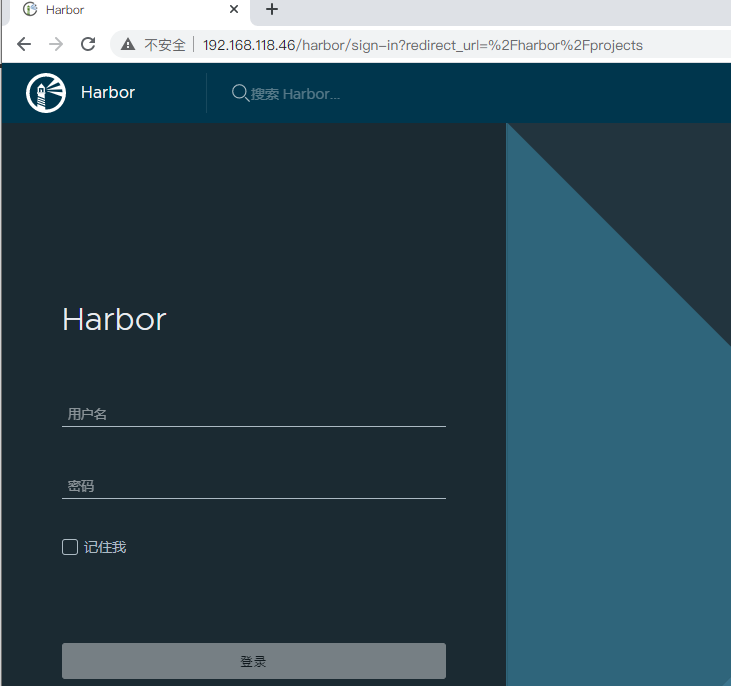
使用Harbor
通过浏览器访问:
用户名:admin
密码:Harbor12345
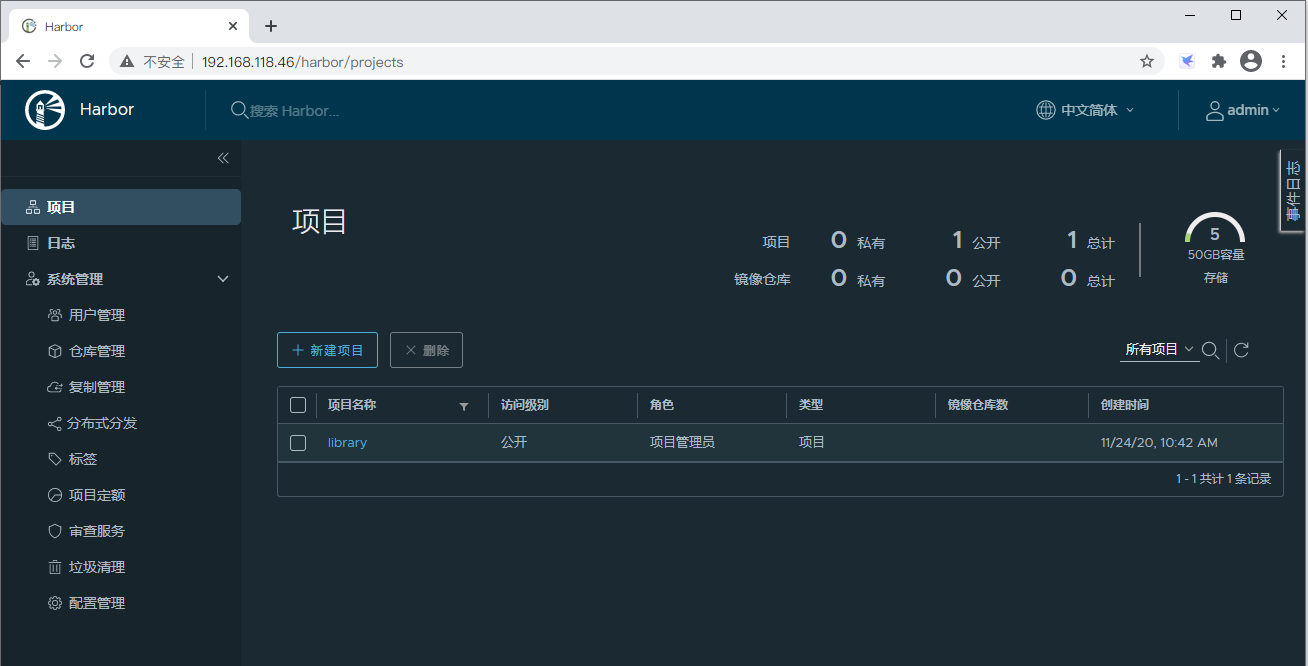
创建一个用户名

新建一个仓库

然后登出 admin用户,用刚才创建的 hukey / Hk0.123456 登录 harbor
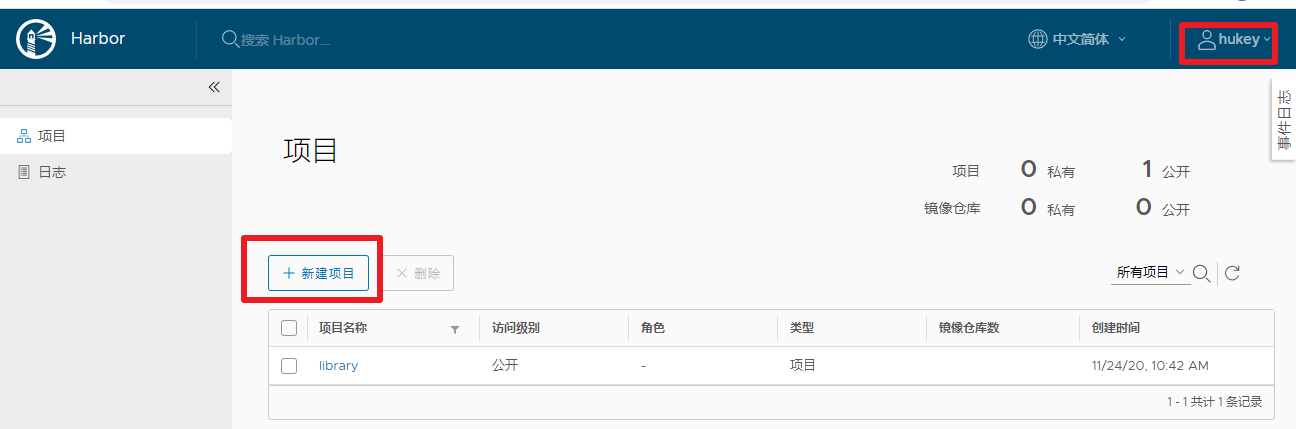
新建项目
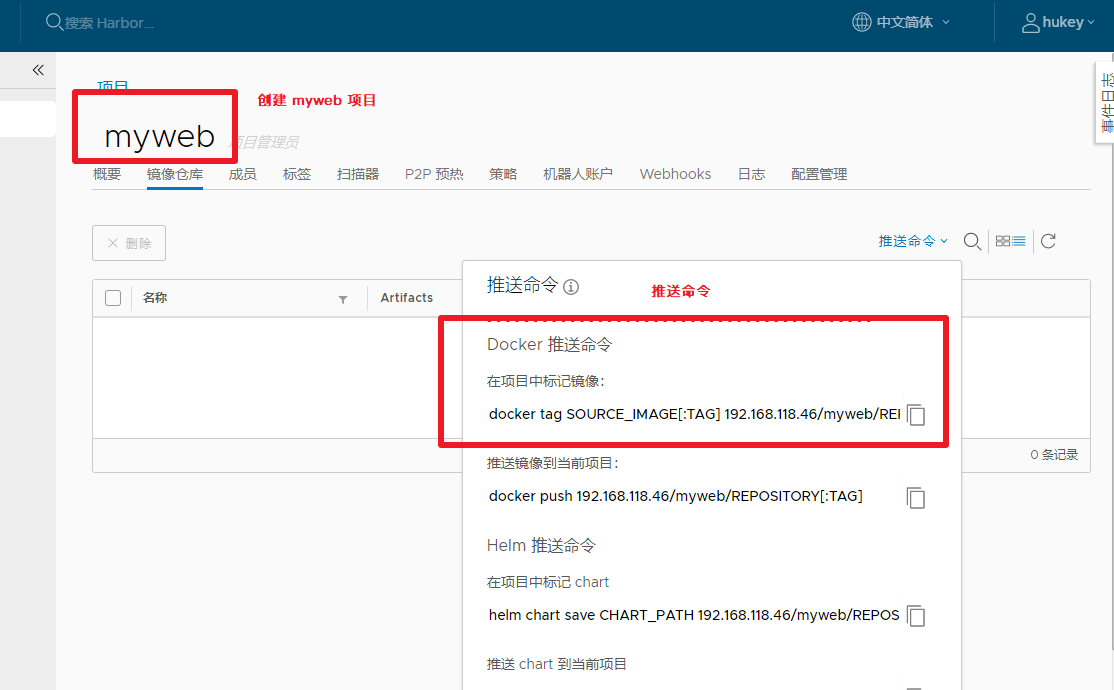
harbor 仓库创建完毕,接下来需要在 docker 主机上进行配置。
Docker 主机推送镜像到Harbor
- 定义信任仓库,修改 daemon.json 配置文件
[root@docker ~]#cat /etc/docker/daemon.json
{
    "registry-mirrors": ["http://hub-mirror.c.163.com"],
    "bip": "10.0.0.1/16",
    "insecure-registries": ["192.168.118.46:80"]
}
[root@docker ~]#systemctl restart docker
- 为要推送的镜像打标
注意:这里默认是443端口,如果要使用80端口必须明确写出来。
[root@docker ~]#docker tag myweb:v0.3-1 192.168.118.46:80/devel/myweb:v0.3-1
[root@docker ~]#docker push 192.168.118.46:80/devel/myweb:v0.3-1
The push refers to repository [192.168.118.46:80/devel/myweb]
eefd61d2a9c8: Preparing
076c58d2644f: Preparing
b2cbae4b8c15: Preparing
5ac9a5170bf2: Preparing
a464c54f93a9: Preparing
unauthorized: unauthorized to access repository: devel/myweb, action: push: unauthorized to access repository: devel/myweb, action: push
出现上面的提示,因为未登录 harbor ,通过以下登录:
注意:这里默认是443端口,如果要使用80端口必须明确写出来。
[root@docker ~]#docker login 192.168.118.46:80
Username: hukey
Password:
WARNING! Your password will be stored unencrypted in /root/.docker/config.json.
Configure a credential helper to remove this warning. See
https://docs.docker.com/engine/reference/commandline/login/#credentials-store

Login Succeeded
再次推送镜像
[root@docker ~]#docker push 192.168.118.46:80/devel/myweb:v0.3-1
The push refers to repository [192.168.118.46:80/devel/myweb]
eefd61d2a9c8: Pushed
076c58d2644f: Pushed
b2cbae4b8c15: Pushed
5ac9a5170bf2: Pushed
a464c54f93a9: Pushed
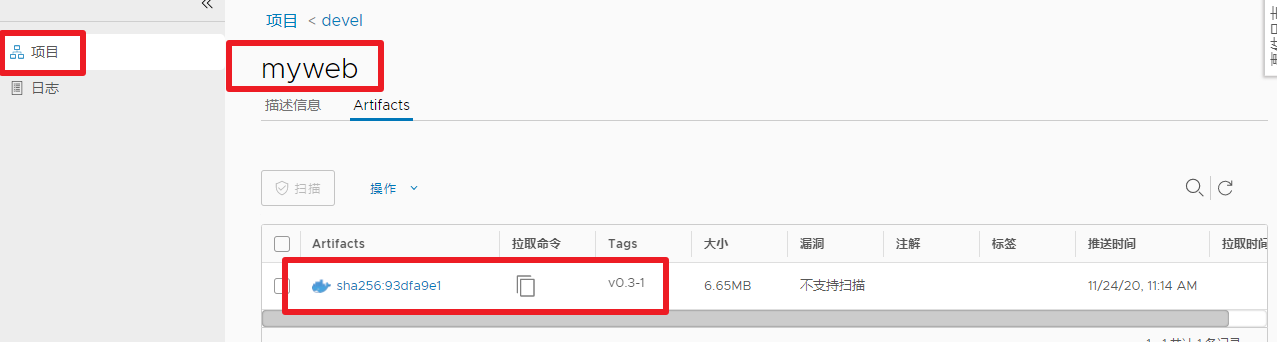
v0.3-1: digest: sha256:93dfa9e178b342c90badd55d0c336d575412ac03b749db02281a0ad386cc8793 size: 1360
推送镜像成功,切换到页面查看。
推送另一个版本:
打标 -> 推送
[root@docker ~]#docker tag myweb:v0.3-2 192.168.118.46:80/devel/myweb:v0.3-2
[root@docker ~]#docker push 192.168.118.46:80/devel/myweb:v0.3-2
The push refers to repository [192.168.118.46:80/devel/myweb]
ff91583fc8fe: Pushed
636c52c0c873: Pushed
076c58d2644f: Layer already exists
b2cbae4b8c15: Layer already exists
5ac9a5170bf2: Layer already exists
a464c54f93a9: Layer already exists
v0.3-2: digest: sha256:140915e52ff7db78d46890336d0bc495cea1f5b6e4bfa7fb0138b6b4a2277db6 size: 1567
页面查看推送镜像:
