一 前言
HAProxy提供高可用性、负载均衡以及基于TCP和HTTP应用的代理,支持虚拟主机,它是免费、快速并且可靠的一种解决方案。而mysql一主多从是比较通用的架构,我们可以利用haproxy在tcp层对数据库的读请求进行代理,从而实现多个从库读的负载均衡。
二 背景说明
目前公司的业务都是一主多从,想要把查询分到多个从库上,都是通过开发维护多个从库的配置来实现,这样比较麻烦,通过haproxy开发只需要一个配置项,开发不用理会后端有多少从库,而且可以把多个从库都利用起来,同时后台db有故障haproxy可以自动摘除,不需要像原先那样需要开发改数据库配置
三 环境说明
我这里都是debian系统
haproxy +mysql_master  192.168.6.123
mysql_slave1  192.168.4.21
mysql_slave2  192.168.9.53
四 haproxy下载安装
下载地址:http://download.openpkg.org/components/cache/haproxy/或者 https://src.fedoraproject.org/repo/pkgs/haproxy/
下载完之后,解压,安装
 make TARGET=linux26 ARCH=x86_64 PREFIX=/home/yx/server/haproxy  # 编译

make install PREFIX=/home/yx/server/haproxy # 安装
五 配置文件默认没有,需要手动创建
global
        log 127.0.0.1 local2
       # chroot /var/lib/haproxy
        pidfile /home/yx/server/haproxy/haproxy.pid
        maxconn 4000
        #user haproxy
        #group haproxy
        daemon
defaults
        mode tcp
        log global
        option httplog
        option dontlognull
        retries 3
        timeout http-request 10s
        timeout queue 1m
        timeout connect 10s
        timeout client 1m
        timeout server 1m
        timeout http-keep-alive 10s
        timeout check 10s
        maxconn 3000
## 定义一个监控页面,监听在1080端口,并启用了验证机制
listen stats
        mode http #监听模式
        bind 192.168.6.123:1080 #haroxy的ip地址和端口
        stats enable
        stats hide-version
        stats uri /haproxyadmin?stats #开启网页访问
        stats realm Haproxy Statistics
        stats auth admin:admin #用户名和密码
        stats admin if TRUE
frontend mysql
        bind *:3306 #监听3306端口
        mode tcp
        #log global
        option tcplog
        default_backend mysqlservers #这里的mysqlservers要跟下面的backend的一致
backend mysqlservers
        balance leastconn
        server zook-3 192.168.4.21:3306 check port 3306 rise 1 fall 2 maxconn 300 #zook-3是主机名,视自己情况而定
        server zook-2 192.168.9.53:3306 check port 3306 rise 1 fall 2 maxconn 300
部分参数介绍
backup:设定为备用服务器,仅在负载均衡场景中的其它server均不可用于启用此server;

check:启动对此server执行健康状态检查,其可以借助于额外的其它参数完成更精细的设定,如:

inter <delay>:设定健康状态检查的时间间隔,单位为毫秒,默认为2000;也可以使用fastinter和downinter来根据服务器端状态优化此时间延迟;

rise <count>:设定健康状态检查中,某离线的server从离线状态转换至正常状态需要成功检查的次数;

fall <count>:确认server从正常状态转换为不可用状态需要检查的次数;

cookie <value>:为指定server设定cookie值,此处指定的值将在请求入站时被检查,第一次为此值挑选的server将在后续的请求中被选中,其目的在于实现持久连接的功能;

maxconn <maxconn>:指定此服务器接受的最大并发连接数;如果发往此服务器的连接数目高于此处指定的值,其将被放置于请求队列,以等待其它连接被释放;
六 配置启动脚本
6.1 启动脚本
#!/bin/bash
    #
    # haproxy
    #
    # chkconfig: 35 85 15
    # description: HAProxy is a free, very fast and reliable solution
    # offering high availability, load balancing, and
    # proxying for TCP and HTTP-based applications
    # processname: haproxy
    # config: /etc/haproxy.cfg
    # pidfile: /var/run/haproxy.pid
    # Source function library.
#    . /etc/rc.d/init.d/functions
. /lib/lsb/init-functions
   # Source networking configuration.
#    . /etc/sysconfig/network
#/run/network
   # Check that networking is up.
    [ "$NETWORKING" = "no" ] && exit 0
    config="/home/yx/server/haproxy/etc/haproxy.cfg" # 根据自己安装的路径来写
    exec="/home/yx/server/haproxy/sbin/haproxy" #根据自己安装的路径来写
    prog=$(basename $exec)
    [ -e /etc/sysconfig/$prog ] && . /etc/sysconfig/$prog
    lockfile=/run/lock/haproxy
    check() {
        $exec -c -V -f $config
    }
    start() {
        $exec -c -q -f $config
        if [ $? -ne 0 ]; then
            echo "Errors in configuration file, check with $prog check."
            return 1
        fi
        echo -n $"Starting $prog: "
        # start it up here, usually something like "daemon $exec"
        start-stop-daemon --quiet --oknodo --start --pidfile /var/run/"$prog.pid"
--exec "$exec" -- -f "$config"  -D -p /var/run/"$prog.pid" || return 2
        retval=$?
        echo
        [ $retval -eq 0 ] && touch $lockfile
        return $retval
    }
    stop() {
        echo -n $"Stopping $prog: "
        # stop it here, often "killproc $prog"
        killproc $prog
        retval=$?
        echo
        [ $retval -eq 0 ] && rm -f $lockfile
        return $retval
    }
    restart() {
        $exec -c -q -f $config
        if [ $? -ne 0 ]; then
            echo "Errors in configuration file, check with $prog check."
            return 1
        fi
        stop
        start
    }
    reload() {
        $exec -c -q -f $config
        if [ $? -ne 0 ]; then
            echo "Errors in configuration file, check with $prog check."
            return 1
        fi
        echo -n $"Reloading $prog: "
        $exec -D -f $config -p /var/run/$prog.pid -sf $(cat /var/run/$prog.pid)
        retval=$?
        echo
        return $retval
    }
    force_reload() {
        restart
    }
    fdr_status() {
        status
    }
    case "$1" in
        start|stop|restart|reload)
            $1
            ;;
        force-reload)
            force_reload
            ;;
        checkconfig)
            check
            ;;
        status)
            fdr_status
            ;;
        condrestart|try-restart)
          [ ! -f $lockfile ] || restart
        ;;
        *)
            echo $"Usage: $0 {start|stop|status|checkconfig|restart|try-restart|reload|force-reload}"
            exit 2
    esac
把上面的脚本放到/etc/init.d/目录下,加上执行权限即可
6.2 测试并启动
yx@es-2:~/server/haproxy$ sudo ./sbin/haproxy -f etc/haproxy.cfg -c  #检测配置文件是否正确
 出现 Configuration file is valid  是正常

    sudo ./sbin/haproxy -f etc/haproxy.cfg  启动服务
    sudo /etc/init.d/haproxy start  # 用脚本启动

  用ps aux | grep haprox查看
用脚本启动的时候如果报下面的错误
Proxy 'admin_stats': stats admin will not work correctly in multi-process mode.
[./haproxy.main()] FD limit (16384) too low for maxconn=20000/maxsock=40014. Please raise 'ulimit-n' to 40014 or more to avoid any trouble.

请设置参数ulimit-n 的值等于maxconn的2倍
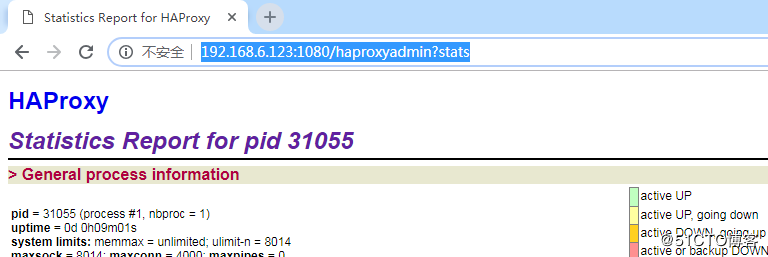
七 浏览器访问
http://192.168.6.123:1080/haproxyadmin?stats # 后面的路径跟你配置文件里面的要一致
八 开启haproxy日志
创建日志目录   mkdir -p /home/yx/server/haproxy/log

更改 sudo vim /etc/rsyslog.conf  这个配置文件
 $ModLoad imudp # 把前面的#号去掉
$UDPServerRun 514 # 把前面的#号去掉
local2.* /home/yx/server/haproxy/log/haproxy.log  # 手动添加,local2.* 要跟你haproxy配置文件里面的一致

 sudo  etc/init.d/rsyslog  restart  # 重启rsylog服务
九 从数据库设置
在slave1和slave2上分别给haproxy的ip授权:
> grant all privileges on *.* to yx1@192.168.6.123 identified by '123456';
grant all privileges on *.* to 'yx1'@'192.168.6.123' identified by '123456';
> flush privileges;
然后在6.123上面及haproxy上面,测试能否用新创建的账户登录slave上面的数据库,如果能正常登录才可以
mysql -uyx1 -p123456 -h192.168.4.21 -P3306
用浏览器查看,两个从数据库也正常了

十测试
10.1 正常两台测试
在两个从上面分别在一个数据库里面建立两个不同的表,其中一台只有一个tb1表 ,另一个有两个表分别是tb1和tb2
#slave1:
create table tb1 (`id` int(4),`name` char(40));
# slave2
create table tb1 (`id` int(4),`name` char(40));
create table tb2 (`id` int(4),`name` char(40));
然后用下面的命令在haproxy上面执行,查询得到的结果
mysql -h192.168.6.123 -P3306 -uyx1 -p123456 -e "use test;show tables;"
如下图所示:

10.2 停掉一台测试
查询日志显示
2019-01-10T14:50:10+08:00 localhost haproxy[8445]: Server mysqlservers/zook-3 is DOWN, reason: Layer4 connection problem, info: "Connection refused", check duration: 0ms. 1 active and 0 backup servers left. 0 sessions active, 0 requeued, 0 remaining in queue
web界面显示,红色代表故障

查询返回的结果只显示其中一个

结果,这样如果其中一个从数据库挂掉之后,不需要更改任何配置,就会自动剔除掉