一、什么是跨域
1、跨域
指的是浏览器不能执行其他网站的脚本。它是由浏览器的同源策略造成的,是浏览器对javascript施加的安全限制。
2、同源策略
是指协议,域名,端口都要相同,其中有一个不同都会产生跨域,在请求数据时,浏览器会在控制台中报一个异常,提示拒绝访问。
3、跨域问题怎么出现的
开发一些前后端分离的项目,比如使用 SpringBoot + Vue 开发时,后台代码在一台服务器上启动,前台代码在另外一台电脑上启动,此时就会出现问题。
比如:
后台 地址为 http://192.168.70.77:8081
前台 地址为 http://192.168.70.88:8080
此时 ip 与 端口号不一致, 不符合同源策略,造成跨域问题。
二、使用 axios 演示并解决跨域问题(vue-cli3.0)
1、项目创建、与 axios 的使用
(1)step1:创建 vue 项目
参考 https://www.cnblogs.com/l-y-h/p/11241503.html
(2)step2:使用 axios
参考 https://www.cnblogs.com/l-y-h/p/11656129.html
2、跨域问题重现
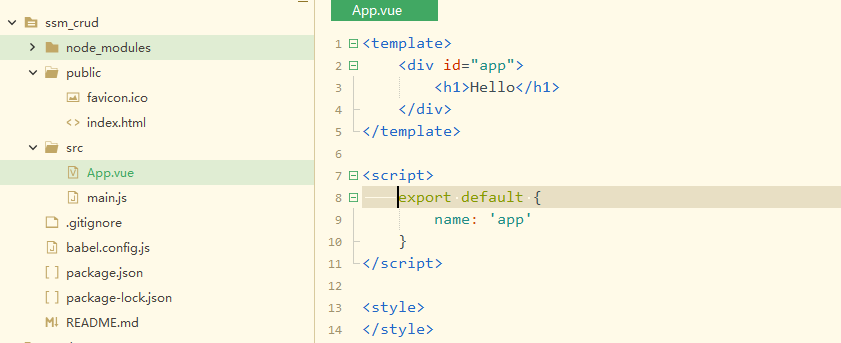
(1)step1:删去 vue 项目初始提供的部分代码,如下图

运行截图:

(2)step2:使用 axios
【App.vue】
<template>
    <div>
        <button @click="testAxios">TestAxios</button>
    </div>
    <!--App -->
</template>

<script>
    // 引入axios
    import Axios from 'axios'

    export default {
        methods: {
            testAxios() {
                const url = 'https://www.baidu.com/'

                Axios.get(url).then(response => {
                    if (response.data) {
                        console.log(response.data)
                    }
                }).catch(err => {
                    alert('请求失败')
                })
            }
        }
    }
</script>

<style>

</style>
此时点击按钮,会出现跨域问题。

(3)常见错误解决
【question1:】
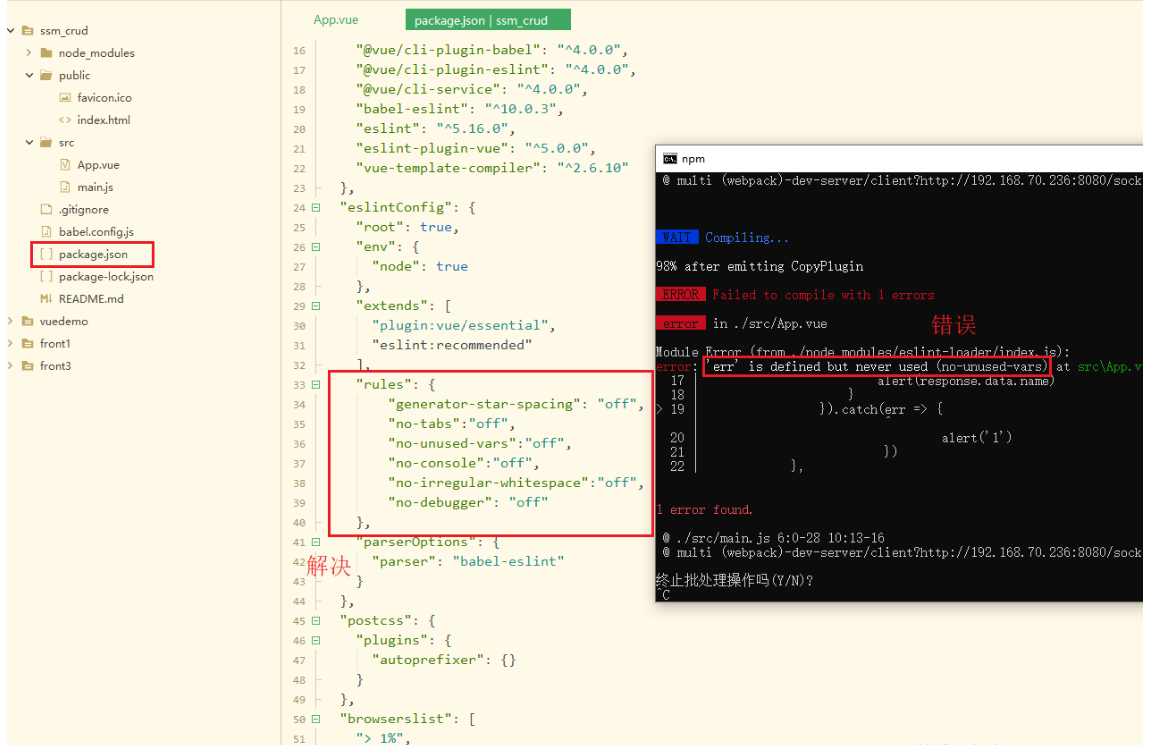
 'err' is defined but never used (no-unused-vars)

 这个问题,是由于 vue 项目安装了 ESLint 。

 暴力解决:直接关闭 ESLint
 在  package.json 文件中 添加
 "rules": {
    "generator-star-spacing": "off",
    "no-tabs":"off",
    "no-unused-vars":"off",
    "no-console":"off",
    "no-irregular-whitespace":"off",
    "no-debugger": "off"
}

3、解决跨域问题
(1)step1:配置 baseURL
可以自定义一个 js 文件,也可以直接在 main.js 中写。
【main.js】
import Vue from 'vue'
import App from './App.vue'
// step1:引入 axios
import Axios from 'axios'

Vue.config.productionTip = false

// step2:把axios挂载到vue的原型中,在vue中每个组件都可以使用axios发送请求,
// 不需要每次都 import一下 axios了,直接使用 $axios 即可
Vue.prototype.$axios = Axios

// step3:使每次请求都会带一个 /api 前缀
Axios.defaults.baseURL = '/api'

new Vue({
  render: h => h(App),
}).$mount('#app')
(2)step2:修改配置文件(修改后要重启服务)
vue 3.0 通过 vue.config.js 文件 修改配置(若没有,则直接在项目路径下新建即可)。
【vue.config.js】
module.exports = {
    devServer: {
        proxy: {
            '/api': {
                // 此处的写法,目的是为了 将 /api 替换成 https://www.baidu.com/
                target: 'https://www.baidu.com/',
                // 允许跨域
                changeOrigin: true,
                ws: true,
                pathRewrite: {
                    '^/api': ''
                }
            }
        }
    }
}
(3)step3:修改 axios 使用方式
【App.vue】
<template>
    <div>
        <button @click="testAxios">TestAxios</button>
    </div>
    <!--App -->
</template>

<script>
    export default {
        methods: {
            testAxios() {
                // 由于 main.js 里全局定义的 axios,此处直接使用 $axios 即可。
                // 由于 main.js 里定义了每个请求前缀,此处的 / 即为 /api/,
                // 经过 vue.config.js 配置文件的代理设置,会自动转为 https://www.baidu.com/,从而解决跨域问题
                this.$axios.get('/').then(response => {
                    if (response.data) {
                        console.log(response.data)
                    }
                }).catch(err => {
                    alert('请求失败')
                })
            }
        }
    }
</script>

<style>

</style>
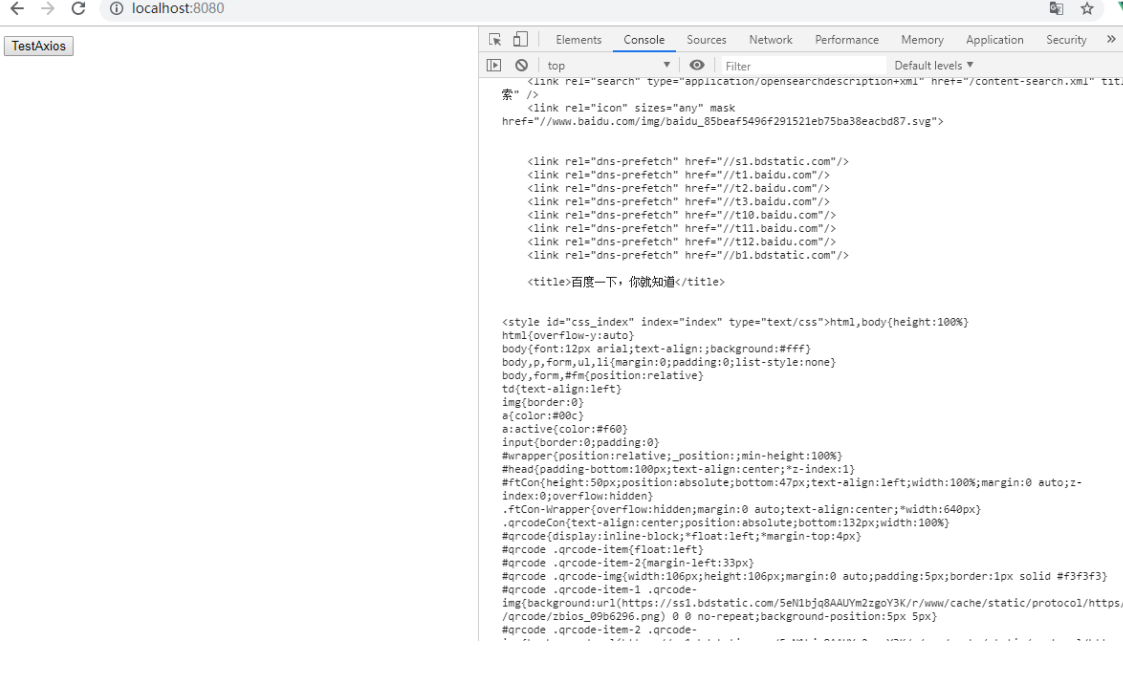
重启服务后,点击按钮,可以成功访问。
