Guacamole是一个基于HTML5的虚拟桌面应用程序,其中包含多个组件,由各组件共同构成Guacamole---一个完整的虚拟桌面解决方案,不需要任何插件,只要浏览器支持HTML5就可以实现,而且实现过程也比较简单,且0.8.3版本预留了websocket的支持,相信下一个虚拟桌面版本会更加出色,下图为guacamole架构:API地址:http://guac-dev.org/doc/gug/users-guide.html

一下是guacamole 0.8.3版本的部署:
1、服务器信息及准备guacamole资源
Linux ubuntu 3.8.0-19-generic #29-Ubuntu SMP Wed Apr 17 18:16:28 UTC 2013 x86_64 x86_64 x86_64 GNU/Linux
配置好的VNC Server,
guacamole-server 下载地址 http://jaist.dl.sourceforge.net/project/guacamole/current/source/guacamole-server-0.8.3.tar.gz
guacamole-client 下载地址 http://jaist.dl.sourceforge.net/project/guacamole/current/source/guacamole-client-0.8.3.tar.gz
tomcat 7.0.47
2、服务器guacamole-server 配置
服务器:解压 guacamole-server-0.8.3.tar.gz
进入解压文件夹之后编译文件
./configure --prefix=/usr
查看编译结果,这是已经装上的组件了支持VNC/rdp协议的虚拟桌面客户端,根据需要安装,安装说明参见API(前面有地址)

这是我的安装代码,只列出安装语句
apt-get install libpng12-dev
apt-get install libpng12-dev
apt-get install libcairo2-dev
apt-get install libvncserver-dev
apt-get install libpulse-dev
apt-get install  libvorbis-dev
make install
安装之后启动 guacd,安装成功会出现如下图示内容:(guacd需要安装)

服务器配置完毕
3、客户端配置(我用的是myeclipse创建的项目,打war包到服务器tomcat发布)
解压guacamole-client-0.8.3
创建web项目
客户端代码嵌入项目
嵌入后项目结构如下图,参照guacamole-client-0.8.3guacamolesrcmainwebapp目录:

一下具体说明web项目配置:
代码清单1、guacamole.properties(两种方式,注释的2验证类是一个免验证组件,可选、不用登陆,其他参数参见官网API)
# Hostname and port of guacamole proxy
guacd-hostname: localhost
guacd-port:     4822

# 1验证类
auth-provider: net.sourceforge.guacamole.net.basic.BasicFileAuthenticationProvider
basic-user-mapping: /etc/guacamole/user-mapping.xml

# 2验证类
#auth-provider: net.sourceforge.guacamole.net.auth.noauth.NoAuthenticationProvider
#noauth-config: /etc/guacamole/noauth-config.xml
代码清单2、user-mapping.xml(两种登陆验证方式,用户可选MD5加密,一个authorize代表一个用户,一个connection代表一个桌面连接,其他参数参见官网API)
<user-mapping>

    <!-- Per-user authentication and config information -->
    <authorize username="admin" password="admin">
        <protocol>vnc</protocol>
        <param name="hostname">127.0.0.1</param>
        <param name="port">6102</param>
        <param name="password">123456</param>
    </authorize>

    <!-- Another user, but using md5 to hash the password
         (example below uses the md5 hash of "PASSWORD") -->
    <authorize
            username="USERNAME"
            password="319f4d26e3c536b5dd871bb2c52e3178"
            encoding="md5">

        <!-- First authorized connection -->
		<connection name="u01">
            <protocol>vnc</protocol>
            <param name="hostname">127.0.0.1</param>
            <param name="port">6102</param>
            <param name="password">123456</param>
        </connection>

        <!-- Second authorized connection -->
   		<connection name="u02">
           <protocol>vnc</protocol>
        <param name="hostname">127.0.0.1</param>
        <param name="port">6103</param>
        <param name="password">123456</param>
        </connection>

		<connection name="u03">
            <protocol>vnc</protocol>
            <param name="hostname">127.0.0.1</param>
            <param name="port">6104</param>
            <param name="password">123456</param>
        </connection>

 </authorize>

</user-mapping>
代码清单3、noauth-config.xml (无用户,一个config代表一个桌面,其他参数参见官网API)
<configs>
    <config name="u01" protocol="vnc">
		<param name="hostname" value="127.0.0.1" />
        <param name="port" value="6102" />
		 <param name="password" value="123456" />
    </config>

    <config name="u02" protocol="vnc">
		<param name="hostname" value="127.0.0.1" />
        <param name="port" value="6103" />
		 <param name="password" value="123456" />
    </config>

    <config name="u03" protocol="vnc">
		<param name="hostname" value="127.0.0.1" />
        <param name="port" value="6104" />
		 <param name="password" value="123456" />
    </config>
</configs>
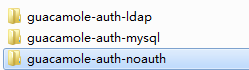
至此,一个guacamole的demo就完成了,当然Guacamole还提供了拓展功能,
其中有MySql拓展、ldap、免验证,还有直接通过代码实例化虚拟桌面连接,而不需要通过配置文件来实例化虚拟桌面
以上三种是官网API都有的,最后一种有时间再补充。