
通用二进制包安装
shell> groupadd mysql
shell> useradd -r -g mysql -s /bin/false mysql
shell> cd /usr/local
shell> tar xvf /path/to/mysql-VERSION-OS.tar.xz
shell> ln -s full-path-to-mysql-VERSION-OS mysql
shell> cd mysql
shell> mkdir mysql-files
shell> chown mysql:mysql mysql-files
shell> chmod 750 mysql-files
shell> bin/mysqld --initialize --user=mysql
shell> bin/mysql_ssl_rsa_setup
shell> bin/mysqld_safe --user=mysql &
# Next command is optional
shell> cp support-files/mysql.server /etc/init.d/mysql.server
1. 在linux上安装mysql时,可能在/etc/文件下已经存在my.cnf 或者 mysql/my.cnf 配置文件了,由此可能会导致脚安装脚本执行失败。
2. 安装mysql时,一定要先卸载原来安装的mysql及marialdb;删除系统自带的mysql,删除方法:
1.6.1、查看系统已安装的mysql,执行命令:
rpm -qa | grep mysql
如果只显示:[root@webhost/]# 则
使用命令:find / -name mysql
系统显示:

然后执行以下命令删除mysql:
rm -rf /usr/lib64/mysql
rm -rf /usr/share/mysql
rm -rf /etc/selinux/targeted/active/modules/100/mysql
如果显示:

则执行:
rpm -aq | grep mysql| xargs rpm -e –nodeps 删除掉系统所有的mysql
1.7、删除mariadb
执行命令:# yum remove mariadb*(过程中提示是否继续,选y 继续)

3. 根据官方说明,要安装libaio和ncurses-compat-libs
4.安装
1. 解压文件
tar -zxvf mysql-8.0.11-el7-x86_64.tar.gz
2. 移动解压后的数据库文件
mv mysql-8.0.11-el7-x86_64 /usr/local/mysql
3. 创建mysql组
groupadd mysql
4. 创建mysql用户并添加到mysql组
useradd -g mysql mysql
5. 创建data目录
mkdir /data
6. 修改目录权限
chown -R mysql.mysql /data
chown -R mysql.mysql /usr/local/mysql
7. 创建my.cnf文件(etc目录下已有my.cnf,可先删除)
vi /etc/my.cnf
[mysqld]
port = 3306
socket = /tmp/mysql.sock
basedir = /usr/local/mysql
datadir = /data
log-error = mysql02_err.log
server-id = 330602
8. 初始化数据库
(mysql 8.0.11是没有/bin/mysql_install_db脚本的,有的人写教程仍在用来误导新人,安装不成功的请注意。官档可查)
#有密码初始化
/usr/local/mysql/bin/mysqld --defaults-file=/etc/my.cnf --user=mysql --initialize
无密码初始化
/usr/local/mysql/bin/mysqld --defaults-file=/etc/my.cnf --user=mysql --initialize-insecure
9. 查看密码
cat /data/mysql02_err.log
2018-07-25T14:10:46.576739Z 0 [System] [MY-013169] [Server] /usr/local/mysql/bin/mysqld (mysqld 8.0.11) initializing of server in progress as process 9796
2018-07-25T14:10:49.072963Z 5 [Note] [MY-010454] [Server] A temporary password is generated for root@localhost: iN:.snX3P_in
2018-07-25T14:10:50.825865Z 0 [System] [MY-013170] [Server] /usr/local/mysql/bin/mysqld (mysqld 8.0.11) initializing of server has completed
10. 启动数据库
/usr/local/mysql/bin/mysqld_safe --defaults-file=/etc/my.cnf --user=mysql &
[1] 9925
2018-07-25T14:20:27.230347Z mysqld_safe Logging to '/data/mysql02_err.log'.
2018-07-25T14:20:27.267638Z mysqld_safe Starting mysqld daemon with databases from /data
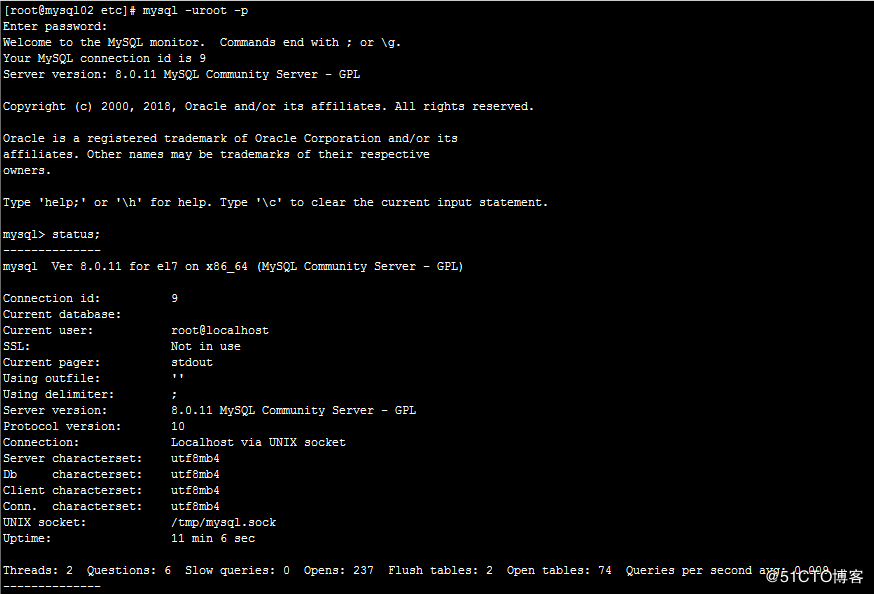
11. 登录数据库
/usr/local/mysql/bin/mysql -uroot -p
12. 第一次登录修改root初始化密码
alter user 'root'@'localhost' identified with mysql_native_password by '123456'
13. 创建root@%
create user 'root'@'%' identified by '123456';
grant all privileges on *.* to 'root'@'%' with grant option;
flush privileges;
14. 配置环境变量
vi /etc/profile 在最后添加:
PATH=/usr/local/mysql/bin:/usr/local/mysql/lib:$PATH
source /etc/profile
14.1 设置mysql自启动
15. 关闭数据库
mysqladmin -uroot -p shutdown
16. 启动数据库
mysqld_safe --defaults-file=/etc/my.cnf --user=mysql &
17. 查看数据库进程
[root@mysql02 data]# ps -ef|grep mysql
root 10253 9892 0 10:48 pts/2 00:00:00 /bin/sh /usr/local/mysql/bin/mysqld_safe --defaults-file=/etc/my.cnf --user=mysql
mysql 10405 10253 16 10:48 pts/2 00:00:01 /usr/local/mysql/bin/mysqld --defaults-file=/etc/my.cnf --basedir=/usr/local/mysql --datadir=/data --plugin-dir=/usr/local/mysql/lib/plugin --user=mysql --log-error=mysql02_err.log --pid-file=mysql02.pid --socket=/tmp/mysql.sock --port=3306
root 10447 9892 0 10:49 pts/2 00:00:00 grep --color=auto mysql
18. 将mysql服务加到系统服务中
cp -a /usr/local/mysql/support-files/mysql.server /etc/init.d/mysql.server
chmod +x /etc/rc.d/init.d/mysql.server
chkconfig --add mysql.server
chkconfig --list mysql.server
19. 关闭数据库
service mysql.server stop
[root@mysql02 etc]# service mysql.server stop
Shutting down MySQL..2018-07-25T15:33:26.490180Z mysqld_safe mysqld from pid file /data/mysql02.pid ended
SUCCESS!
[1]+ Done mysqld_safe --defaults-file=/etc/my.cnf --user=mysql (wd: /data)
(wd now: /etc)
20. 启动数据库
sudo -u mysql service mysql.server start
[root@mysql02 etc]# sudo -u mysql service mysql.server start
Starting MySQL.. SUCCESS!
21. 查看服务
ps -ef|grep mysql
[root@mysql02 etc]# ps -ef|grep mysql
mysql 10833 1 0 11:35 pts/2 00:00:00 /bin/sh /usr/local/mysql/bin/mysqld_safe --datadir=/data --pid-file=/data/mysql02.pid
mysql 11003 10833 10 11:35 pts/2 00:00:00 /usr/local/mysql/bin/mysqld --basedir=/usr/local/mysql --datadir=/data --plugin-dir=/usr/local/mysql/lib/plugin --log-error=mysql02_err.log --pid-file=/data/mysql02.pid --socket=/tmp/mysql.sock --port=3306
root 11047 9892 0 11:36 pts/2 00:00:00 grep --color=auto mysql
22. 重启数据库
sudo -u mysql service mysql.server restart
[root@mysql02 etc]# sudo -u mysql service mysql.server restart
Shutting down MySQL.. SUCCESS!
Starting MySQL. SUCCESS!
2.0、远程登陆解决方法
远程登陆如果报:Host'xxx'is not allowed to connect to this MySQL server
则执行以下命令:
mysql-u root –p
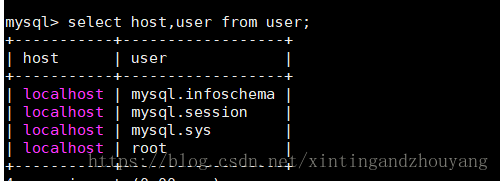
mysql> use mysql;
select host,user from user;
更改root的host 为 %
执行:mysql> update user set host='%' where user='root';
mysql> FLUSH PRIVILEGES;
修改完成后登陆如果报:
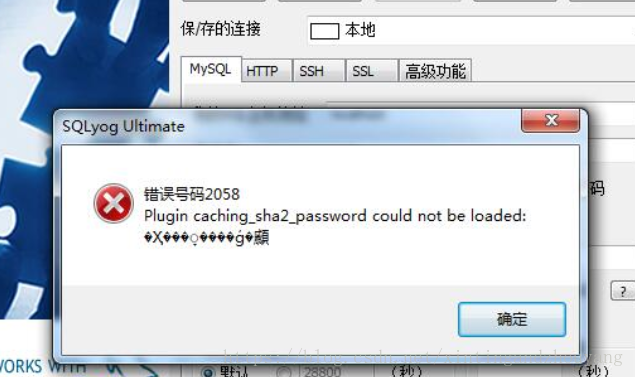
登陆mysql :mysql -uroot –p
按照顺序执行:
ALTER USER 'root'@'%' IDENTIFIED BY 'password' PASSWORDEXPIRE NEVER;#修改加密规则
ALTER USER 'root'@'%' IDENTIFIED WITHmysql_native_password BY 'password'; #更新一下用户的密码
alter user 'root'@'%' identified by ‘123qab’;#修改密码
FLUSH PRIVILEGES; #刷新权限
exit;退出
重启mysql 服务:service mysqld restart