First example, EchoService
1. 新建一个名叫 “EchoService” 的空白项目
2. 添加SuperSocket的Common和SocketBase这两个dll或者项目引用到EchoService项目
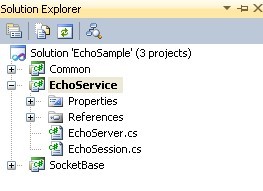
3. 新增名为EchoServer和EchoSession的类,如下图
EchoSession.cs
using System;
using System.Collections.Generic;
using System.Linq;
using System.Text;
using SuperSocket.SocketBase;
namespace SuperSocket.QuickStart.EchoService
{
public class EchoSession : AppSession<EchoSession>
{
public override void StartSession()
{
SendResponse("Welcome to EchoServer!");
}
public override void HandleExceptionalError(Exception e)
{
SendResponse("Server side error occurred!");
}
}
}
EchoServer.cs
using System;
using System.Collections.Generic;
using System.Linq;
using System.Text;
using SuperSocket.SocketBase;
namespace SuperSocket.QuickStart.EchoService
{
public class EchoServer : AppServer<EchoSession>
{
}
}
4. 添加命令类
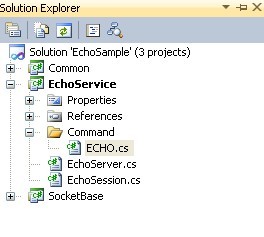
ECHO.cs
using System;
using System.Collections.Generic;
using System.Linq;
using System.Text;
using SuperSocket.SocketBase.Command;
namespace SuperSocket.QuickStart.EchoService.Command
{
public class ECHO : StringCommandBase<EchoSession>
{
#region CommandBase<EchoSession> Members
public override void ExecuteCommand(EchoSession session, StringCommandInfo commandInfo)
{
session.SendResponse(commandInfo.Data);
}
#endregion
}
}
注意: 命令类必须为public.
5. 编译项目 “EchoService” 然后拷贝项目输出到"SocketService"这个项目的输出目录 (请先提前编译SocketService项目)
6. 更新SocketService的配置文件app.config 来启用“EchoService”
<?xml version="1.0" encoding="utf-8" ?>
<configuration>
<configSections>
<section name="socketServer" type="SuperSocket.SocketEngine.Configuration.SocketServiceConfig, SuperSocket.SocketEngine"/>
</configSections>
<appSettings>
<add key="ServiceName" value="EchoService"/>
</appSettings>
<socketServer loggingMode="IndependantFile">
<servers>
<server name="EchoServer"
serviceName="EchoService" ip="Any" port="911" mode="Async">
</server>
</servers>
<services>
<service name="EchoService"
type="SuperSocket.QuickStart.EchoService.EchoServer, SuperSocket.QuickStart.EchoService" />
</services>
</socketServer>
<startup>
<supportedRuntime version="v4.0" sku=".NETFramework,Version=v4.0" />
</startup>
</configuration>
请注意配置文件中的 "socketServer" 节点.
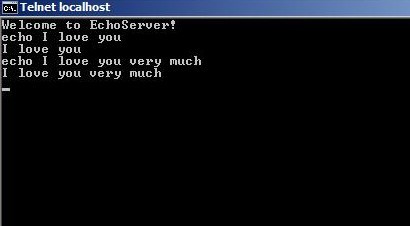
7. 运行“RunServer.bat” 然后输入任意键启动SuperSocket, 然后你就可以通过telnet client来测试你的EchoService了 (你也可以运行"InstallService.bat"来将SuperSocket安装成服务, 服务的名称是在app.config的appSetting以"ServiceName"为key的值,你可以按照项目需要修改它),测试方式如下,输入“ECHO Any message”:
本文源代码在SuperSocket的源代码中QuickStart目录中已包含: