之前弄了个ssh方式访问的git服务器,但是那种方式不太方便,而且网页也访问不了,所以这里又弄个http方式访问的git服务器。
安装过程还和之前一样,这里我再复制一遍,省的再去找了。
1、 安装依赖的库
[root@localhost ~]# yum install curl-devel expat-devel gettext-devel openssl-devel zlib-devel perl-devel
2、 删除原本的安装的git
[root@localhost ~]# yum remove git -y
3、下载git-2.10.0.tar.gz 到 /usr/local/src
[root@localhost ~]# cd /usr/local/src
[root@localhost src]# wget https://www.kernel.org/pub/software/scm/git/git-2.10.0.tar.gz
4、 编译安装
[root@localhost src]# tar -zvxf git-2.10.0.tar.gz
[root@localhost src]# cd git-2.10.0
[root@localhost src]# make prefix=/usr/local/git all
[root@localhost src]# make prefix=/usr/local/git install
5、 增加软连接
[root@localhost src]# ln -s /usr/local/git/bin/* /usr/bin/
[root@localhost src]# git --version
如果能正常显示版本号,即表示成功。
6、新建git仓库
[root@localhost root]$ mkdir /home/git/repositories/test.git
[root@localhost root]$ cd /home/git/repositories/test.git
[root@localhost test.git]$ git --bare init
7、修改上一步创建的文件夹test.git的所有者与所属群组,要让apache能读/写这个文件夹,注意这里-R必须加上,不然clone会出现权限不够问题
[root@localhost ~]# chown -R apache:apache /home/git
8、Apache的配置(ps:这里开始就和之前安装git方式不一样了)
8.1、安装Apache(系统有的可以忽略这一步)
[root@localhost src]# yum install httpd apr apr-util
[root@localhost src]# yum install httpd-manual mod_ssl mod_perl mod_auth_mysql
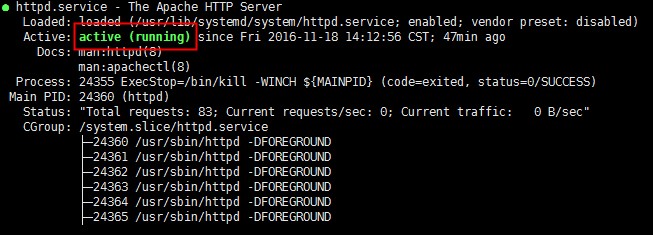
启动Apache,并测试安装是否成功
[root@localhost src]# /bin/systemctl start httpd.service
[root@localhost src]# /bin/systemctl enable httpd
[root@localhost src]# /bin/systemctl status httpd.service
8.2、创建新用户,输入密码
[root@localhost ~]# htpasswd -m -c /etc/httpd/conf.d/git-team.htpasswd <username>
(PS: -m:表示MD5加密方式 ;-c:表示创建文件,只有第一次创建用户时候加上该参数,以后不用)
8.3、设置git-team.htpasswd文件的访问权限
[root@localhost ~]# chmod 640 /etc/httpd/conf.d/git-team.htpasswd
8.4、修改apache配置文件httpd.conf
[root@localhost ~]# vi /etc/httpd/conf/httpd.conf
在文件末尾添加下列内容:
<VirtualHost *:80>
        ServerName 自己的服务器IP或者域名
        SetEnv GIT_HTTP_EXPORT_ALL
        SetEnv GIT_PROJECT_ROOT /home/git/repositories
        ScriptAlias /git/ /usr/libexec/git-core/git-http-backend/
        <Location />
                AuthType Basic
                AuthName "Git"
                AuthUserFile /etc/httpd/conf.d/git-team.htpasswd
                Require valid-user
        </Location>
</VirtualHost>
8.5、重启Apache
[root@localhost ~]# /bin/systemctl restart httpd.service
到这里git服务器基本功能就搭建好了,可以clone了
地址 http://自己服务器IP或域名/git/test.git
(PS:这里如果连接不上,可以查看你的防火墙80端口是否开启,如果没开启当然是无法clone的)
9、安装gitweb实现浏览器访问git服务器
9.1、下载安装gitweb
[root@localhost ~]# yum install gitweb
9.2、修改git.conf
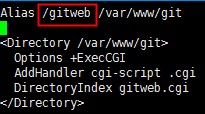
[root@localhost ~]# vi /etc/httpd/conf.d/git.conf
将 "Alias /git /var/www/git" 改为 "Alias /gitweb /var/www/git"
9.3、修改gitweb.conf
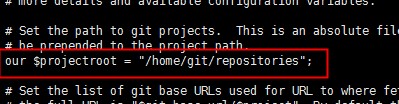
[root@localhost ~]# vi /etc/gitweb.conf
修改成:our $projectroot = "/home/git/repositories"
ok,到这里就可以用浏览器访问了,地址 http://自己的服务器IP或者域名/gitweb/

10、客户端http方式访问的,每次都要输入密码这里可以设置长期存储密码,客户端运行
git config --global credential.helper store
增加仓库地址时候带上用户名(name)和密码(password)也可以
http://name:password@自己服务器IP或域名/git/test.git
这里注意一点,如果用户名是邮箱地址或者中文 把它 url编码 ,@对应的是%40
OK,到这里http方式访问的git服务器,安装到位,有需要的拿走,不谢!