1 构建应用程序
示例: 我们期望有一个输出工具类,当前希望通过控制台(console)输出,但是又希望仅能在控制台模式下输出。所以我们把输出抽象为一个接口
using System; namespace AutofacDemo { public interface IOutput { void Write(string content); } public class ConsoleOutput : IOutput { public void Write(string content) { Console.WriteLine(content); } } } |
通过这个接口,我可以在控制台输出任意内容。 现在针对日期进行输出,我可以输出当前日期,明天,或者后天,或者… 我希望输出的日期很灵活。一个日期输出接口
public interface IDateWriter { void WriteDate(); } public class CurentDateWriter :IDateWriter { IOutput _output; public CurentDateWriter(IOutput output) { this._output = output; } public void WriteDate() { this._output.Write(DateTime.Now.ToString()); } } |
到此,我们的应用程序构建完毕,CurrentDateWriter 依赖 Ioutput 接口,并通过构造函数进行了注入。
using System; namespace AutofacDemo { class Program { static void Main(string[] args) { IOutput ioutput = new ConsoleOutput(); IDateWriter idatewriter = new CurentDateWriter(ioutput); idatewriter.WriteDate(); Console.ReadKey(); } } } |
main 函数的调用代码,很明显对组件类(ConsoleOoutput 和 CurrentDateWriter) 形成了New 依赖。 接下来使用Autofac 实现依赖注入 (DI)
2 引用Autofac
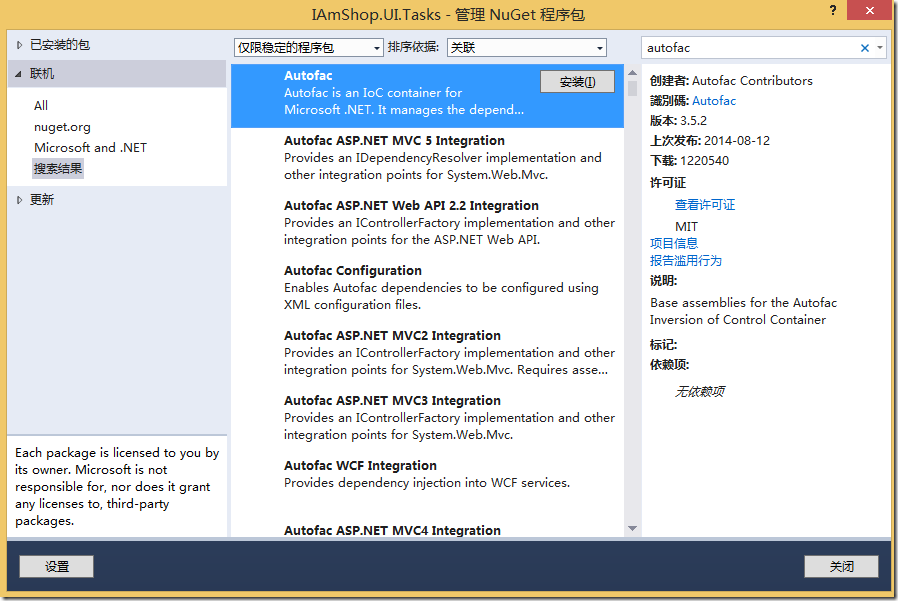
打开项目,在管理Nuget程序包 中,输入aufofac 添加引用
也可以使用命令形式进行安装
PM> install-package aufofac
Autofac 需要一个 ContainerBuilder 来对 组件(实现类)和接口 进行注册,对外部调用代码,只暴露接口。Main 函数修改如下:
using System; using Autofac; namespace AutofacDemo { class Program { static IContainer container { get; set; } static void Main(string[] args) { var builder = new ContainerBuilder(); //注册 【组件类】 作为 【接口】 的实现 builder.RegisterType<ConsoleOutput>().As<IOutput>(); builder.RegisterType<CurentDateWriter>().As<IDateWriter>(); container = builder.Build(); //构建容器 //使用 IDateWriter datawriter = container.Resolve<IDateWriter>(); datawriter.WriteDate(); Console.ReadKey(); } } } |
我们把接口实例化的工作交给autofac 容器后,使用Idaewriter 输出日期时,就不用关心它的具体实现了。
3 应用程序执行
在应用程序执行期间,需要确保使用的组件已经被注册,而且是在一个生命周期内。autofac 容器有自己的生命周期, 不推荐直接从容器中取出一个组件。这等于直接new 了很多实例,然后等待系统自动释放。
推荐是在容器的生命周期范围内,获取一个组件时,为这个组件创建一个子生命周期。这样,当结束这个生命周期时,立即释放这个组件,避免内存堆积造成的内存泄露(memory leak)。
所以,我们改变我们上面的代码,附加一个使用范围
using System; using Autofac; namespace AutofacDemo { class Program { static IContainer container { get; set; } static void Main(string[] args) { var builder = new ContainerBuilder(); //注册 【组件类】 作为 【接口】 的实现 builder.RegisterType<ConsoleOutput>().As<IOutput>(); builder.RegisterType<CurentDateWriter>().As<IDateWriter>(); container = builder.Build(); //构建容器 //使用 using (var scope = container.BeginLifetimeScope()) { IDateWriter datawriter = container.Resolve<IDateWriter>(); datawriter.WriteDate(); } Console.ReadKey(); } } } |
当执行WriteDate 方法时过程是这样:
- WriteDate 方法向 autofac 容器请求一个 IDataWriter
- autofac 发现 IDataWriter 映射到 CurrentDataWriter , 所以开始 实例化创建 CurrentDataWriter
- autofac 发现 CurrentDataWriter 构造函数需要传递一个 IOutput 接口
- autofac 发现 IOutput 映射到 ConsoleOutput 类,于是开始创建 ConsoleOutput 的实例
- aufofac 用 ConsoleOutput 的实例 完成 CurrentDataWriter 实例的创建
- aufofac 用 CurrentDataWriter 的实例 来构造 IDataWriter 接口
