前段日子公司搞java项目,使用nexus repository搭建了私有maven库,现在把原来的私有nuget也迁到nexus repository上了,下面介绍下搭建流程:
https://help.sonatype.com/display/NXRM3/Download
官方下载tar包 当前 nexus-3.8.0-02-unix.tar.gz
使用xshell的rz命令上传到linux服务器
解压缩文件:tar -zxvf nexus-3.8.0-02-unix.tar.gz (会解压出两个文件夹)

进入解压后文件 cd nexus-3.8.0-02
编辑配置文件:vi etc/nexus-default.properties
配置文件中更改端口号(默认端口号8081):
application-port=5006
(如果更改工作路径,修改nexus-work,如 nexus-work=${user.home}/sonatype-work/nexus)
进入bin文件夹:cd bin
启动nexus服务: ./nexus start
查看服务状态: ./nexus status
访问地址ip:5006,出现下面界面:
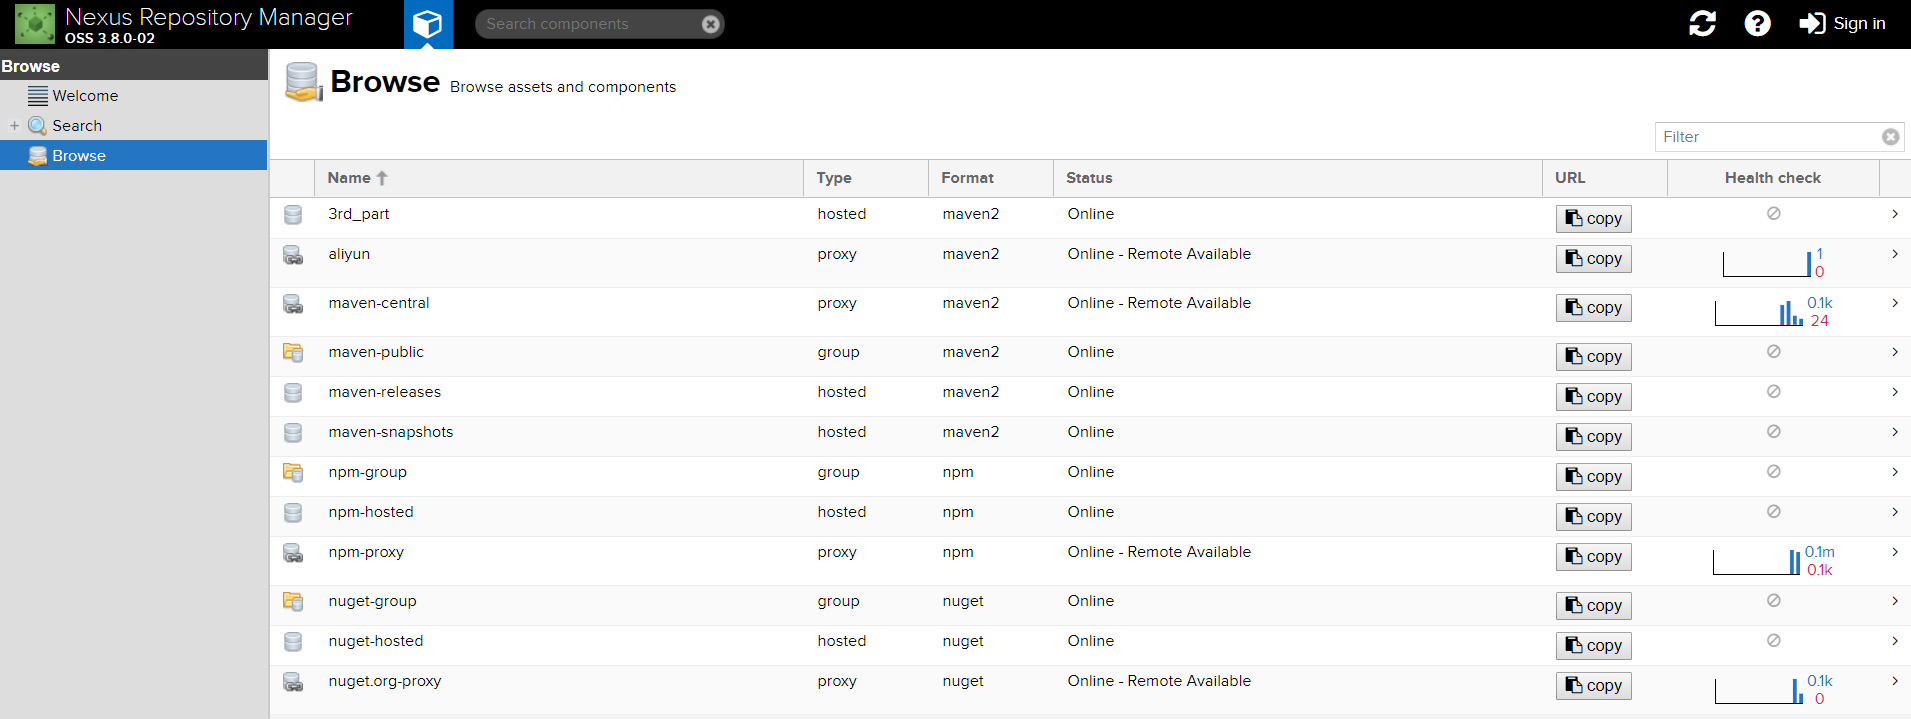
默认用户:admin admin123
登陆后可以创建不同类型仓储,关于nexus repository仓储说明如下:
一、component name解释:
(1)maven-central:maven中央库,默认从https://repo1.maven.org/maven2/拉取jar
(2)maven-releases:私库发行版jar
(3)maven-snapshots:私库快照(调试版本)jar
(4)maven-public:仓库分组,把上面三个仓库组合在一起对外提供服务,在本地maven基础配置settings.xml中使用。
二、Nexus默认的仓库类型有以下四种:
(1)group(仓库组类型):又叫组仓库,用于方便开发人员自己设定的仓库
(2)hosted(宿主类型):内部项目的发布仓库(内部开发人员,发布上去存放的仓库)
(3)proxy(代理类型):从远程中央仓库中寻找数据的仓库(可以点击对应的仓库的Configuration页签下Remote Storage Location属性的值即被代理的远程仓库的路径)
(4)virtual(虚拟类型):虚拟仓库
三、Policy(策略):表示该仓库为发布(Release)版本仓库还是快照(Snapshot)版本仓库
四、Public Repositories下的仓库:
(1)3rd party: 无法从公共仓库获得的第三方发布版本的构件仓库,即第三方依赖的仓库,这个数据通常是由内部人员自行下载之后发布上去
(2)Apache Snapshots: 用了代理ApacheMaven仓库快照版本的构件仓库
(3)Central: 用来代理maven中央仓库中发布版本构件的仓库
(4)Central M1 shadow: 用于提供中央仓库中M1格式的发布版本的构件镜像仓库
(5)Codehaus Snapshots: 用来代理CodehausMaven 仓库的快照版本构件的仓库
(6)Releases: 内部的模块中release模块的发布仓库,用来部署管理内部的发布版本构件的宿主类型仓库;release是发布版本
(7)Snapshots:发布内部的SNAPSHOT模块的仓库,用来部署管理内部的快照版本构件的宿主类型仓库;snapshots是快照版本,也就是不稳定版本
所以自定义构建的仓库组代理仓库的顺序为:Releases,Snapshots,3rd party,Central。也可以使用oschina放到Central前面,下载包会更快。
Intellij Idea 集成私有maven:
找到maven的配置文件setting.xml( 在idea的 File 》Setting 中 )操作如图:

( 如果上图路径下没有配置setting.xml文件,可以在idea安装过路径的pluginsmavenlibmaven3conf中拷贝一个过去,
本人电脑在C:Program FilesJetBrainsIntelliJ IDEA 2017.3.2pluginsmavenlibmaven3conf中 )
setting.xml中增加如下配置:
<servers>
<server>
<id>nexus</id>
<username>admin</username>
<password>admin123</password>
</server>
</servers>
使用idea打开或新建项目,在项目的pom.xml文件中增<project></project>节点下增加如下配置:
//代理repository
<repositories>
<repository>
<id>maven-central</id>
<name>maven-central</name>
<url>http://ip:port/repository/maven-central/</url>
<snapshots>
<enabled>true</enabled>
</snapshots>
<releases>
<enabled>true</enabled>
</releases>
</repository>
</repositories>
需要将源码上传到maven的话,在项目的pom.xml文件中增<project></project>节点下增加如下配置:
//jar包发布repository
<distributionManagement>
<snapshotRepository>
<id>nexus</id>
<name>Nexus Snapshot</name>
<url>http://ip:port/repository/maven-snapshots/</url>
</snapshotRepository>
<repository>
<id>nexus</id>
<name>Nexus Release</name>
<url>http://ip:port/repository/maven-releases/</url>
</repository>
//网站信息
<!--<site>
<id>nexus</id>
<name>Nexus Sites</name>
<url>dav:http://ip:port/repository/maven-snapshots/</url>
</site>-->
</distributionManagement>
<build>
<plugins>
//上传源码插件
<plugin>
<artifactId>maven-source-plugin</artifactId>
<version>2.1</version>
<configuration>
<attach>true</attach>
</configuration>
<executions>
<execution>
<phase>compile</phase>
<goals>
<goal>jar</goal>
</goals>
</execution>
</executions>
</plugin>
</plugins>
</build>
注意:
setting.xml和pom.xml中的id节点值必须一致,
pom.xml头部文件中version节点的值中含有SNAPSHOT时maven会认为是快照版本,发布到maven-snapshots仓库,
不含则认为是release版本,发布到maven-releases仓库
配置完成后就可以使用idea发布jar到私有仓库或者拉取jar了,打开idea下maven工具方式如如下图:
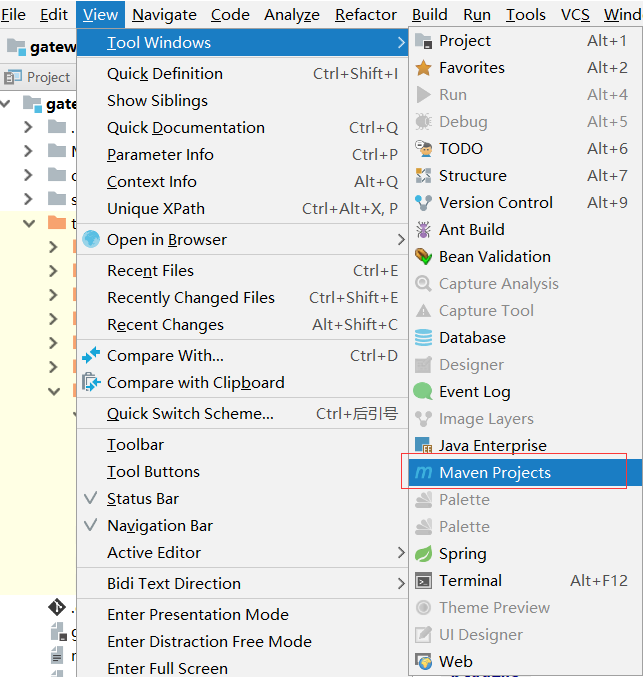
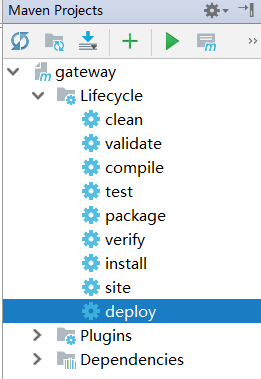
添加Maven Project视图后在idea右侧会显示工具界面,点击相应按钮即可完成操作,如图:
PS:idea创建maven项目时更改默认jdk版本为1.8方法如下:
修改maven的setting.xml文件,添加如下:
<profile>
<id>jdk-1.8</id>
<activation>
<activeByDefault>true</activeByDefault>
<jdk>1.8</jdk>
</activation>
<properties>
<maven.compiler.source>1.8</maven.compiler.source>
<maven.compiler.target>1.8</maven.compiler.target>
<maven.compiler.compilerVersion>1.8</maven.compiler.compilerVersion>
</properties>
</profile>
重启idea后生效。