安装 php
sudo yum -y install php php-fpm php-json
启动php-fpm服务
#执行以下命令启动php-fpm
sudo systemctl start php-fpm

#查看php-fpm启动状态
systemctl status php-fpm

#查看自启动情况
systemctl list-unit-files | grep php-fpm

#开机自启动
systemctl enable php-fpm
在 /etc/nginx/conf.d 新增 站点的配置文件
server {
        listen       80;
        server_name  xxx.com;
        server_name  localhost;
        charset utf-8;
        client_max_body_size 5M;

        location / {
            root /opt/my_php;
            index index.php;
        }

        location ~ .php$ {
            root            /opt/my_php;
            fastcgi_pass    unix:/run/php-fpm/www.sock;           #fastcgi服务端口,将http请求代理到此端口
            fastcgi_index   index.php;                    #fastcgi服务默认页面
            fastcgi_param   SCRIPT_FILENAME  $document_root$fastcgi_script_name;    #设置请求的脚本文件路径
            include         fastcgi_params;
        }
}
关于 fastcgi_pass 节点的配置,不要配置成
fastcgi_pass 127.0.0.1:9000;
配置成该值,访问时会报错如下:
connect() failed (111: Connection refused) while connecting to upstream, client: x.x.x.x, server: xxx.com, request: "GET /index.php HTTP/1.1", upstream: "fastcgi://127.0.0.1:9000", host: "xxx.com"
fastcgi_pass 节点正确配置的方法
centos8里,php-fpm 的配置文件在
/etc/php-fpm.d/www.conf
通过cat打开该文件,找到 listen 节点
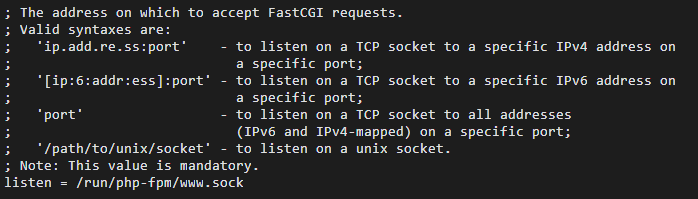
将该值配置到 fastcgi_pass 节点即可
重启
sudo systemctl restart php-fpm
sudo systemctl restart nginx