在我们访问页面的时候经常会遇到各种问题,比如404,400,500,502等等,可返回的错误页对用户来讲,并不太亲民,所以要定制一下自己的错误页。
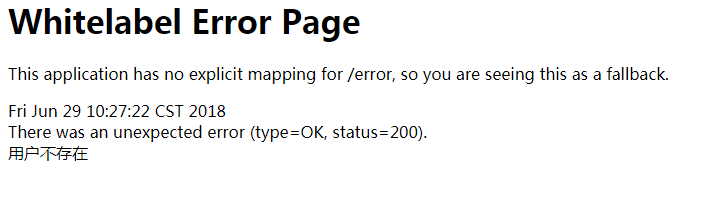
我们先访问一个错误页面,看下效果:(虽然给我们提供了错误时间、类型、状态码、错误信息,但是好丑,而且用户也不知道这是什么意思)

如果定制呢?我们下边介绍两个定制化的地方。
定制错误页面
1. 对于SpringBoot来说,它默认会帮我们查找对应的错误页面,也就是说,如果在模板引擎里没有找到匹配的页面,他就对应状态码来展示错误页,例如:
访问页面是404的错误,它就将 error/404.html 展示。
所以,我们要做的就是先在模板引擎的他们templates文件夹下,建立一个用来管理错误页的文件夹“error”,然后将错误码的页面,按照规格扔进去。(类推,503.html、400.html都一样的)

另外,我们还可以添加4xx.html和5xx.html,它会自动将所有4或5开头的html匹配。当然优先精确匹配的404等。
(我把之前的拦截器注释掉,访问一个错误路径看下)
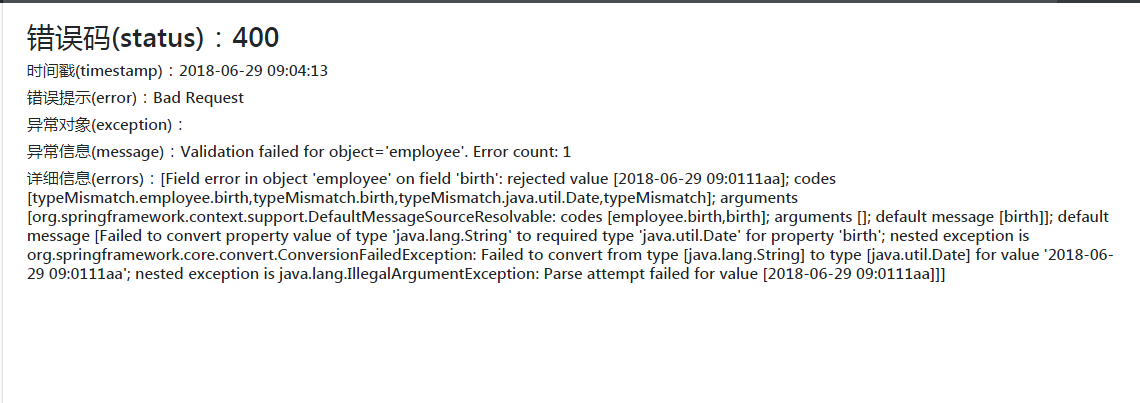
针对于这个页面,我想把之前给我的信息再返回到页面上怎么处理呢? 那就需要在html页面上做个手脚了~:(这里应该是行内写法,有这样几个参数可以用):
            <h3>错误码(status):[[${status}]]</h3>
            <h6>时间戳(timestamp):[[${#dates.format(timestamp,'yyyy-MM-dd HH:mm:ss')}]]</h6>
            <h6>错误提示(error):[[${error}]]</h6>
            <h6>异常对象(exception):[[${exception}]]</h6>
            <h6>异常信息(message):[[${message}]]</h6>
            <h6>详细信息(errors):[[${errors}]]</h6>
看一下表现:
定制错误信息-Json
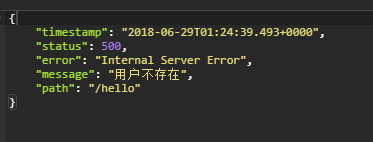
我先来给大家看一下,这个json的是什么意思。
就是在使用第三方工具,比如postman或者jmeter时,给我们返回的那段Json串~(我用postman发个请求):

我们要修改的就是这个,按照我们需要的来输出参数。
1. 先来建一个我们自定义的异常输出:
public class UserNotExistException extends RuntimeException {
    public UserNotExistException() {
        super("用户不存在");
    }
}
然后修改下helloworld的请求,看下效果:
    @GetMapping("/hello")
    @ResponseBody
    // 请求中如果有参数是aaa,就抛出异常
    public String hello(@RequestParam("user") String user) {
        if (user.equals("aaa")) {
            throw new UserNotExistException();
        }
        return "hello ONE PEACE";
    }
2. 接下来,要按照我们自己的设定来输出这些信息。
首先,建一个异常的处理器吧:
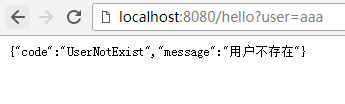
2.1 关于异常的处理有几种,第一种:Json格式,不论网页还是工具输出方式一样:(先添加一个异常捕捉器)
// SpringBoot处理异常信息需要引用的
@ControllerAdvice
public class MyExceptionController {

    @ResponseBody
    // 异常处理捕捉的注解
    @ExceptionHandler(UserNotExistException.class)
    public Map<String, Object> handleException(Exception e) {
        // 将我们需要的信息放到map中,并在页面中返回
        Map<String, Object> map = new HashMap<>();
        map.put("code", "UserNotExist");
        map.put("message", e.getMessage());
        return map;
    }
}
现在访问页面的话就是我们设置好的了

2.2 但是这种方法不能自适应,也就是说,我们页面访问返回的不是期望的页面,不能都是json啊,肿么办?
2.2.1 先修改controller:
     // 异常处理捕捉的注解
    @ExceptionHandler(UserNotExistException.class)
    public String handleException(Exception e) {
        // 将我们需要的信息放到map中,并在页面中返回
        Map<String, Object> map = new HashMap<>();
        map.put("code", "UserNotExist");
        map.put("message", e.getMessage());
     // 转发到/error页面
        return "forward:/error";
    }
看效果:

2.2.2 初步OK,一个网页,一个json。那我们如何把网页改成我们期望的呢?(注意看,这里的status是200,所以没有指向我们写好的error页面;而且返回的json里边也没有我们写好的参数吧?比如code)继续:
处理器加一句:
重写一下SpringBoot默认的错误处理器的东西,把我们自己的参数扔进去:
import org.springframework.boot.web.servlet.error.DefaultErrorAttributes;
import org.springframework.stereotype.Component;
import org.springframework.web.context.request.WebRequest;

import java.util.Map;

@Component
public class MyErrorAttributes extends DefaultErrorAttributes {
    @Override
    public Map<String, Object> getErrorAttributes(WebRequest webRequest, boolean includeStackTrace) {
        Map<String, Object> map = super.getErrorAttributes(webRequest, includeStackTrace);
        map.put("company", "IceOooodin");
        return map;
    }
}
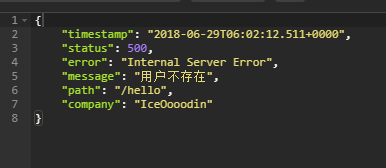
如上,我们添加一个“company”的参数,看看展示:
OK,我们来把需要的更多的信息,也带进去,并且可以在页面中看到,也就是最后要改成什么样子呢:(注意,html里边自己把th模板引擎写进去: xmlns:th="http://www.thymeleaf.org" )


import org.springframework.boot.web.servlet.error.DefaultErrorAttributes;
import org.springframework.stereotype.Component;
import org.springframework.web.context.request.WebRequest;

import java.util.Map;

@Component
public class MyErrorAttributes extends DefaultErrorAttributes {

    // 这里返回的就是页面和json获取的字段
    @Override
    public Map<String, Object> getErrorAttributes(WebRequest webRequest, boolean includeStackTrace) {
        Map<String, Object> map = super.getErrorAttributes(webRequest, includeStackTrace);
        map.put("company", "IceOooodin");
        Object ice = webRequest.getAttribute("ice", 0);
        map.put("ice", ice);
        return map;
    }

}
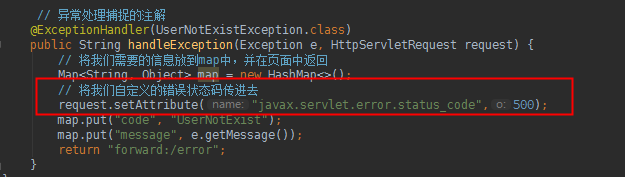
import com.iceodin.exception.UserNotExistException;
import org.springframework.web.bind.annotation.ControllerAdvice;
import org.springframework.web.bind.annotation.ExceptionHandler;

import javax.servlet.http.HttpServletRequest;
import java.util.HashMap;
import java.util.Map;

// SpringBoot处理异常信息需要引用的
@ControllerAdvice
public class MyExceptionController {

    // 异常处理捕捉的注解
    @ExceptionHandler(UserNotExistException.class)
    public String handleException(Exception e, HttpServletRequest request) {
        // 将我们需要的信息放到map中,并在页面中返回
        Map<String, Object> map = new HashMap<>();
        // 将我们自定义的错误状态码传进去
        request.setAttribute("javax.servlet.error.status_code", 500);
        map.put("code", "UserNotExist");
        map.put("message", e.getMessage());
        request.setAttribute("ice", map);
        return "forward:/error";
    }
}
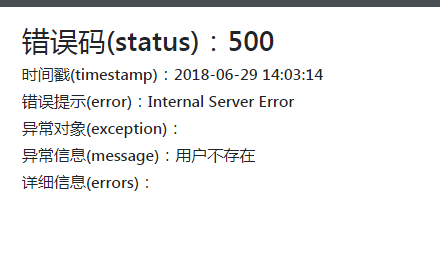
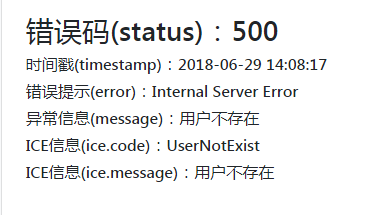
            <h3>错误码(status):[[${status}]]</h3>
            <h6>时间戳(timestamp):[[${#dates.format(timestamp,'yyyy-MM-dd HH:mm:ss')}]]</h6>
            <h6>错误提示(error):[[${error}]]</h6>
            <h6>异常信息(message):[[${message}]]</h6>
            <h6>ICE信息(ice.code):[[${ice.code}]]</h6>
            <h6>ICE信息(ice.message):[[${ice.message}]]</h6>
然后我们看下最终效果:

最后我补充一下说明:
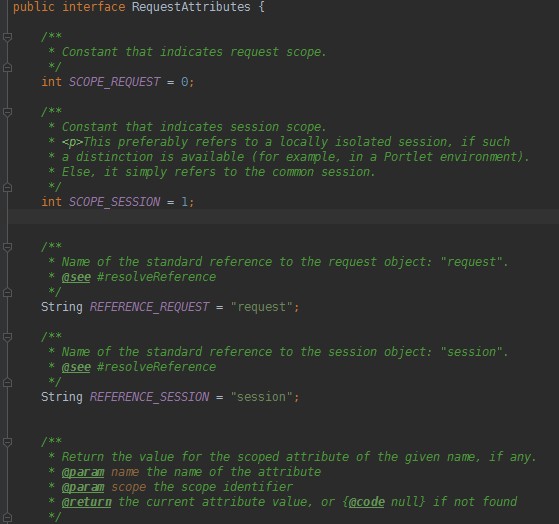
有同学可能不知道,代码中"javax.servlet.error.status_code"是怎么来的?
我们看,在AbstractErrorController中,也就是SpringBoot是怎么处理的
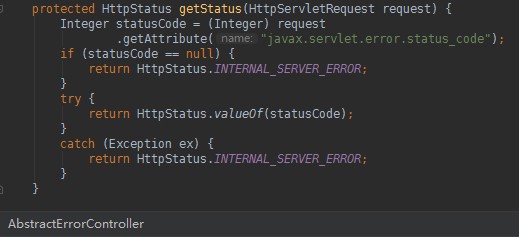
以及MyErrorAttributes中 Object ice = webRequest.getAttribute("ice", 0);的这个0是干嘛的,同样看源码,从getAttribute点进去: