近期改版RXEditor,把改版过程,用到的技术点,记录下来。昨天完成了静态页面的制作,制作过程并未详细记录,后期已经不愿再补了,有些遗憾。不过工作成果完整保留在github上,地址:https://github.com/vularsoft/studio-ui
这个项目下面的html-demo.html,便是静态文件。
话不多说,今天就把昨天的HTML转化成VUE。
先看效果:
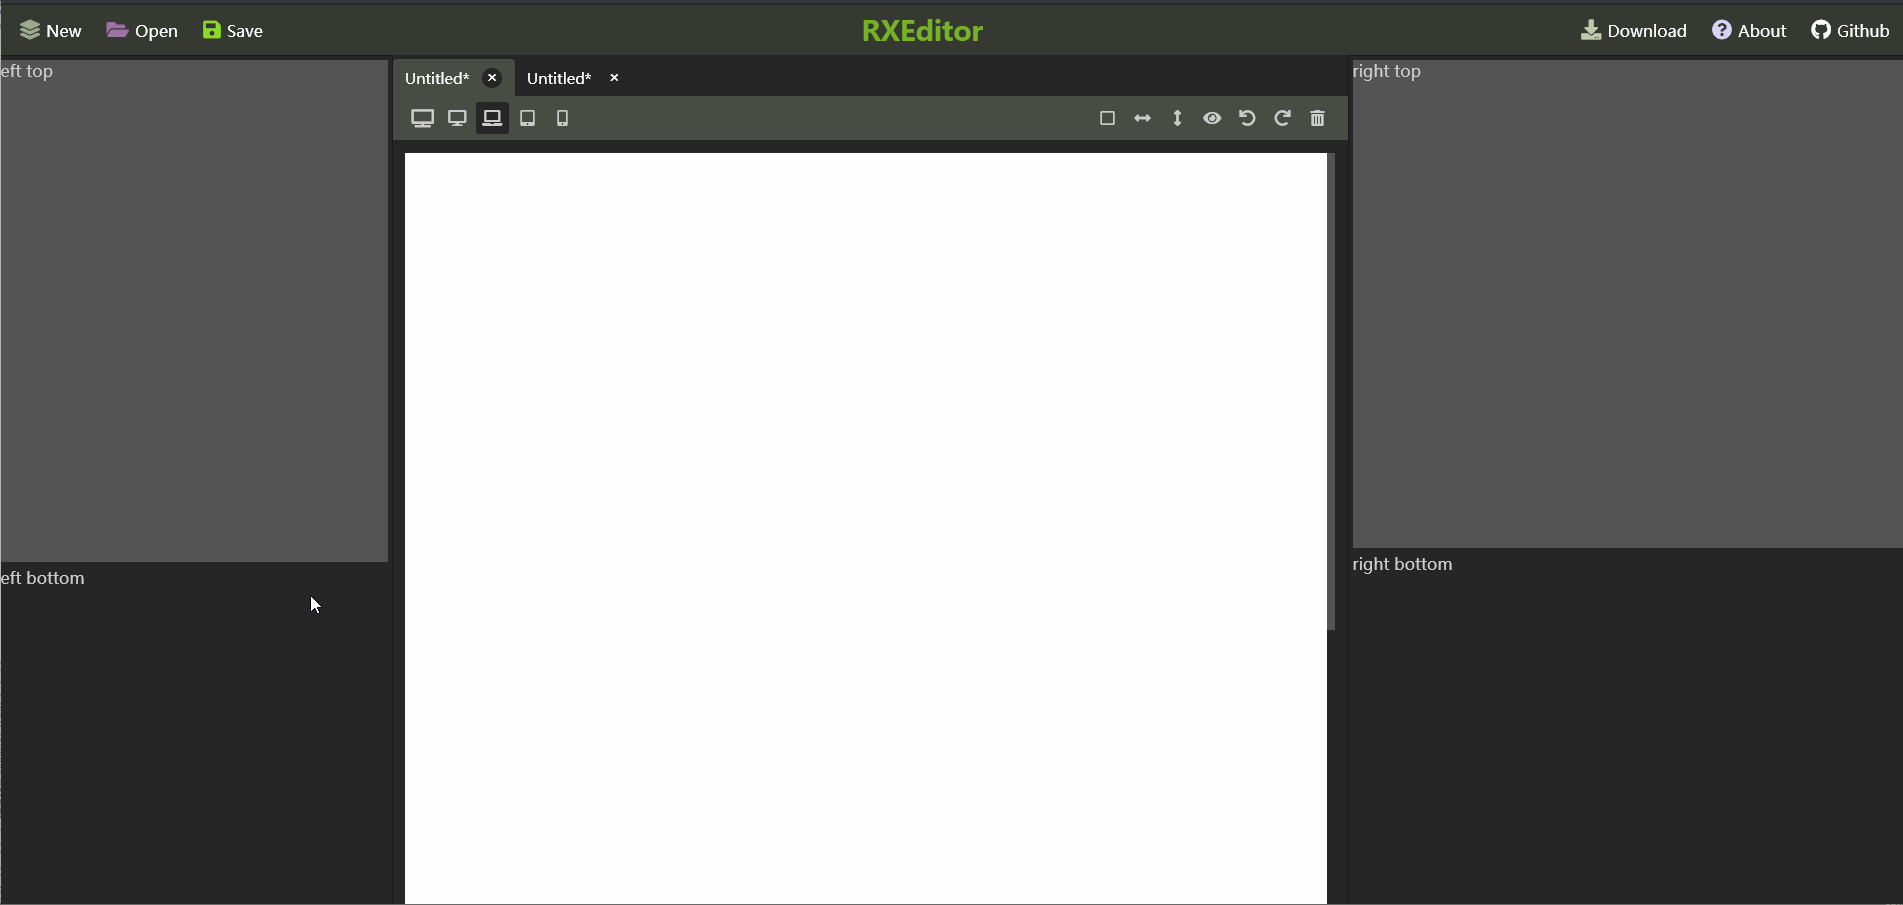
布局原理
页面采用纯弹性盒子flex box布局,无float postion等,页面分成如下几个区域:

细实线描述的是各个DIV之间的嵌套关系,粗黑线是独立的DIV,我称它们为把手(HADLE),主要用来接受鼠标拖动事件,以完成拖动操作。handle非为两种,横向x-handle,纵向y-handle,css中定义x-handle宽度为3px,高度为100%,y-handle高度为3px,宽度为100%,鼠标光标也相应设置一下:
.vular-studio .x-handle{
  width: 3px;
  cursor: w-resize;
  z-index: 10;
}

.vular-studio .y-handle{
  height: 3px;
  cursor: s-resize;
  z-index: 10;
}
拖动原理
带有把手的区域固定大小(固定宽度或者高度),不带把手的部分跟随弹性盒子变化。把手handle是一个独立的VUE组件,它把拖动信息传递给父窗口,父窗口改变自身大小。以bottom-area为例,这是一个可以改变自身大小的DIV:
<template>
  <div class="bottom-area" :style="{height:height + 'px'}">
    <YHandle @heightChange="heightChange"></YHandle>
    <div class="bottom-inner">
      <slot></slot>
    </div>
  </div>
</template>

<script>
import YHandle from './YHandle.vue'
export default {
  name: 'BottomArea',
  components:{
    YHandle,
  },
  data () {
    return {
      height:220,
    }
  },
  methods: {
    heightChange(movement){
      this.height += movement
      if(this.height < 30){
        this.height = 30
      }
      if(this.height > 600){
        this.height = 600
      }
    },
  },
}
</script>
它对应的把手代码:
<template>
  <div class="y-handle"
    @mousedown="mouseDown"
  ></div>
</template>

<script>
export default {
  name: 'YHandle',
  data () {
    return {
      lastY:''
    }
  },

  created () {
    document.addEventListener('mouseup', this.mouseUp)
  },

  destroyed() {
    document.removeEventListener('mouseup', this.mouseUp)
  },


  methods: {
    mouseDown(event){
      document.addEventListener('mousemove', this.mouseMove)
      this.lastY = event.screenY
    },
    mouseMove(event){
      console.log('move')
      this.$emit('heightChange', this.lastY - event.screenY)
      this.lastY = event.screenY
    },
    mouseUp(event){
      this.lastY = ''
      document.removeEventListener('mousemove', this.mouseMove)
    },
  },
}
</script>
制作步骤
先建一个VUE项目:
1、安装node
2、安装webpack
3、安装VUE
4、新建VUE项目:vue init webpack-simple
5、根据相应布局制作VUE组件
具体代码,请参考:https://github.com/vularsoft/studio-ui,根据标注,获取相应的版本记录即可。