思路:
1. 组件的好处,重用性
2. 组件对的slot用法
3. 子如何调用父的数据
4. 子如何触发父的方法执行
5. 父如何触发子的方法执行

6. 如何创建组件和销毁自建--如何缓存避免每次切换创建
研究一下组件的销毁
- componet是vue内置命令,用于调用显示子组件
is="home": 根据组件名html通过is=""获取.

如下我定义了两个组件,home,list,然后我在html里将2个组件显示出来
componet事实上是创建了组件.

<div id="app">
    <h1>显示组件</h1>
    <componet is="home"></componet>
    <componet is="list"></componet>
</div>
<script src="node_modules/vue/dist/vue.js"></script>
<script>
    let vm = new Vue({
        el: "#app",
        components: {
            home: {
                template: "<div>home</div>",
            },
            list: {
                template: "<div>list</div>",
            }
        },
    })
</script>
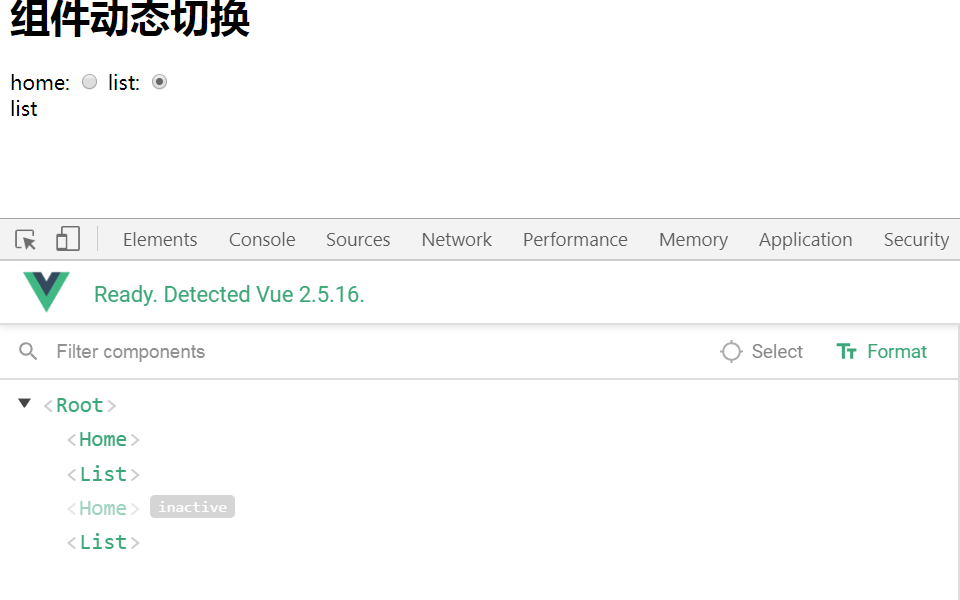
- 想要实现两个radio动态切换,类似页卡效果

- componet事实上是创建了组件.那么如何销毁组件呢

1.数据绑定到2个radio(注2个radio用value标识为一组)
2.componet获取radio的值作为自己获取的组件名
    1.动态获取:is="radio"

<div id="app">
    <h1>组件动态切换</h1>
    home: <input type="radio" value="home" v-model="radio">
    list: <input type="radio" value="list" v-model="radio"> <br>
    <componet :is="radio"></componet>
</div>
<script src="node_modules/vue/dist/vue.js"></script>
<script>
    let vm = new Vue({
        el: "#app",
        data: {
            radio: 'home'
        },
        components: {
            home: {
                template: "<div>home</div>",
            },
            list: {
                template: "<div>list</div>",
            }
        },
    })
</script>
- 用vue生命周期函数,研究下切换componet时候,每次都存在创建,销毁, 浪费资源了.
    1.使用created/mounted 标识创建前动作
    2.使用beforeDestory   标识销毁前动作
- keep-alive命令缓存componet,不至于每次都销毁创建, 节约资源.

<div id="app">
    <h1>组件动态切换</h1>
    home: <input type="radio" value="home" v-model="radio">
    list: <input type="radio" value="list" v-model="radio"> <br>
    <keep-alive>
        <componet :is="radio"></componet>
    </keep-alive>
</div>
<script src="node_modules/vue/dist/vue.js"></script>
<script>
    let vm = new Vue({
        el: "#app",
        data: {
            radio: 'home'
        },
        components: {
            home: {
                template: "<div>home</div>",
                mounted(){alert("创建前")},
                beforeDestroy(){alert("销毁前")}
            },
            list: {
                template: "<div>list</div>",
                mounted(){alert("创建前")},
                beforeDestroy(){alert("销毁前")}
            }
        },
    })
</script>
1.先子组件的mounted
    1,异步的,不会等dom渲染

2.在父组件的mounted

3.如果父操作子类的dom,要加上nextTick才能保证同步.(即子选mounted,后渲染,然后父mounted获取到子渲染后的数据)
mounted(){
    console.log(this.$refs.child.$el.innerHTML); //<li>1</li><li>2</li><li>3</li>
},
mounted(){
    this.$nextTick(()=>{ // 想操作dom 就加一个nextTick
        console.log(this.$refs.child.$el.innerHTML); //<li>4</li><li>5</li><li>6</li>
    })
},
<div id="app">
    <child ref="child"></child>
</div>
<!--子组件和父组件同时拥有mounted方法 会先走谁?-->
<!--需要等待子组件挂载完成后在触发父组件的挂载-->
<template id="child">
    <div>
        <li v-for="a in arr">{{a}}</li>
    </div>
</template>
<script src="node_modules/vue/dist/vue.js"></script>
<script>
    let vm = new Vue({
        el:'#app',
        mounted(){
            this.$nextTick(()=>{ // 想操作dom 就加一个nextTick
                console.log(this.$refs.child.$el.innerHTML);
            })
        },
        components:{
            child:{
                template:'#child',
                data(){
                  return {arr:[1,2,3]}
                },
                mounted(){
                   this.arr = [4,5,6] // 此处是异步渲染dom
                }
            }
        }
    })
</script>
pannel栗子
<!DOCTYPE html>
<html lang="en">
<head>
  <meta charset="UTF-8">
  <title>maotai http://www.zhufengpeixun.cn</title>
  <link rel="stylesheet" href="node_modules/bootstrap/dist/css/bootstrap.css">
</head>
<body>
<div id="app">
  <panel type="warning" @say-title="parent">
    <div slot="title">这是一篇vue的使用</div>
    <div slot="content">内容区
      <p>组件的属性传递</p>
      <p>slot的用法</p>
      <p>ref的使用</p>
      <p>nextTick的用法</p>
    </div>
    <div>作者:zfpx</div>
  </panel>
</div>
<template id="panel">
  <div class="panel" :class="[color]">
    <div class="panel-heading" ref="head">
      <slot name="title"></slot>
    </div>
    <div class="panel-body">
      <slot name="content"></slot>
    </div>
    <div class="panel-footer">
      <slot>匿名</slot>
      <button @click="say">点我说标题</button>
    </div>
  </div>
</template>
<script src="node_modules/vue/dist/vue.js"></script>
<script>
  let panel = {
      template:'#panel',
      computed:{
          color(){return 'panel-'+this.type}
      },
      methods:{
          say(){this.$emit('say-title',this.$refs.head.innerText)}
      },
      props:{
          type:{ // this.type = 'primary'子不能更改父组件传递的属性
              type:[String],
              default:'default'
          }
      }
  };
  let vm = new Vue({
      el:'#app',
      methods:{
        parent(tit){
          alert(tit);
        }
      },
      components:{
          panel
      }
  });
</script>
</body>
</html>
pannel-for
<!DOCTYPE html>
<html lang="en">
<head>
    <meta charset="UTF-8">
    <title>maotai http://www.zhufengpeixun.cn</title>
    <link rel="stylesheet" href="node_modules/bootstrap/dist/css/bootstrap.css">
</head>
<body>
<div id="app">
    <panel :type="article.type" @say-title="parent" v-for="(article,index) in articles" :key="index">
        <div slot="title"><span v-html="article.title"></span></div>
        <div slot="content">{{article.content}}</div>
        <div v-if="article.auth">{{article.auth}}</div>
    </panel>
</div>
<template id="panel">
    <div class="panel" :class="[color]">
        <div class="panel-heading" ref="head">
            <slot name="title"></slot>
        </div>
        <div class="panel-body">
            <slot name="content"></slot>
        </div>
        <div class="panel-footer">
            <slot>匿名</slot>
            <button @click="say">点我说标题</button>
        </div>
    </div>
</template>
<script src="node_modules/vue/dist/vue.js"></script>
<script>
    let panel = {
        template: '#panel',
        computed: {
            color() {
                return 'panel-' + this.type
            }
        },
        methods: {
            say() {
                this.$emit('say-title', this.$refs.head.innerText)
            }
        },
        props: {
            type: { // this.type = 'primary'子不能更改父组件传递的属性
                type: [String],
                default: 'default'
            }
        }
    };
    let vm = new Vue({
        el: '#app',
        data: {
            articles: [
                {type: 'warning', title: '<h2>vue</h2>', content: '这是vue的文章', auth: '作者:zfpx'},
                {type: 'primary', title: '<h2>react</h2>', content: '这是react的文章'},
                {type: 'danger', title: '<h2>angular</h2>', content: '这是react的文章'},
            ]
        },
        methods: {
            parent(tit) {
                alert(tit);
            }
        },
        components: {
            panel
        }
    });
</script>
</body>
</html>