https://medium.com/kouosl/opencv-4-2-0-set-up-for-c-in-android-studio-dc88b0bb34b2
https://stackoverflow.com/questions/27406303/opencv-in-android-studio
I will explain in detail the use of OpenCV, an open source image processing library with C ++ on Android. You must download and install Android NDK tools set, CMake and LLDB from the Android SDK manager in Android Studio.
1.OpenCV Android SDK
Download OpenCV android sdk here and extract the compressed file.
2. Project Creation

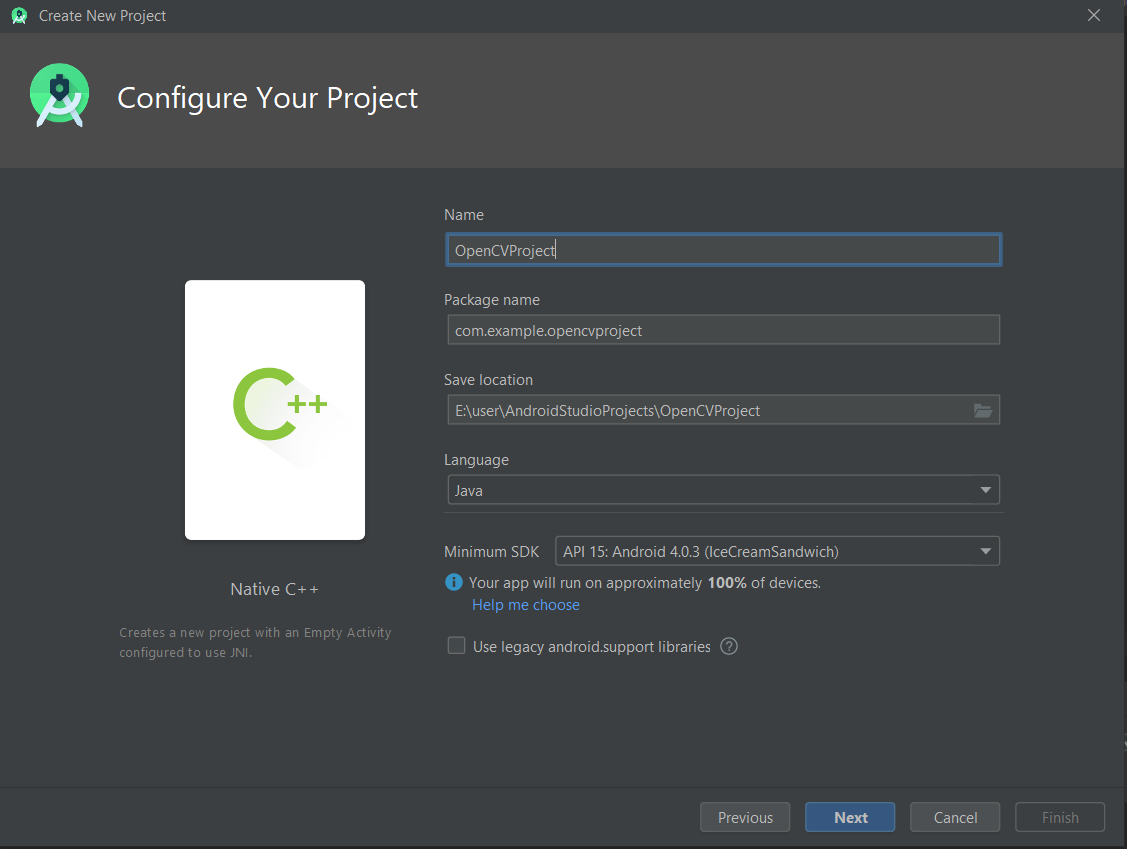
Select the Native C ++ project and click next.
3.OpenCV Import Module

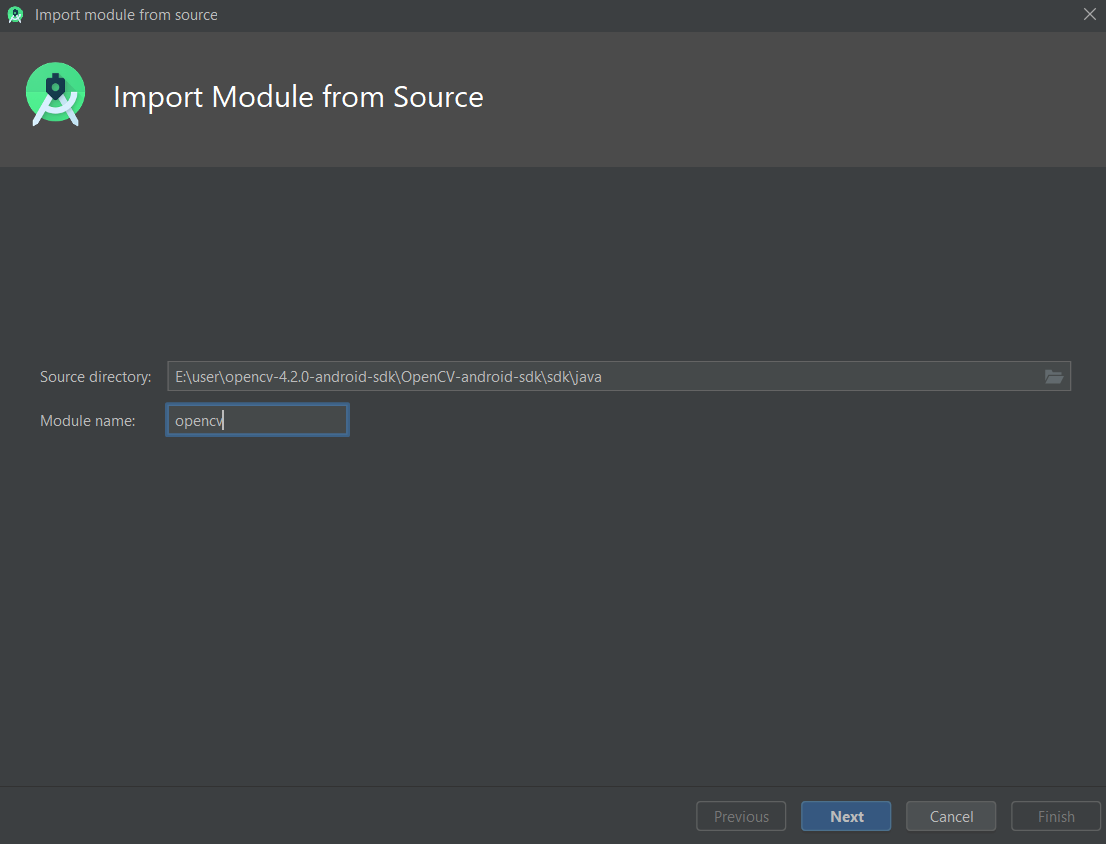
Enter the file path of downloaded OpenCV. Write ‘opencv’ for the module name.

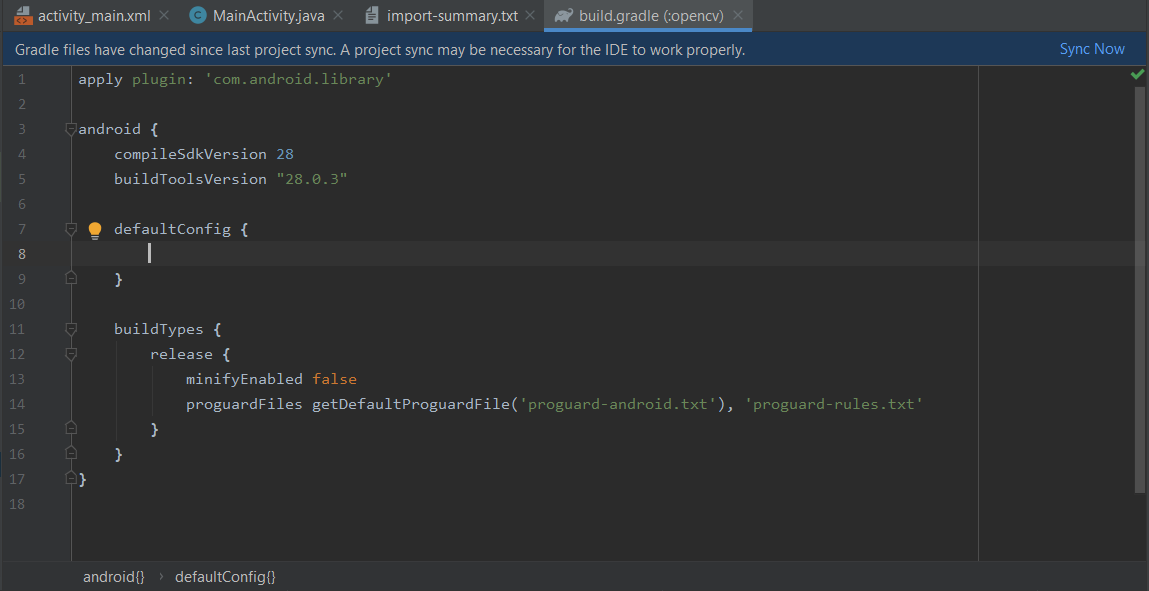
Write ‘library’ instead of ‘application’ in the first line in build.gradle (opencv). Delete the line ‘ “applicationId” org.opencv ” ’.

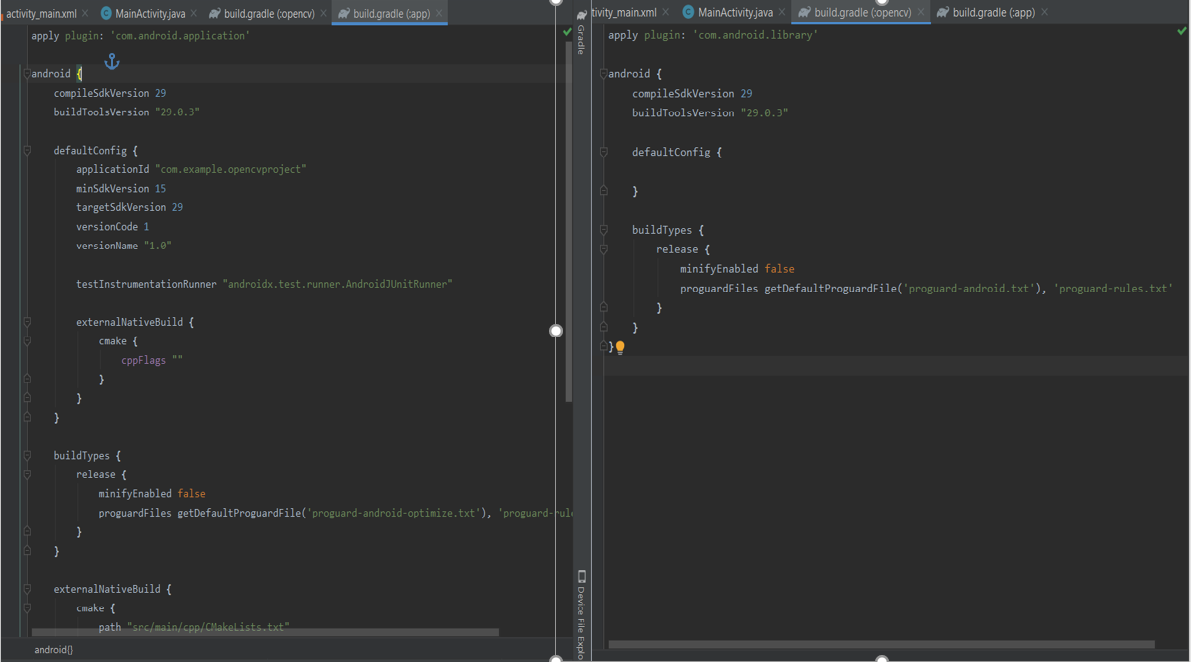
Note that compileSdkVersion and build ToolsVersion in build.gradle (: app) and build.gradle (: opencv) are the same.


Select ‘Module Dependency’ by pressing the ‘+’ sign and click OK by selecting the ‘opencv’ module.

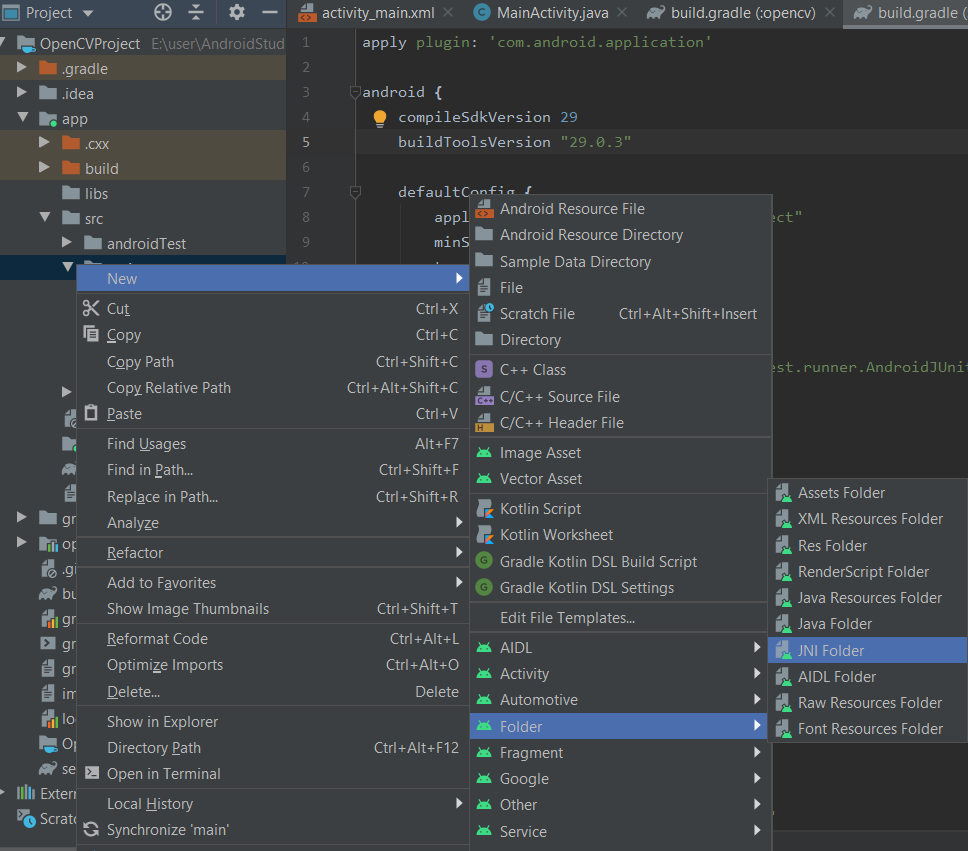
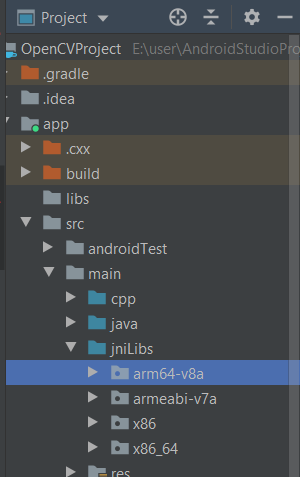
Create a JNI Folder in Main and name it as ‘jniLibs’. Copy the 4 folders in sdk native libs in the OpenCV folder and paste them into jniLibs.

4.Gradle.properties
Add the following line into gradle.properties. Write the path to the file where the OpenCV folder is located.
opencvsdk=E:/user/opencv-4.2.0-android-sdk/OpenCV-android-sdk
5.Settings.gradle
Add the following lines into Settings.gradle.
include ':opencv'
project(':opencv').projectDir = new File(opencvsdk + '/sdk')

https://medium.com/androiddevelopers/gradle-path-configuration-dc523f0ed25c
6.Build.gradle(:app)
Let’s add the following lines to the cmake in the defaultConfig in build.gradle (: app).
externalNativeBuild {
    cmake {
        cppFlags "-frtti -fexceptions"
        abiFilters 'x86', 'x86_64', 'armeabi-v7a', 'arm64-v8a'
        arguments "-DOpenCV_DIR=" + opencvsdk + "/sdk/native"
    }
}
Add the following line to the Dependencies section.
dependencies {
  implementation project(path: ':opencv')
}
7.CMakeList.txt
Add the part of code just above the add_library section.
include_directories(${OpenCV_DIR}/jni/include)
add_library( lib_opencv SHARED IMPORTED )
set_target_properties(lib_opencv PROPERTIES IMPORTED_LOCATION ${OpenCV_DIR}/libs/${ANDROID_ABI}/libopencv_java4.so)
Add the following line to the target_link_libraries section.
lib_opencv
8.Native-lib.cpp
Copy the following functions to native-lib.cpp.
#include <jni.h>
#include <string>
#include <opencv2/core.hpp>

extern "C"
JNIEXPORT jstring JNICALL
Java_com_example_myapplication_MainActivity_validate(JNIEnv *env, jobject thiz, jlong mad_addr_gr,jlong mat_addr_rgba) {
    cv::Rect();
    cv::Mat();
    std::string hello2="hello from validate";
    return env->NewStringUTF(hello2.c_str());
    // TODO: implement validate()
}
extern "C"
JNIEXPORT jstring JNICALL
Java_com_example_myapplication_MainActivity_stringFromJNI(JNIEnv *env, jobject thiz) {
    // TODO: implement stringFromJNI()
    std::string hello = "Hello from C++";
    return env->NewStringUTF(hello.c_str());
}
9.MainActiviy.java
Add lines that call native methods and load OpenCV / Native libraries in MainActivity.
import androidx.appcompat.app.AppCompatActivity;
import android.os.Bundle;
import android.util.Log;
import android.widget.TextView;
import org.opencv.android.OpenCVLoader;

public class MainActivity extends AppCompatActivity {

            private static String TAG="MainActivity";
            static {
                System.loadLibrary("native-lib");
                System.loadLibrary("opencv_java4");
            }

            @Override
            protected void onCreate(Bundle savedInstanceState) {
                super.onCreate(savedInstanceState);
                setContentView(R.layout.activity_main);
                TextView textView=(TextView) findViewById(R.id.sample_text);
                textView.setText(stringFromJNI());

                // Example of a call to a native method
                TextView tv = findViewById(R.id.sample_text);
                tv.setText(stringFromJNI());

        if (OpenCVLoader.initDebug()) {
            textView.setText(textView.getText()+"
 OPENCV LOADED SUCCESSFULLY");
            textView.setText(textView.getText()+"
"+validate(500,500));

        } else {
            Log.d(TAG, "OPENCV DİD NOT LOAD");

        }
    }
    public native String stringFromJNI();
    public native String validate(long madAddrGr,long matAddrRgba);
}
When you compile the project, you can print as follows.
Congratulations…

